
Step 6 of 13 in Enrich your products with Atlas
Add and enrich a product in Vestis Atlas
Vestis Atlas creates suggestions to enrich your product data and you stay in control of your data.
Under review. This page is published while we check it against the live app, so some details may have changed.
Screenshots may be out of date.
Good to know:
Vestis Atlas creates suggestions to enrich your product data and you stay in control of your data. Always review, correct, and complete the product information before you approve it.
**Before you start:
**
- Use clear JPG or PNG product photos. One image is enough to begin; front, back and detail images improve accuracy.
- Keep information that cannot be seen in a photo ready, such as exact composition, care instructions and intended fit. (note: if you are a Vestis Labs platform user, accurate and detailed product information can be synced automatically)
- This guide uses one shirt as an example. Choose the values that are correct for your own product.
Open Vestis Atlas: https://atlas.vestislabs.com/
How the process works

Add a new product
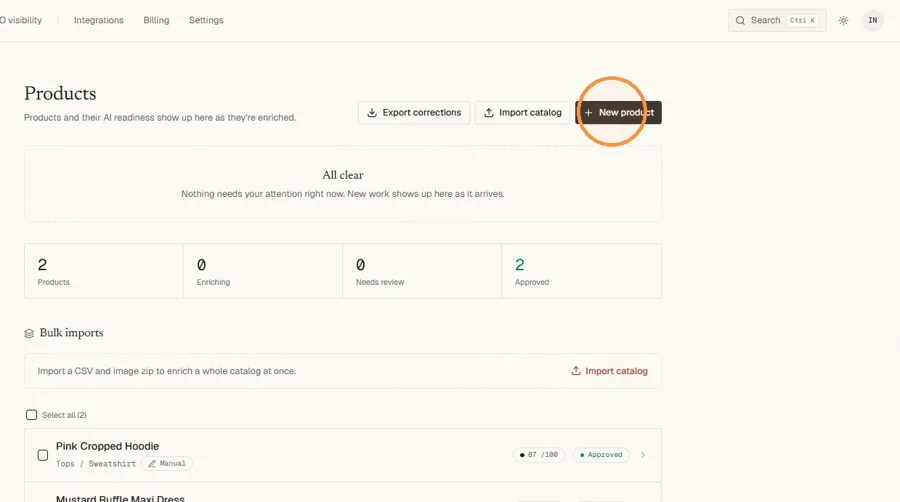
Click Add product at the top right of the Products page, then upload the images by clicking the product photo upload area.
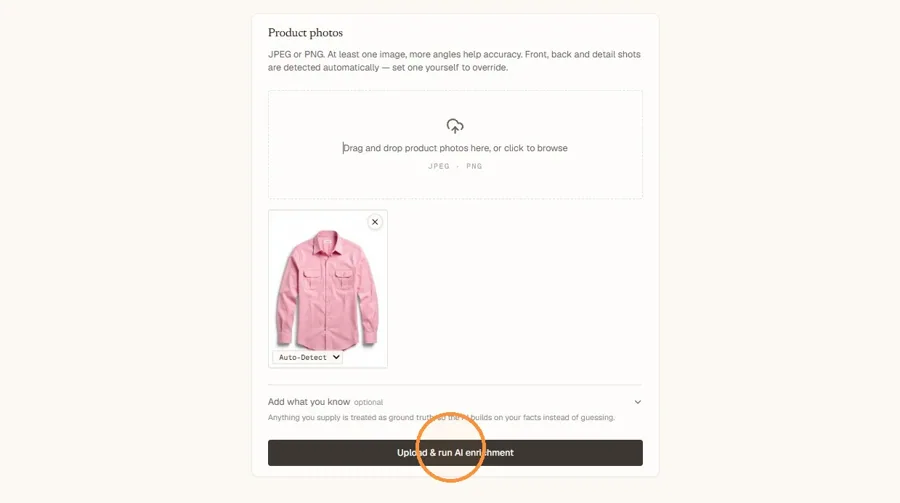
Use the shot type dropdown under each photo to identify the role of the image: front, back or detail. Leave it on Auto-detect and Atlas works it out after upload. Setting it yourself gives a more accurate result.
Photo Tip:
Use clean product images with the item clearly visible. Add more angles when details such as the back, fastening or construction cannot be seen in one image.
Click Upload & enrich.
What Atlas is doing:
Atlas analyses the images and creates a first draft of the product identity, attributes and content. This is a starting point, not the final approved data.
Photo tip:
Use clean product images with the item clearly visible. Add more angles when details such as the back, fastening or construction cannot be seen in one image.
Use the Atlas Readiness Score as your guide
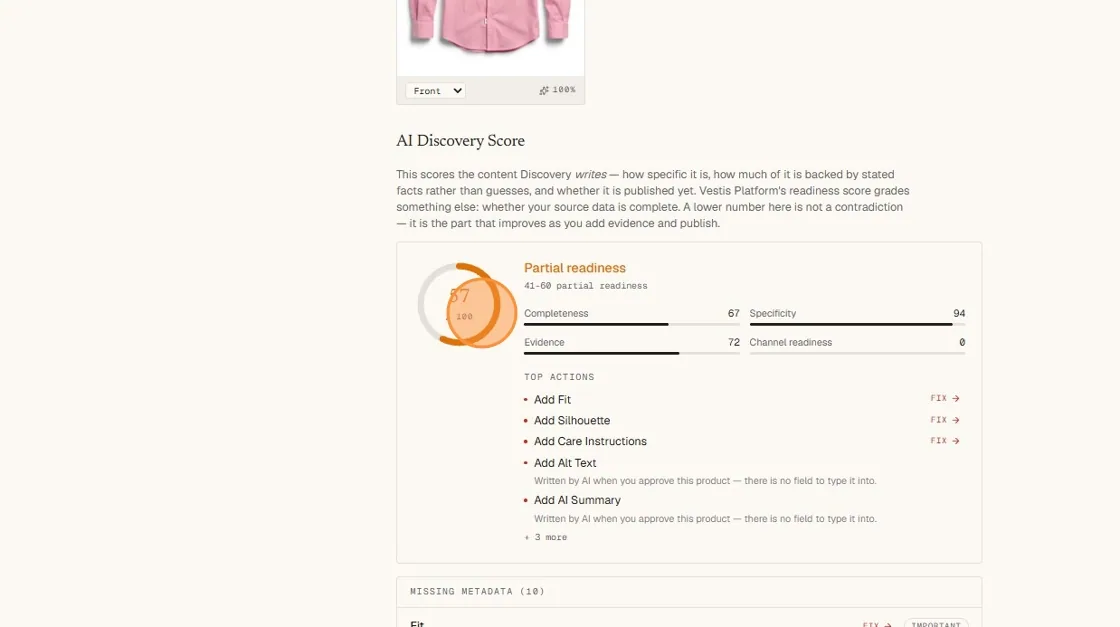
After enrichment, Atlas shows an Atlas Readiness Score and a list of top actions and items that are still missing.
What the score means
The score reflects how complete, specific and well-supported your product data is. Atlas uses the information available to it including verified product data from the Vestis Labs Platform when connected, or information inferred from product images and details you provide.
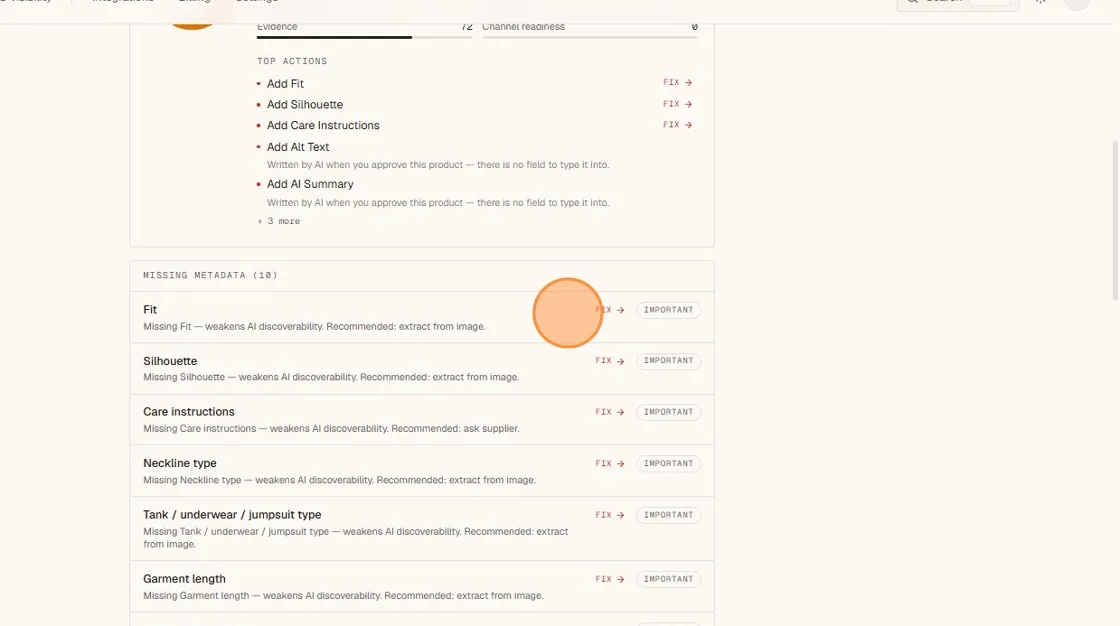
Start with the actions shown under the score. Use “Fix” to jump to a field that needs attention. Some text, such as summaries or alt text, is generated after approval.
Check the product identity first
Review the basic information that tells Atlas what the product is.
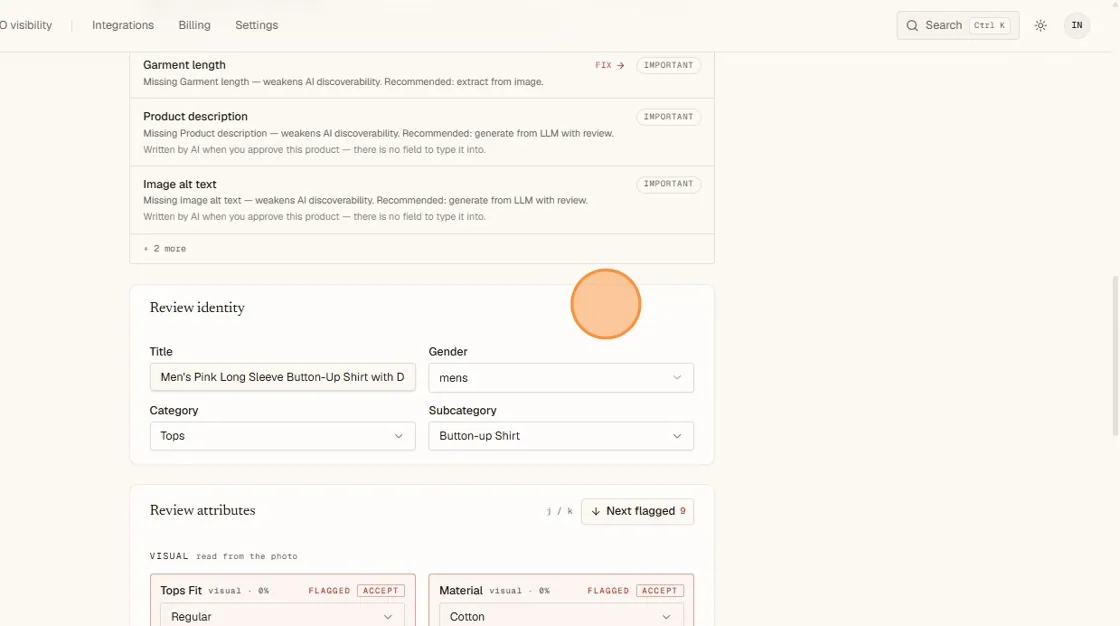
Check the product title. Confirm the gender or intended customer group. Confirm the category and subcategory. Correct any inaccurate value.
Why this matters
The category and subcategory help Atlas show the right product attributes and create the correct category hierarchy. The hierarchy is set from these selections rather than edited separately.
Review the suggested attributes
Atlas suggests details it can identify or infer. Review each highlighted field before accepting it. Read the suggested value.
If it is correct, select “Accept”.
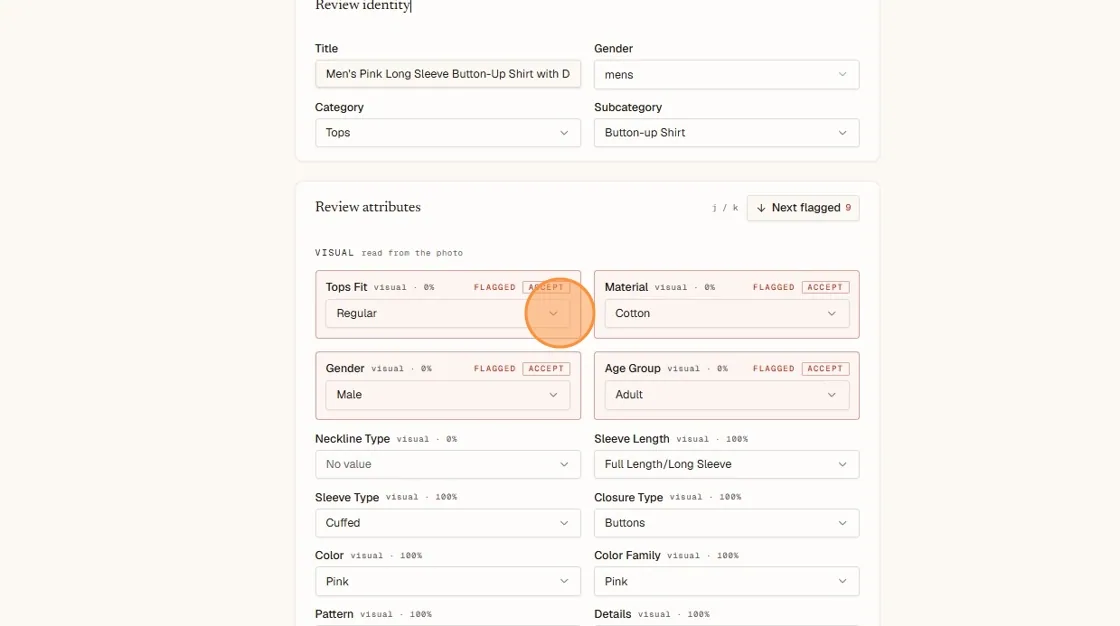
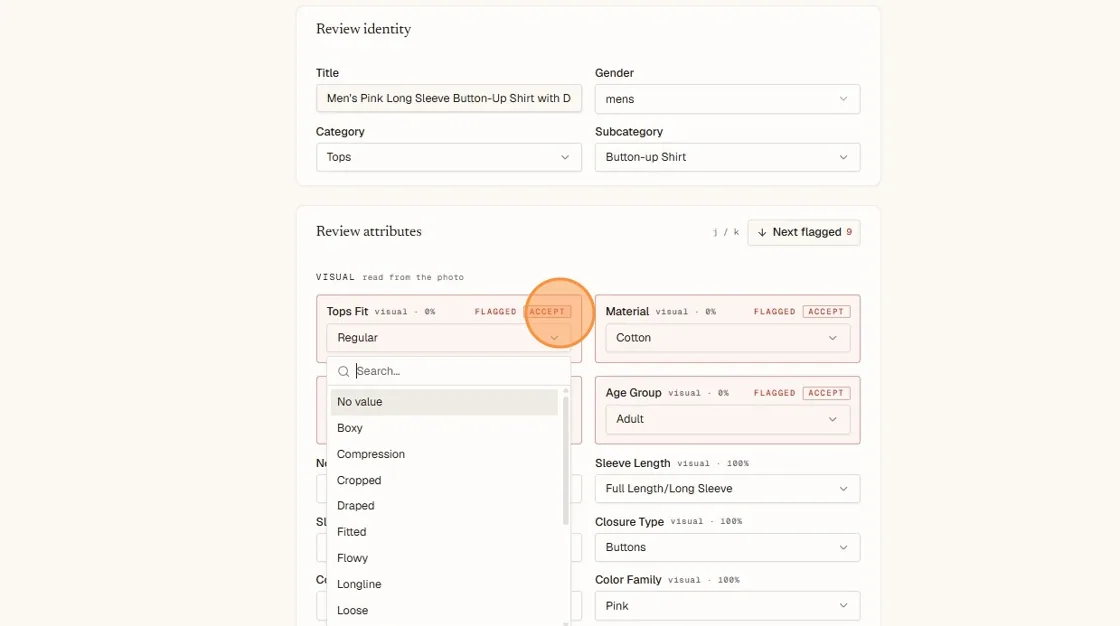
If it is incorrect, open the dropdown and choose the correct value, then accept it. Use “Next flagged” to move to the next item that needs review.
Understanding the labels
Labels such as “Visual”, “Inferred”, “Flagged” and a confidence percentage help explain how Atlas arrived at a suggestion and whether it still needs your confirmation.
Do not accept blindly
A product photo cannot confirm every fact. Only approve values you know are correct—especially material, fit, care and technical product details.
If connected to the Vestis Labs Platform
Products synced from the Vestis Labs Platform can use your actual product data, such as materials, specifications and other verified information.
Important note: GEO Readiness Score in Vestis Labs Platform is different: it measures the completeness of your underlying source data, while the Atlas Data Enrichment score measures the completeness and quality of the enriched product data.
Complete the missing product information
The Still missing list shows information Atlas still needs. Select the correct value for each relevant field. Complete fields that are missing and relevant to the product.
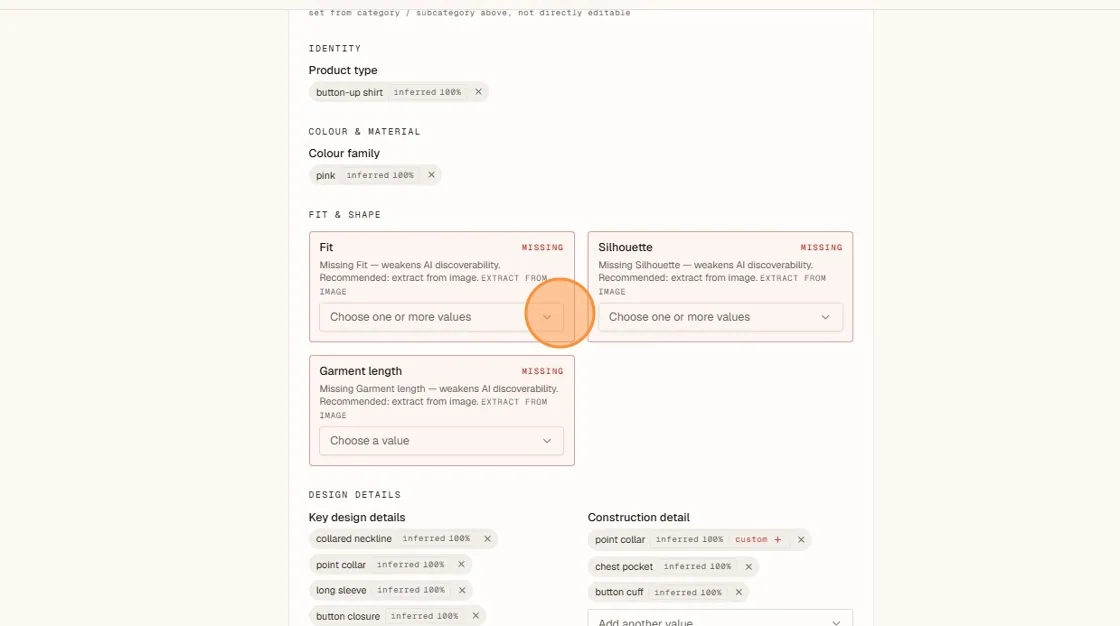
Use the search box in a dropdown to find a value quickly. You may be able to add more than one value where appropriate.
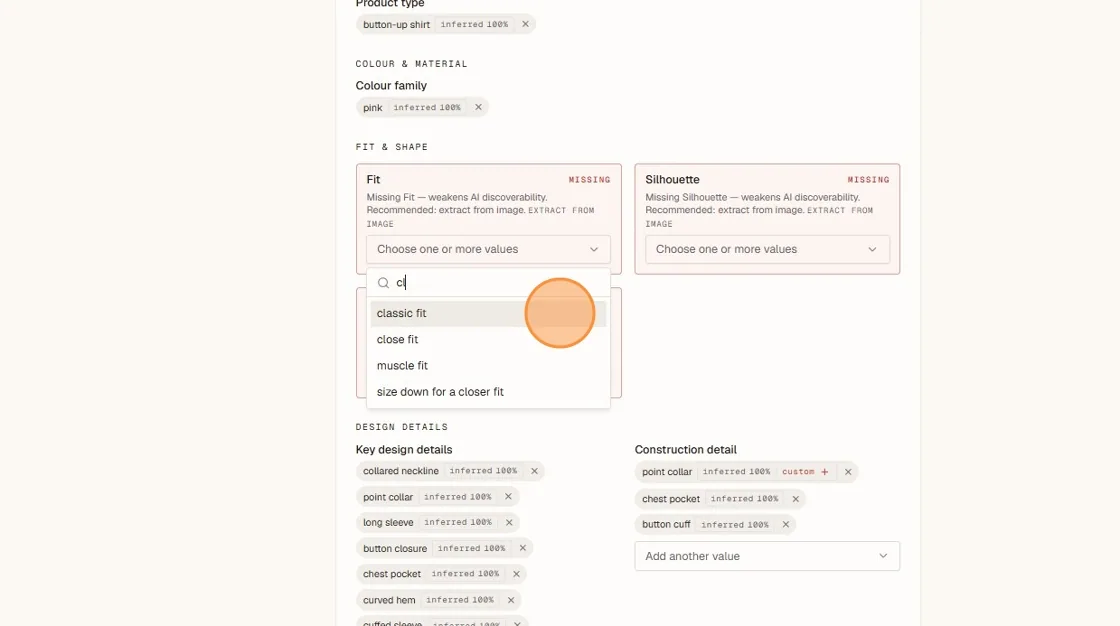
Information often added manually
Exact material composition, care instructions, fit, garment length and other facts that may not be clearly visible in a photo.
When the information is accurate and complete enough for use, select “Save changes”.
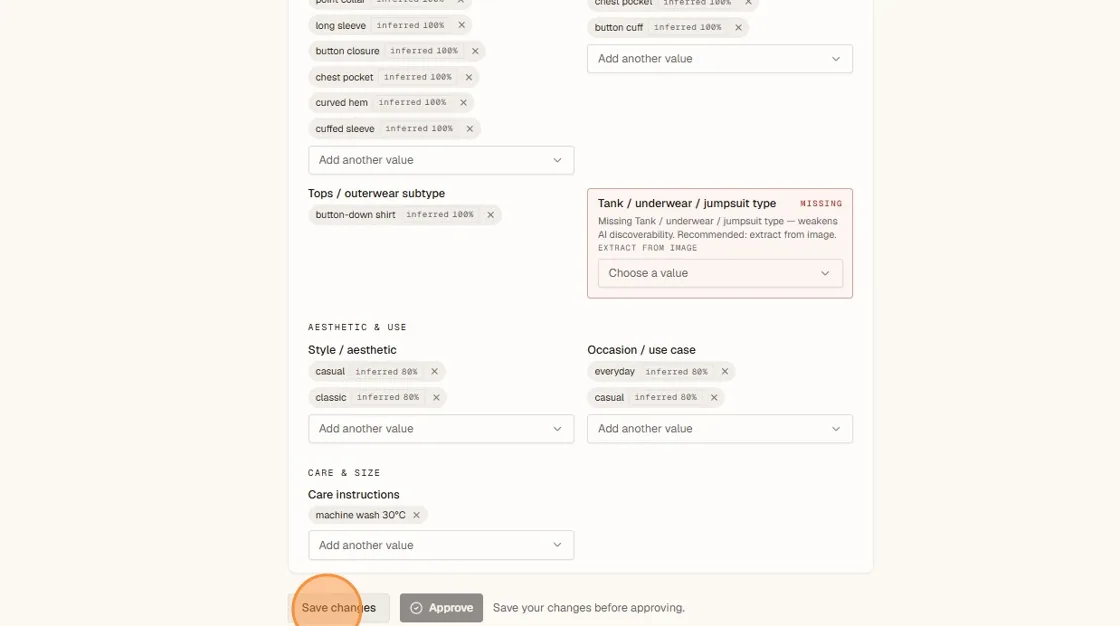
Review any remaining flagged or missing fields. Select “Approve”.
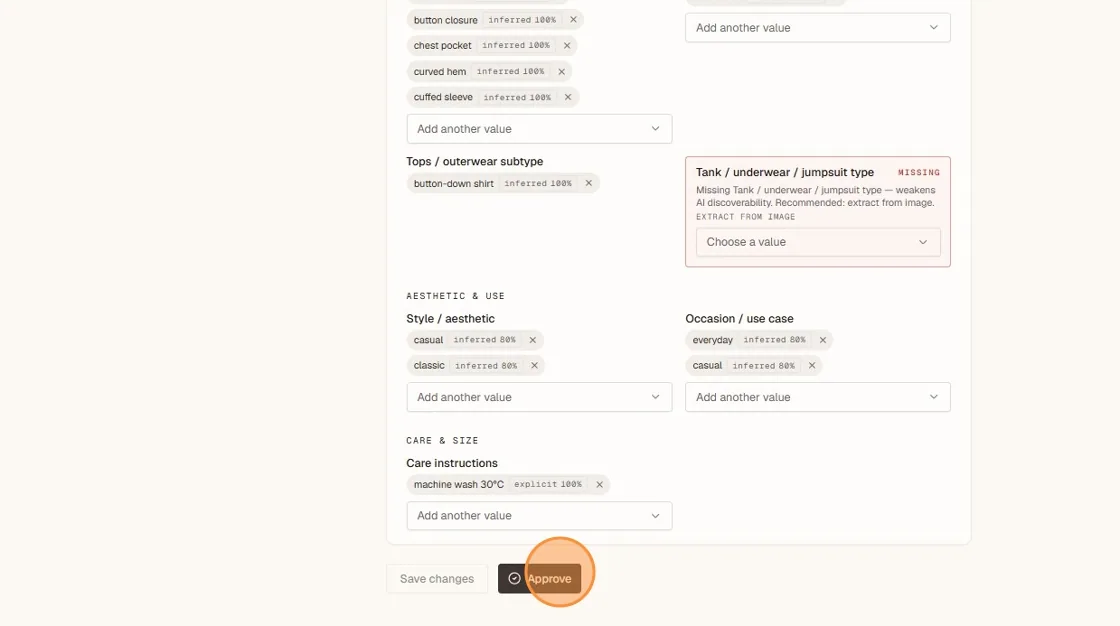
What approval does
Approval confirms that the reviewed product data can be used. Atlas then creates the generated product content and structured output.
Before approving
Check that your edits have been saved. Approve only when the information reflects the real product.
Review and download the generated output
After approval, Atlas generates content from the reviewed product data. Review the generated title, AI summary, short description, ecommerce description and image alt text.
Use “Regenerate copy” when the content needs another version.
Download the CSV
Click CSV for a spreadsheet or catalog workflow.
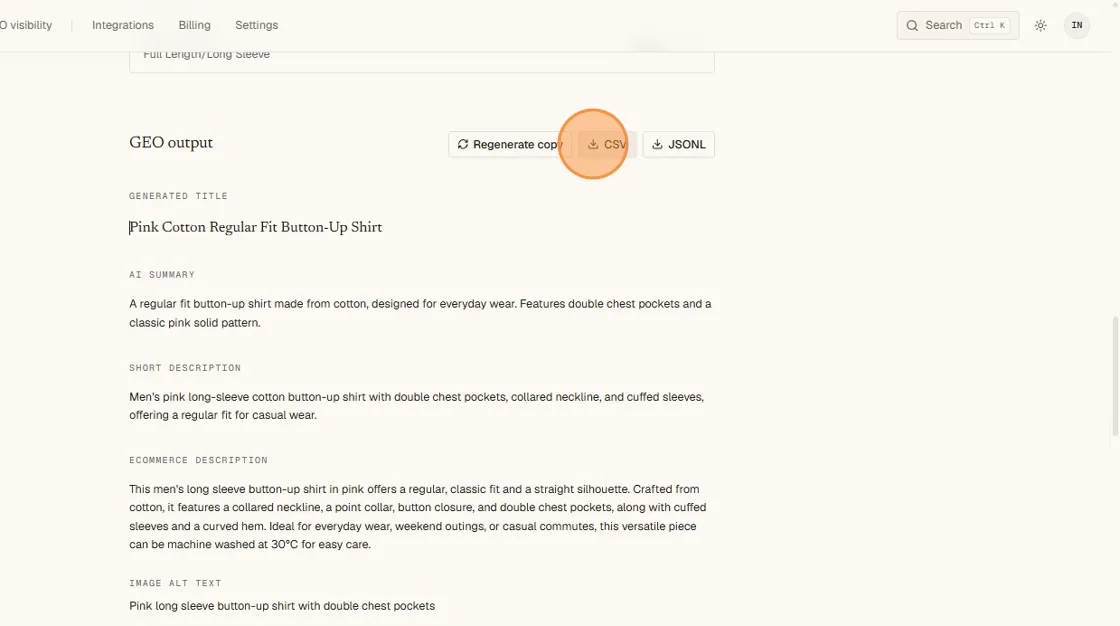
Download the data file
Click Data file when you need structured, machine-readable output (one record per line, JSONL).
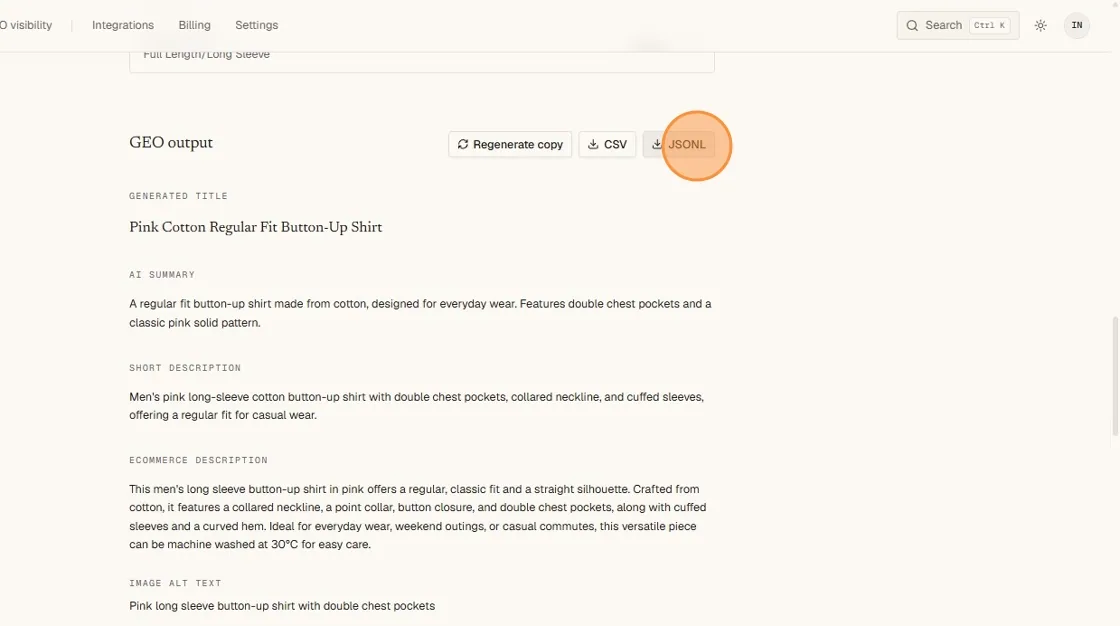
The output is only as reliable as the approved data
Correct product facts produce more accurate and useful descriptions. Review the generated copy before publishing it.
On the Publish tab, choose the Shopify or Other platforms instructions. Select “Copy” to copy the code snippet.
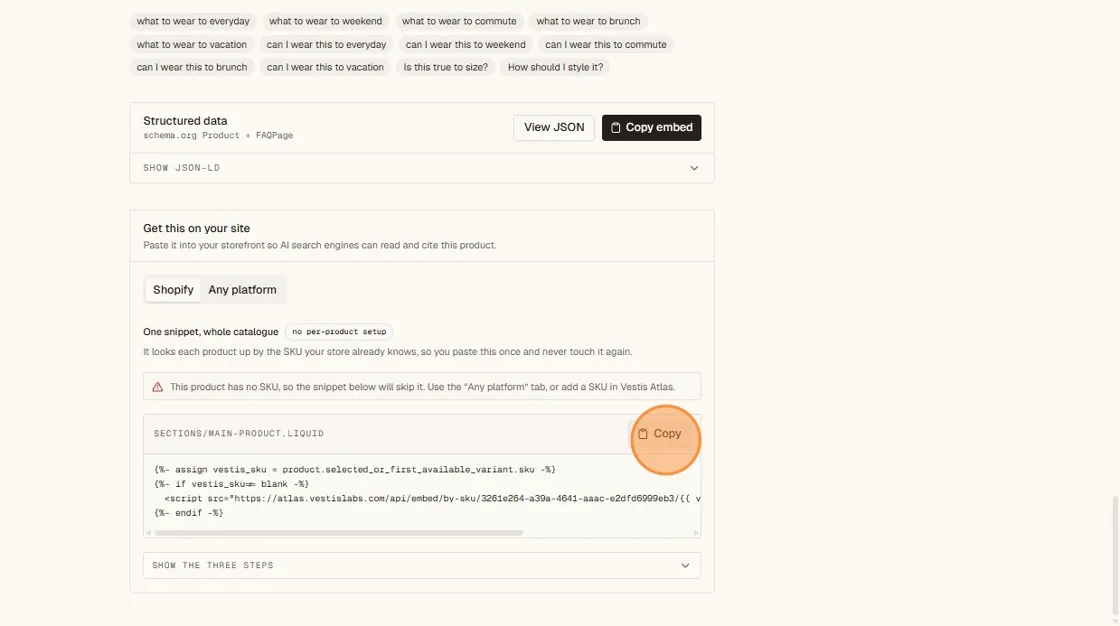
Paste it into the appropriate area of your website, or send it to the person who manages your ecommerce site. Test the page after installation.
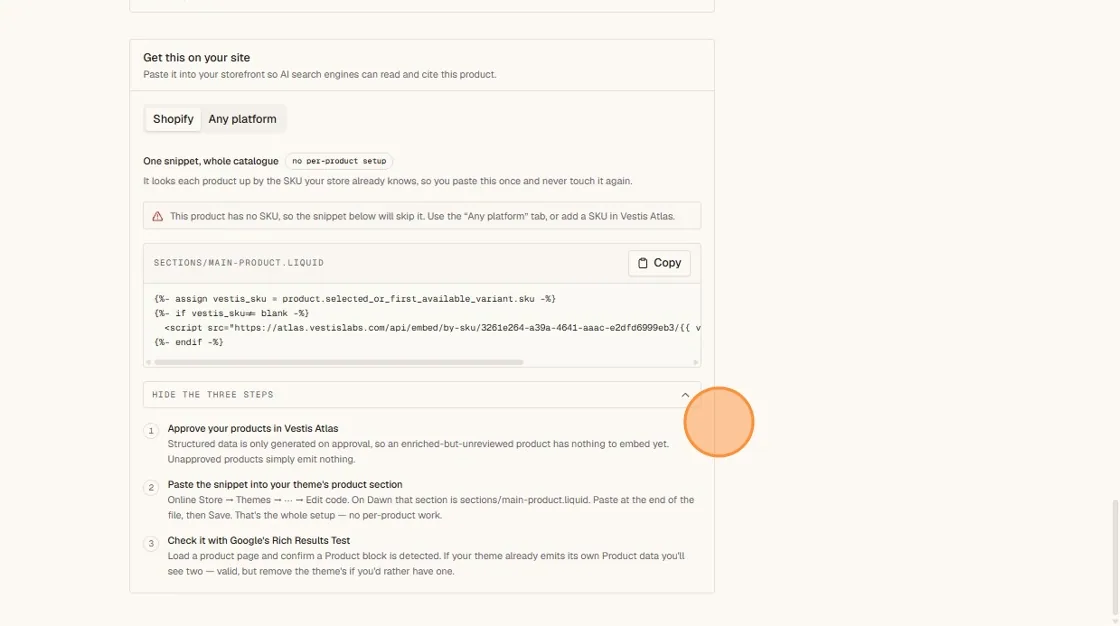
You do not need to understand the code
The snippet is designed to be copied. A Shopify administrator, ecommerce manager or developer can add it to the website if you do not manage the theme yourself.