
Step 6 of 13 in Onboard your brand
Invite user
To get you and your brand started, it is important to add your colleagues and team members to Vestis Labs so you can start collaborating.
Under review. This page is published while we check it against the live app, so some details may have changed.
Screenshots may be out of date.
To get you and your brand started, it is important to add your colleagues and team members to Vestis Labs so you can start collaborating. Follow the steps below to invite them.
ManagementUsersInvite
Permission: UPDATE_USER
Before you start
Users can be invited by the Brand Admin or by any other user who has the Update user permission. You can set brand permissions and access to styles and collections before you send the invitation. Once invited, the user receives a registration email and completes the account setup.
Note
The Invite button is hidden when every PRO seat and every guest seat of your subscription is in use. Check User Limit Status on the Users page, and see Subscription management to add seats.
Invite a user
Open Users
Go to Management → Users.
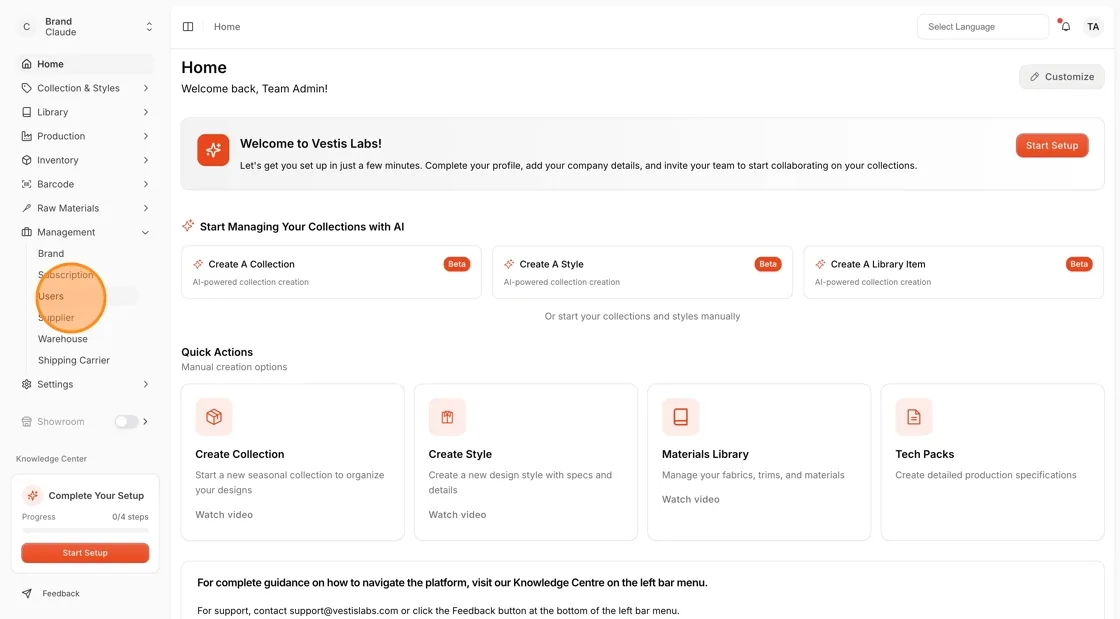
Click "Invite"
Click Invite at the top right of the page.
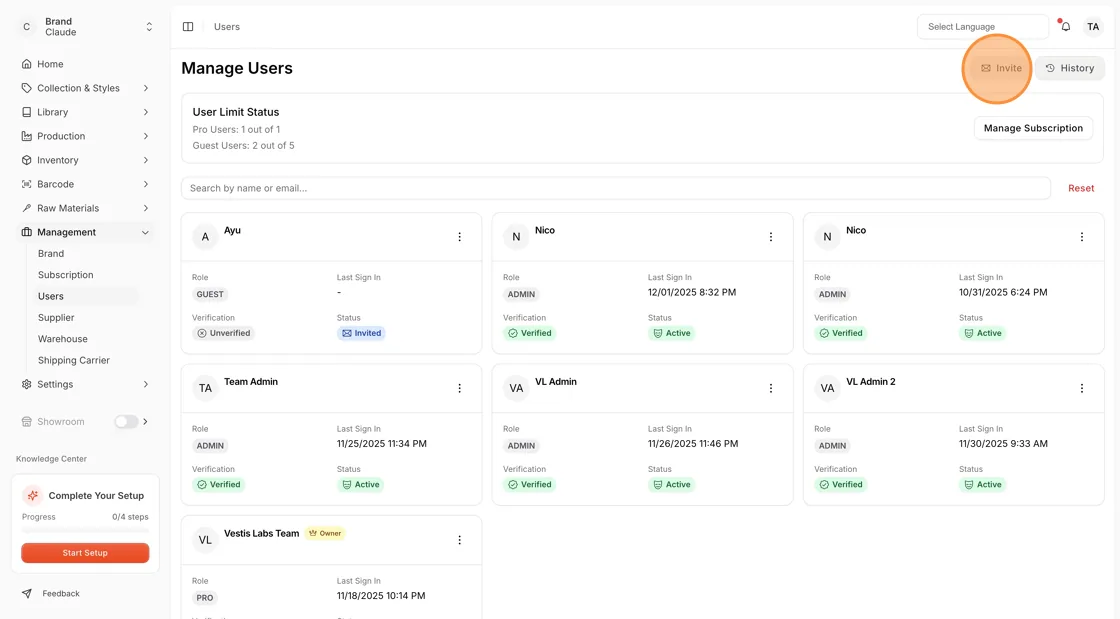
Fill in the user details
Enter the Name (at least 3 characters) and Email, then select the Profile. All three are required. The Brand field shows the brand you are working in and cannot be changed.
Note
The Profile list offers PRO, GUEST and SUPPLIER. A profile is disabled when no seat of that type is left.
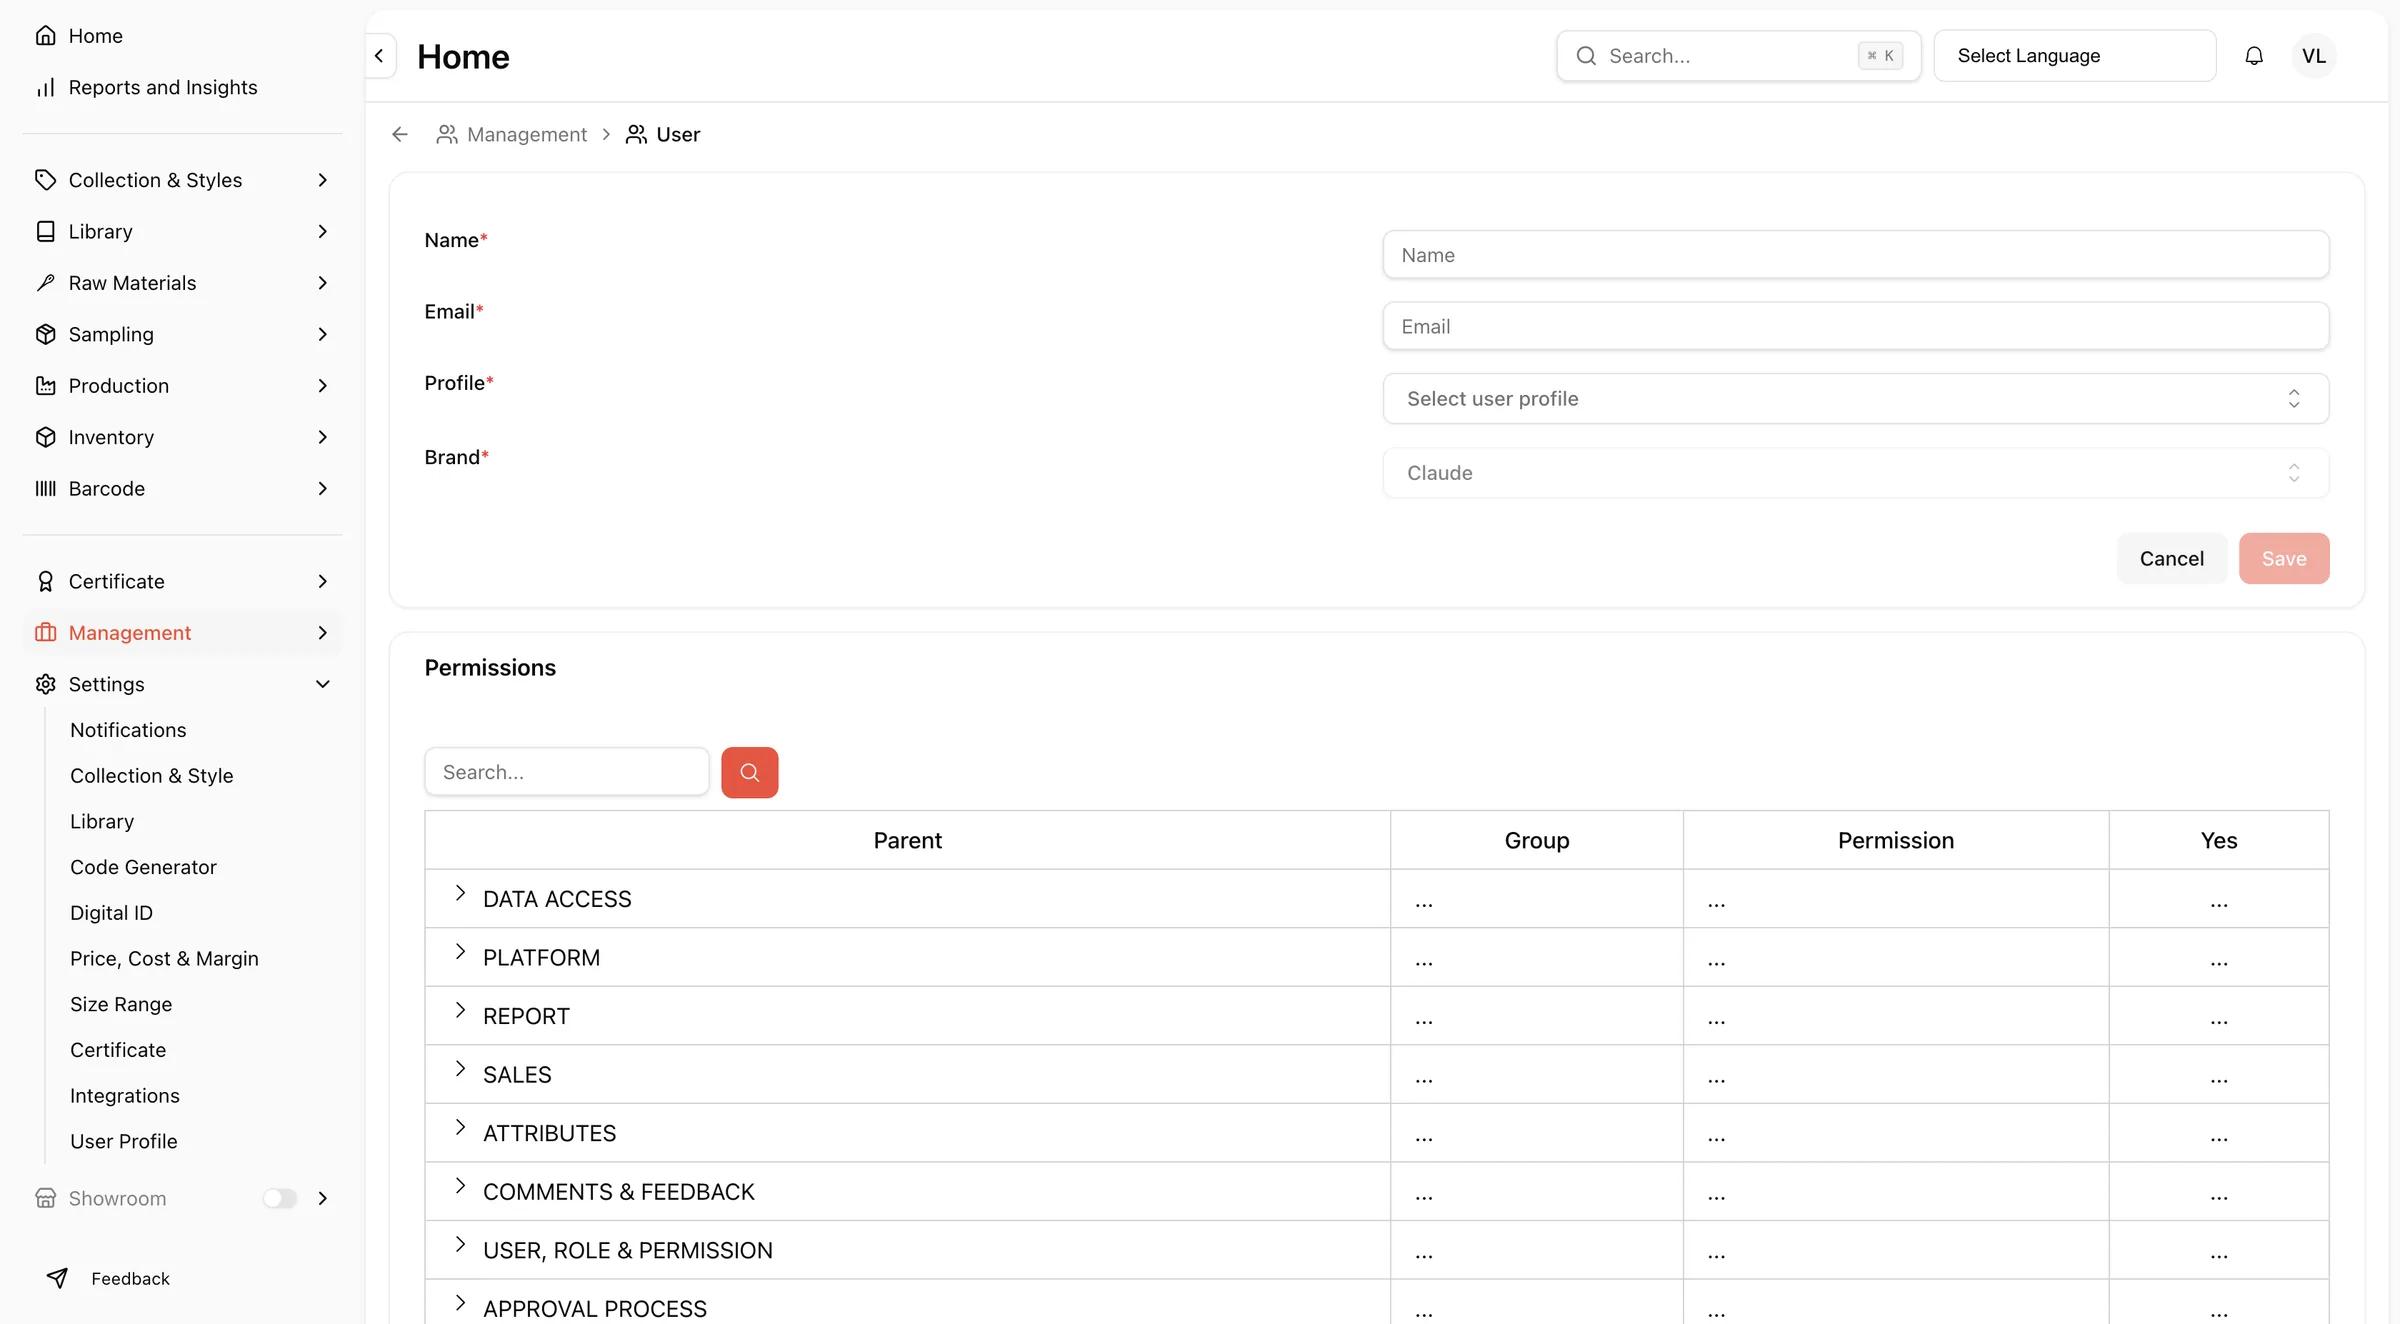
Adjust the permissions
In the Permissions card, tick the permissions the user should have. Selecting a profile ticks that profile's defaults first. Click the arrow next to a group to expand it, or use Search... to find a permission.
Set the platform access
In the Platform Access card, open Collection Access or Style Access to choose what the user can open.
Note
Collection Access is only available once View collection is ticked, and Style Access once View style is ticked. The cards only appear if you have the permission to update collection or style access.
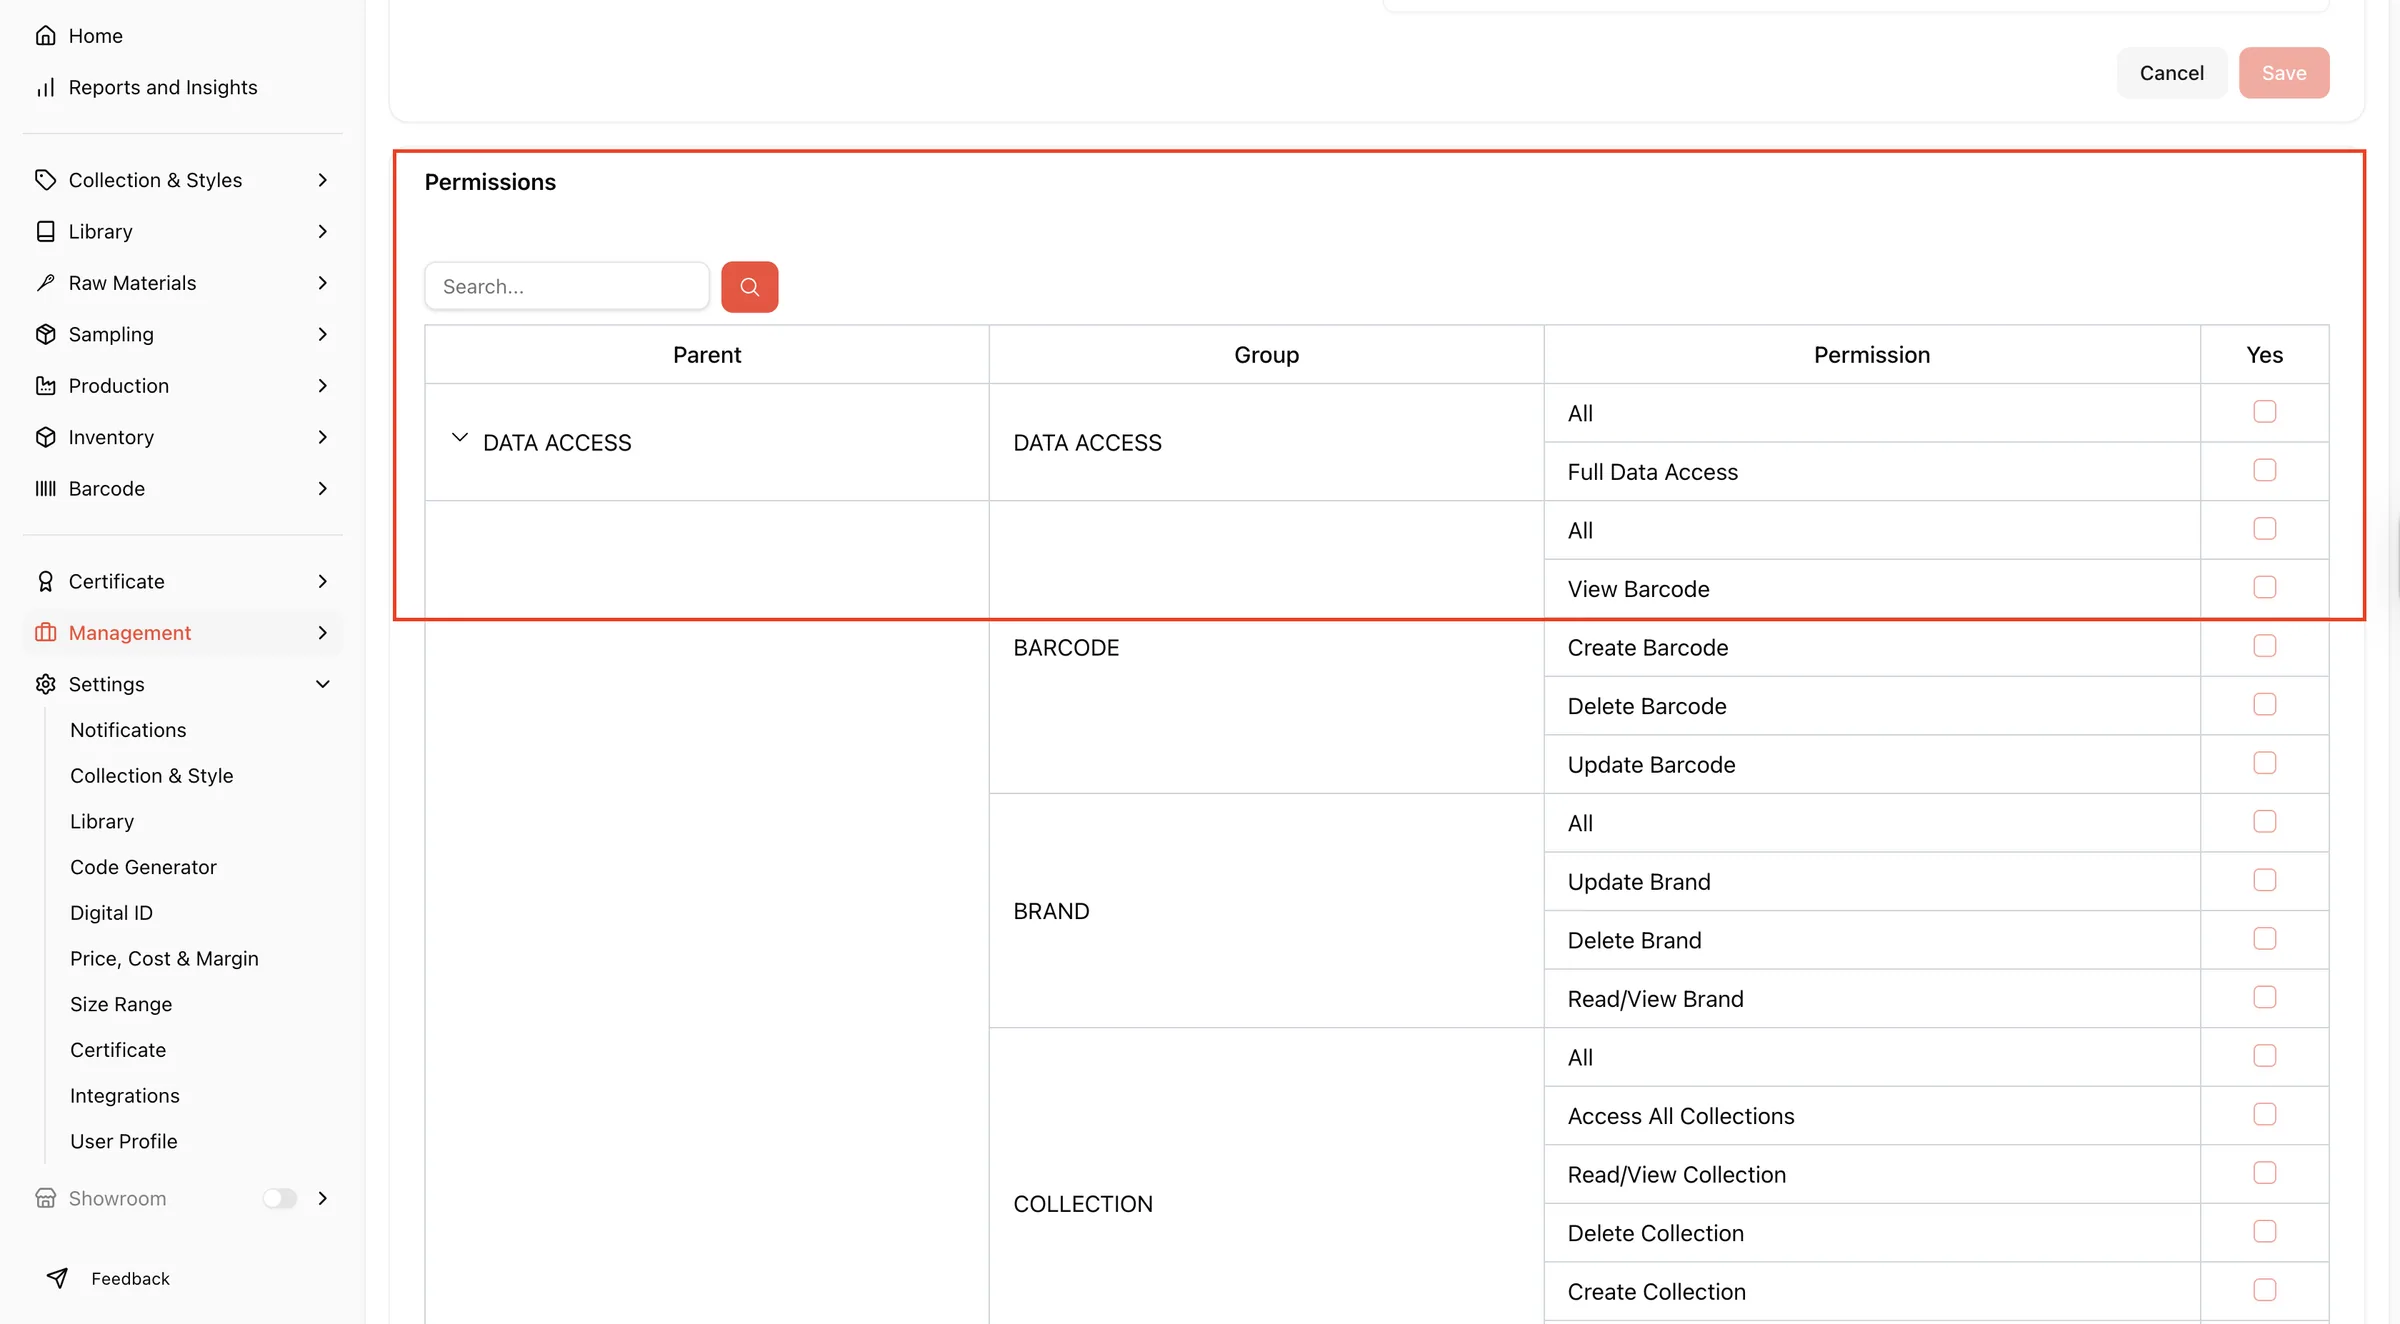
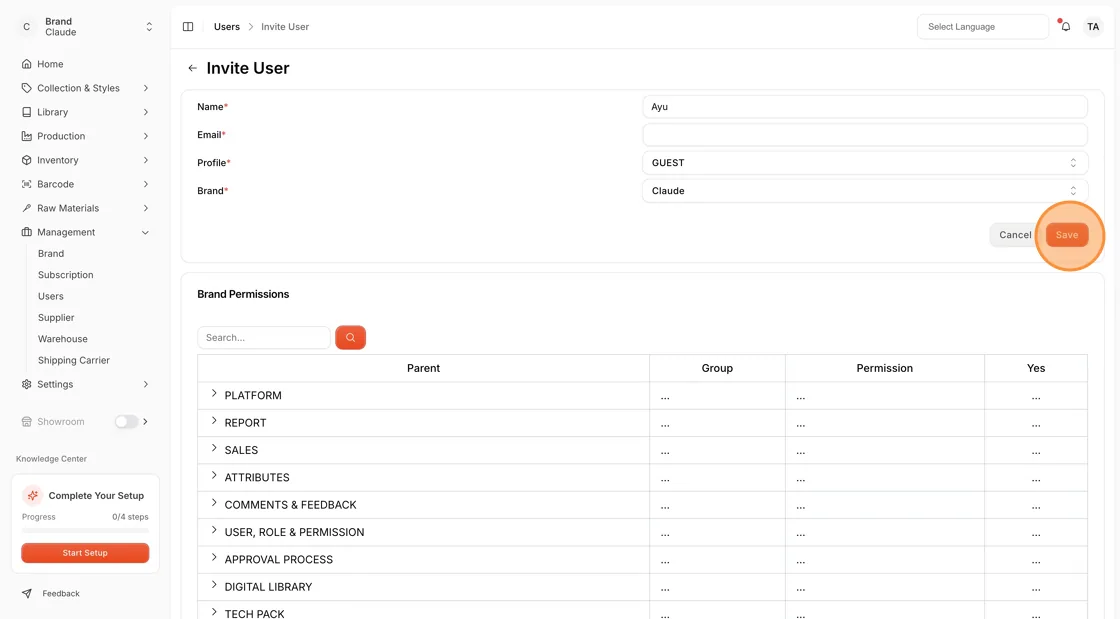
Click "Save"
Click Save to send the invitation. Save is disabled until the form is valid.
You see User invited successfully and the new user on the Users page with the status Invited. The user receives a registration email and must follow its instructions to register.
Note
You can change the permissions and the collection and style access later from the Users page. See Users' permission page.
Resend a user invitation
If a user has not yet been activated, you can send a new invitation.
Open Users
Go to Management → Users.
Open the user menu
Click the three dots on the card of a user whose Status is Invited.
Click "Resend invitation"
Click Resend invitation. The user receives a new email invitation.
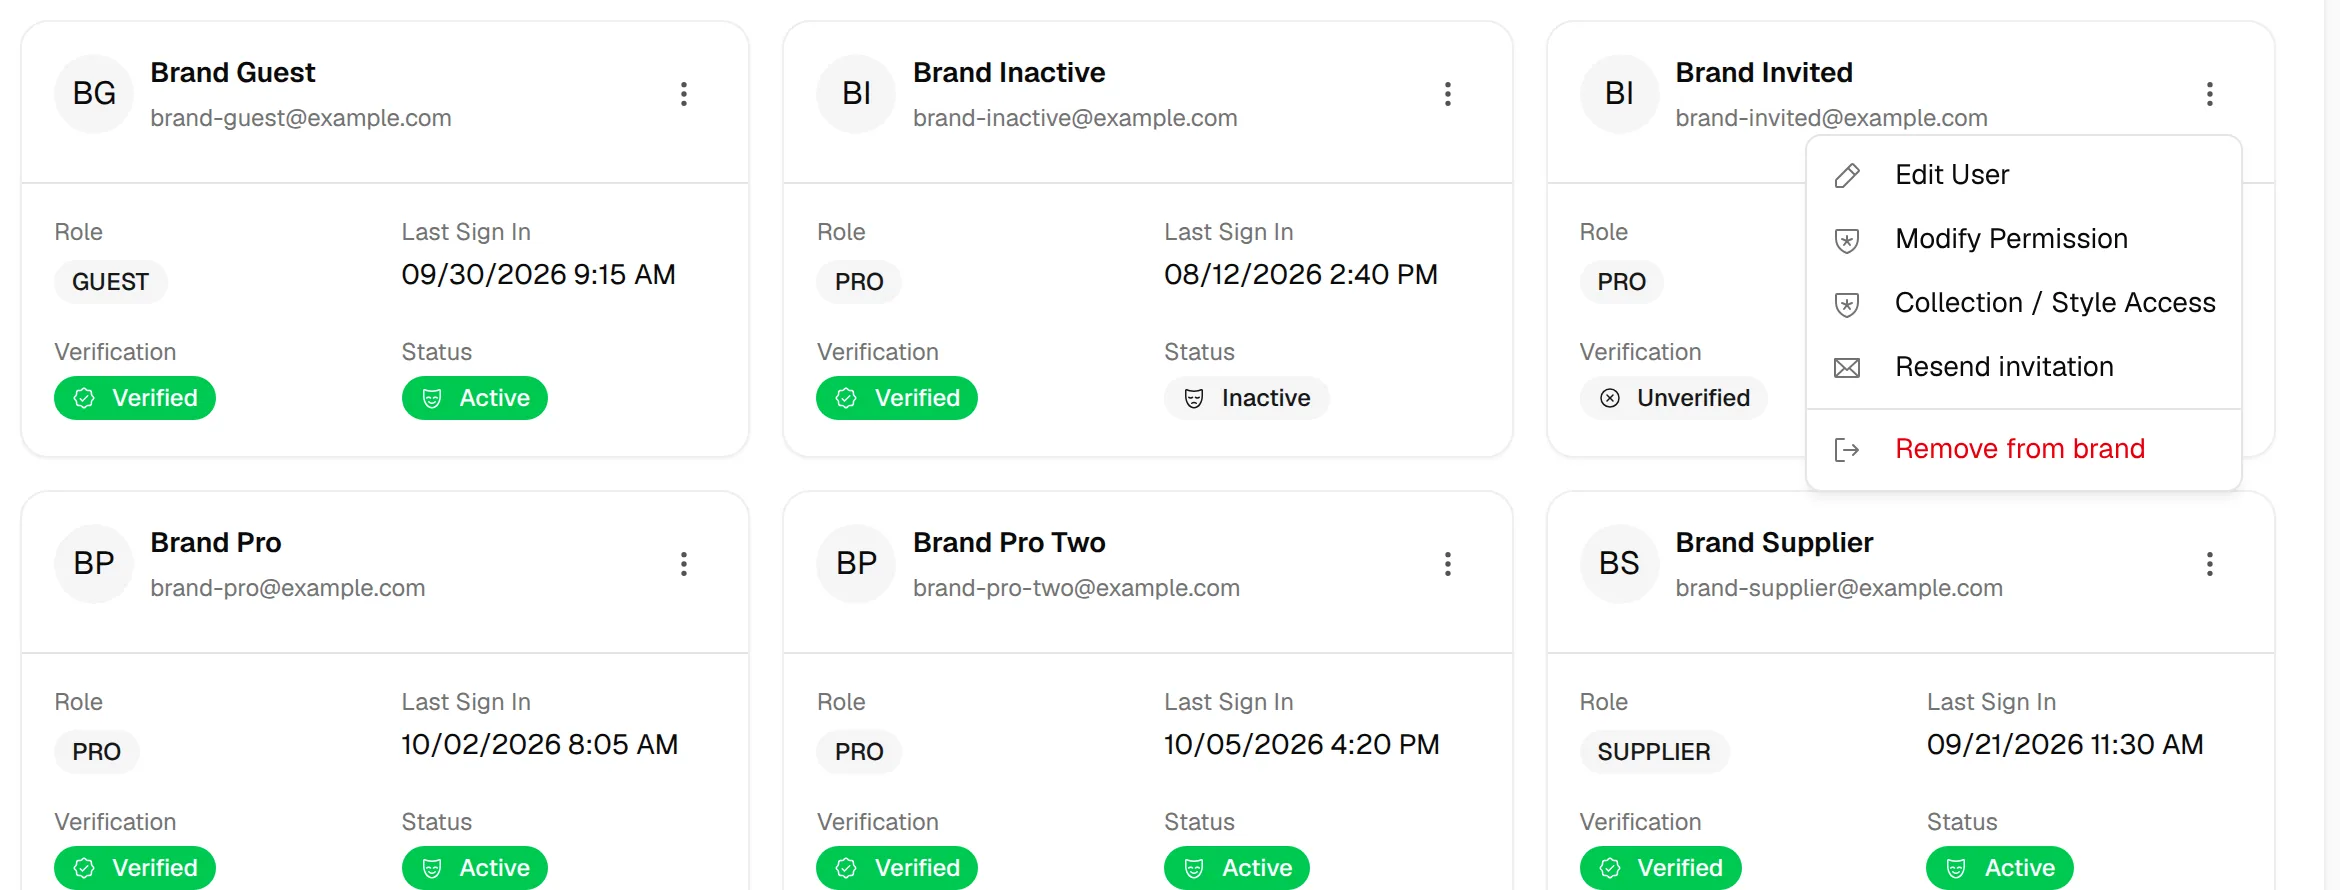
You see Invitation sent successfully.