Production overview
Open Production Overview
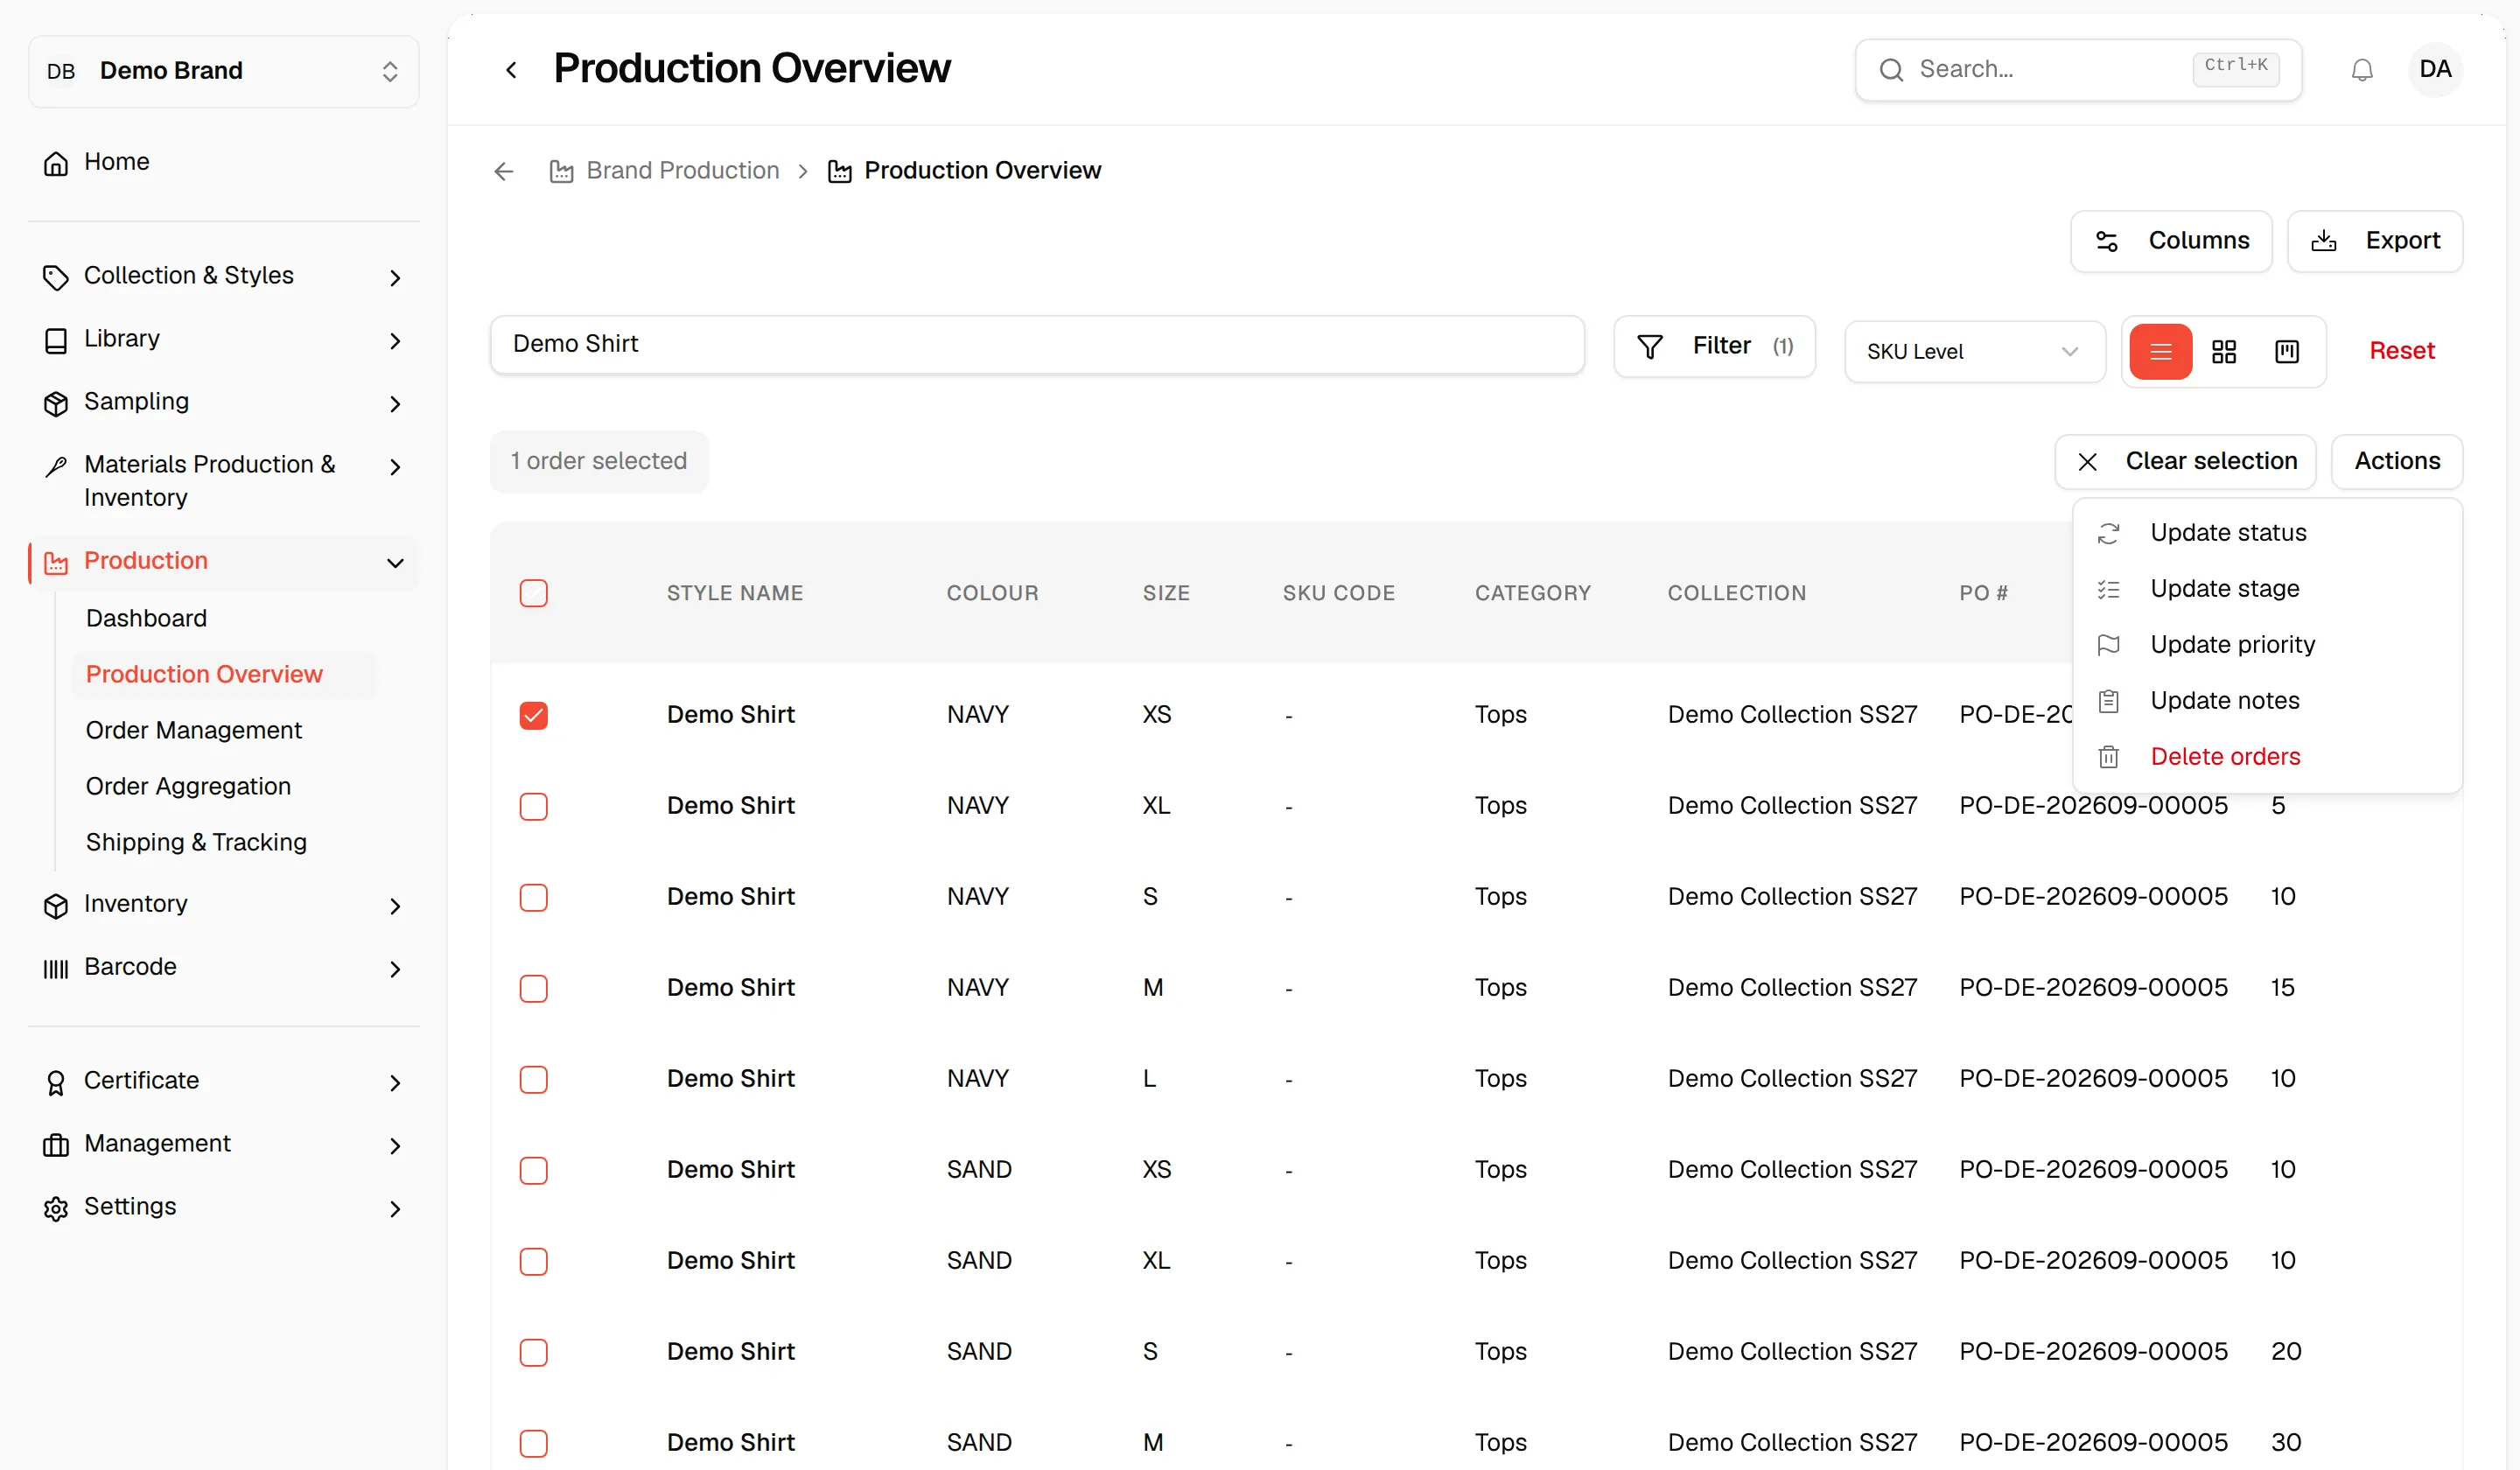
The Production Overview page lists everything that is in production, grouped by style, colour and size, with the agreed and actual production dates (Start, End, Ex-Factory). You can search and filter the list, change which columns you see, update an order's status, stage, priority or notes, and export the list.
ProductionProduction Overview
Permission: VIEW_BRAND_PRODUCTION
In the left sidebar, expand Production and click Production Overview. The page displays all active production orders grouped by style name, size, and actual production dates (Start, End, Ex-Factory).
Note
Bulk changes, the Delete order option and the selection checkboxes need permission to update brand production. Without it, you can still view, filter and export the list.
Search for a specific item
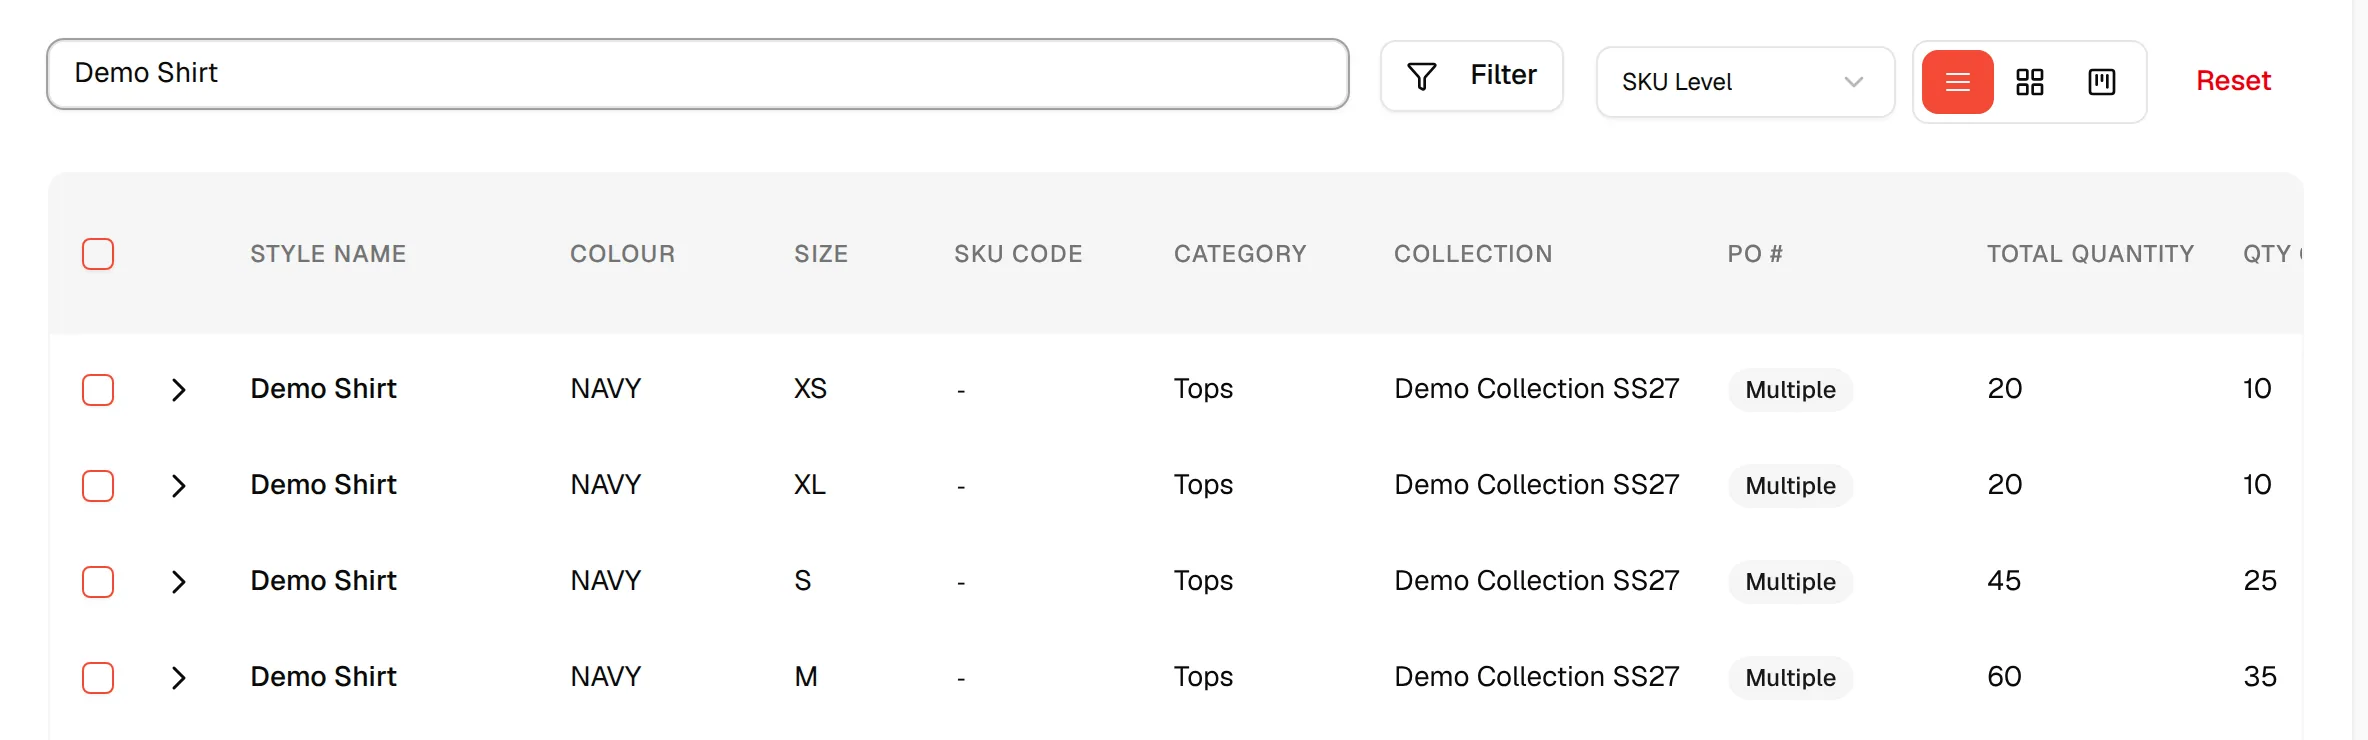
Use the Search by name, style code, or SKU bar at the top of the list to quickly locate a specific style or production order.
Filter the list
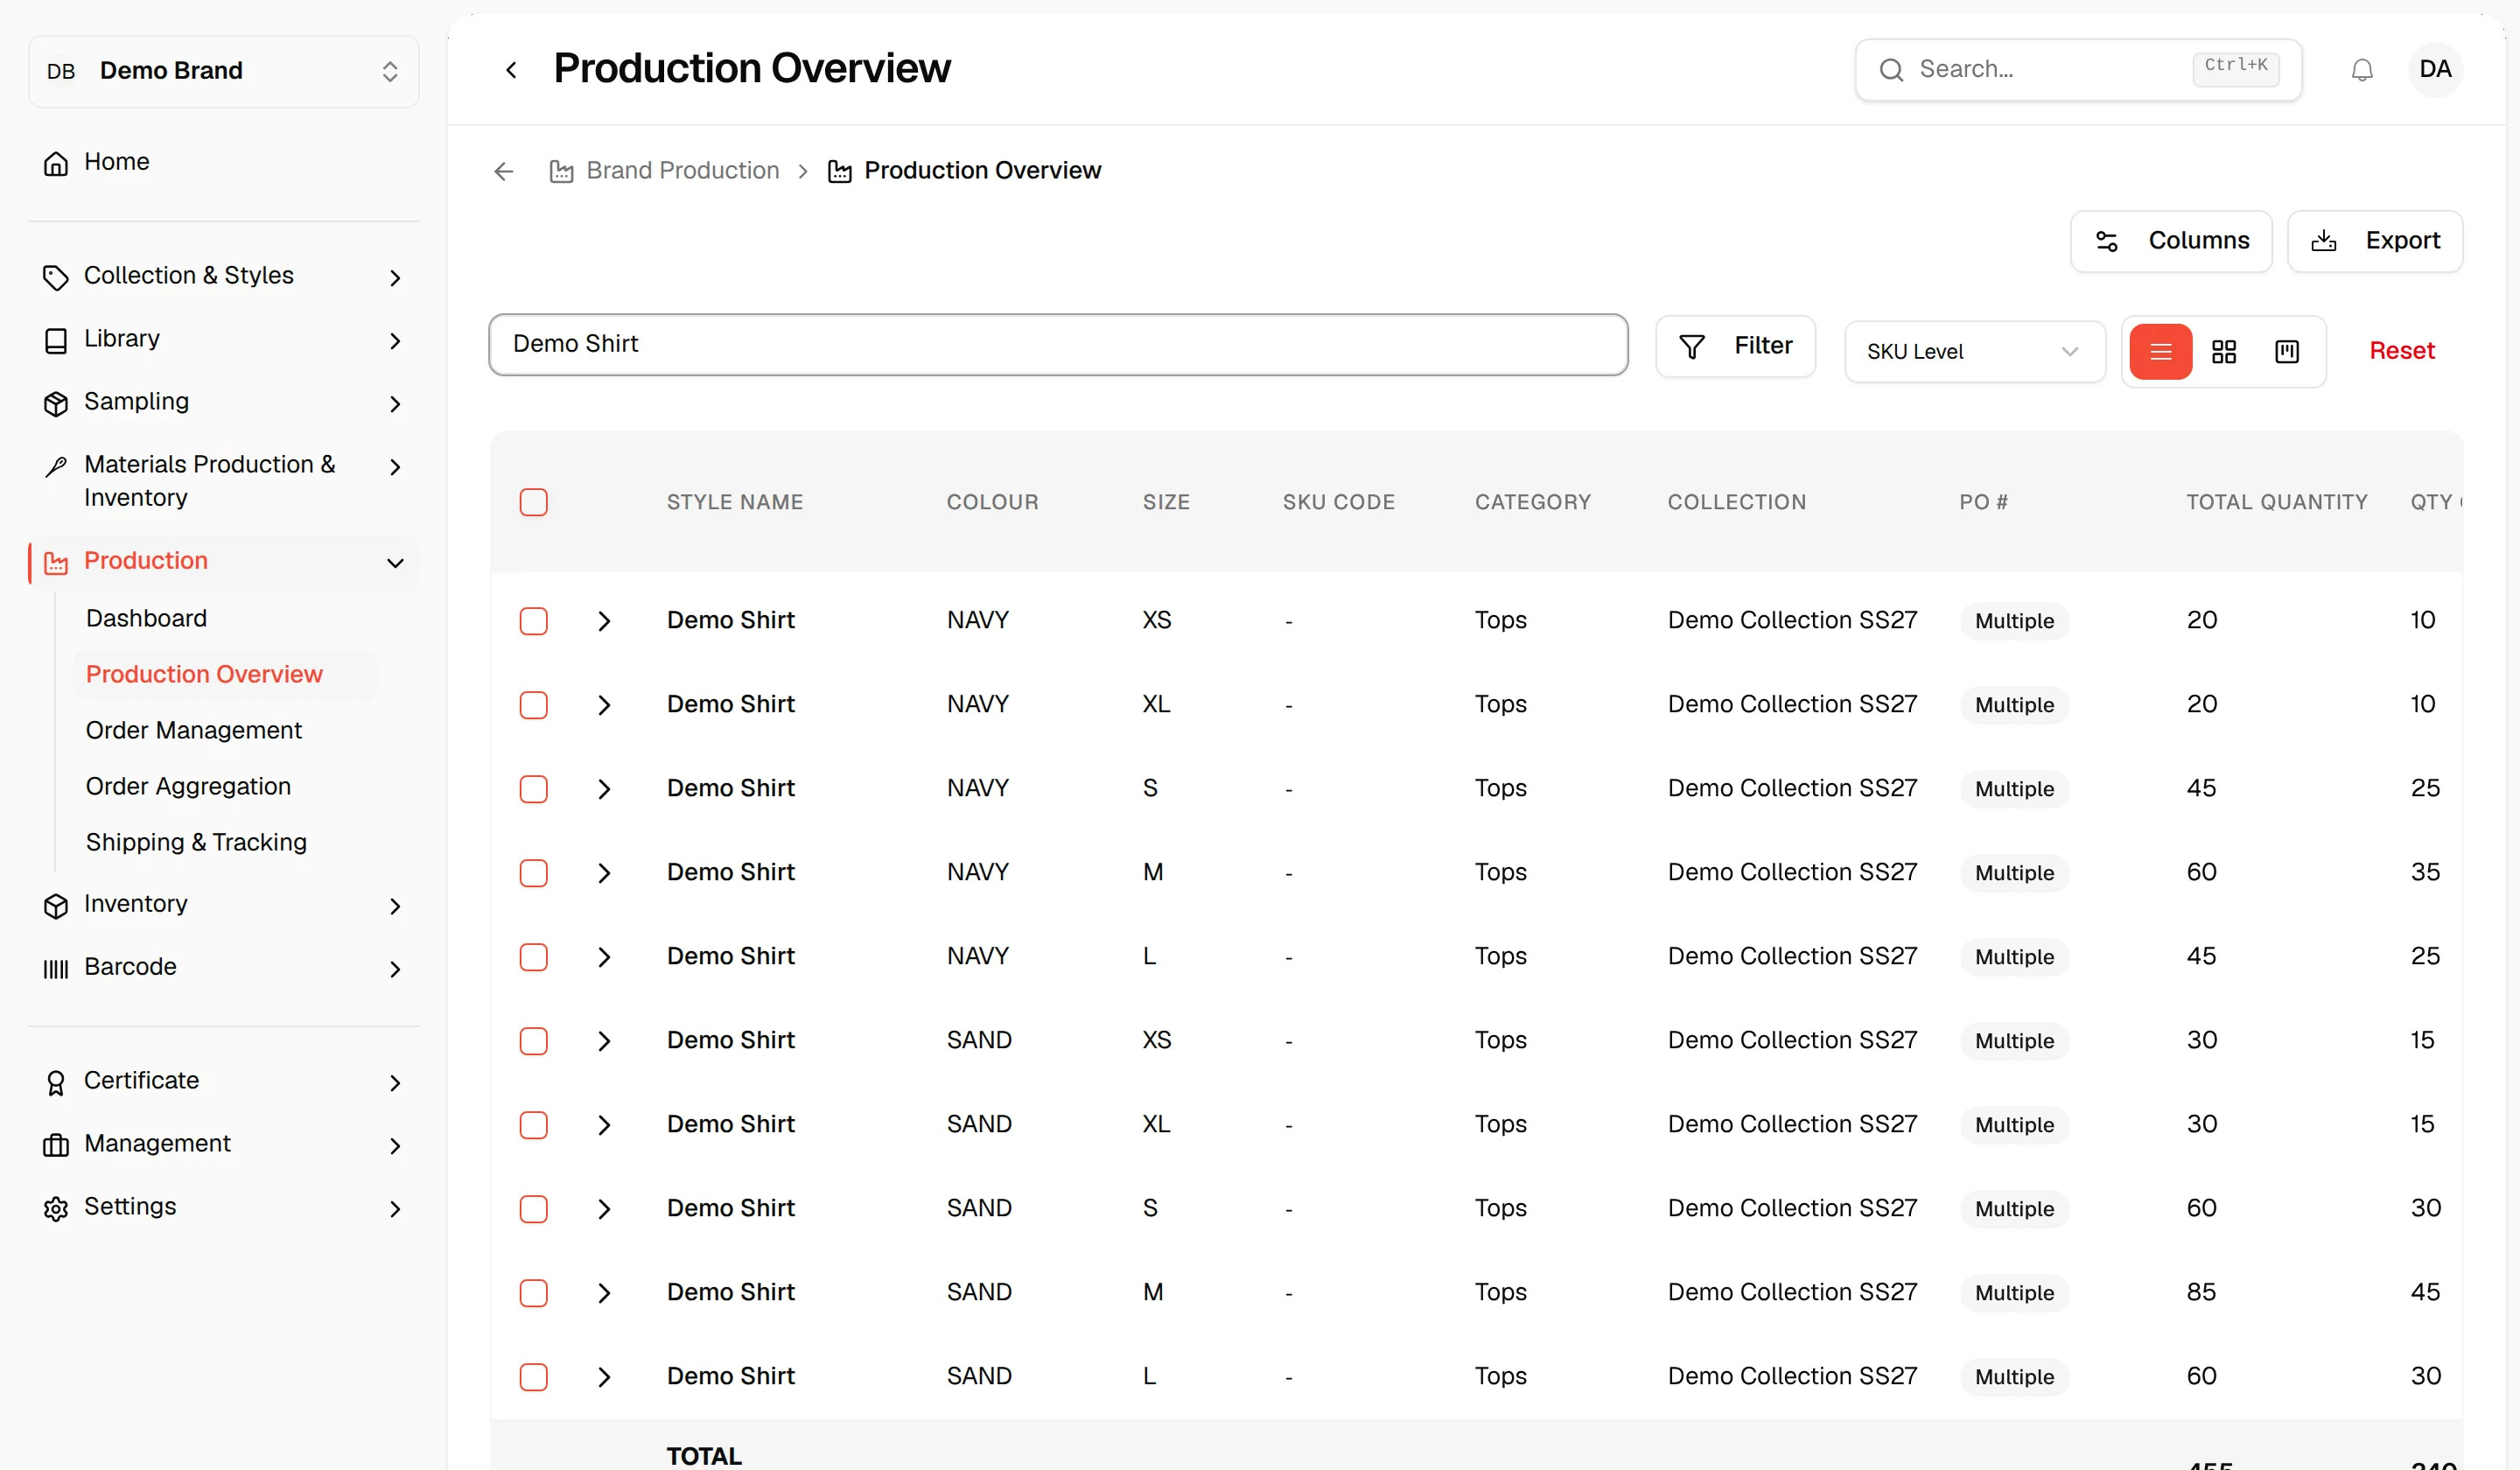
Click the Filter button. A filter panel opens with options including Category, Collection, Season, Supplier, Location, Status, Health and Created. Expand any group and check the values you want (for example Pants, Jersey, Dress). The list updates immediately.
- Status offers Created, Delayed, In Production, Completed, Shipped, Delivered and Cancelled.
- Health offers On Track, At Risk and Delayed. You can pick one value at a time; select it again to clear it.
- Created lets you enter a From and To date to show only orders created in that window.
Tip
Click Reset at the right of the toolbar to clear every filter, the search and the level, and return to the default list.
Switch between SKU, style option and style level
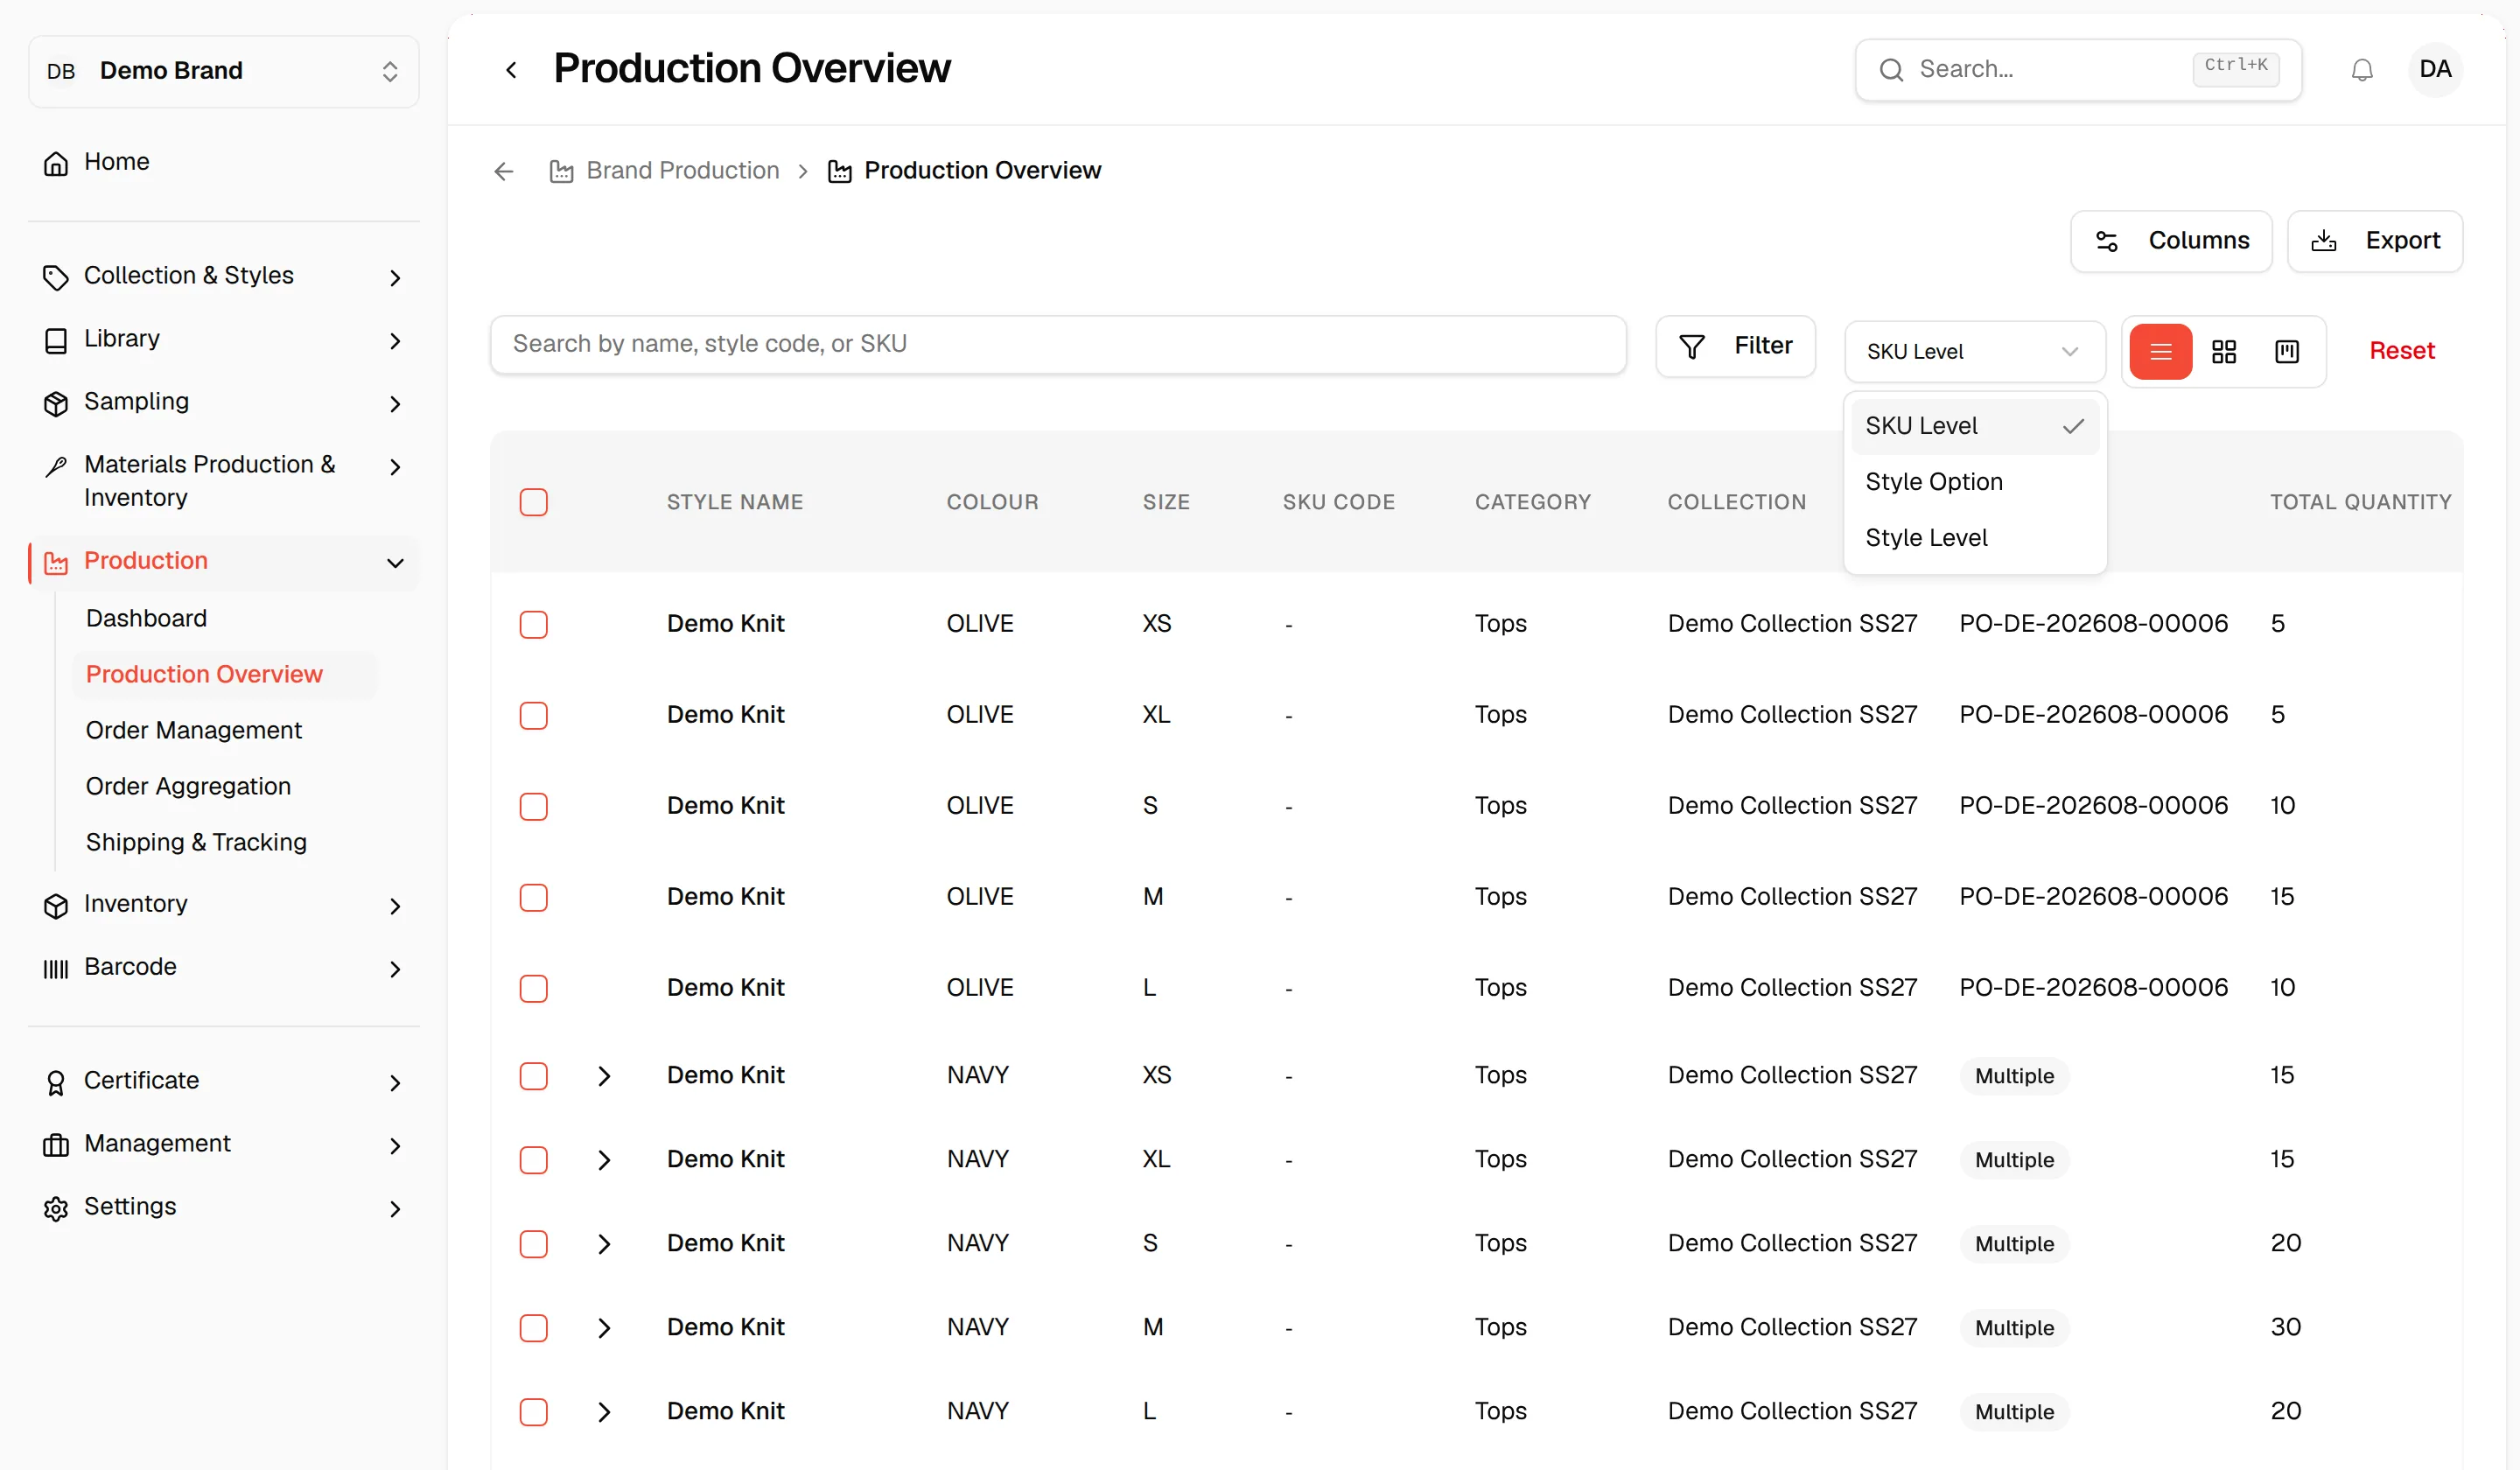
Use the level dropdown next to Filter to choose how rows are grouped. It offers SKU Level, Style Option and Style Level.
SKU Level shows one row per size/colour variant.
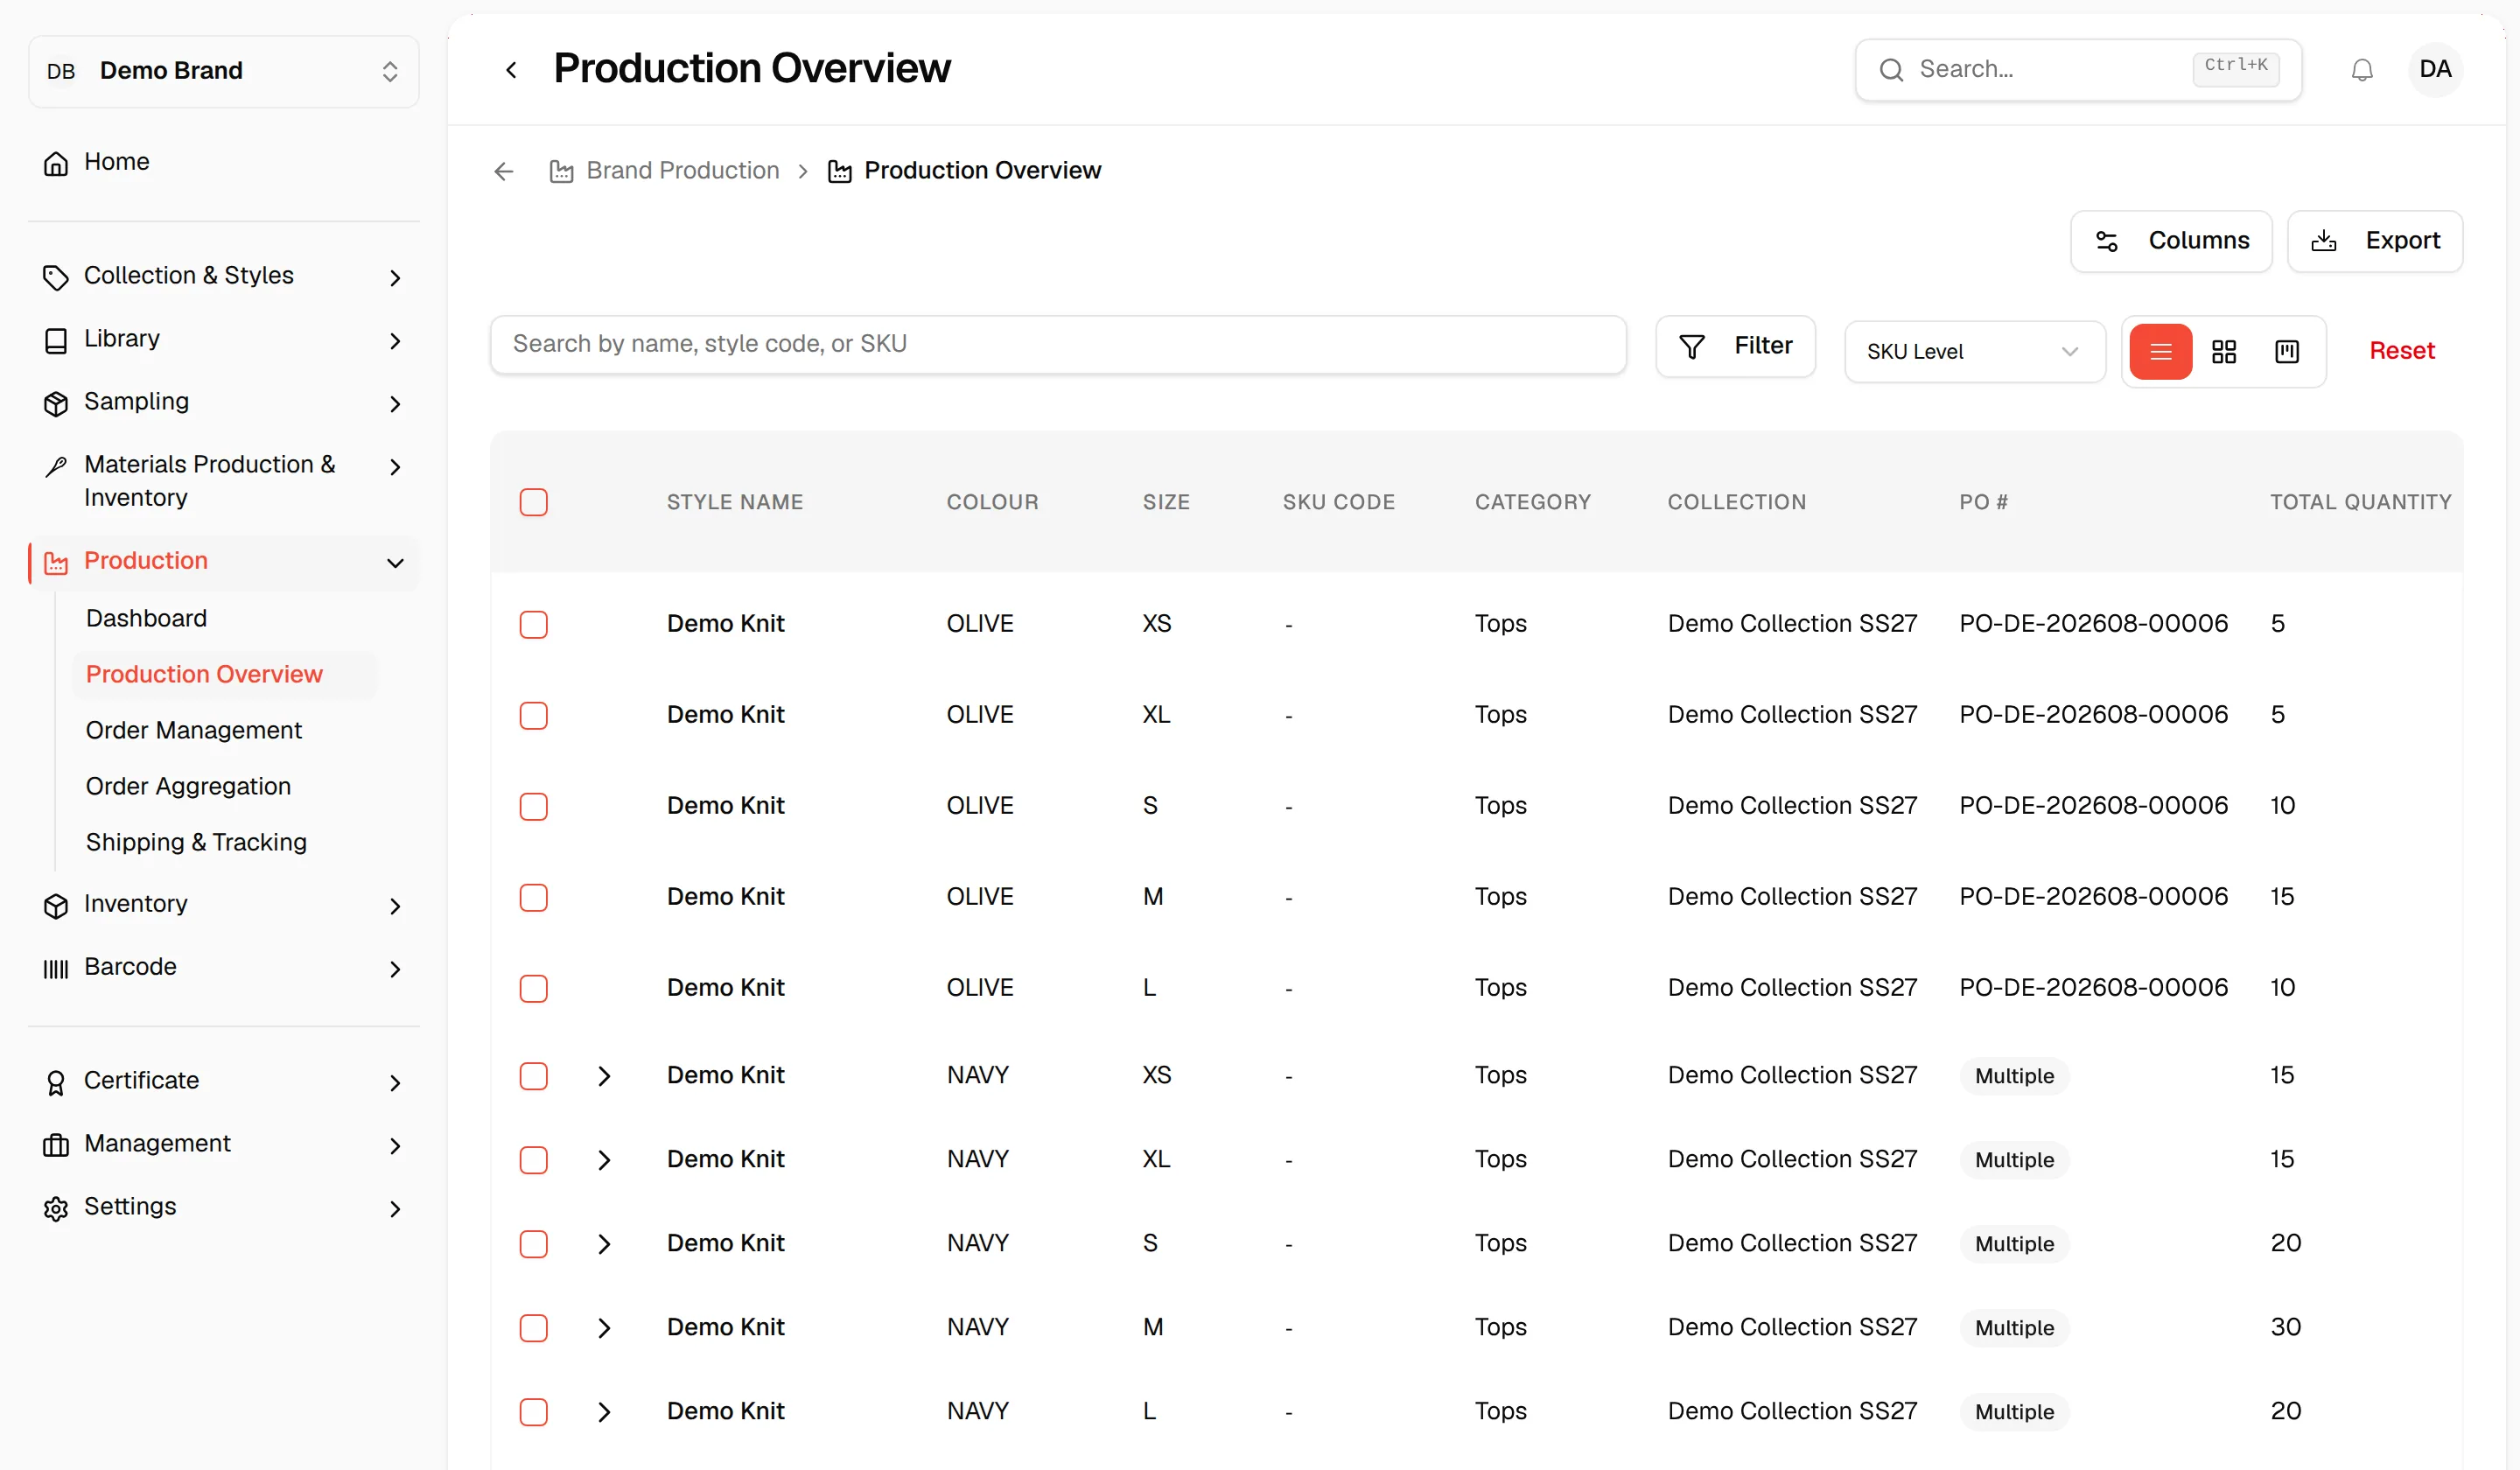
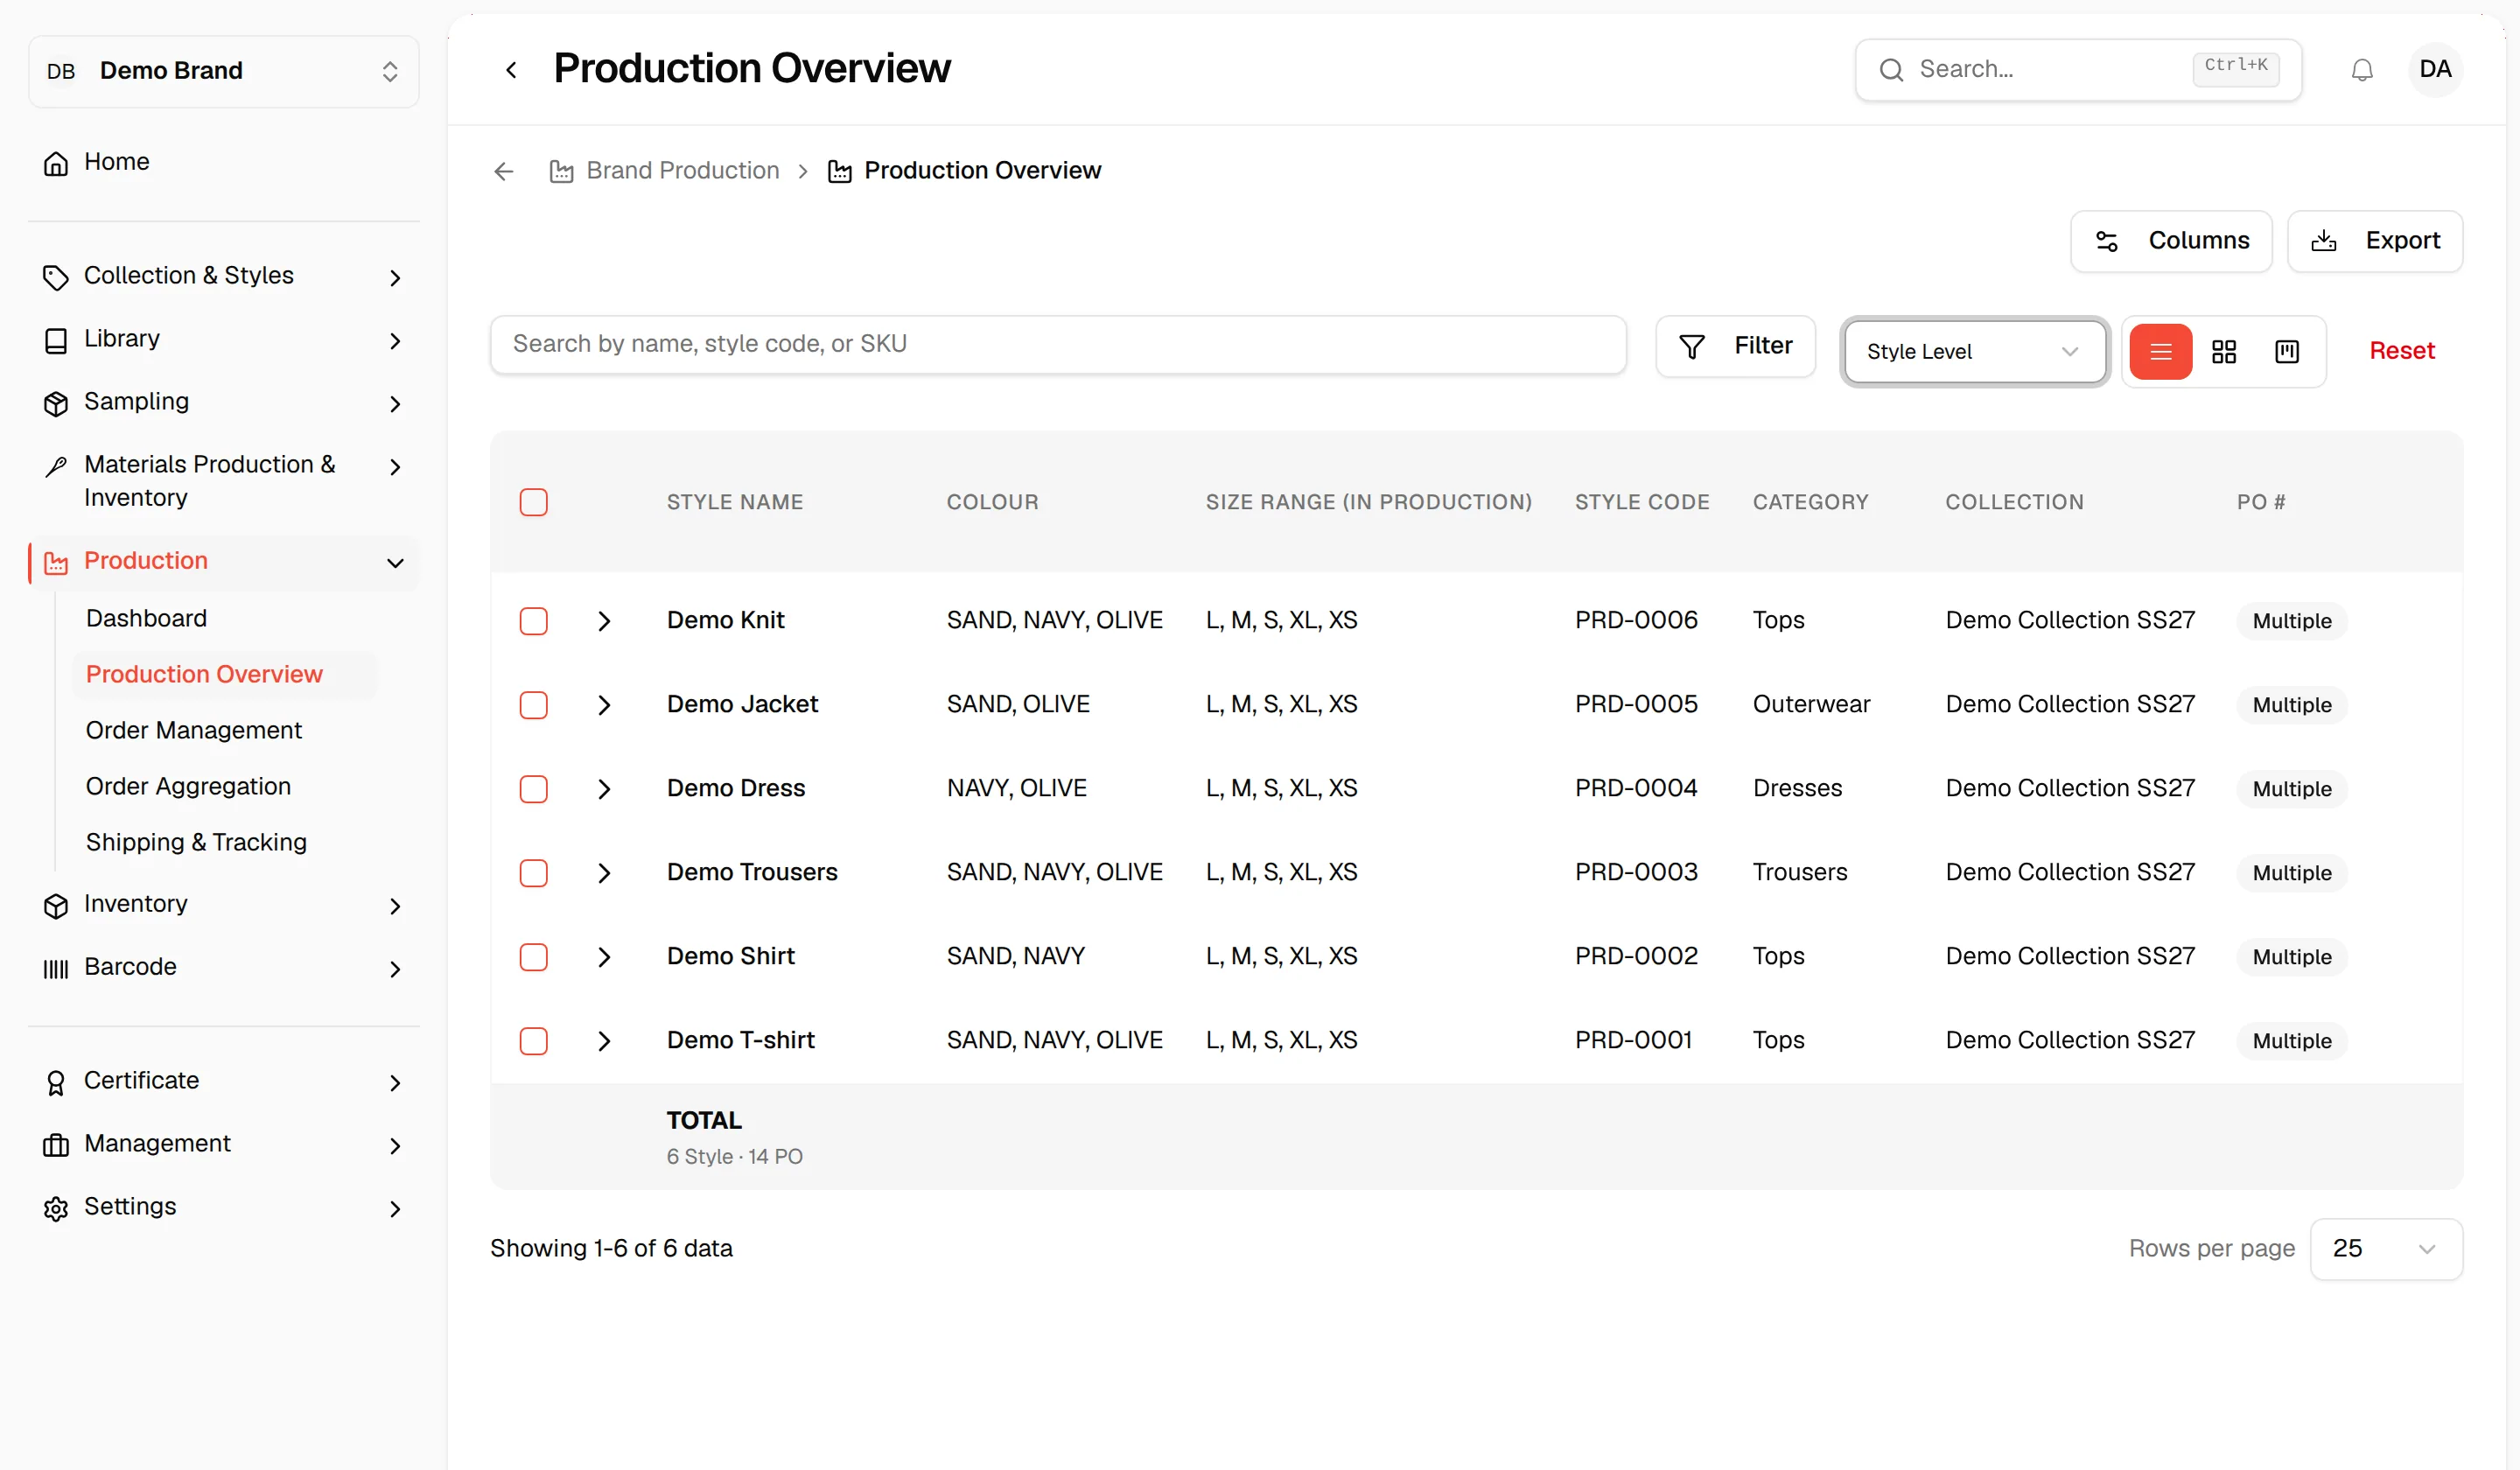
Style Level rolls up all variants into a single row per style, showing size ranges, total quantities, and completion percentages. Style Option gives one row per style and colour option.
Note
Changing the level also clears your search and filters.
Click the arrow at the start of a row to expand it and see the individual production orders (PO) that make it up.
Change the layout view
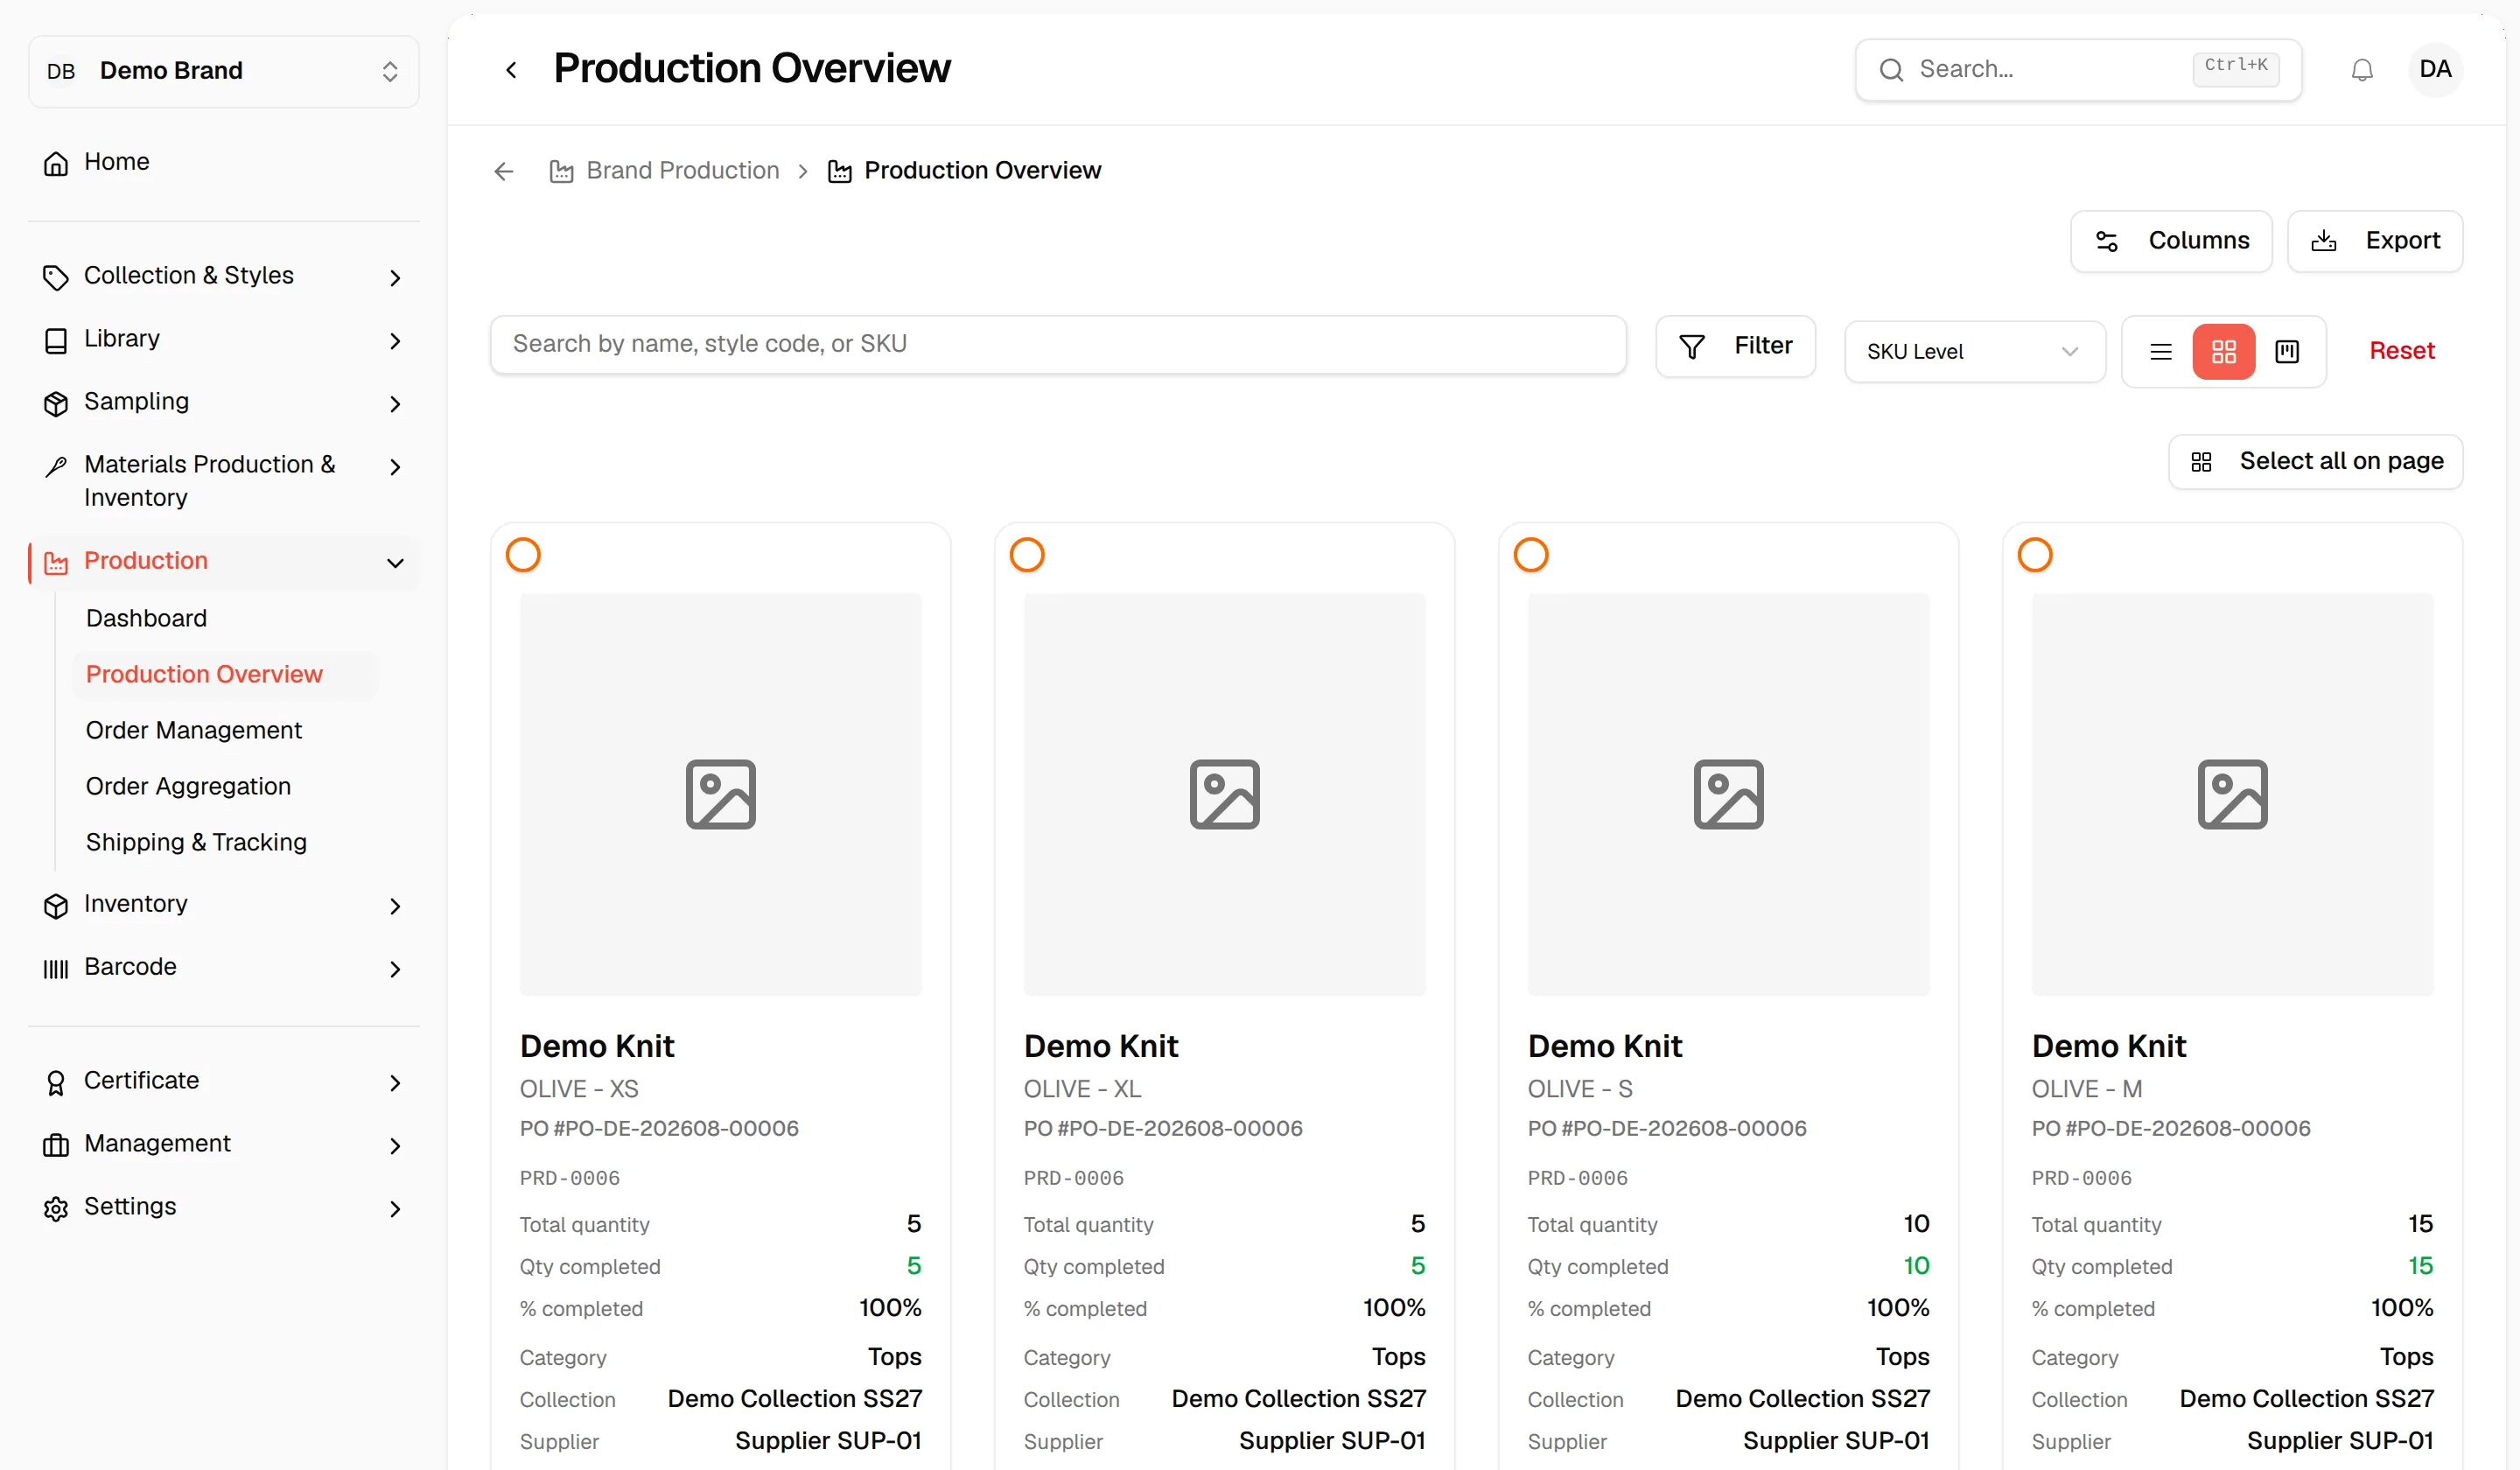
To the right of the level dropdown, three view icons let you switch between list view (default rows), grid view and kanban view. Click whichever suits your workflow.
Select orders
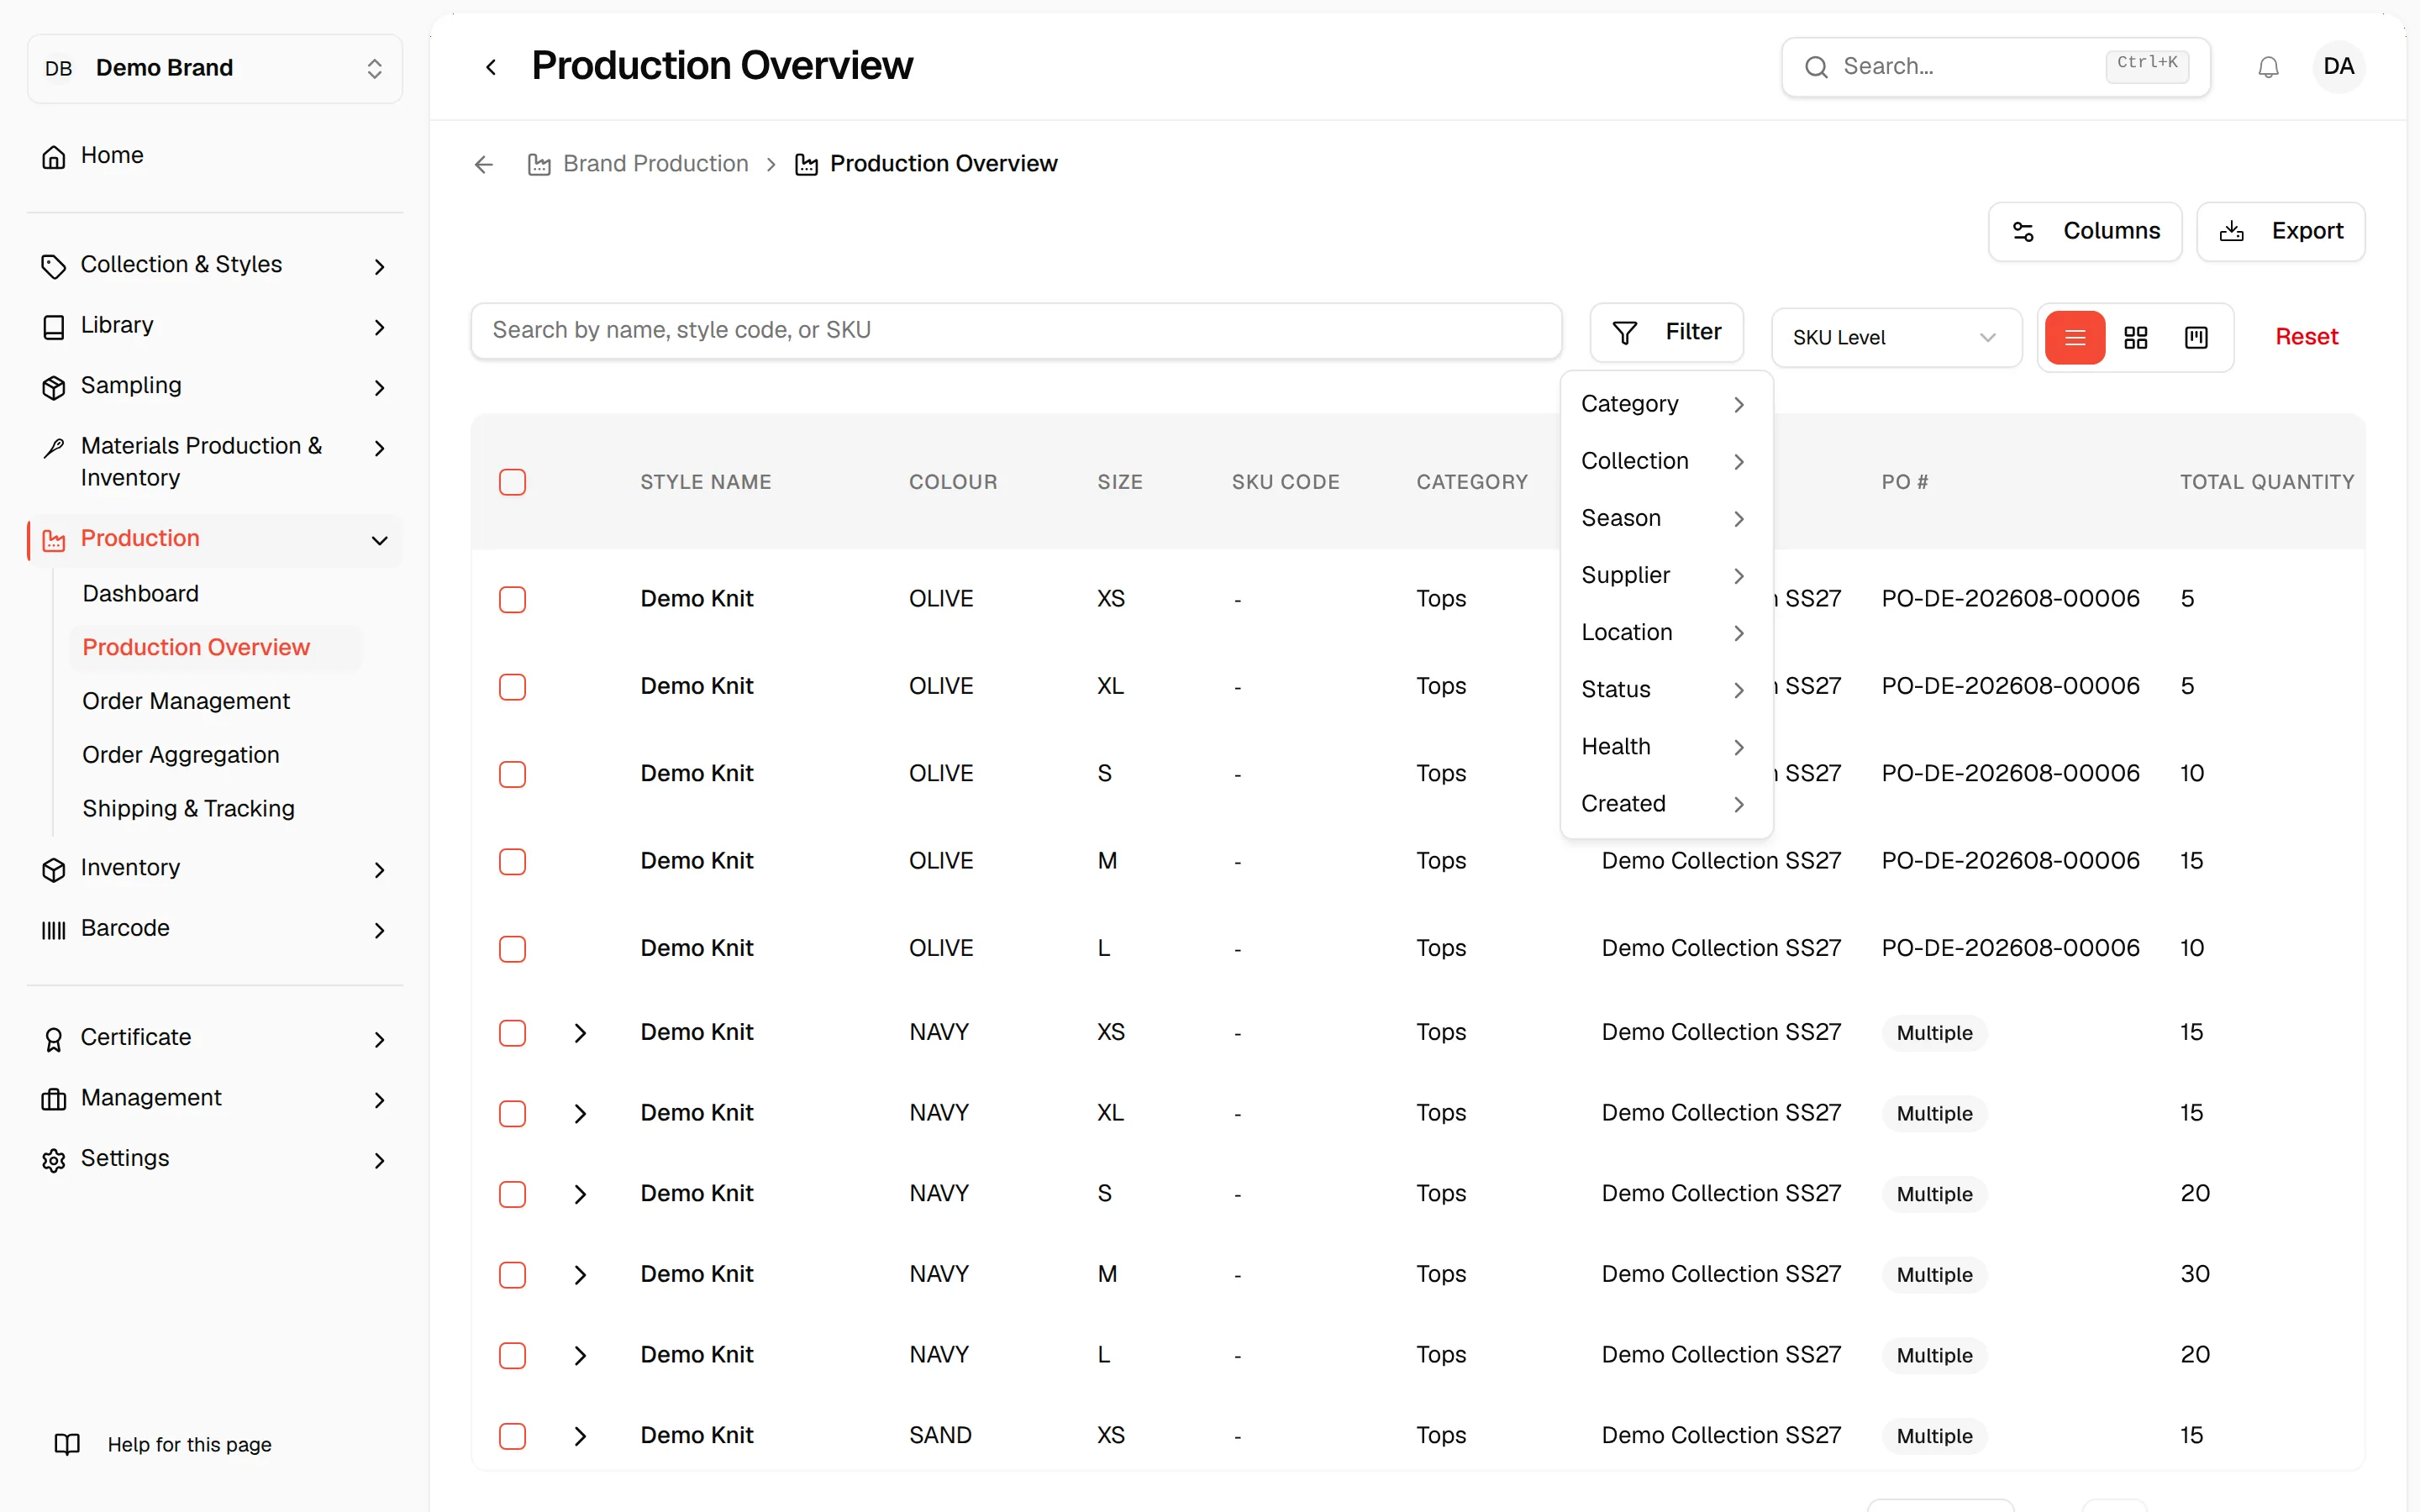
In list view, check the checkbox at the top of the list to select all rows on the page, or check individual row checkboxes to select specific items for bulk actions. In grid and kanban view, use the checkbox on each card, or click Select all on page.
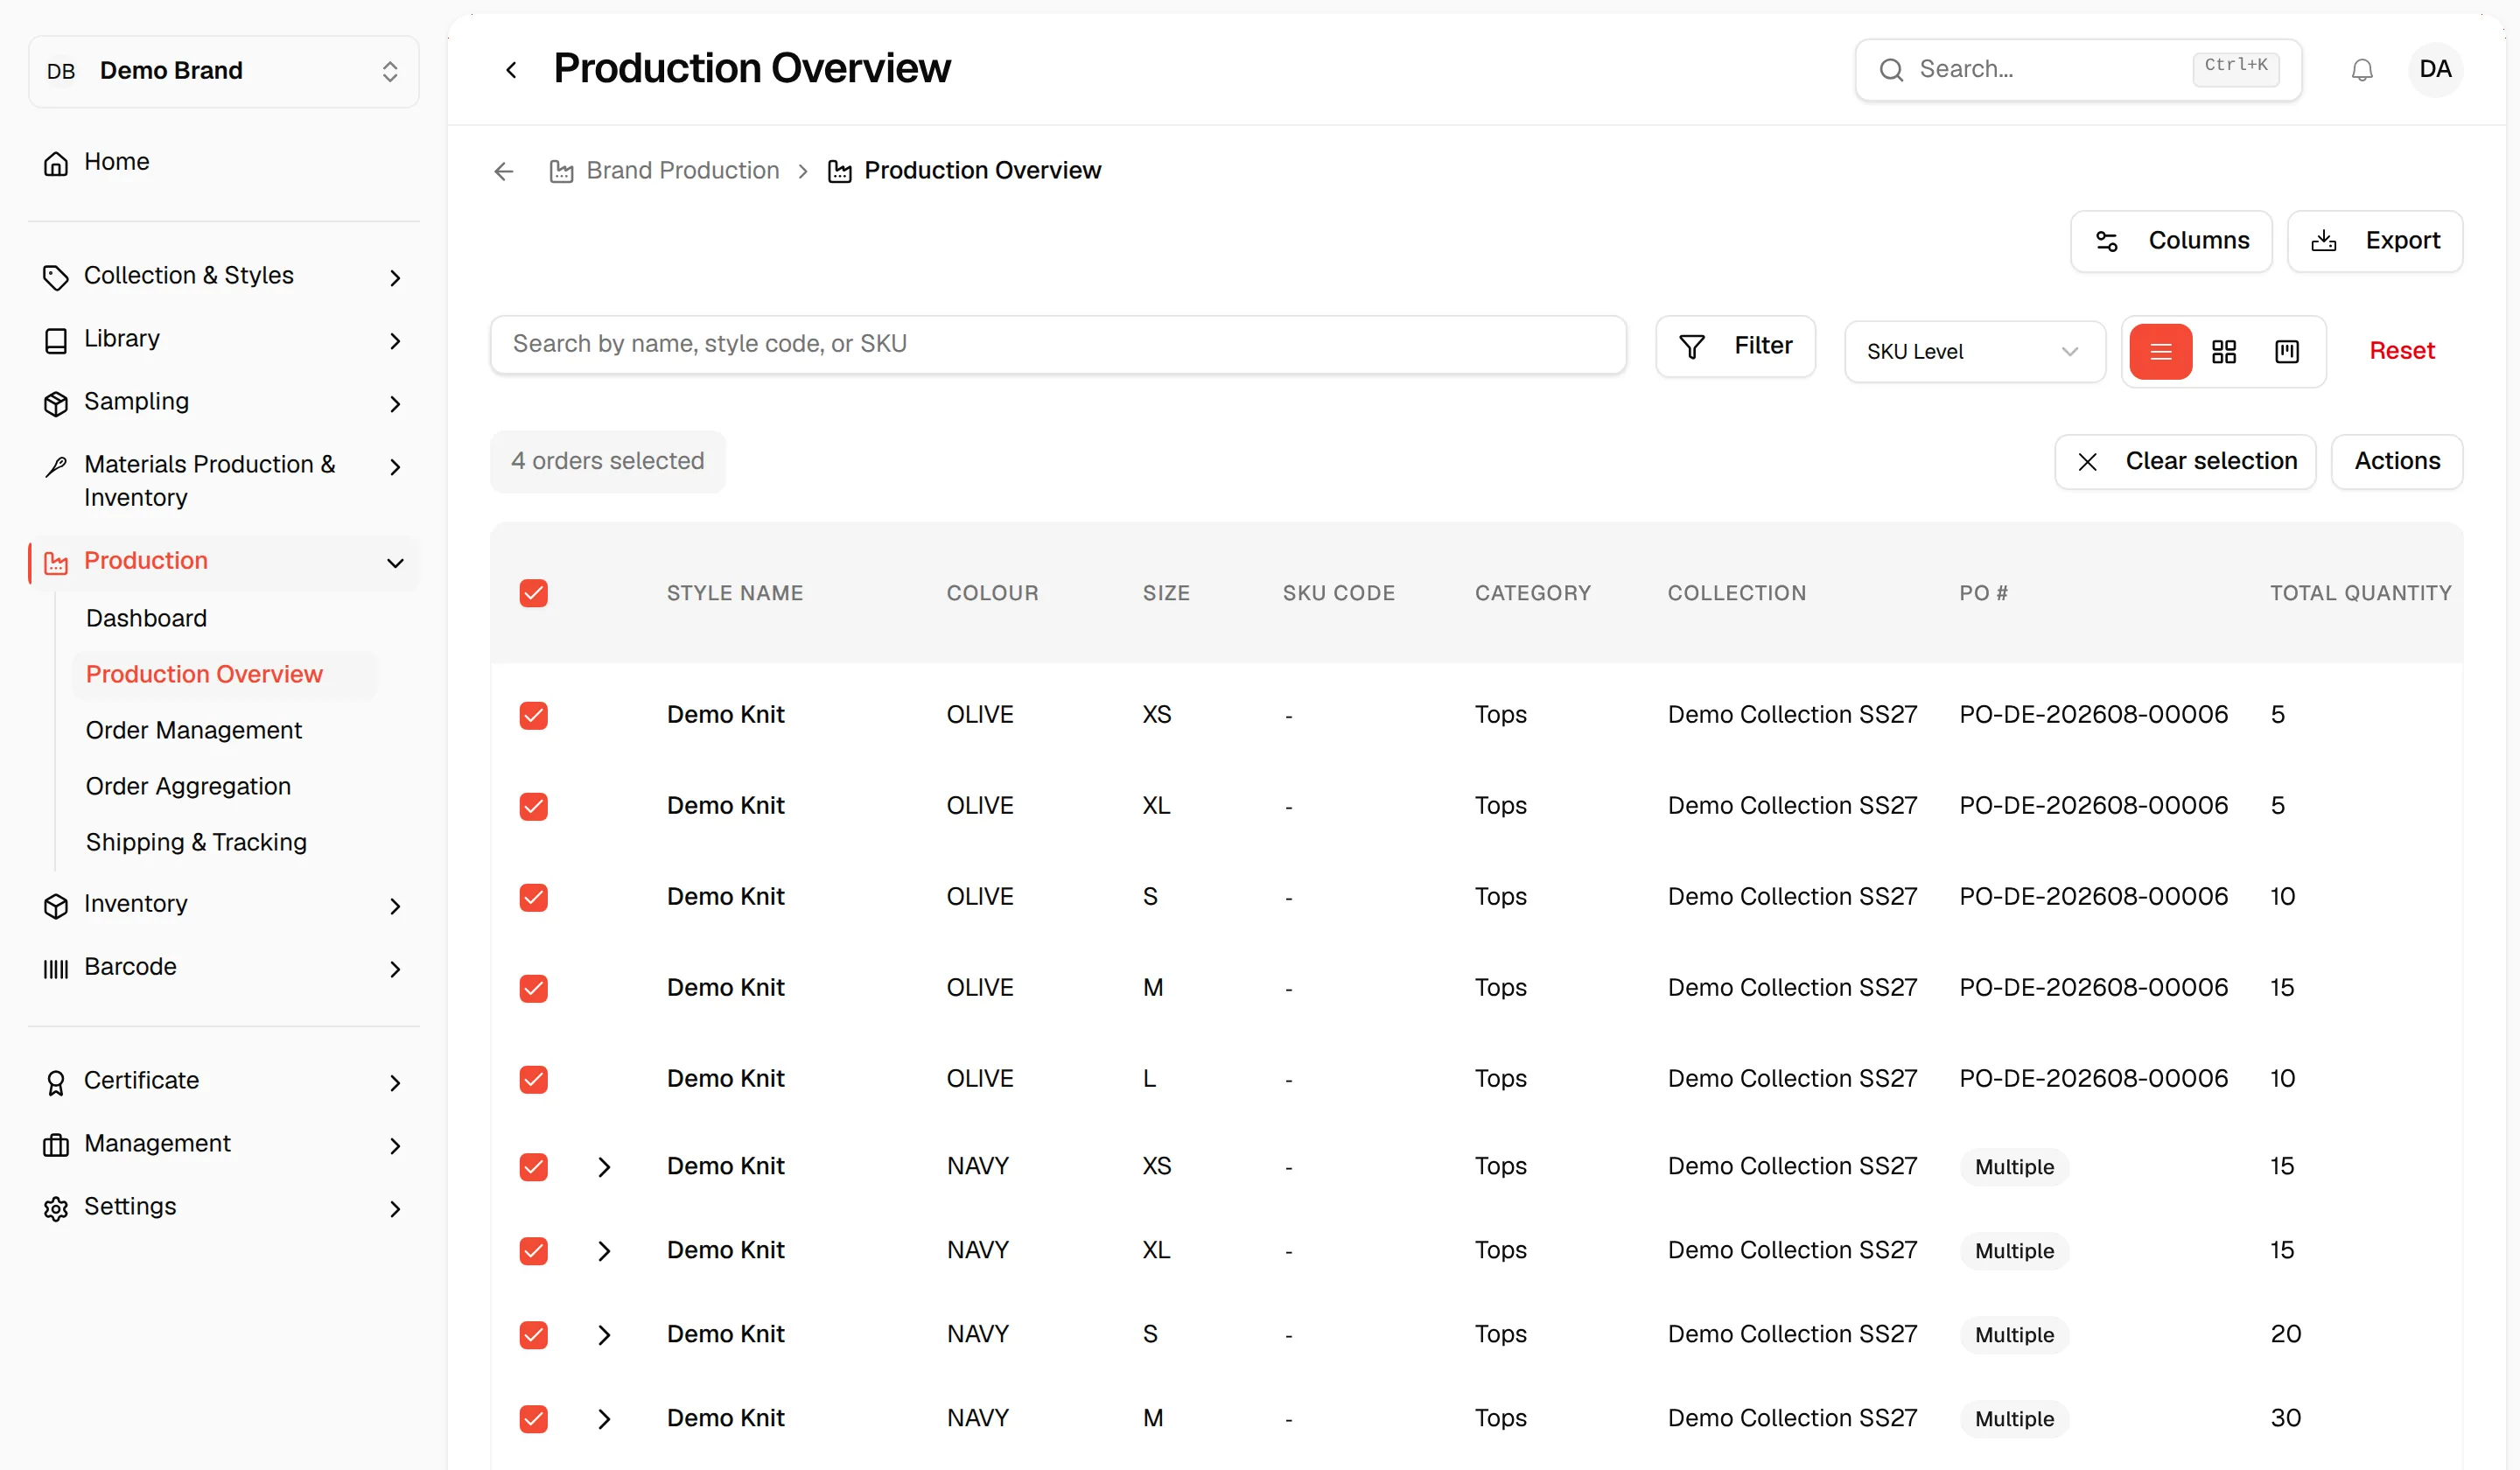
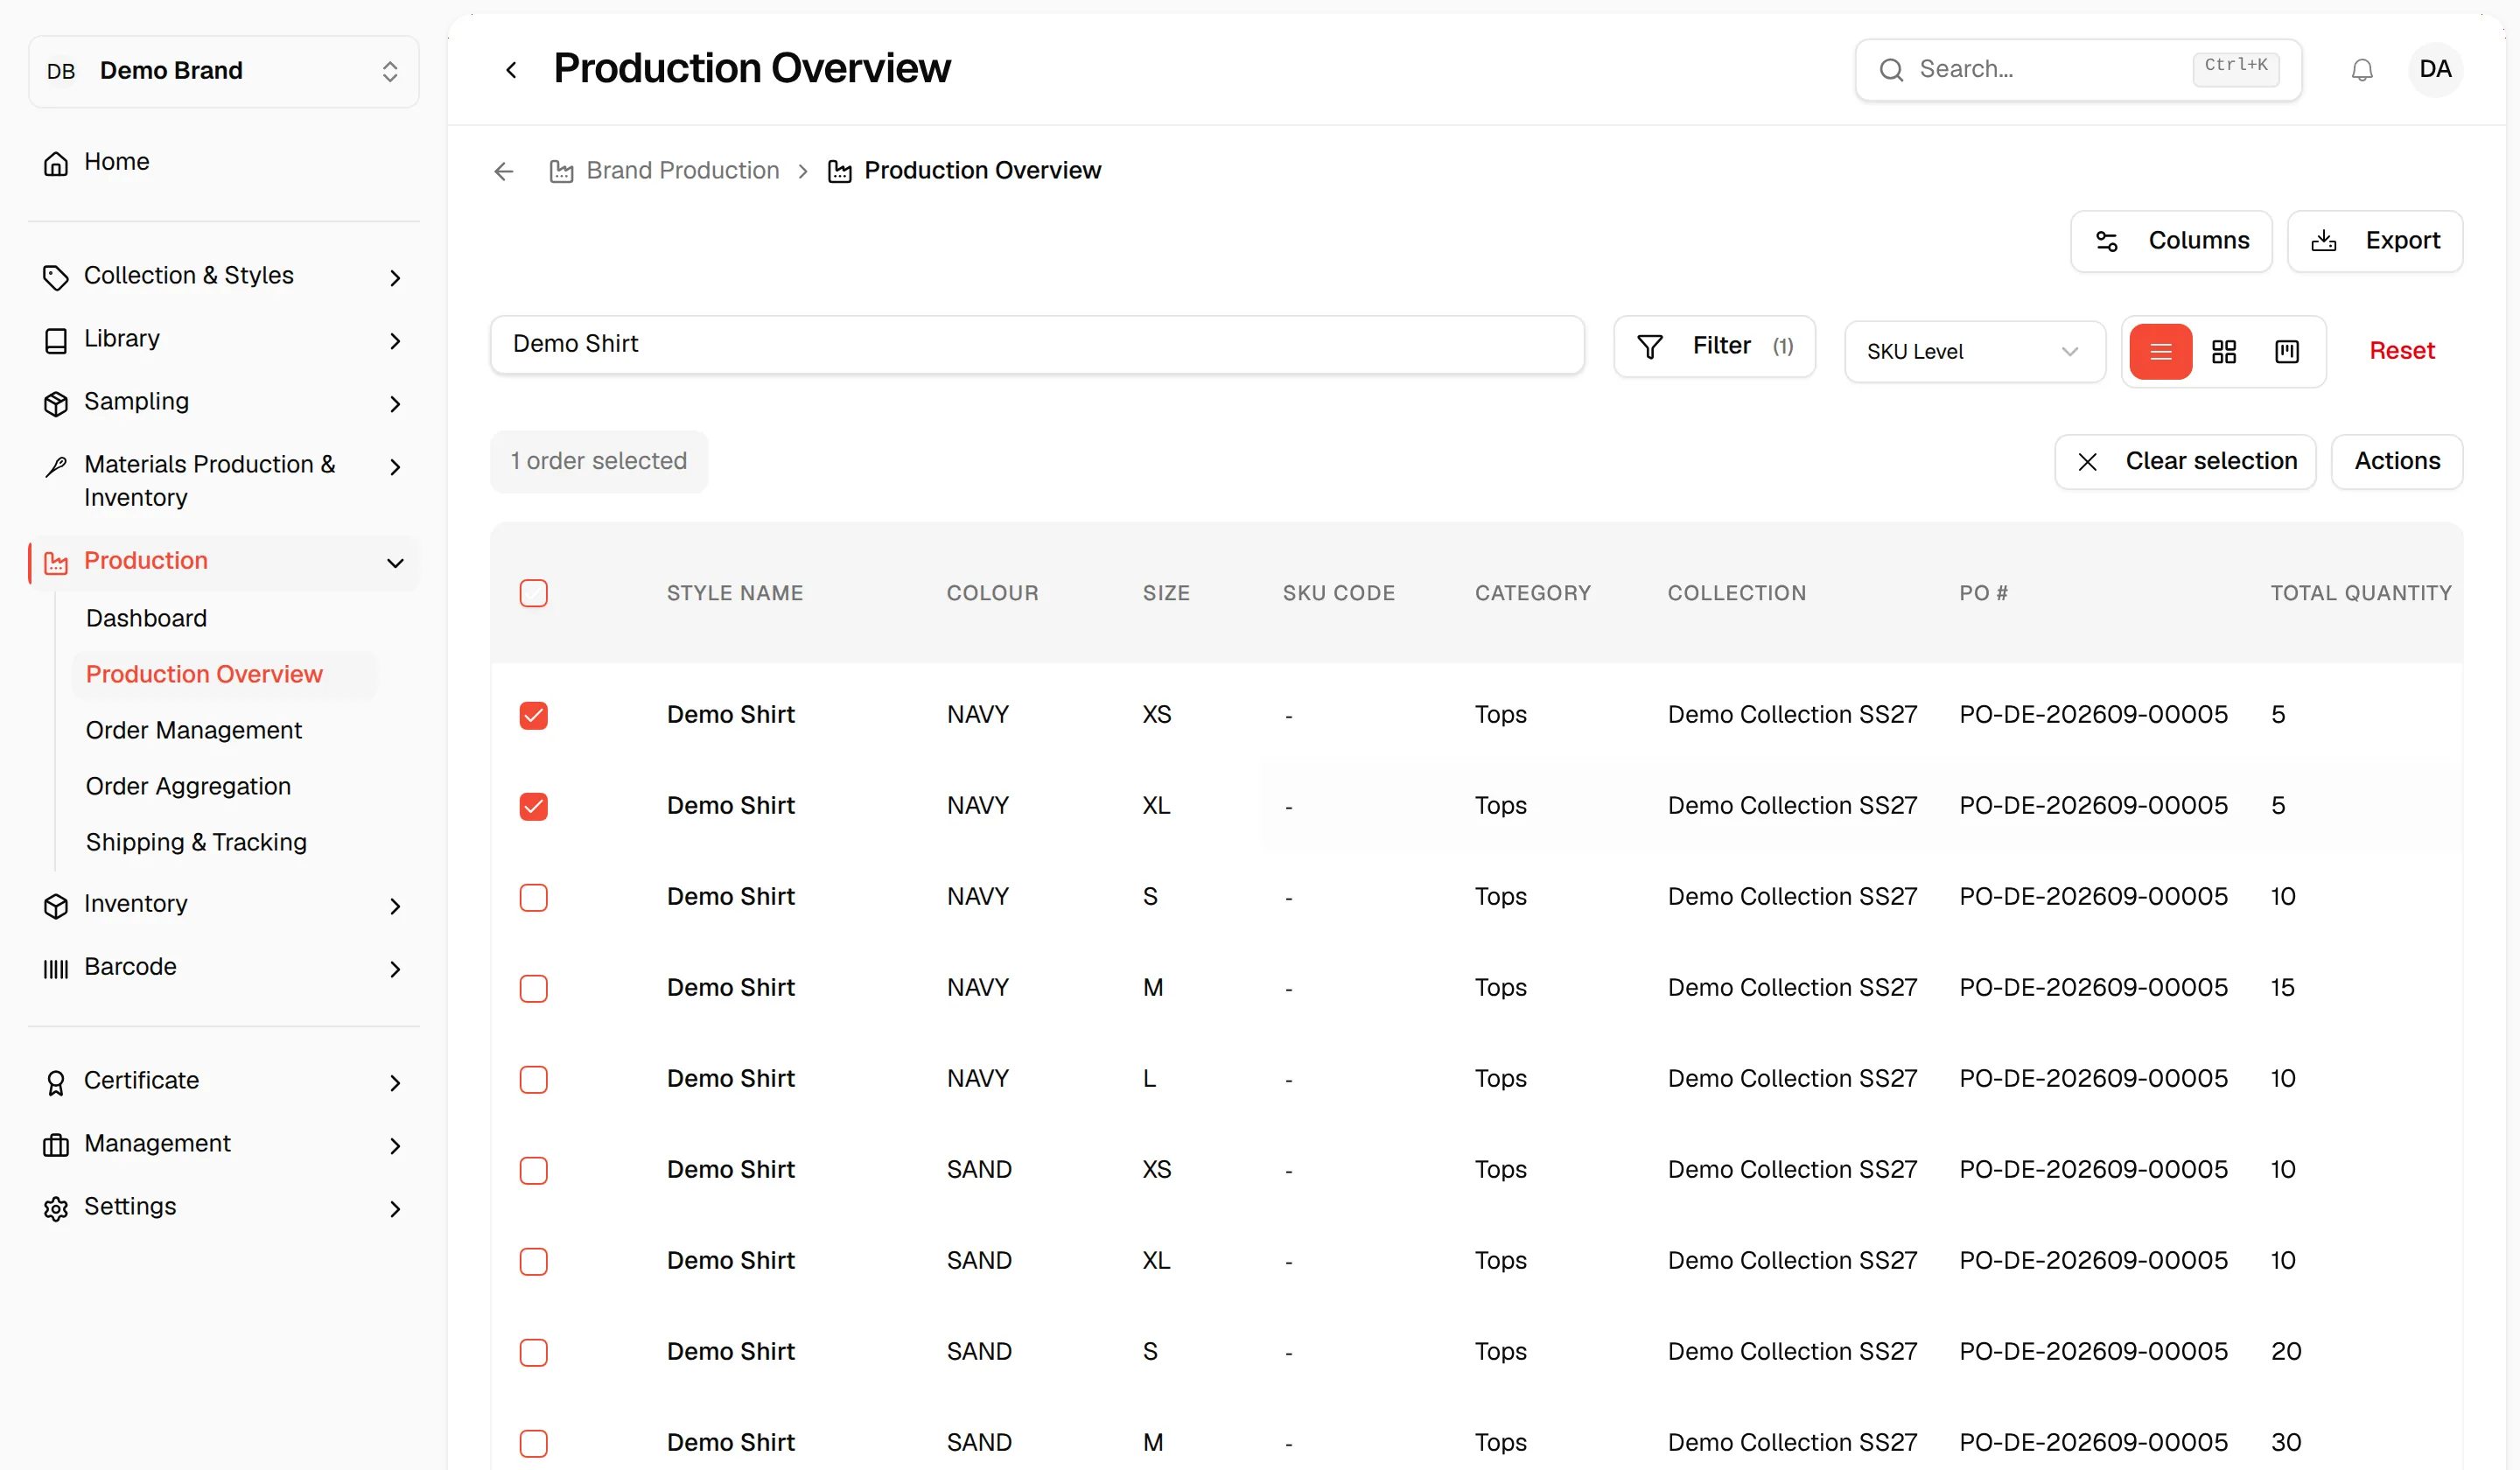
Once something is selected, the bar above the list shows how many orders are selected, with Clear selection and Actions.
Manage columns
Open Manage Columns
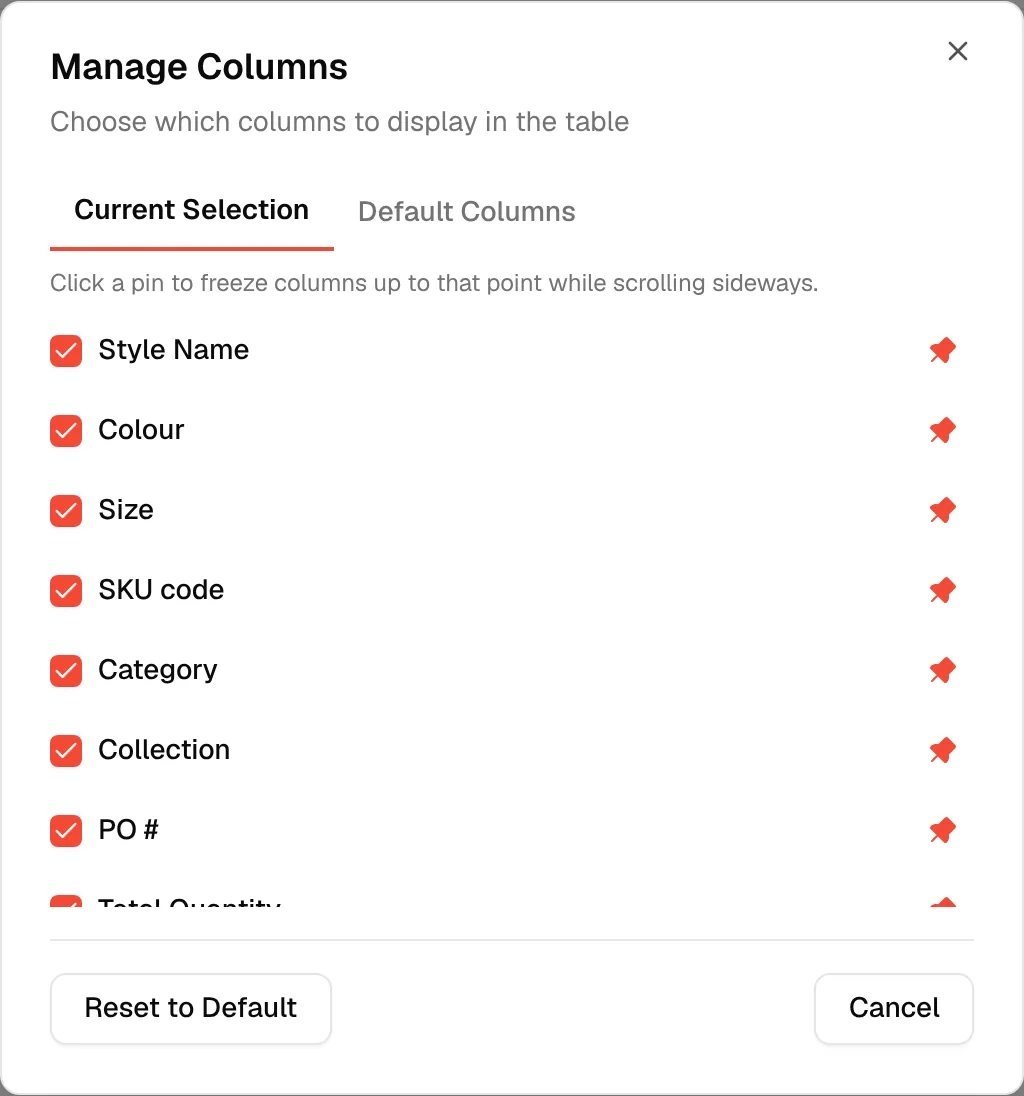
Click the Columns button in the top-right area. A Manage Columns dialog opens with two tabs: Current Selection and Default Columns.
Choose your columns
In the Current Selection tab, check or uncheck the columns you want visible in your personal view. Available columns include Style Name, Colour, Size, SKU code, Category, Collection, PO #, Total Quantity, Qty Completed, % Completed, Total Value, Status, Health, Production Stage, Supplier, Location, Order Type, Priority, Order Date, the agreed and actual Start, End and Ex-Factory dates, Last Updated and Notes.
Freeze columns (optional)
Click a pin in the list to freeze every column up to that point, so those columns stay visible while you scroll sideways.
Set the default layout for new users
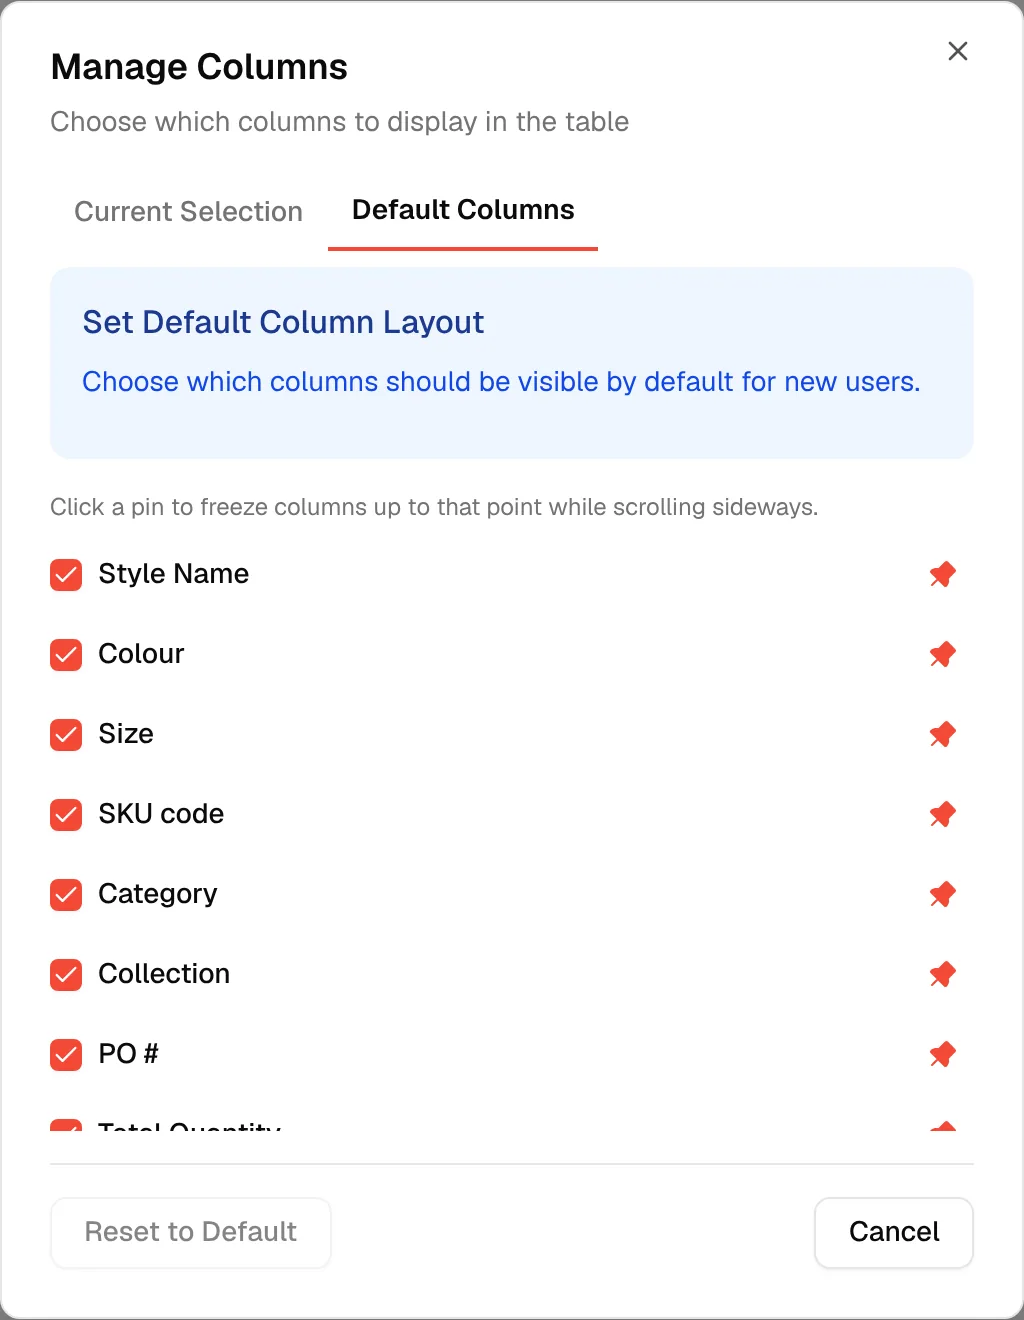
Click the Default Columns tab. This view lets you choose which columns are visible by default for new users across your brand.
Reset your view
Click Reset to Default at any time to revert your personal view to the brand default.
Note
Column changes are saved as soon as you check or uncheck a column. There is no separate save button.
Export the production list
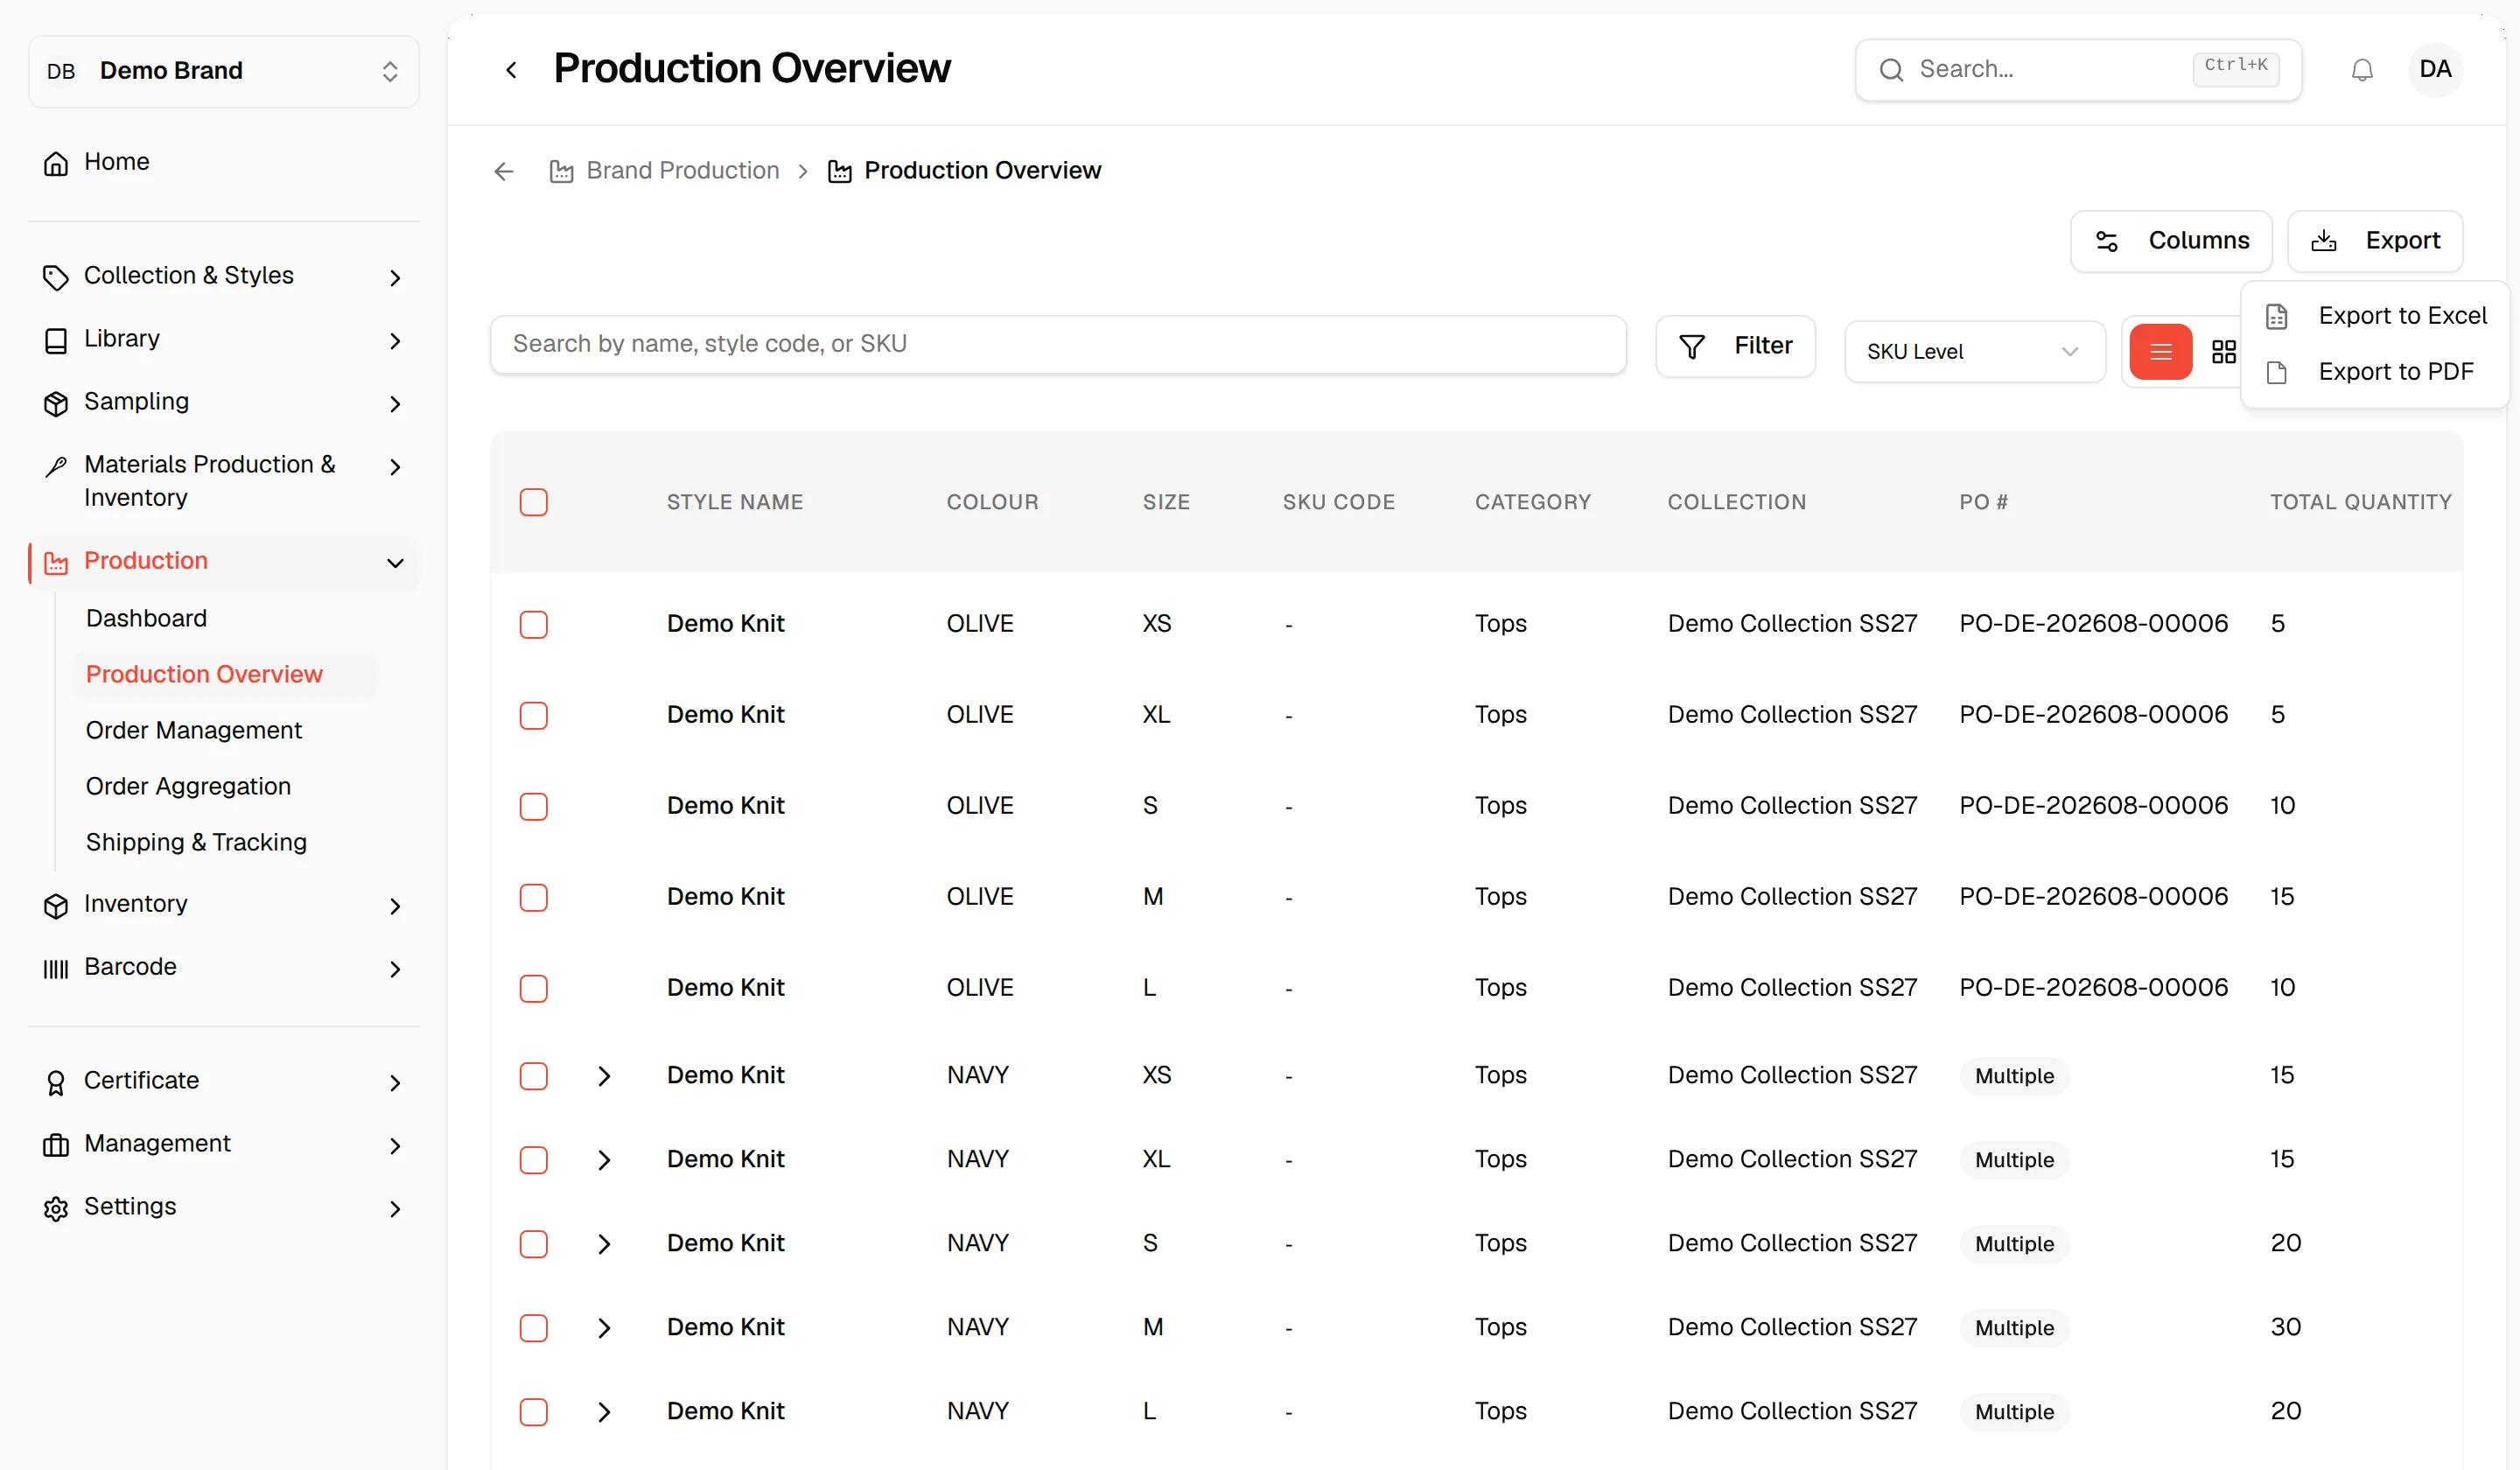
Click the Export button in the top-right corner. A dropdown offers two options: Export to Excel or Export to PDF. Choose your preferred format to download the current filtered and sorted view. Export to PDF opens a print page in a new tab; see Print the production overview.
Open the row action menu
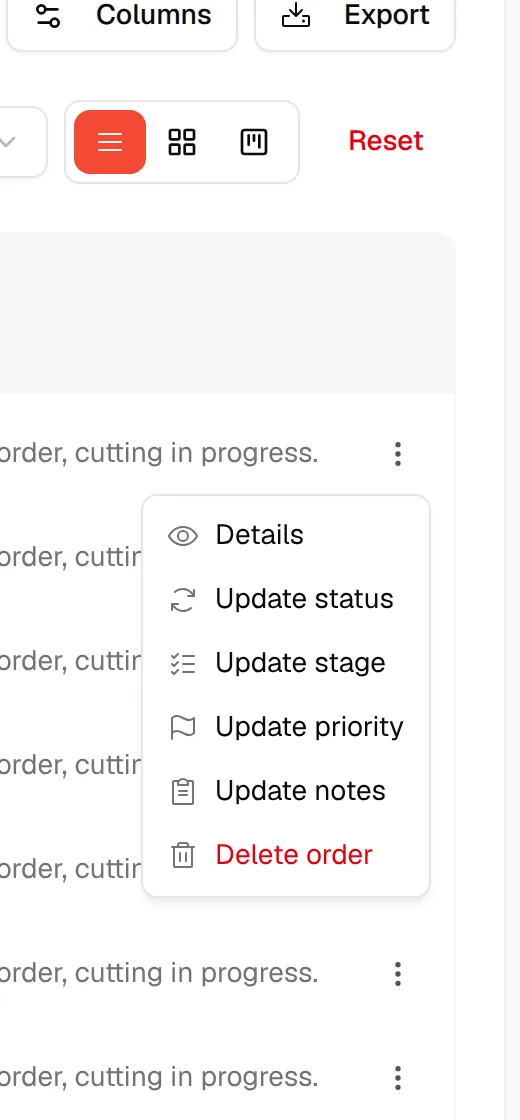
Click the ⋮ (three-dot) icon at the far right of any production order row. A context menu appears with these options: Details, Update status, Update stage, Update priority, Update notes, and Delete order.
Note
Delete order only appears if you can update brand production.
View order details
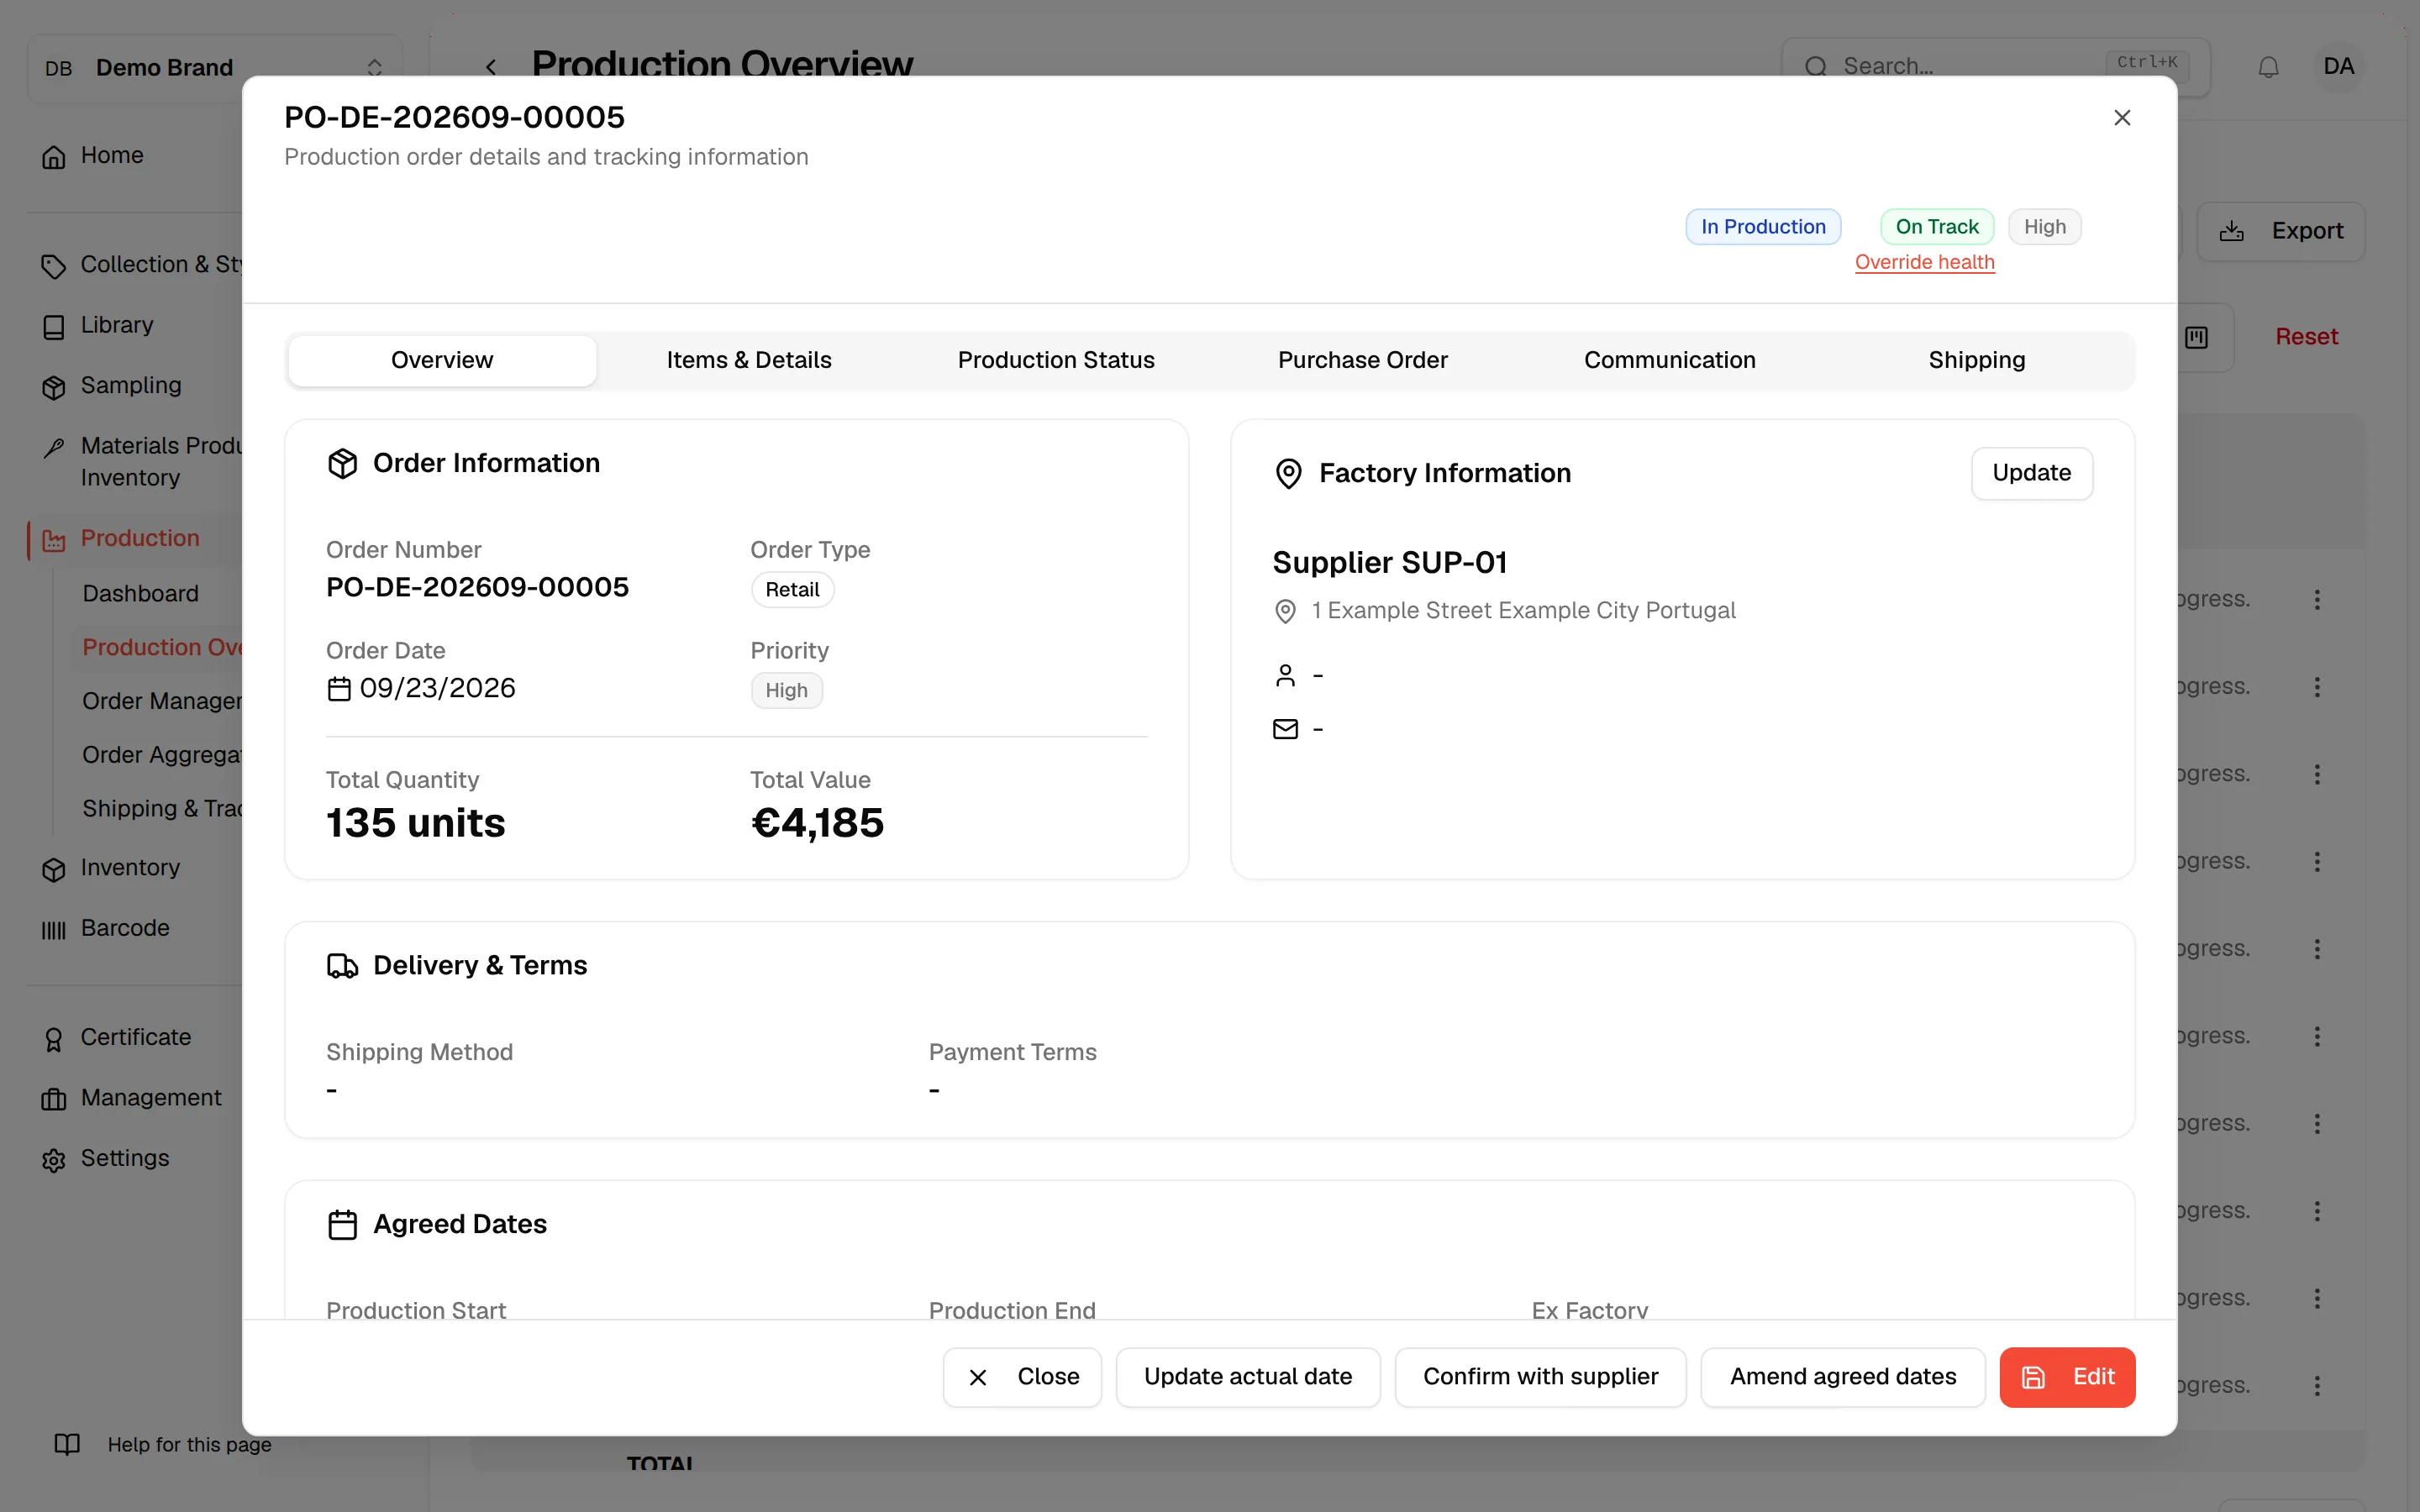
Select Details from the row menu. A Production Order dialog opens showing the order's status badge, priority badge, and these tabs: Overview, Items & Details, Production Status, Purchase Order, Communication, and Shipping. Use these tabs to inspect every aspect of the order.
Edit an order
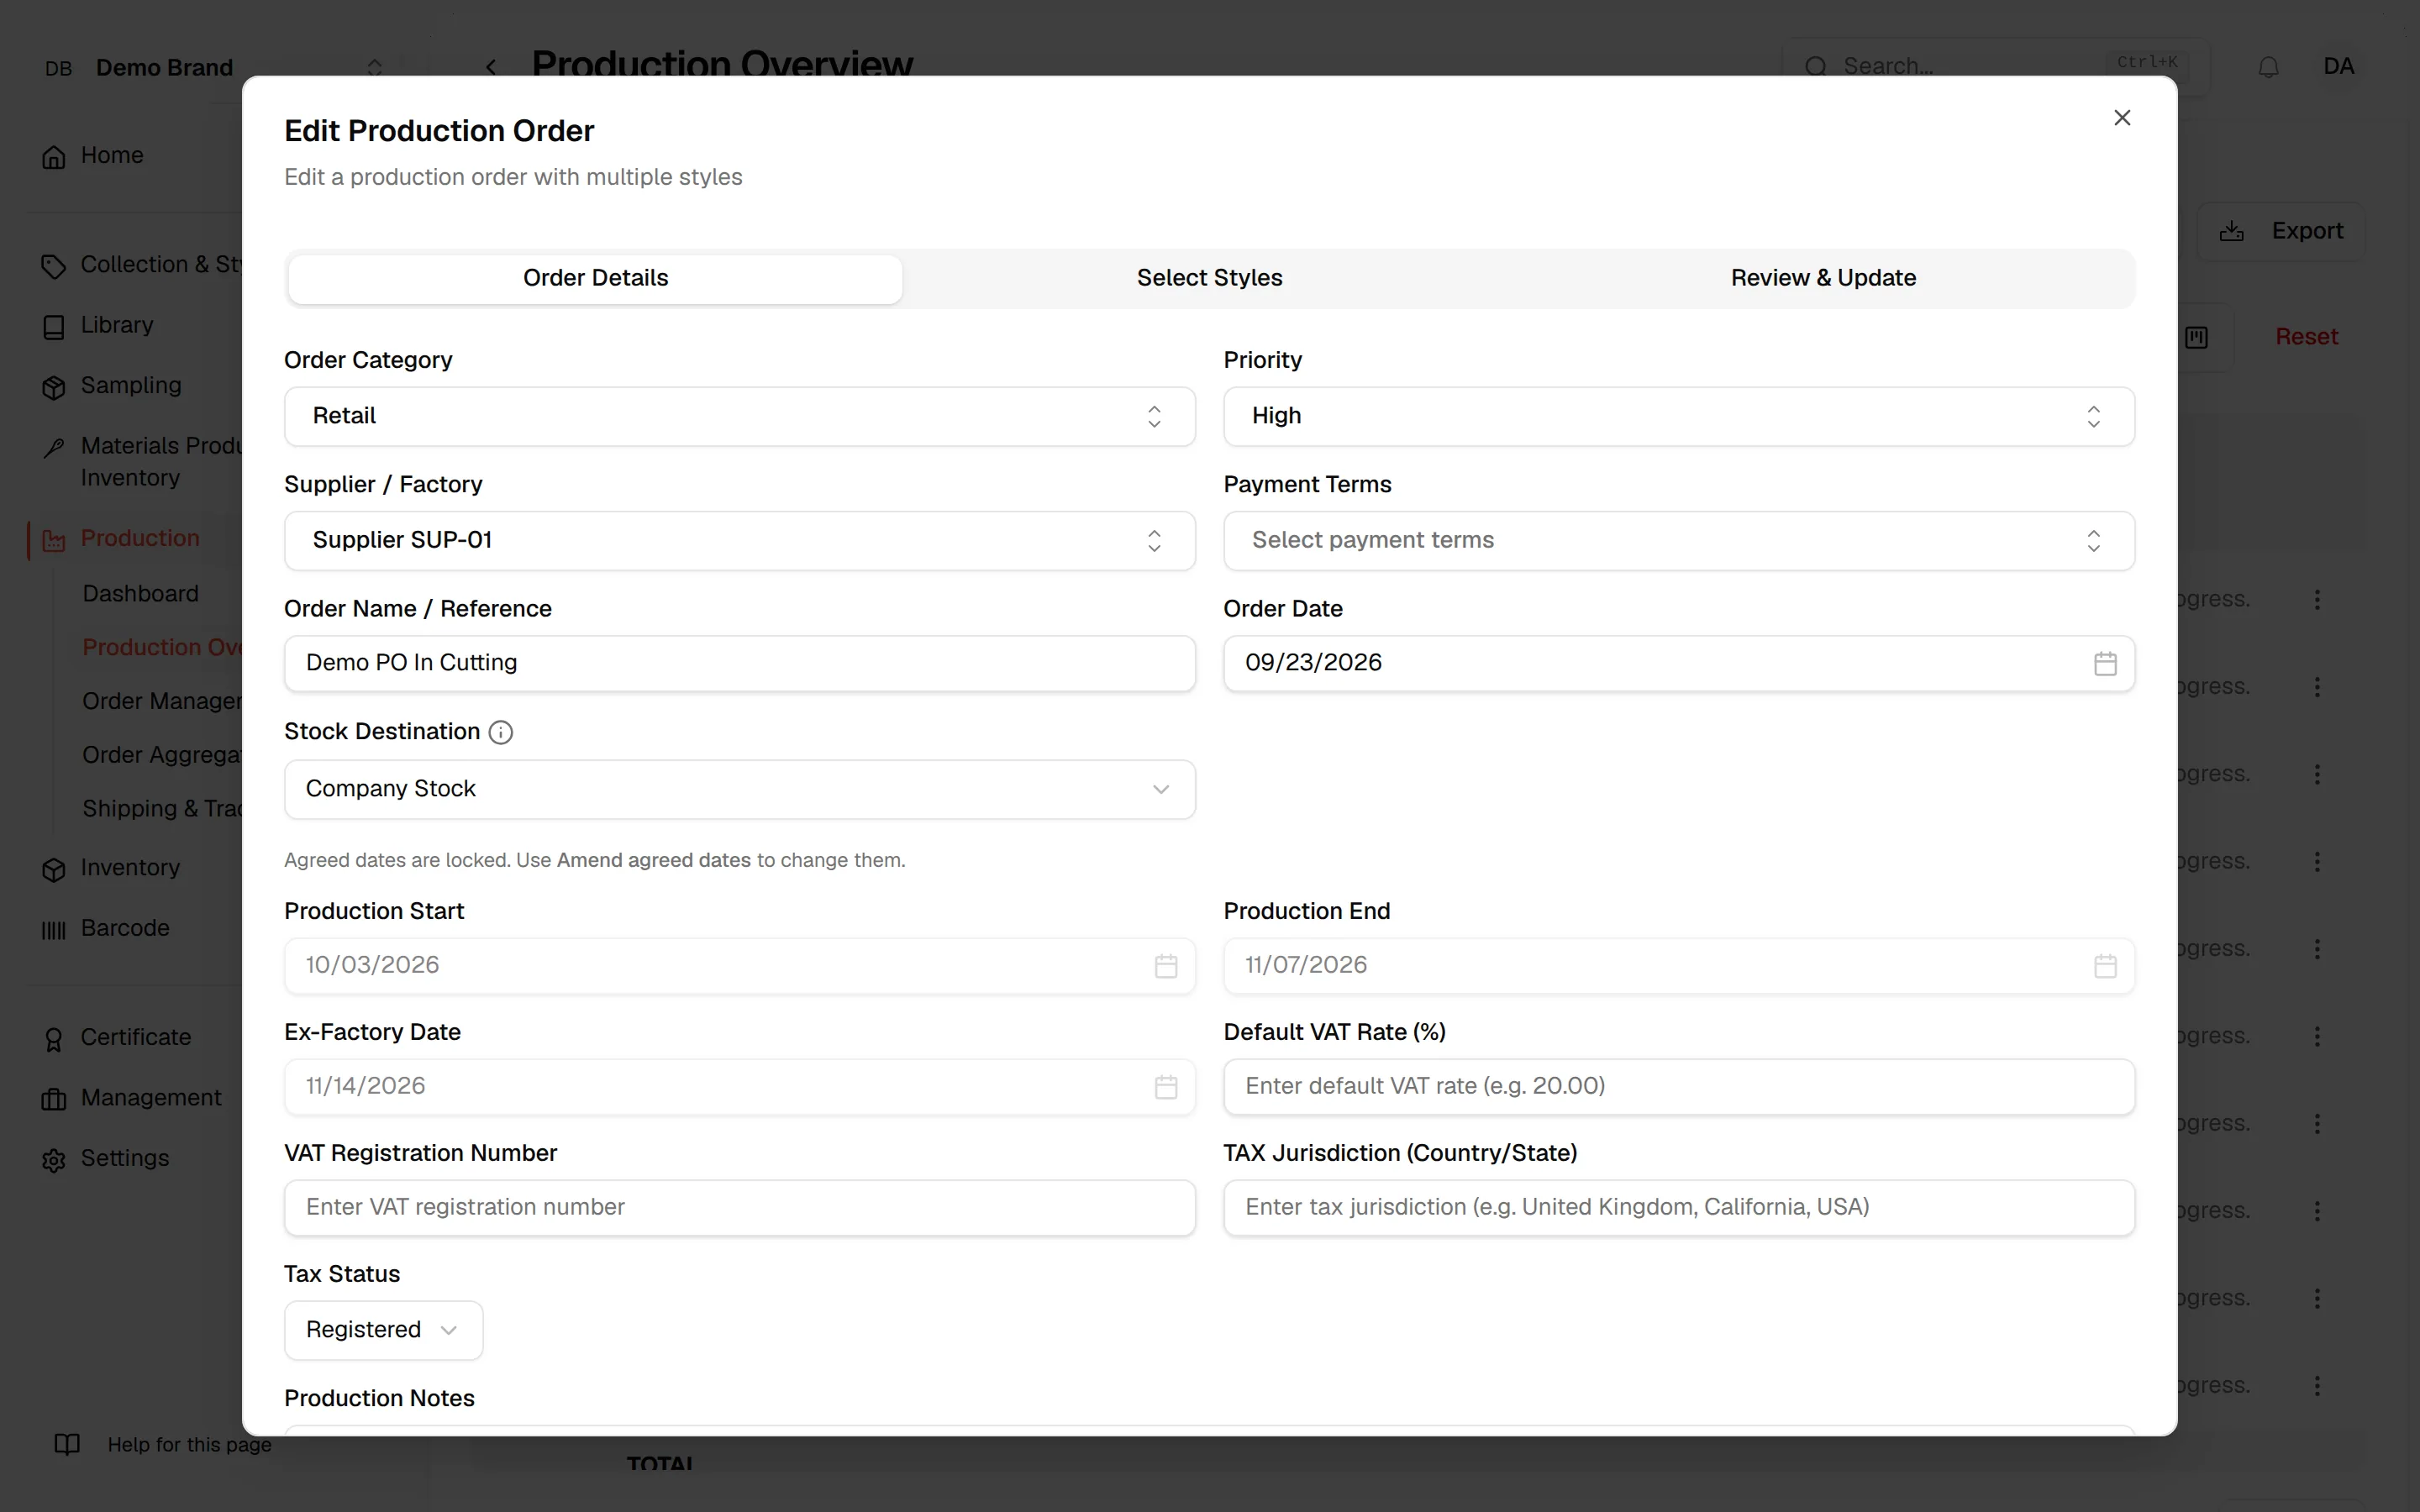
Inside the Details dialog, click the Edit button (bottom-right). An edit form opens with fields for: Supplier/Factory, Payment Terms, Order Name/Reference, Order Date, Stock Destination, Buyer Name, Production Start & End, Ex-Factory Date, VAT rate, Registration Number, Tax Status, Production Notes, Shipment Method, Delivery Address, and more. Click Next: Select Styles to proceed through the edit.
Update a production order
Update the status
Select "Update status"
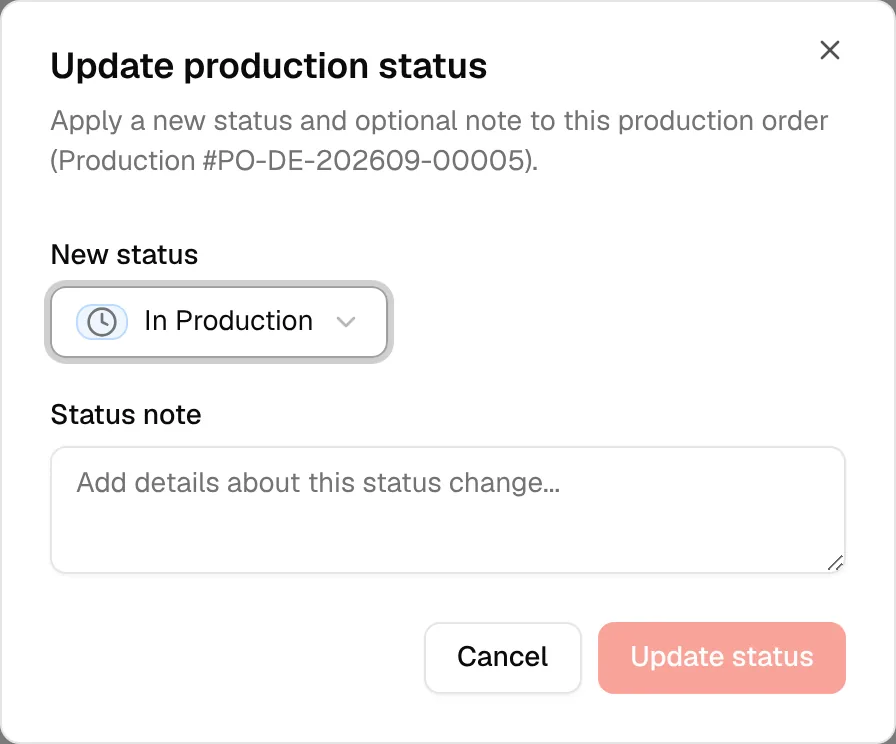
Click the ⋮ (three-dot) icon and select Update status in the menu. The Update production status dialog opens, showing the production order reference.
Choose a new status
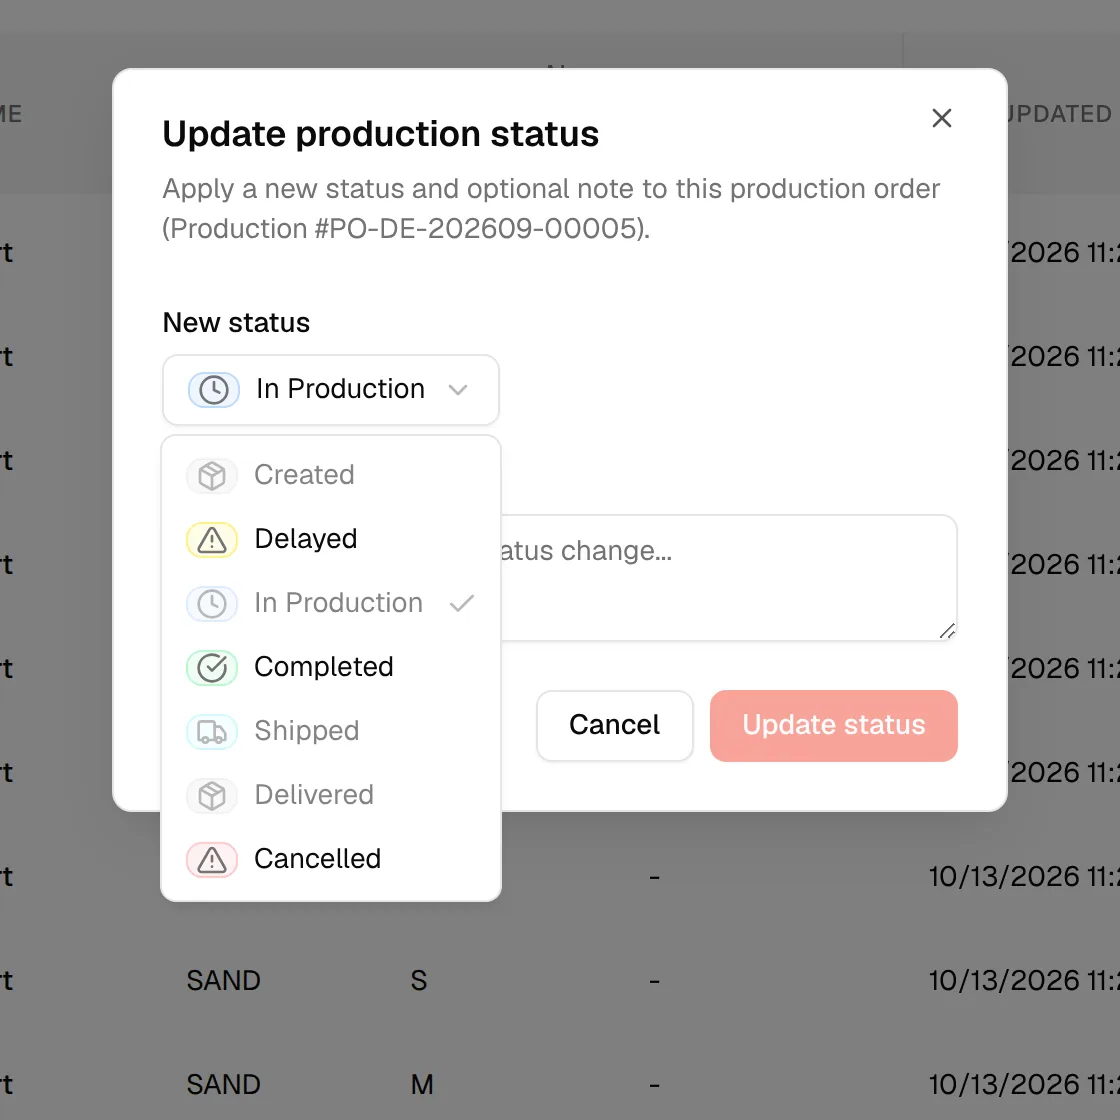
Click the New status dropdown to open the status list and select one of the available options: Created, Delayed, In Production, Completed, Shipped, Delivered, or Cancelled.
Note
Statuses that the order cannot move to from its current status are greyed out.
Add an optional status note
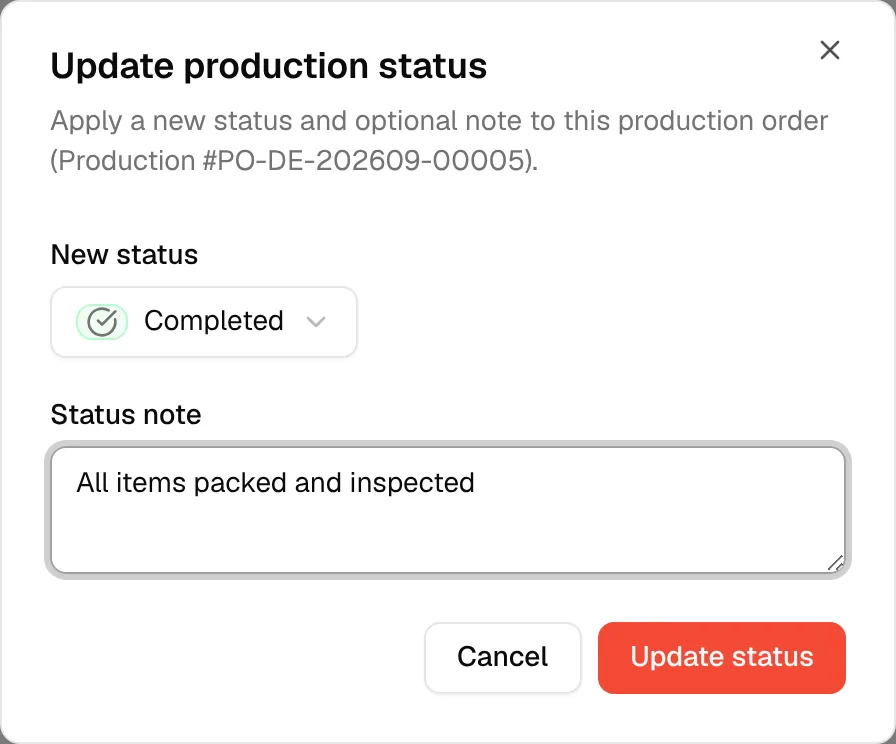
Type any relevant context in the Status note field (for example the reason for a delay, or shipping details).
Confirm
Click Update status to save. The new status is applied immediately and logged in the order's history.
Update the stage
Select "Update stage"
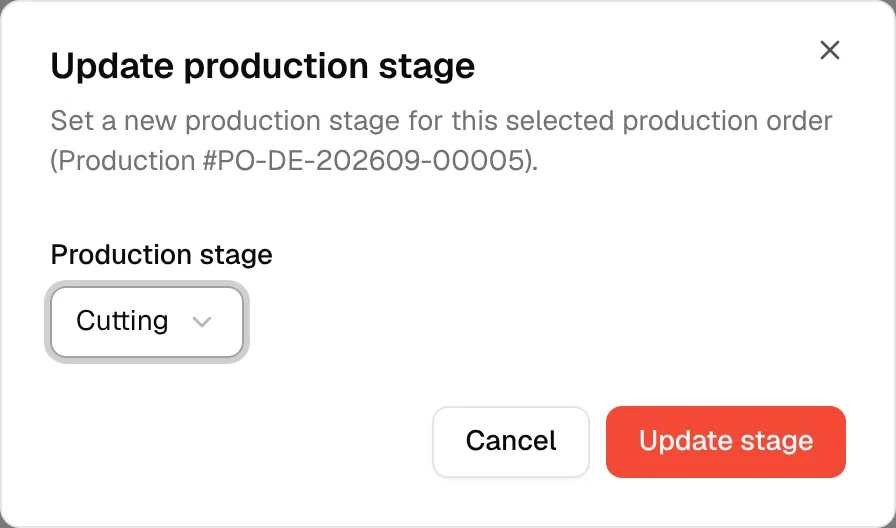
From the ⋮ row menu, click Update stage. The Update production stage dialog opens.
Assign a production stage
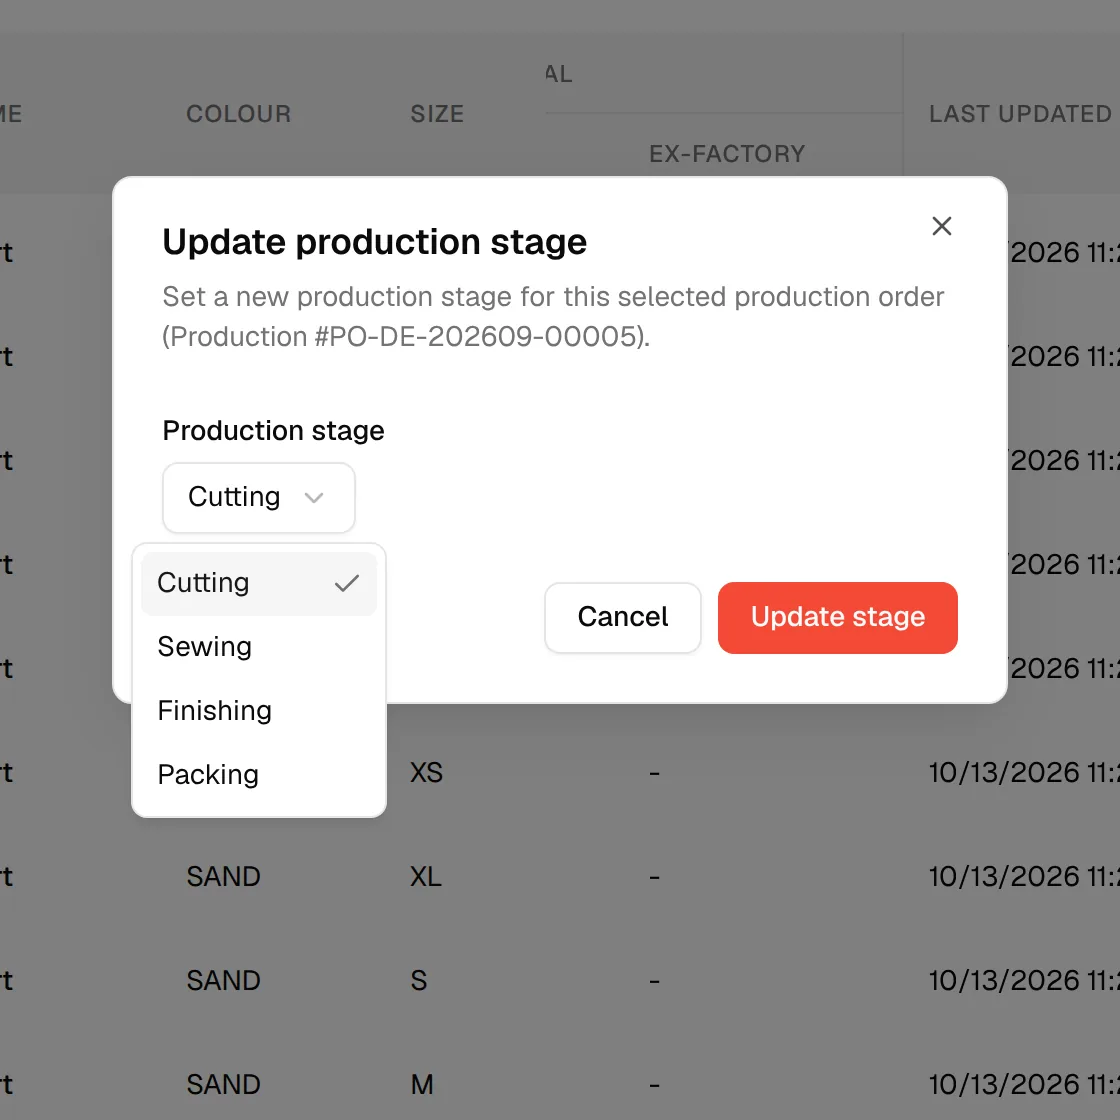
If production stages have been configured for your brand in Production Settings, select the appropriate stage from the Production stage dropdown. Click Update stage to save.
Update the priority
Select "Update priority"
From the ⋮ row menu, click Update priority. The Update production priority dialog opens for the selected order.
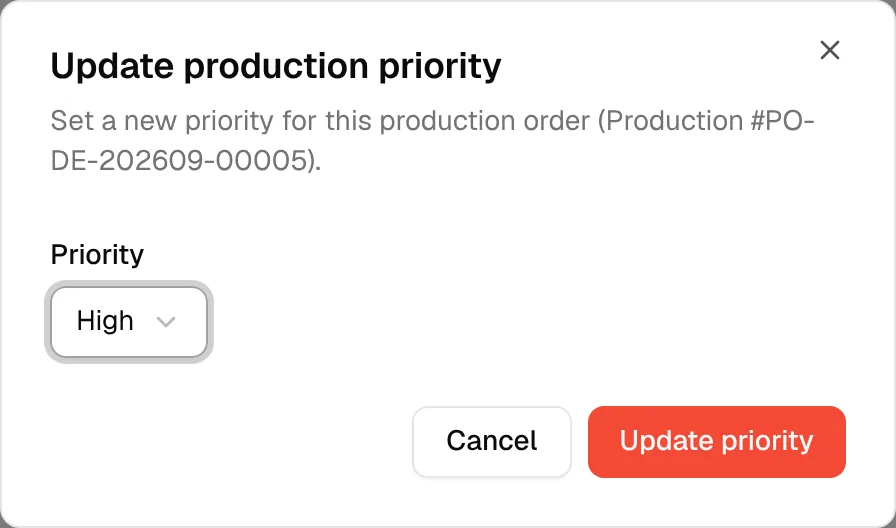
Choose a priority level and confirm
Click the Priority dropdown and choose one of the priorities set up for your brand in production settings, then click Update priority. The priority badge on the order updates instantly.
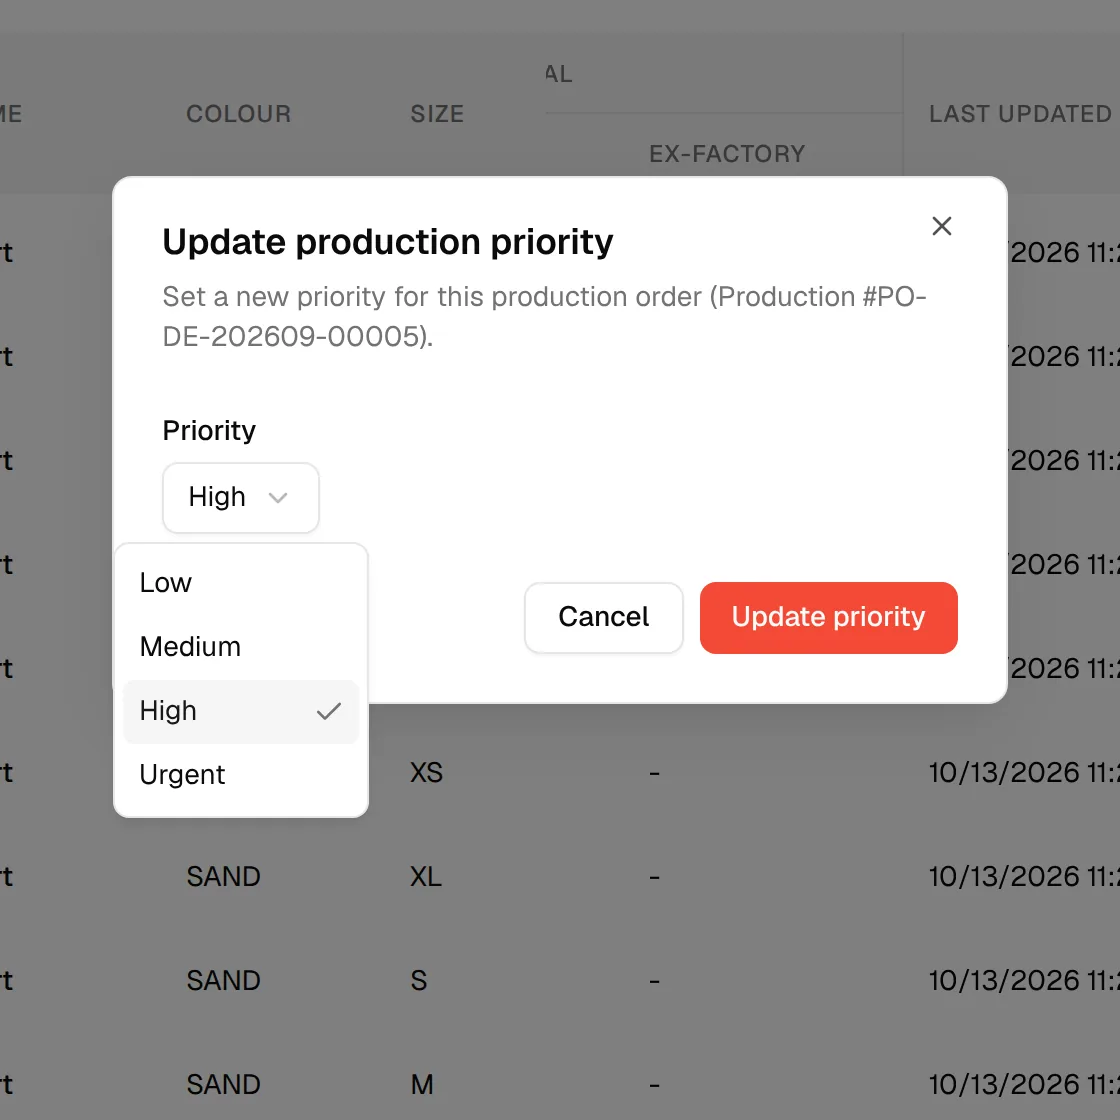
Note
If no priorities are set up for your brand, the dialog tells you to add priorities in production settings first.
Update the notes
Select "Update notes"
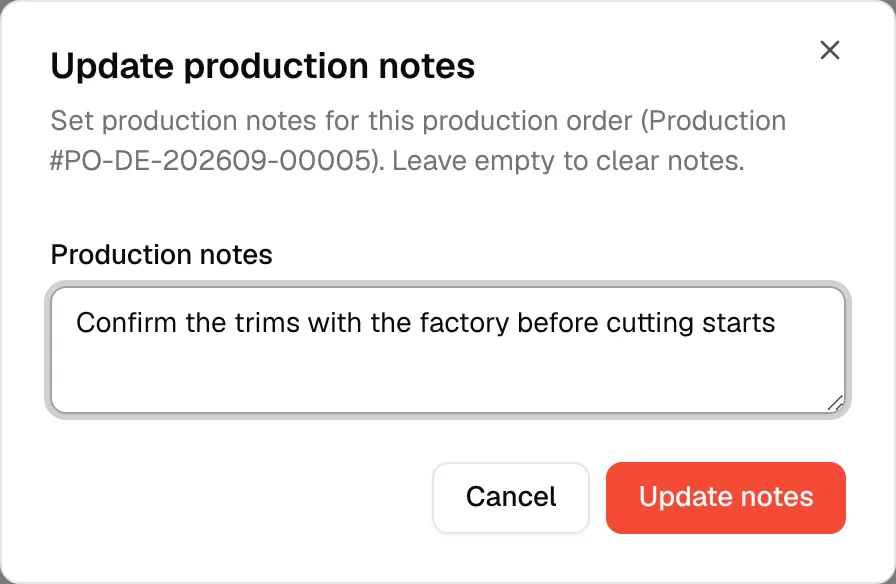
From the ⋮ row menu, click Update notes. The Update production notes dialog opens.
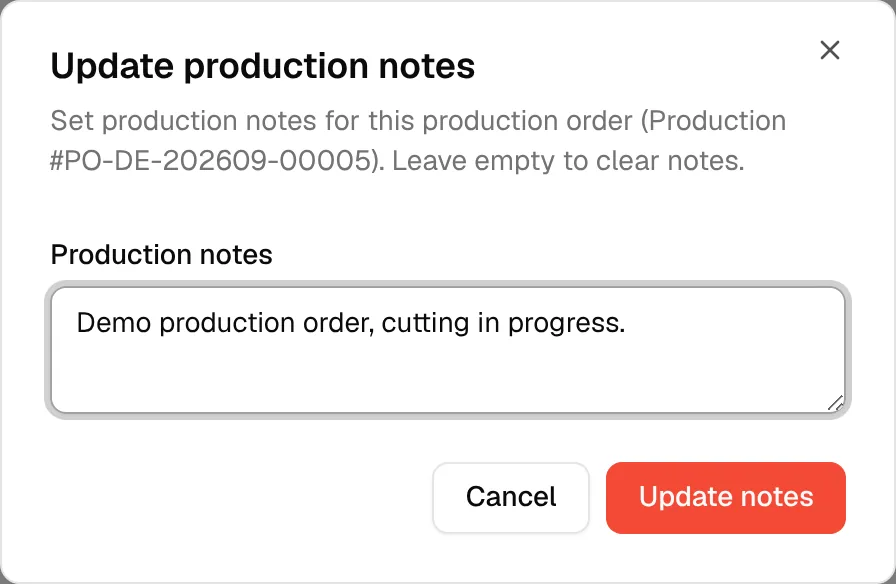
Write your notes and save
Type your notes in the Production notes text area. These can include instructions, reminders, or any relevant context for this order. Leave the field empty to clear existing notes. Click Update notes to save.
Delete an order
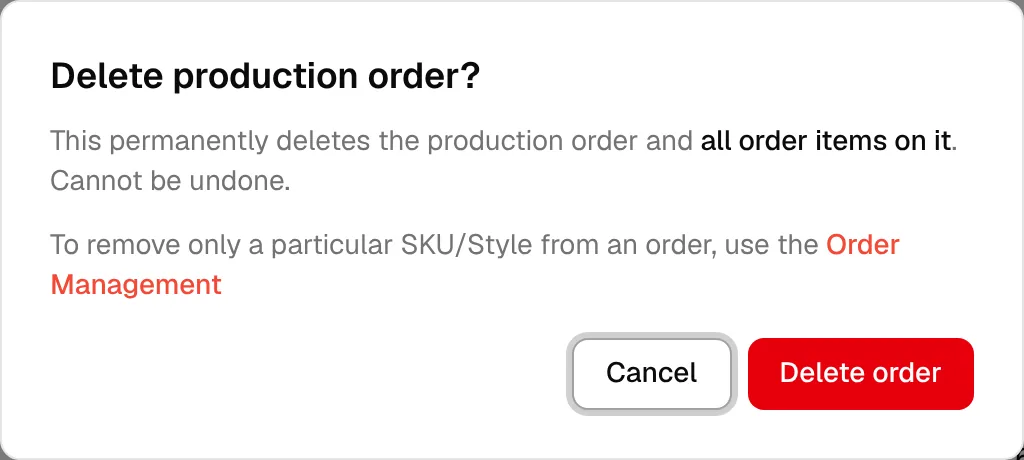
From the ⋮ row menu, click Delete order. A confirmation dialog appears warning that this action permanently deletes the production order and all order items on it and cannot be undone.
Update several orders at once
Select the orders
Click the Select All checkbox to select all production orders currently displayed in the table, or select one or more individual orders by checking the checkbox on the left side of each row.
Open Actions
Click the Actions button located in the upper-right area above the order list, then select the action you want to apply to the selected orders:
- Update status: change the current production status of the selected orders. Orders where the change is not allowed are skipped.
- Update stage: change the production stage for all selected orders.
- Update priority: assign a new priority to the selected orders.
- Update notes: add or update notes for the selected orders.
- Delete orders: remove the selected orders from the system.