
Step 4 of 9 in Run a sampling round
Sample details
Open a sample request to edit its quantity, cost and dates, follow its status history, discuss it in comments and export the order sheet.
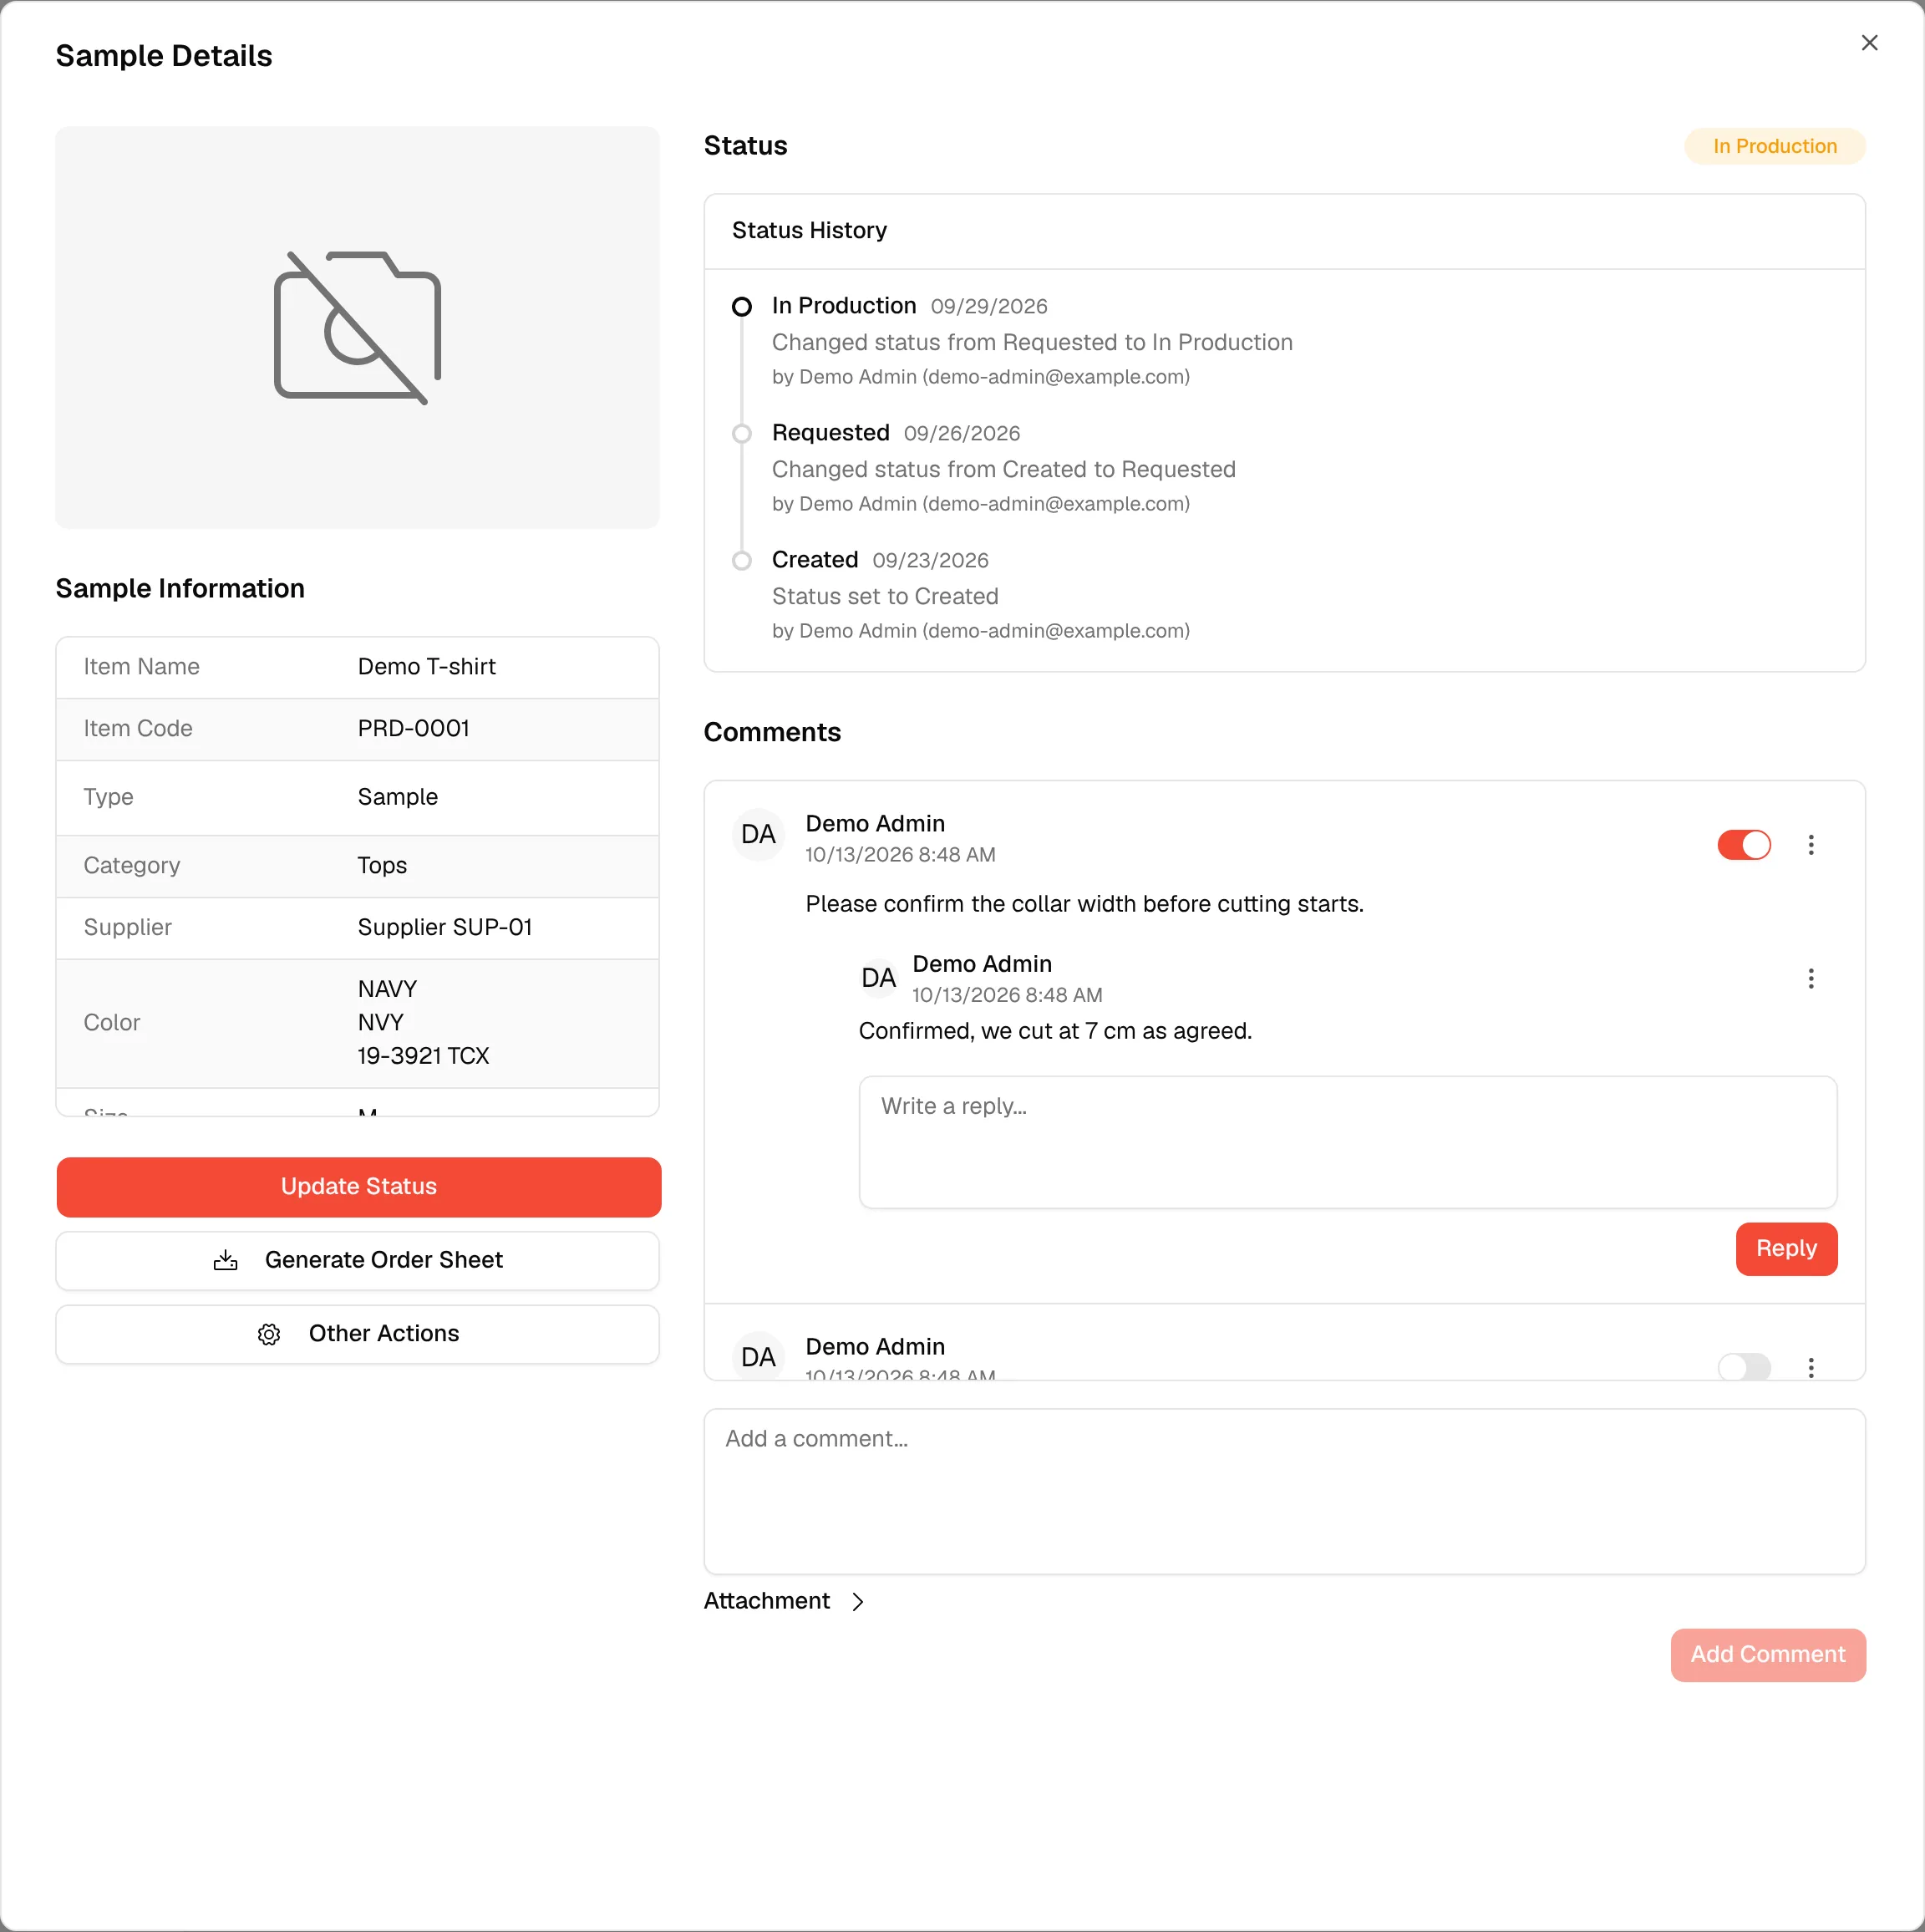
The Sample Details window shows everything about one sample request in a single place: its information, its status history and the comments of your team. You can edit most fields right there.
SamplingSample Management
Permission: SAMPLING_VIEW,SAMPLING_UPDATE
Open the sample details
Find the sample
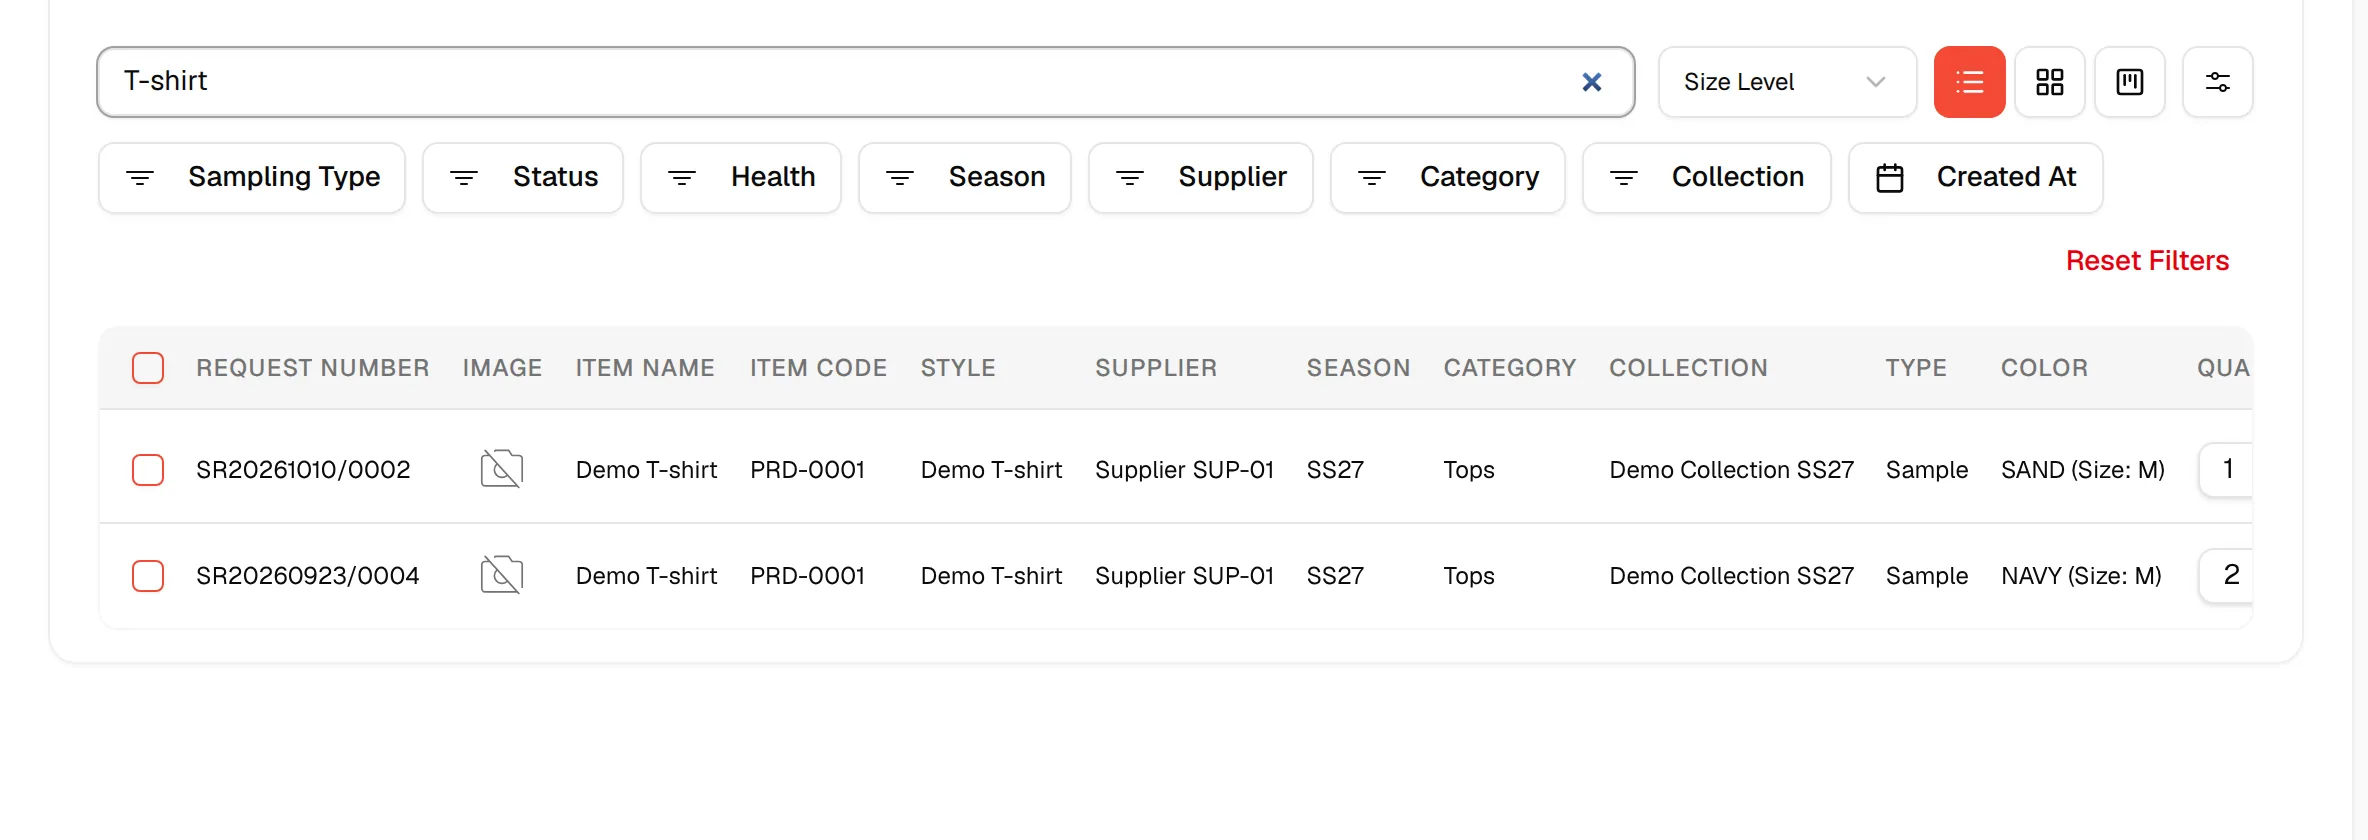
From the left sidebar, click Sampling, then Sample Management. Use the search and filters to find the request. See Sampling for the list and its views.
Open the details
In the table view, click the speech-bubble icon at the end of the row, or open the row menu and click Edit/View. In the card view and the kanban view, click the card's image or name, or use Edit/View in its menu. A small number on the speech-bubble icon shows how many comments the sample has.
You can also open the details from the Active Alerts panel on the Sampling Dashboard by clicking View in the alert's menu.
Read the sample information
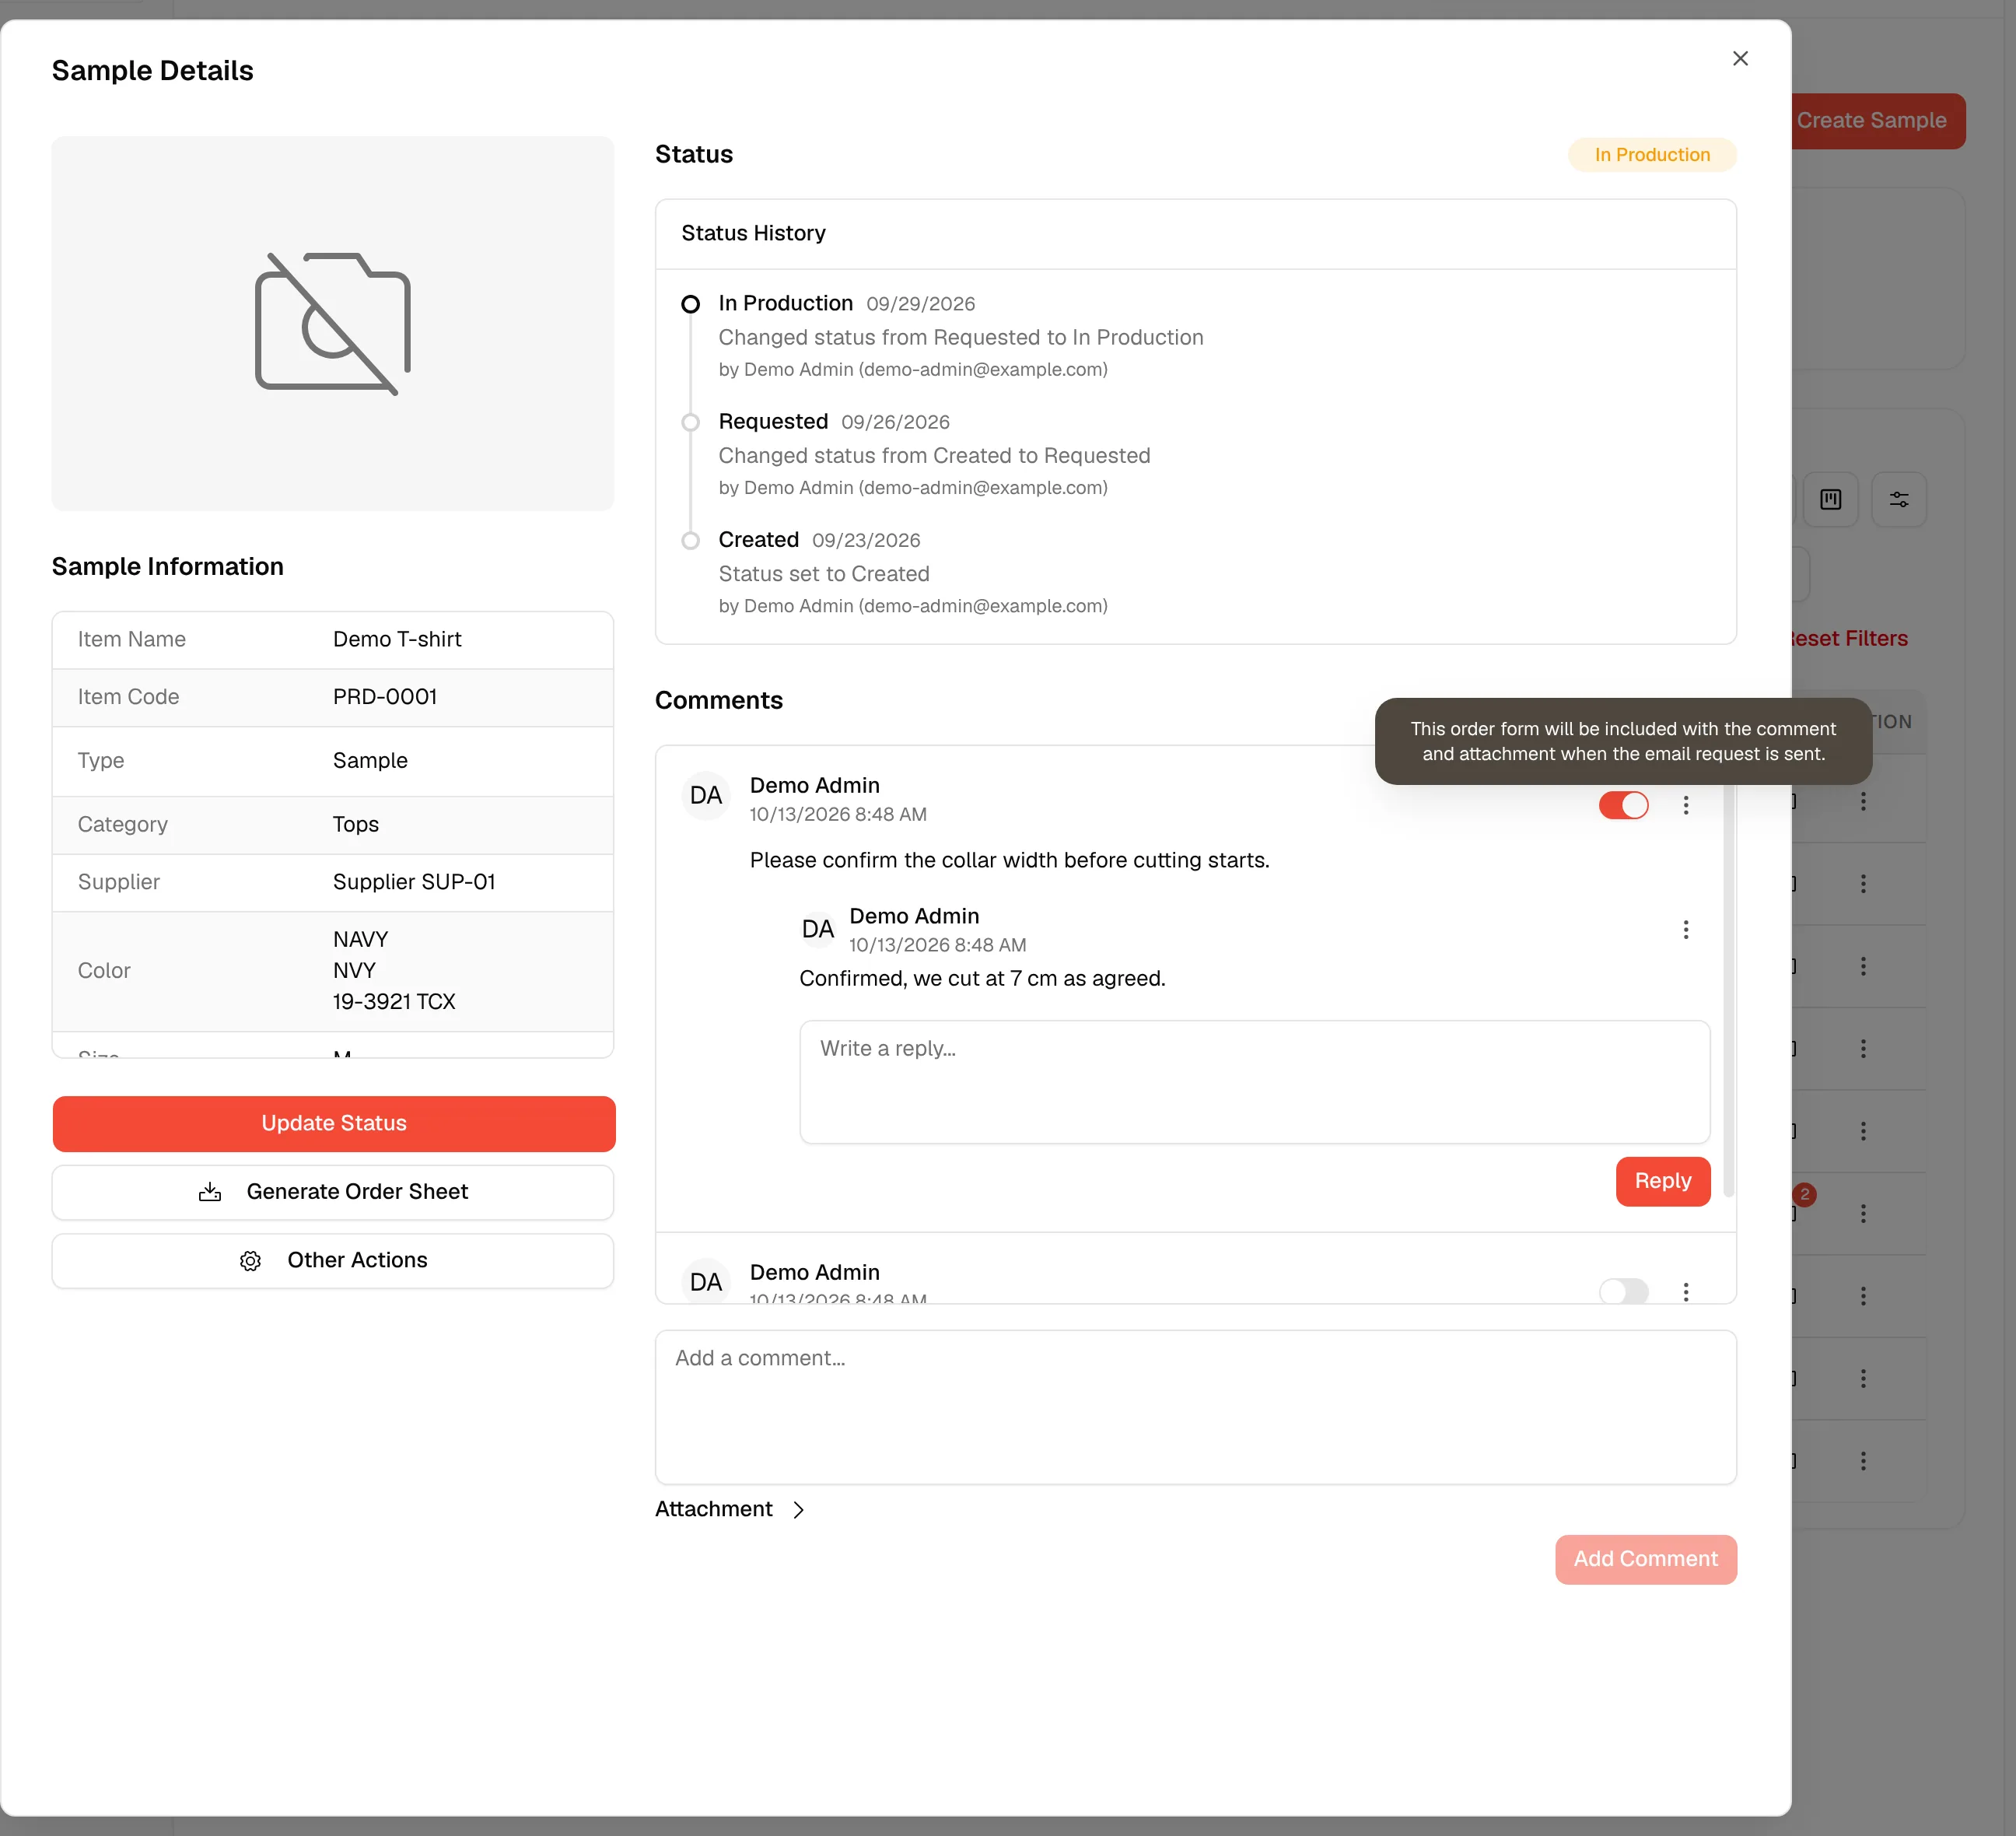
The Sample Information list on the left shows these fields:
| Field | What it shows |
|---|---|
| Item Name, Item Code | The style name and code for a product sample, or the material name and code for a material sample. |
| Type | The sampling type. |
| Category | The style category, or the material category. |
| Supplier | The supplier of the style or material. |
| Color | The colour name, and its code and Pantone code when they exist. |
| Size | The sample size. Shown for product samples only. |
| Quantity, Currency, Unit Cost | The order quantity and cost. |
| Total Cost | Quantity multiplied by unit cost, in the sample's currency. |
| Health | The health badge, and whether the ex-factory date is confirmed. |
| Created At | When the request was created. |
| Agreed Due Date, Actual Due Date | The planned and the current expected due date. |
| Last Status Update | When the status last changed. |
| Notes | Free text. It shows No notes when empty. |
| Supplier Confirmation | Not requested, Requested — awaiting response or Confirmed. |
Edit the sample information
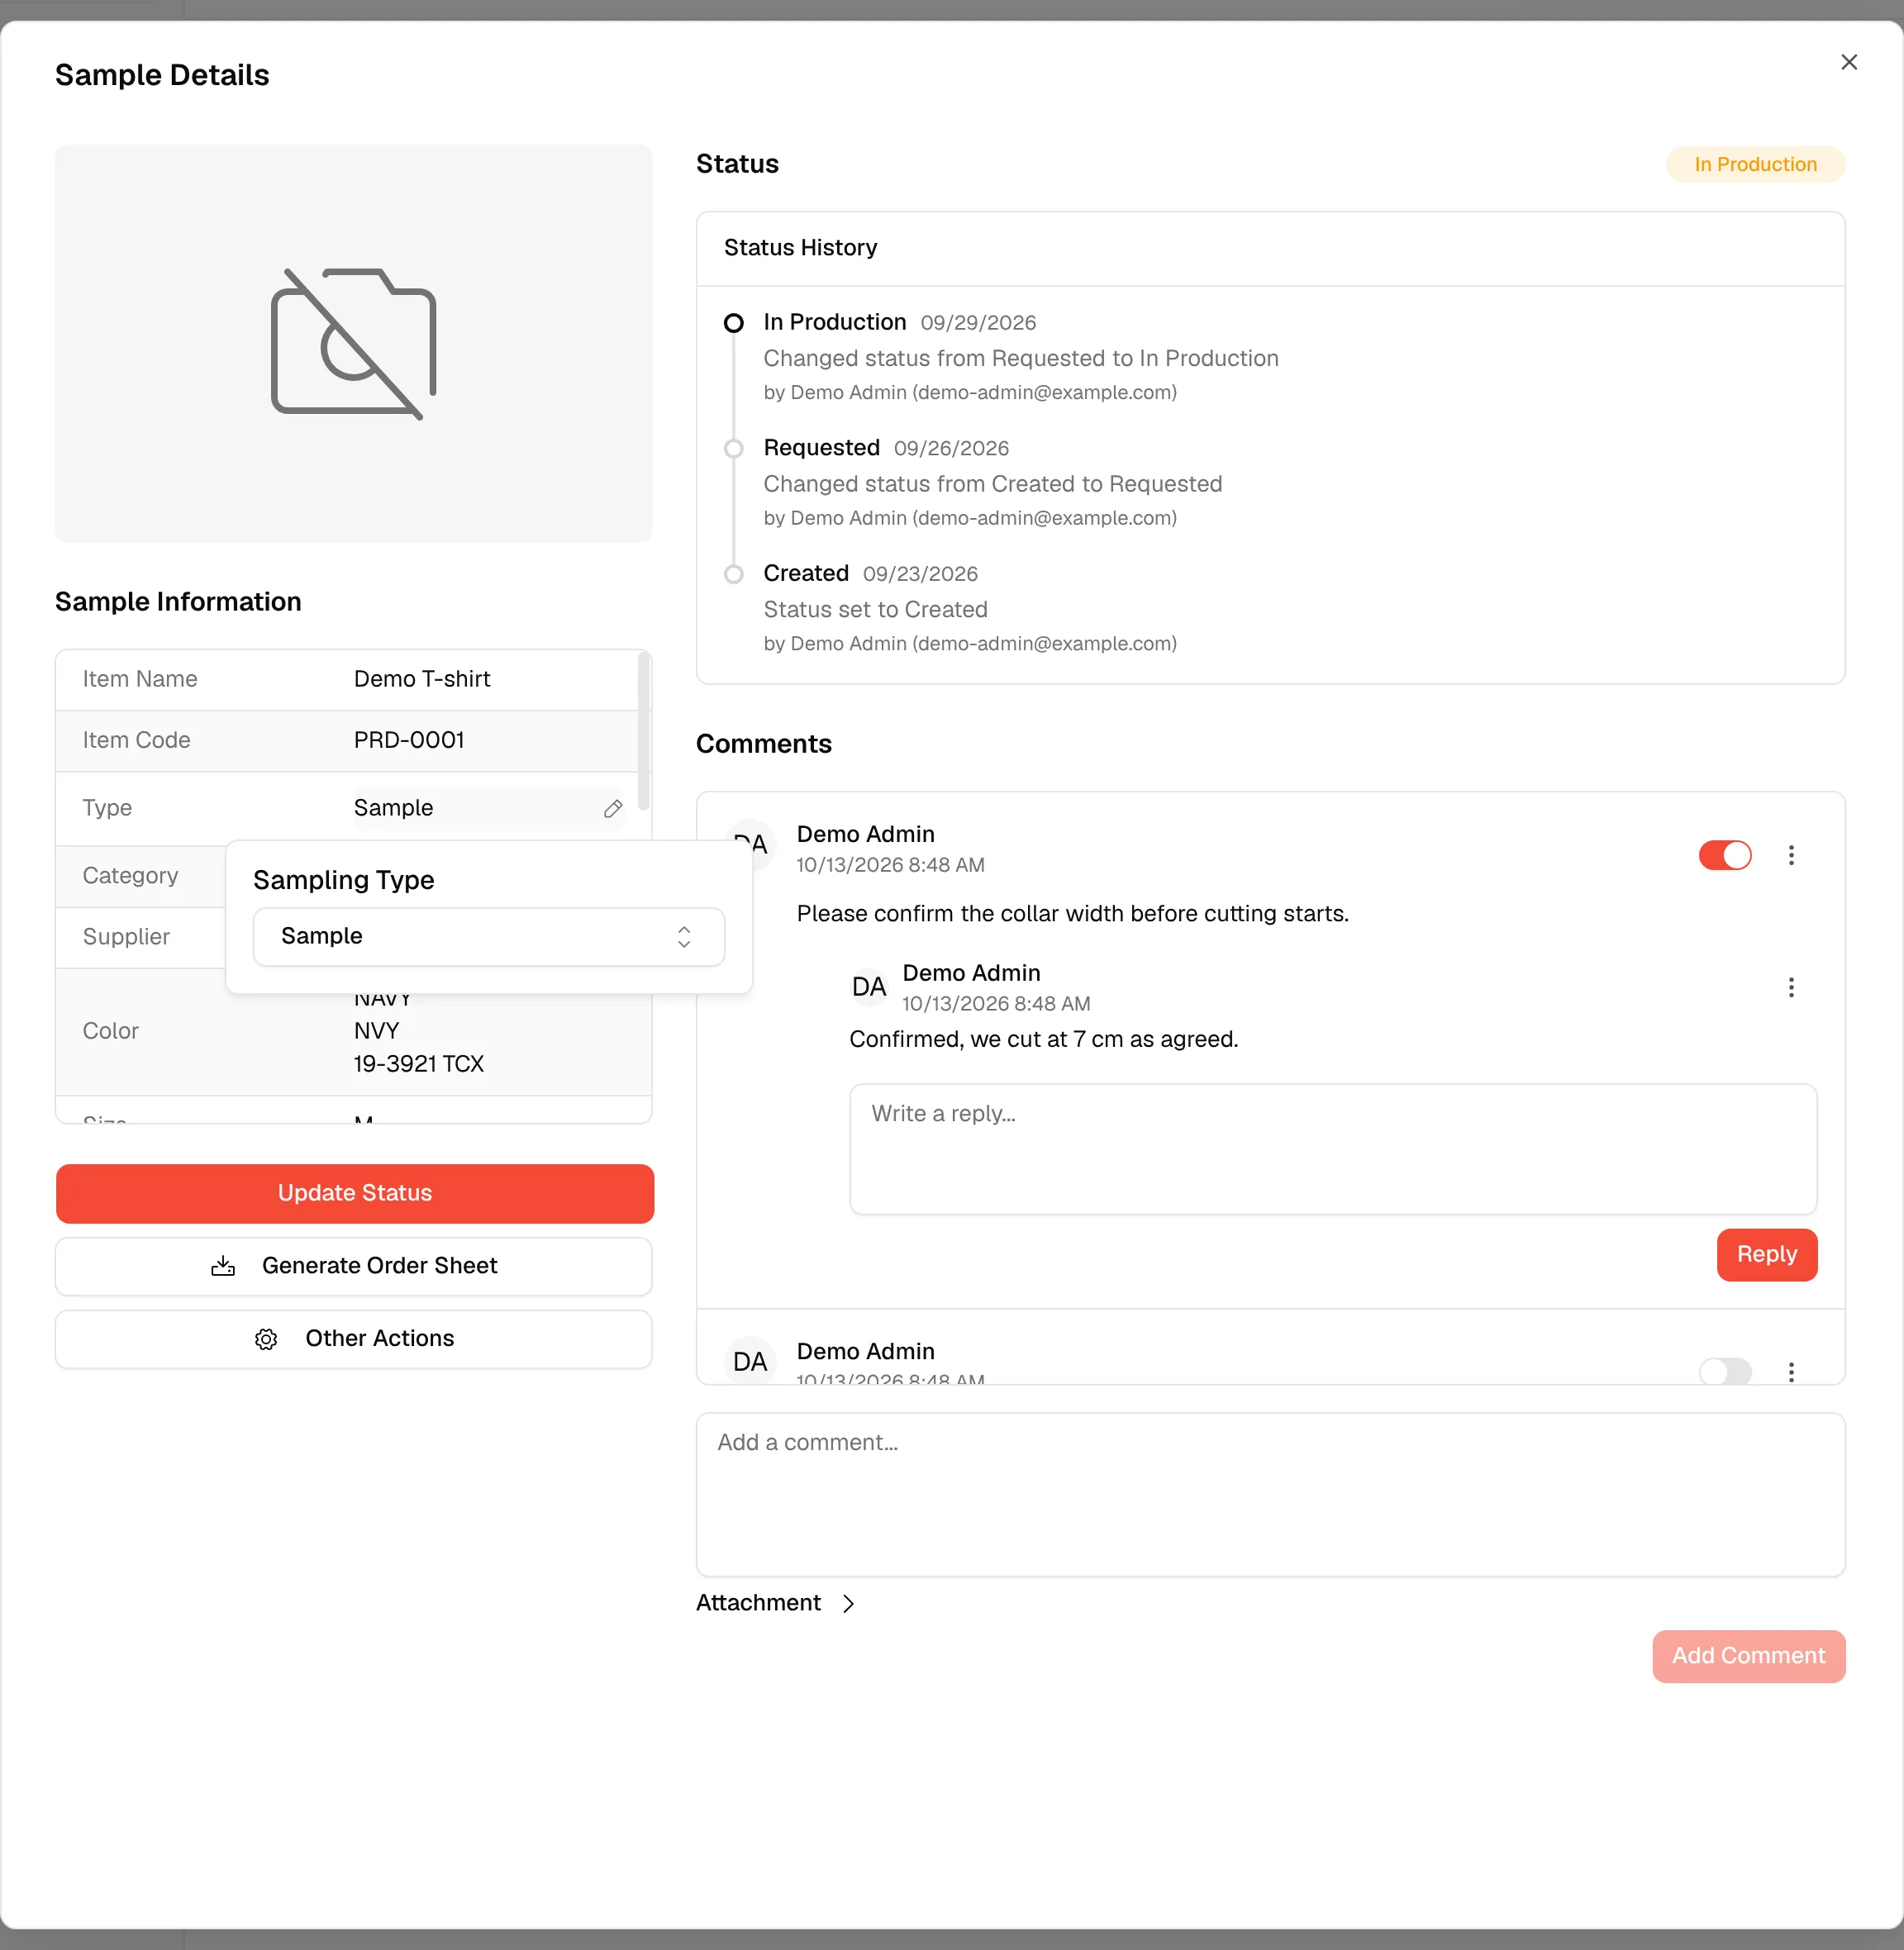
Fields that can be edited show a pencil icon when you point at them.
Change the type
Click the Type value and pick another sampling type in the list, or type a new name to create one.
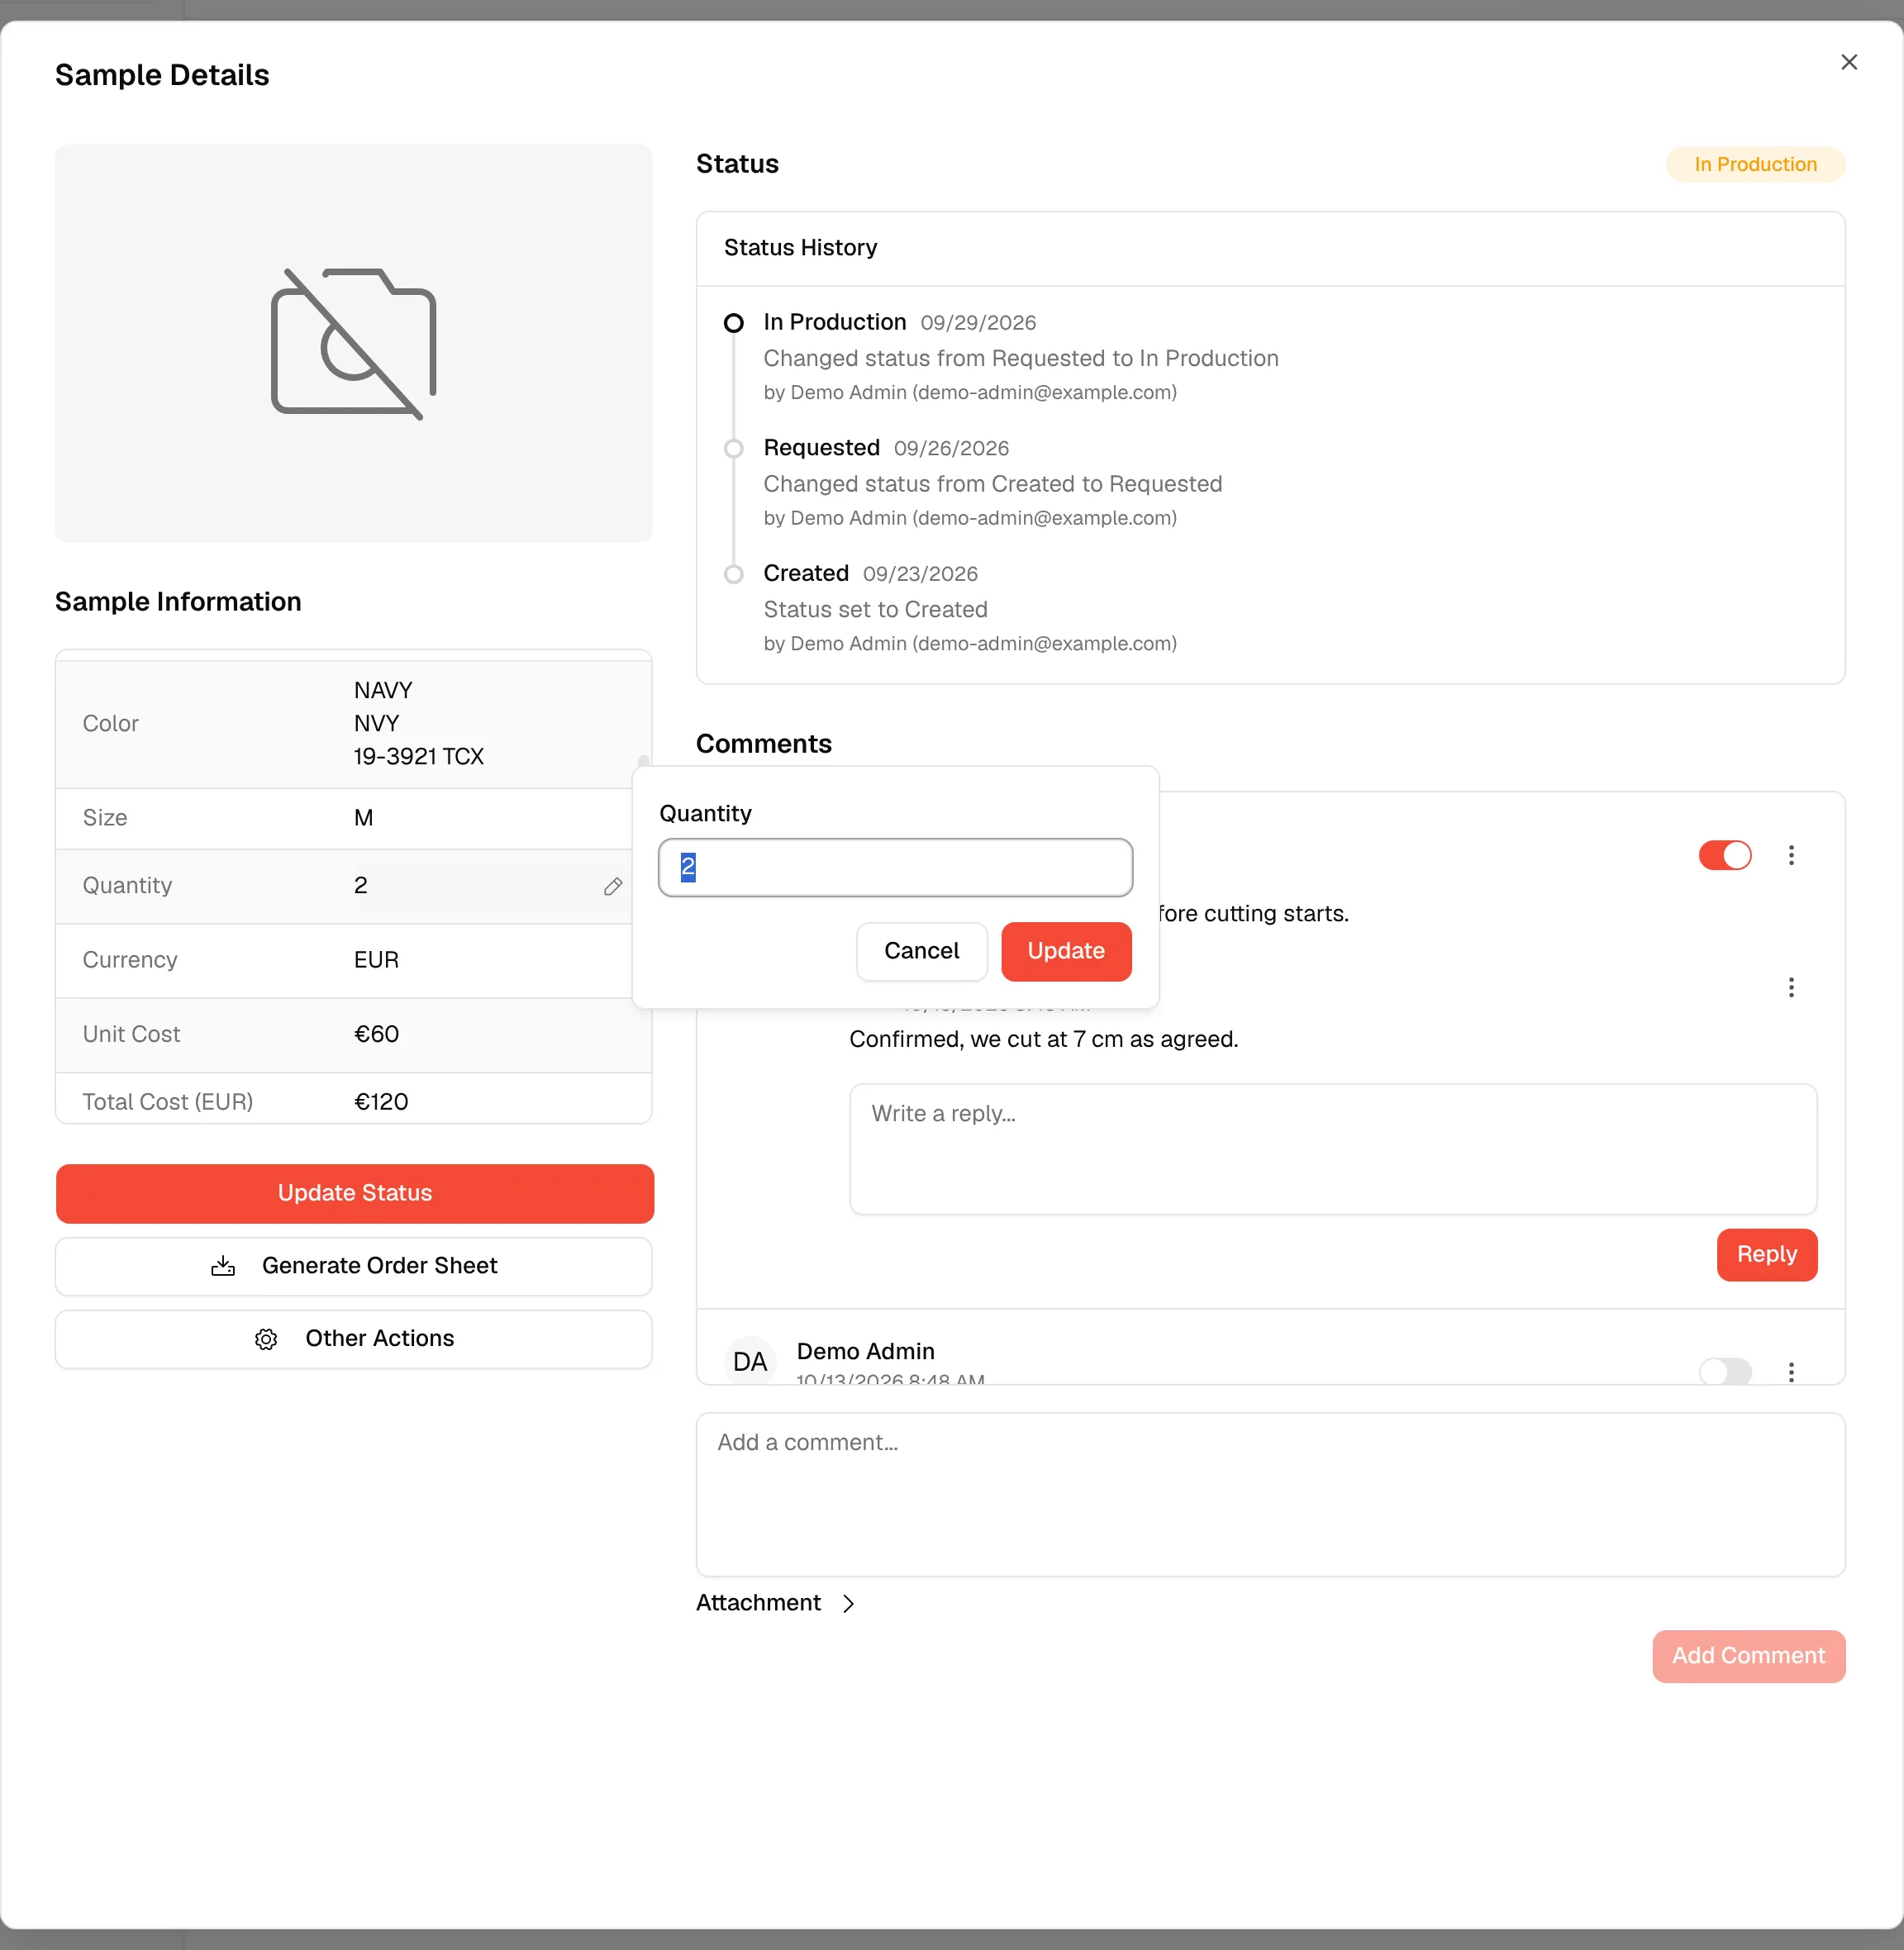
Edit the quantity, currency or unit cost
Click the value, change it in the small window and click Update. The quantity must be a whole number of 0 or more, and the unit cost must be 0 or more. For Currency, pick a currency from the list.
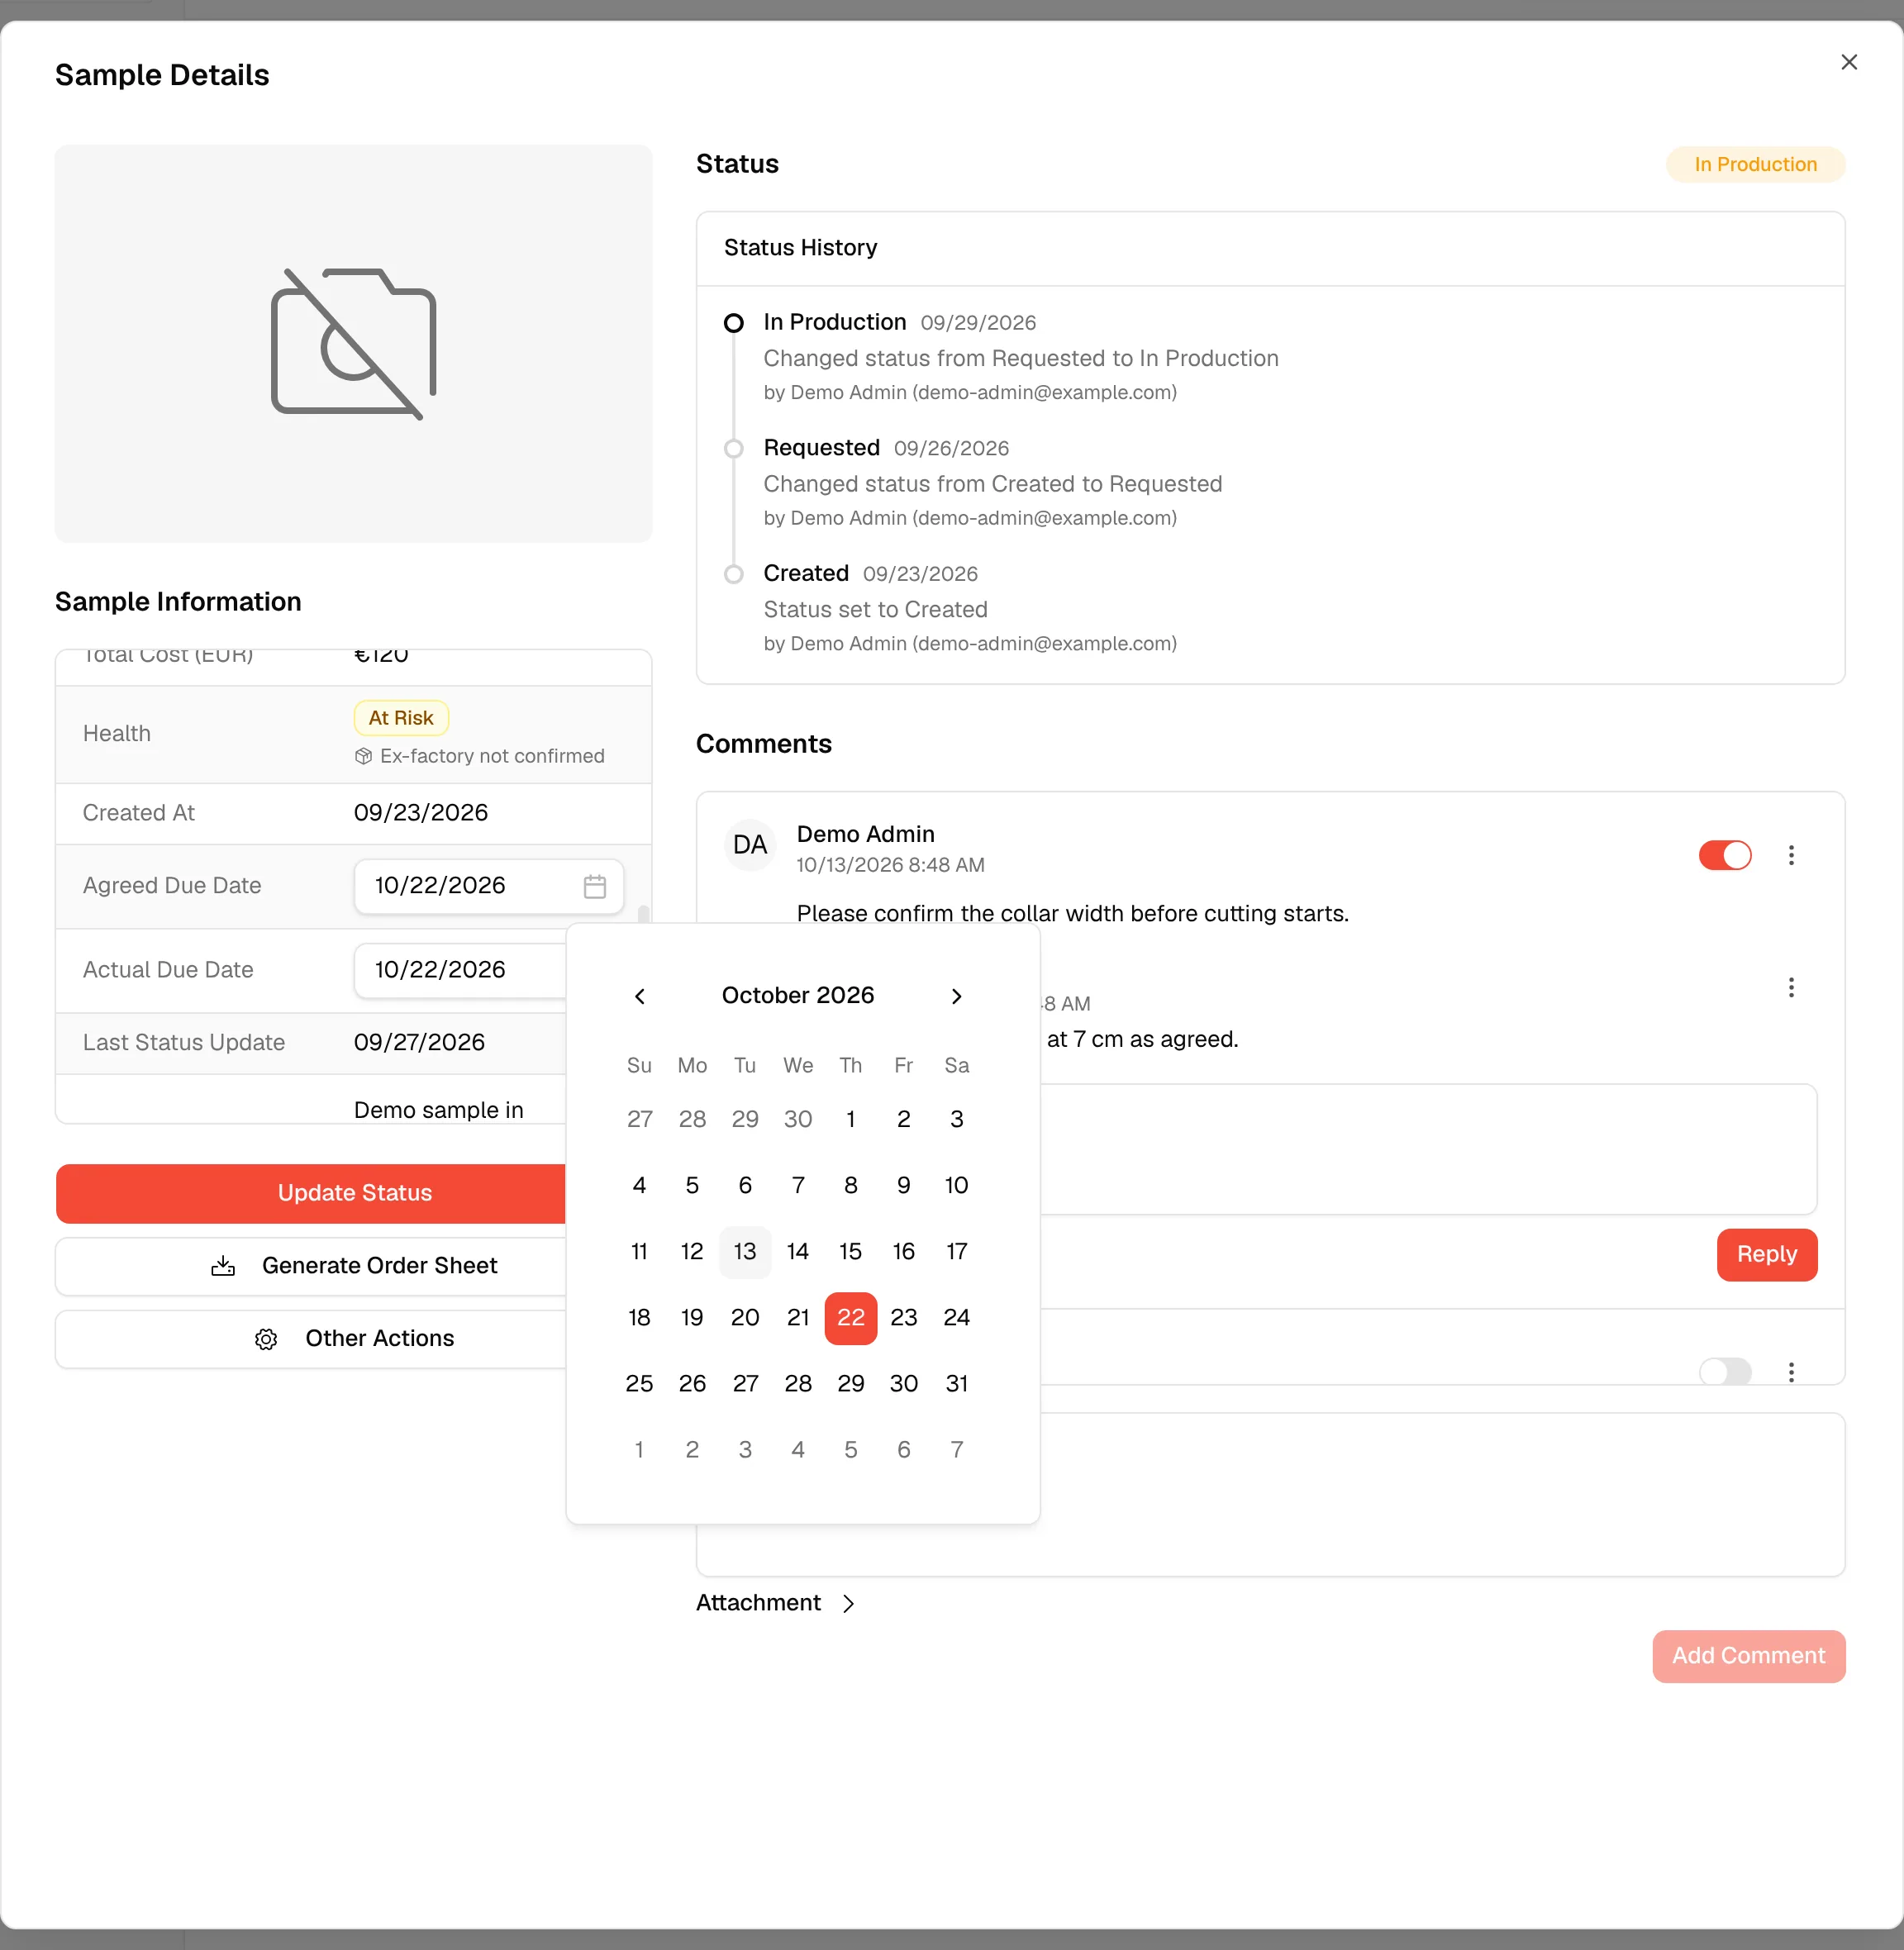
Set the due dates
Next to Agreed Due Date, type the date as mm/dd/yyyy, or click the calendar icon and pick a day. Actual Due Date works the same way, but only for users who have the permission to update the actual due date. Others see the date without being able to change it.
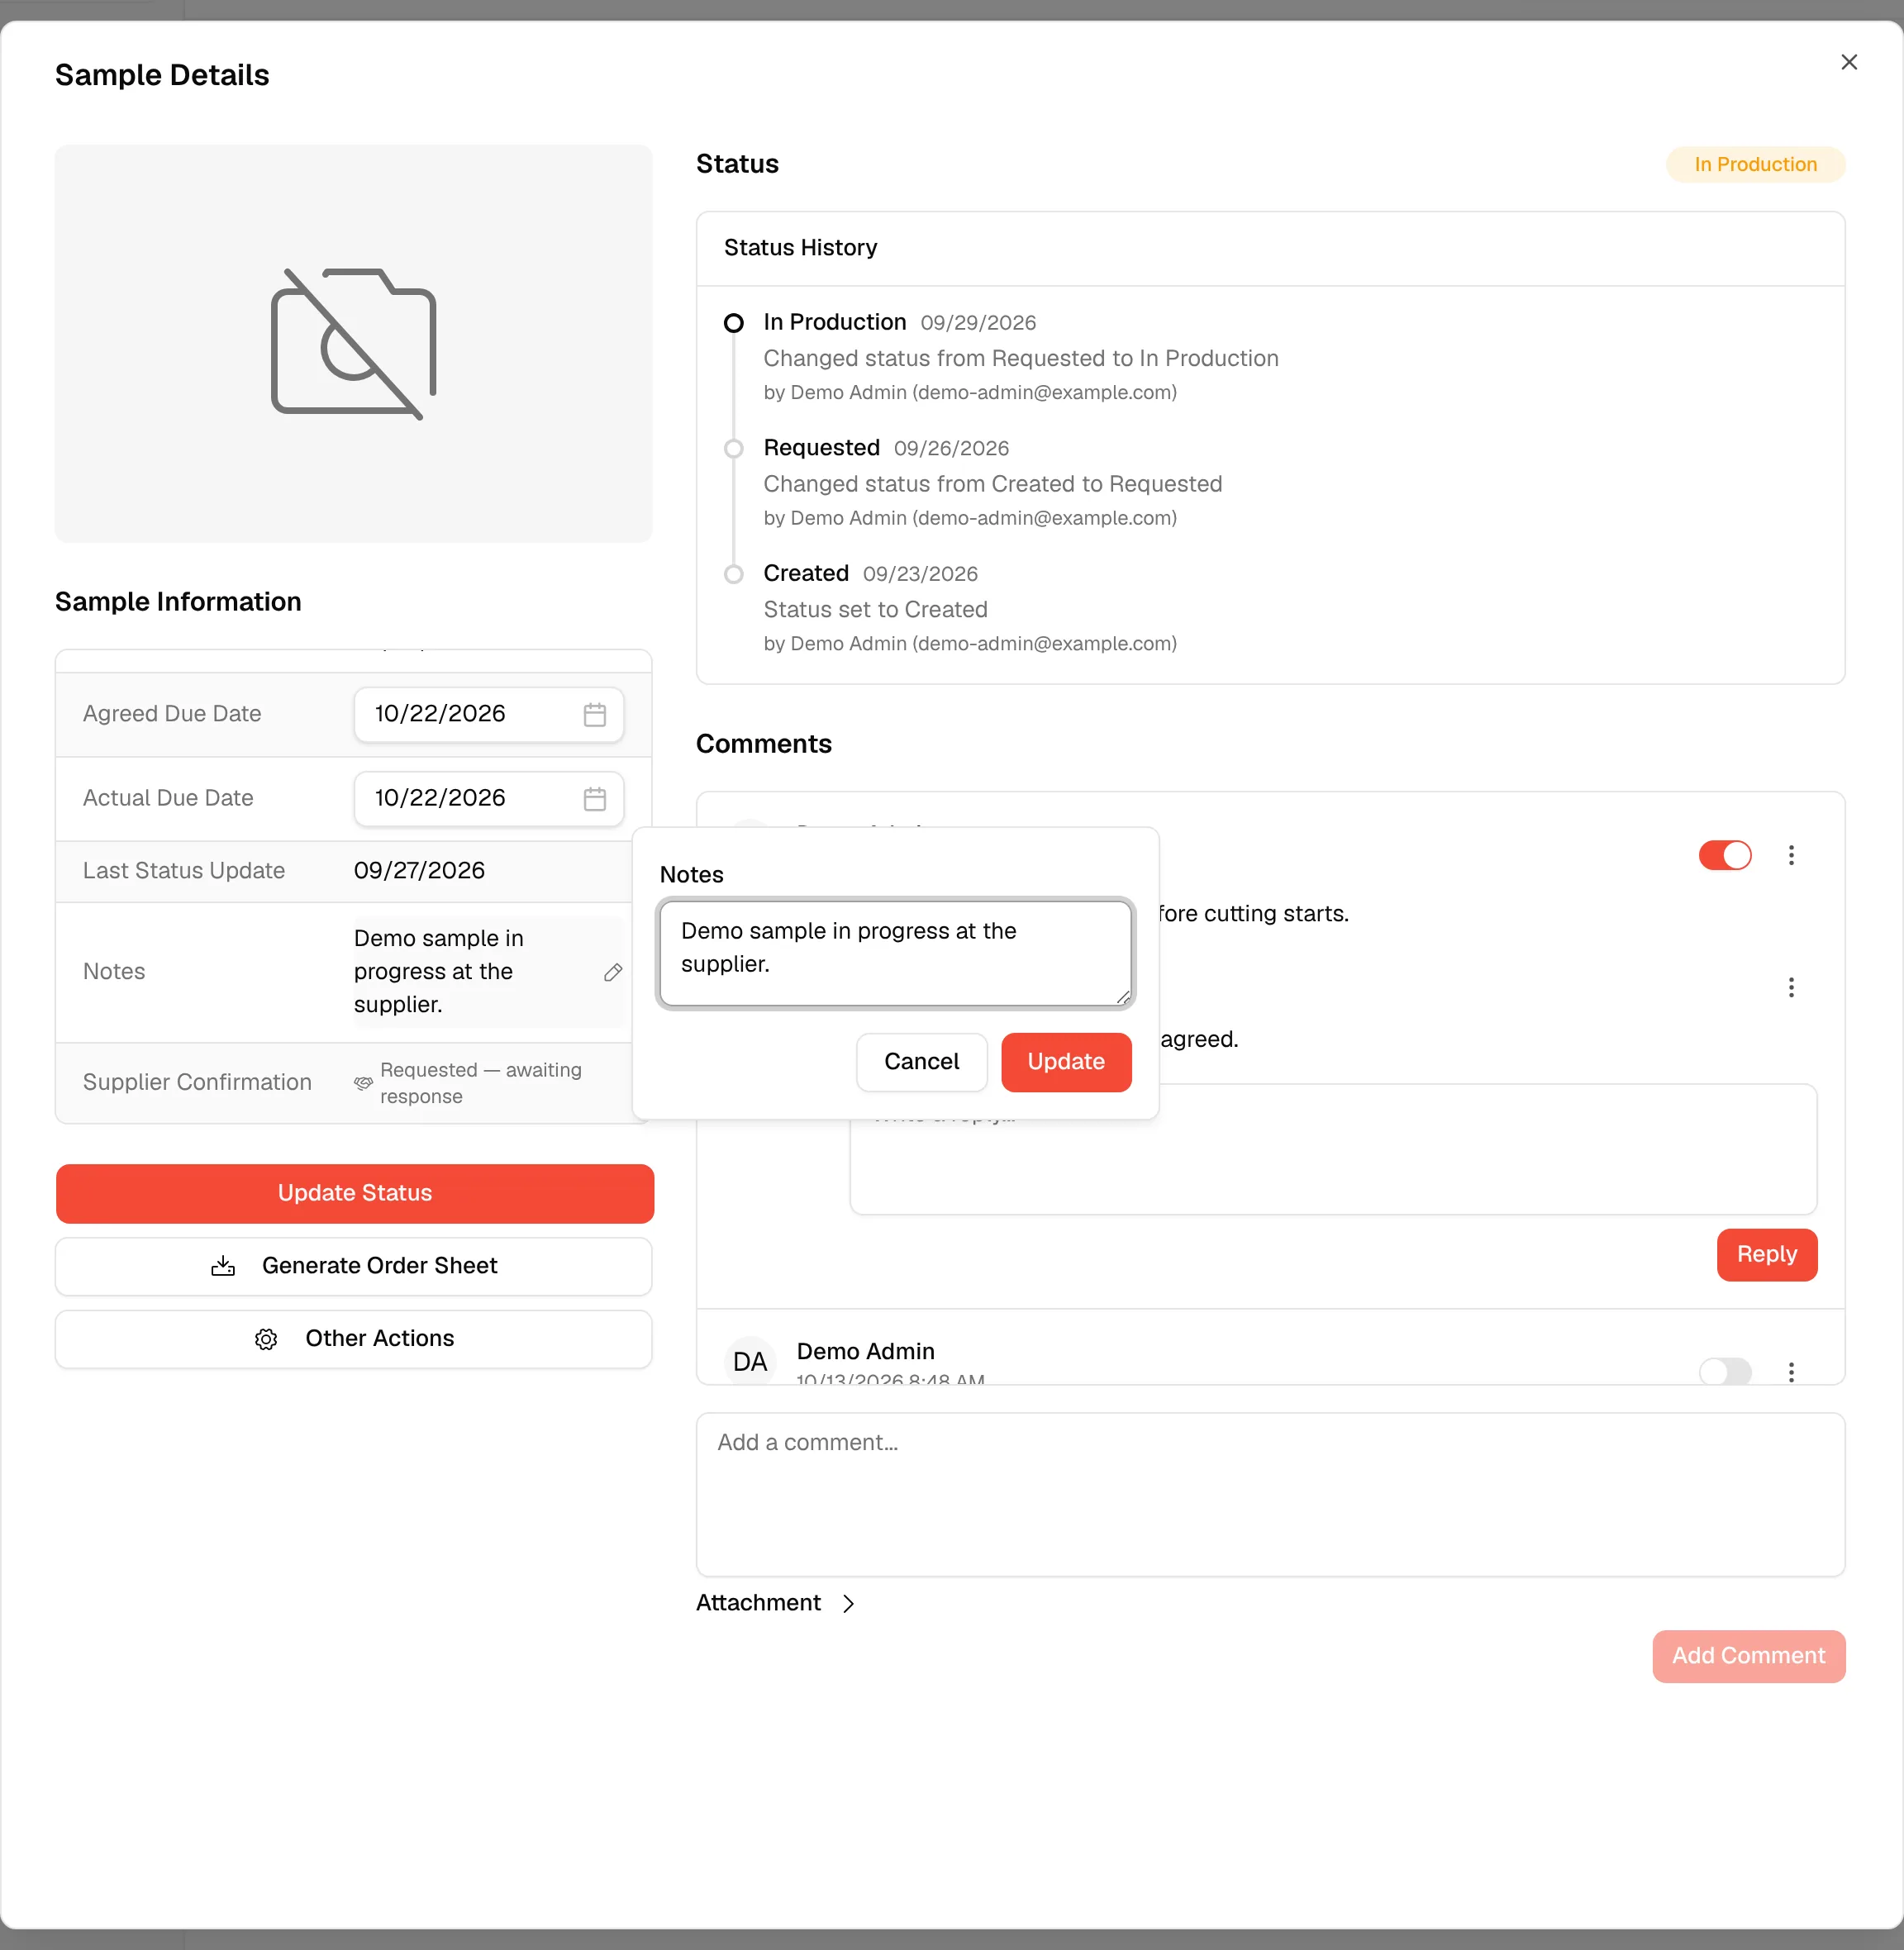
Write a note
Click the value next to Notes, type your text and click Update.
Change the status
The status of the request is shown at the top of the right-hand side, next to Status History, which lists every change with its date and the user who made it. It shows No status history available until the first change.
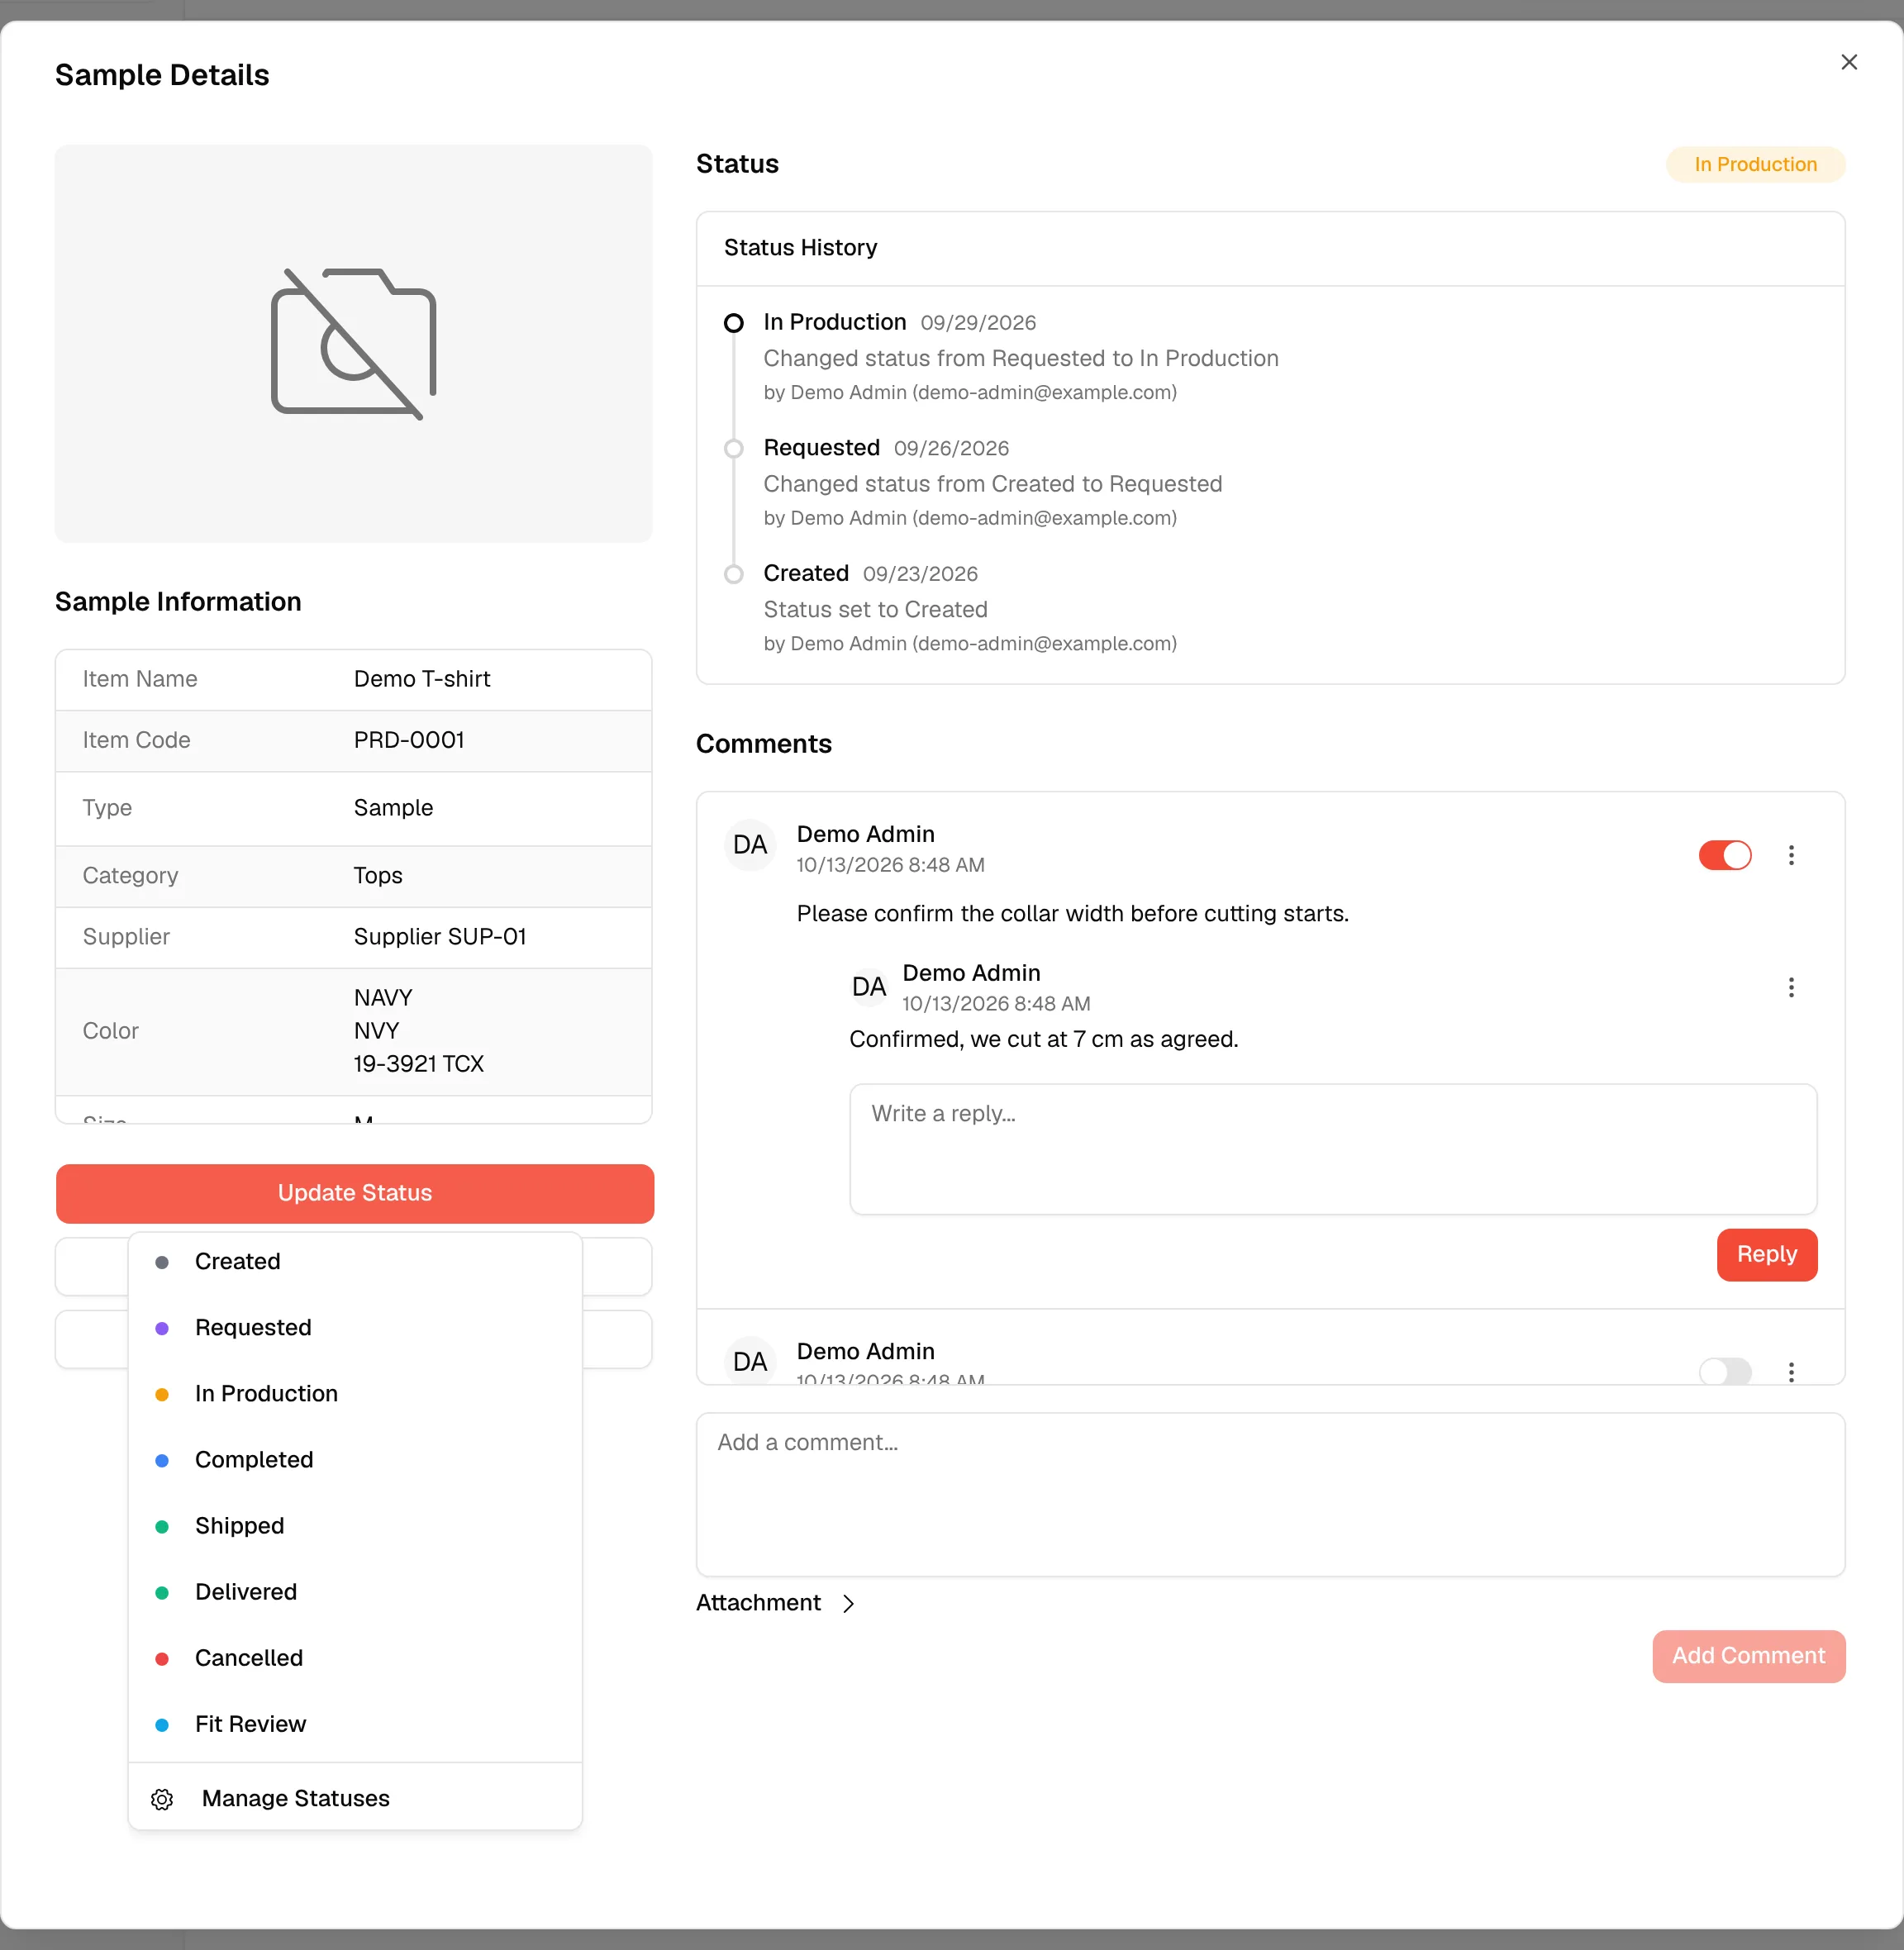
Click "Update Status"
Under the sample information, click Update Status. A list of the statuses of your brand opens.
Select the new status
Click a status. The badge and the Status History update straight away.
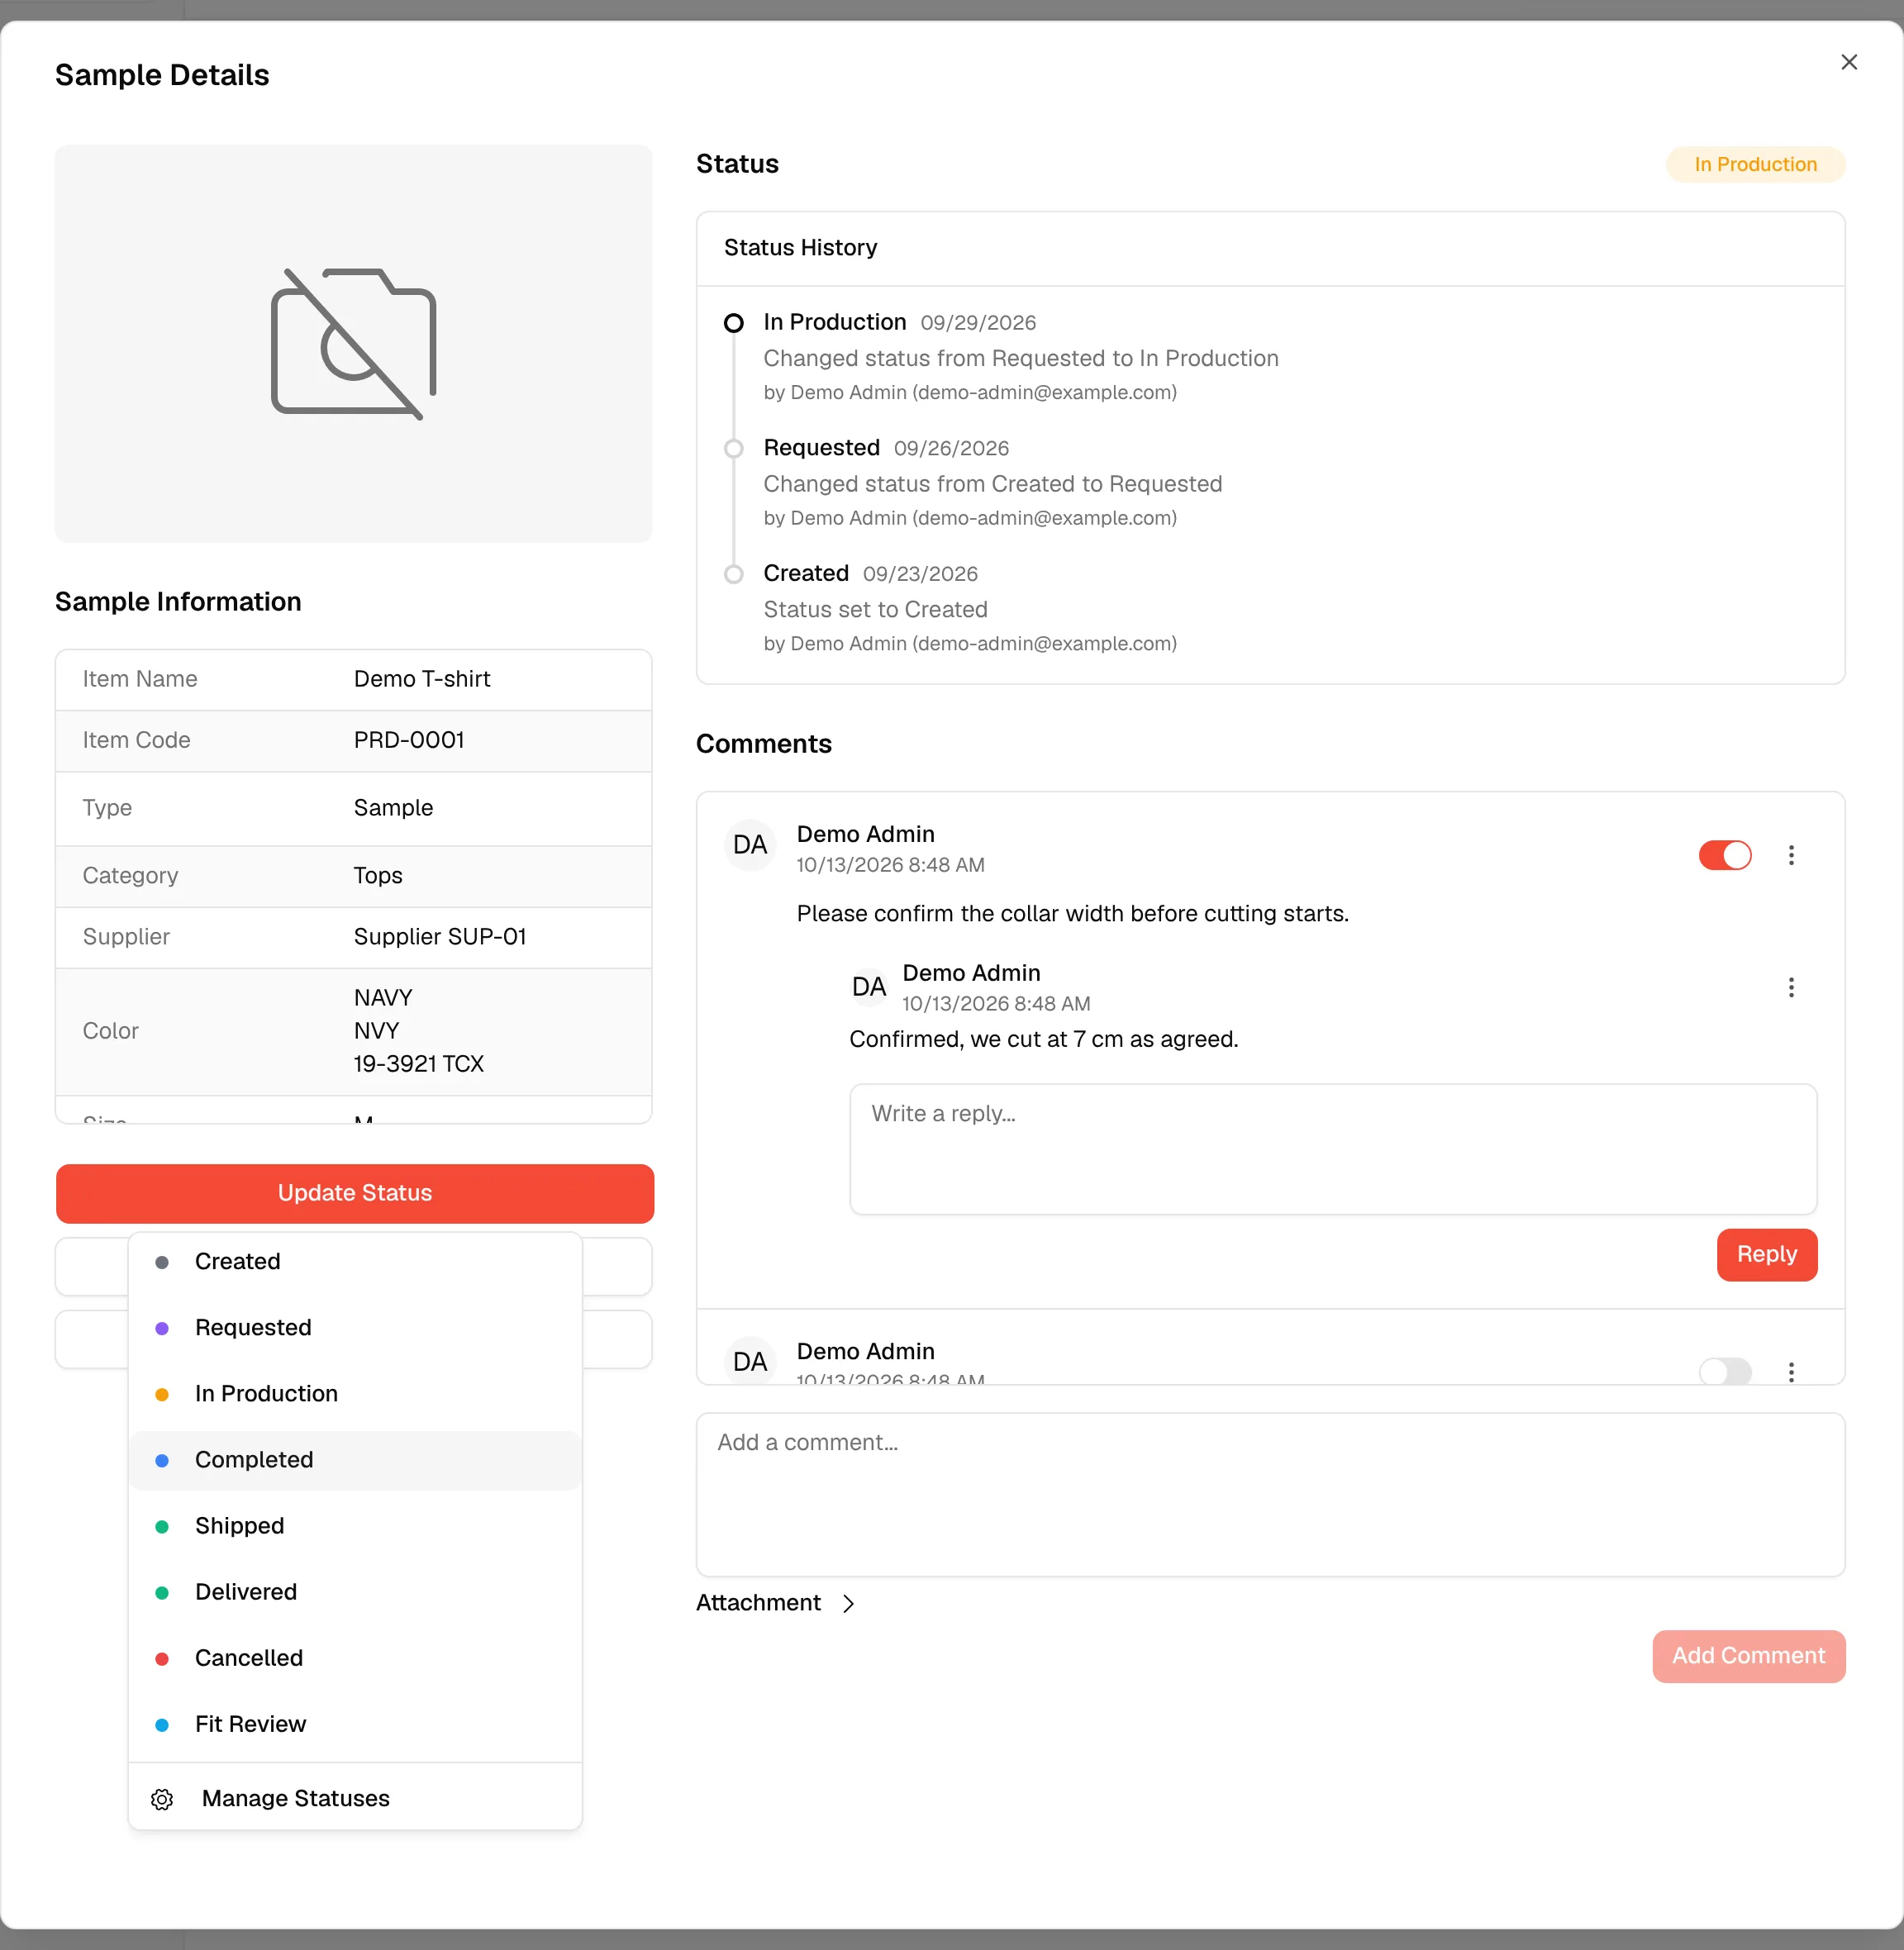
To add, rename or delete statuses, click Manage Statuses at the bottom of the list. See Manage sampling statuses.
Use the comments
The Comments area is where your team discusses the sample. It shows No comments yet until someone writes the first one.
Write a comment
Type in Add a comment... and click Add Comment. Type @ to mention a team member.
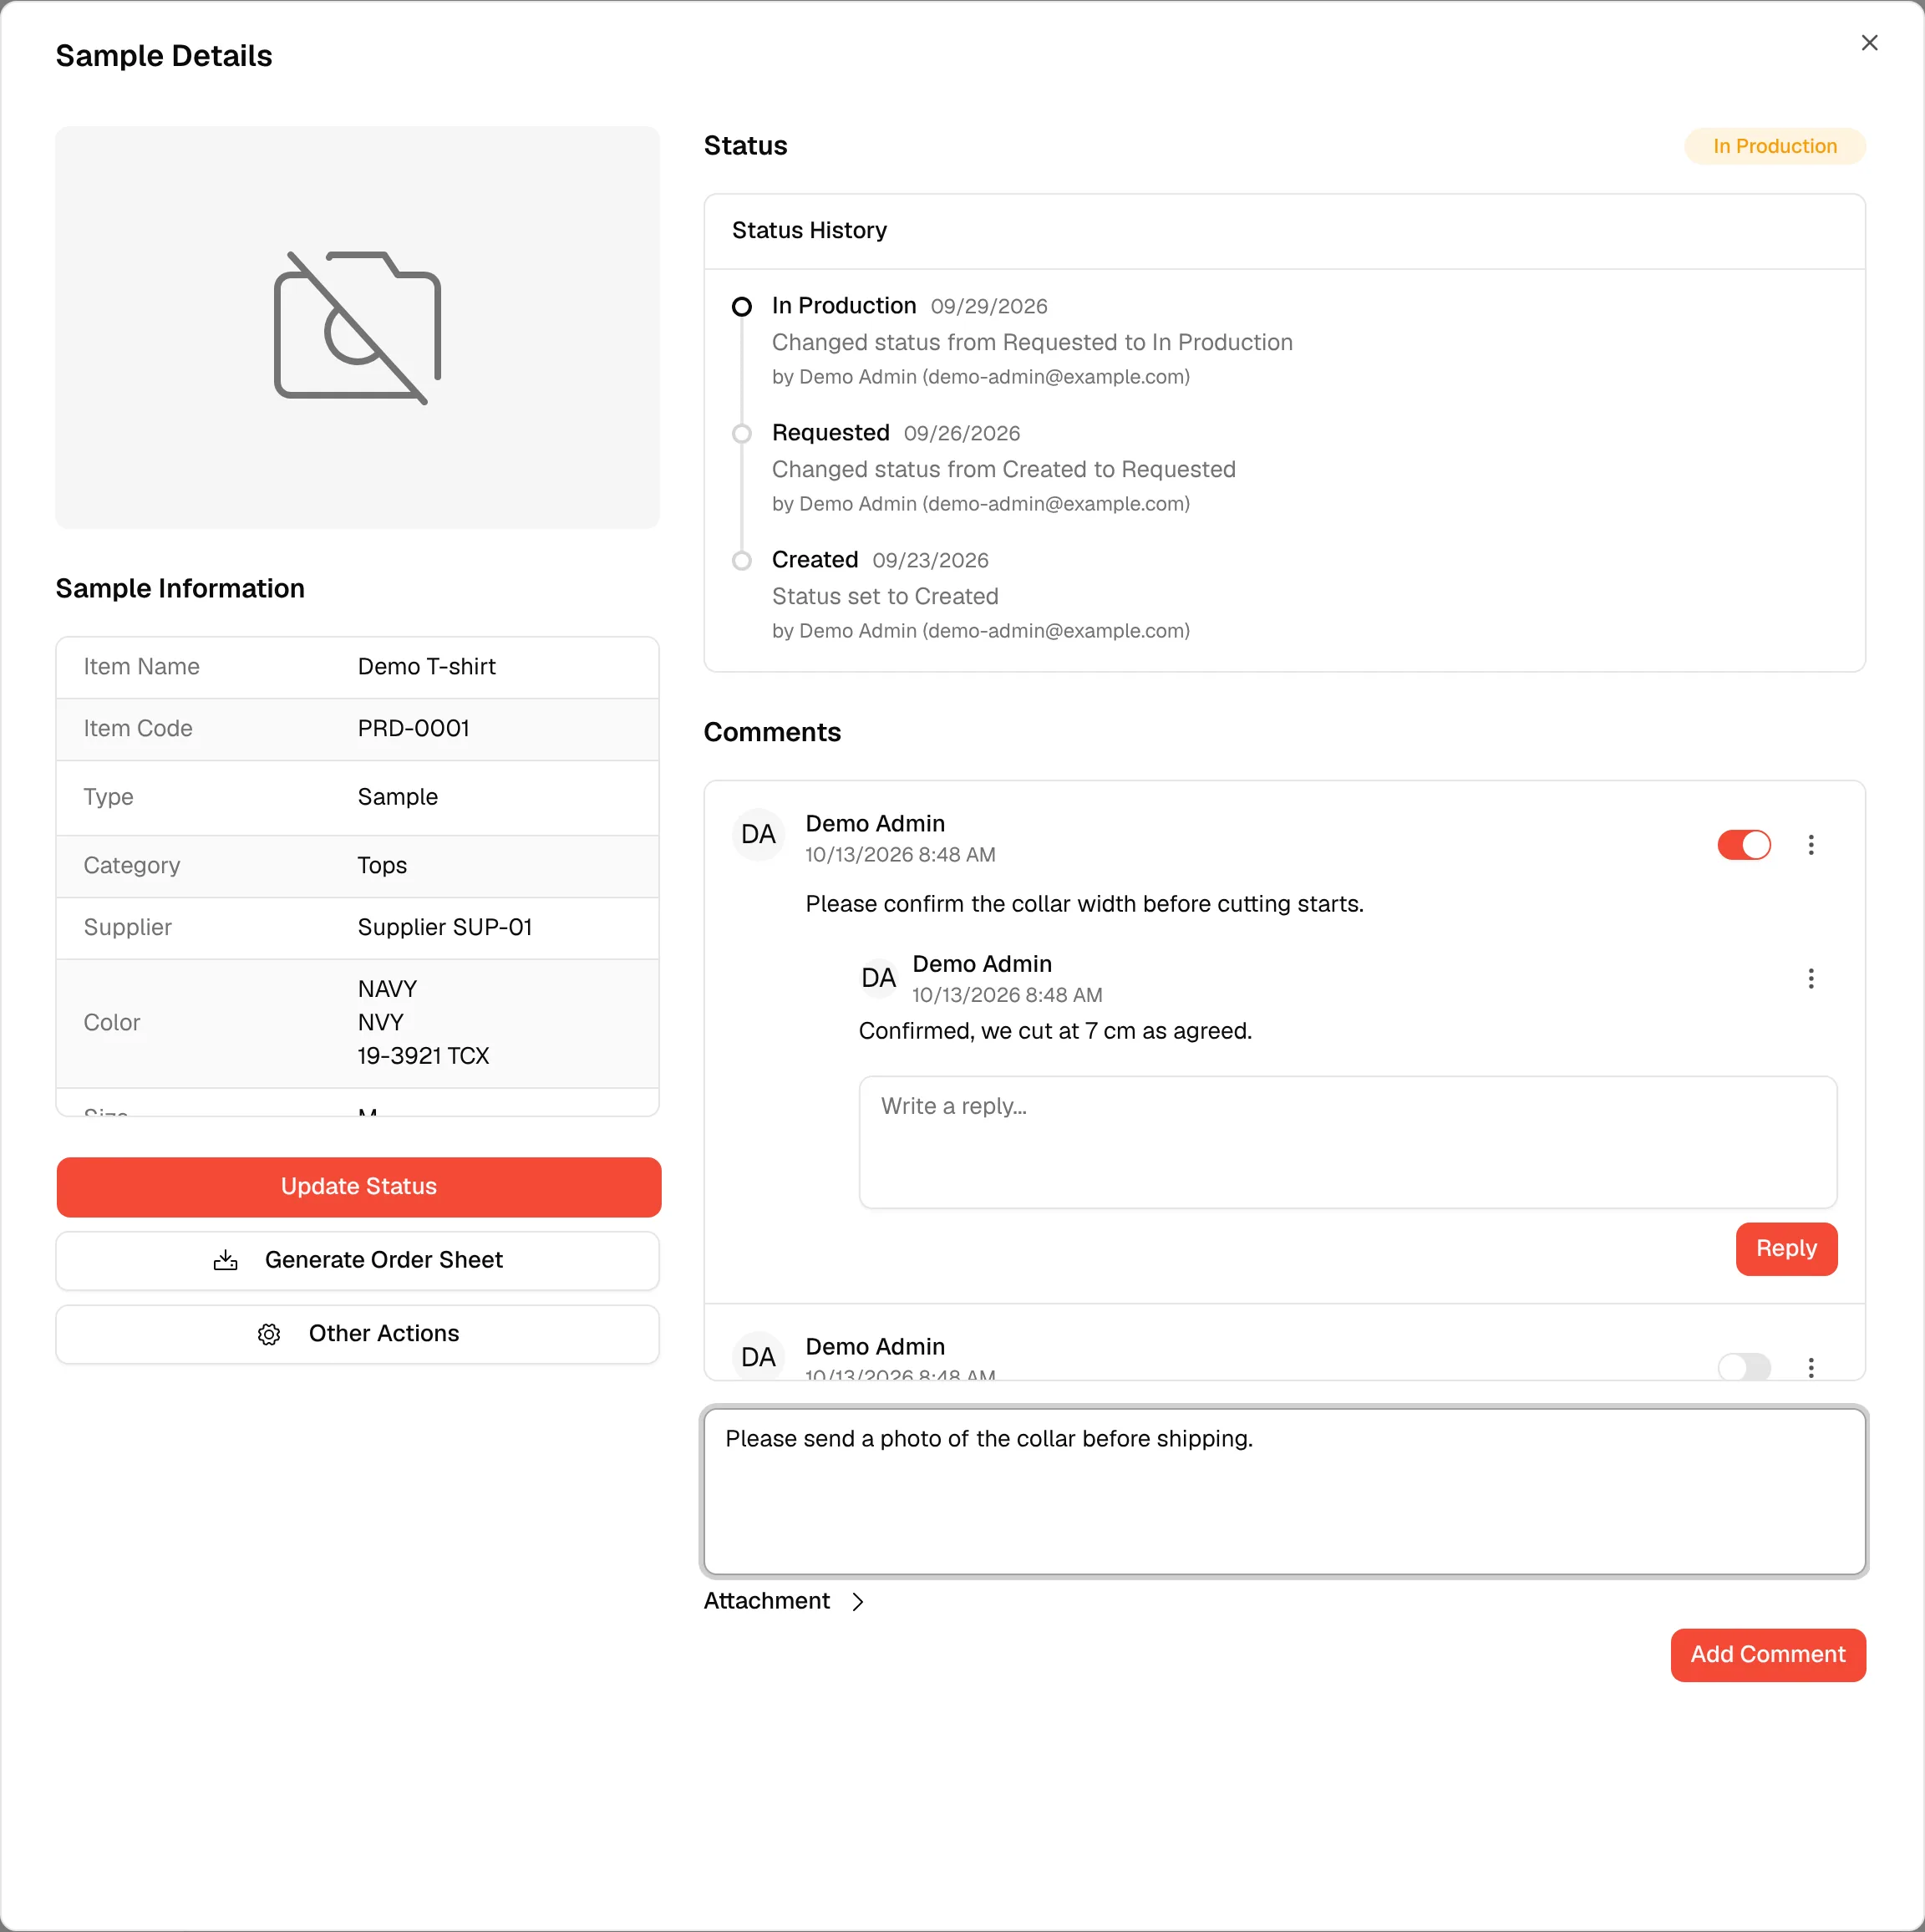
Attach a file (optional)
Click Attachment below the box to expand it, then click Click to select a file to attach. The accepted file types and the size limit are shown under the box. Click the x to remove the file before you post.
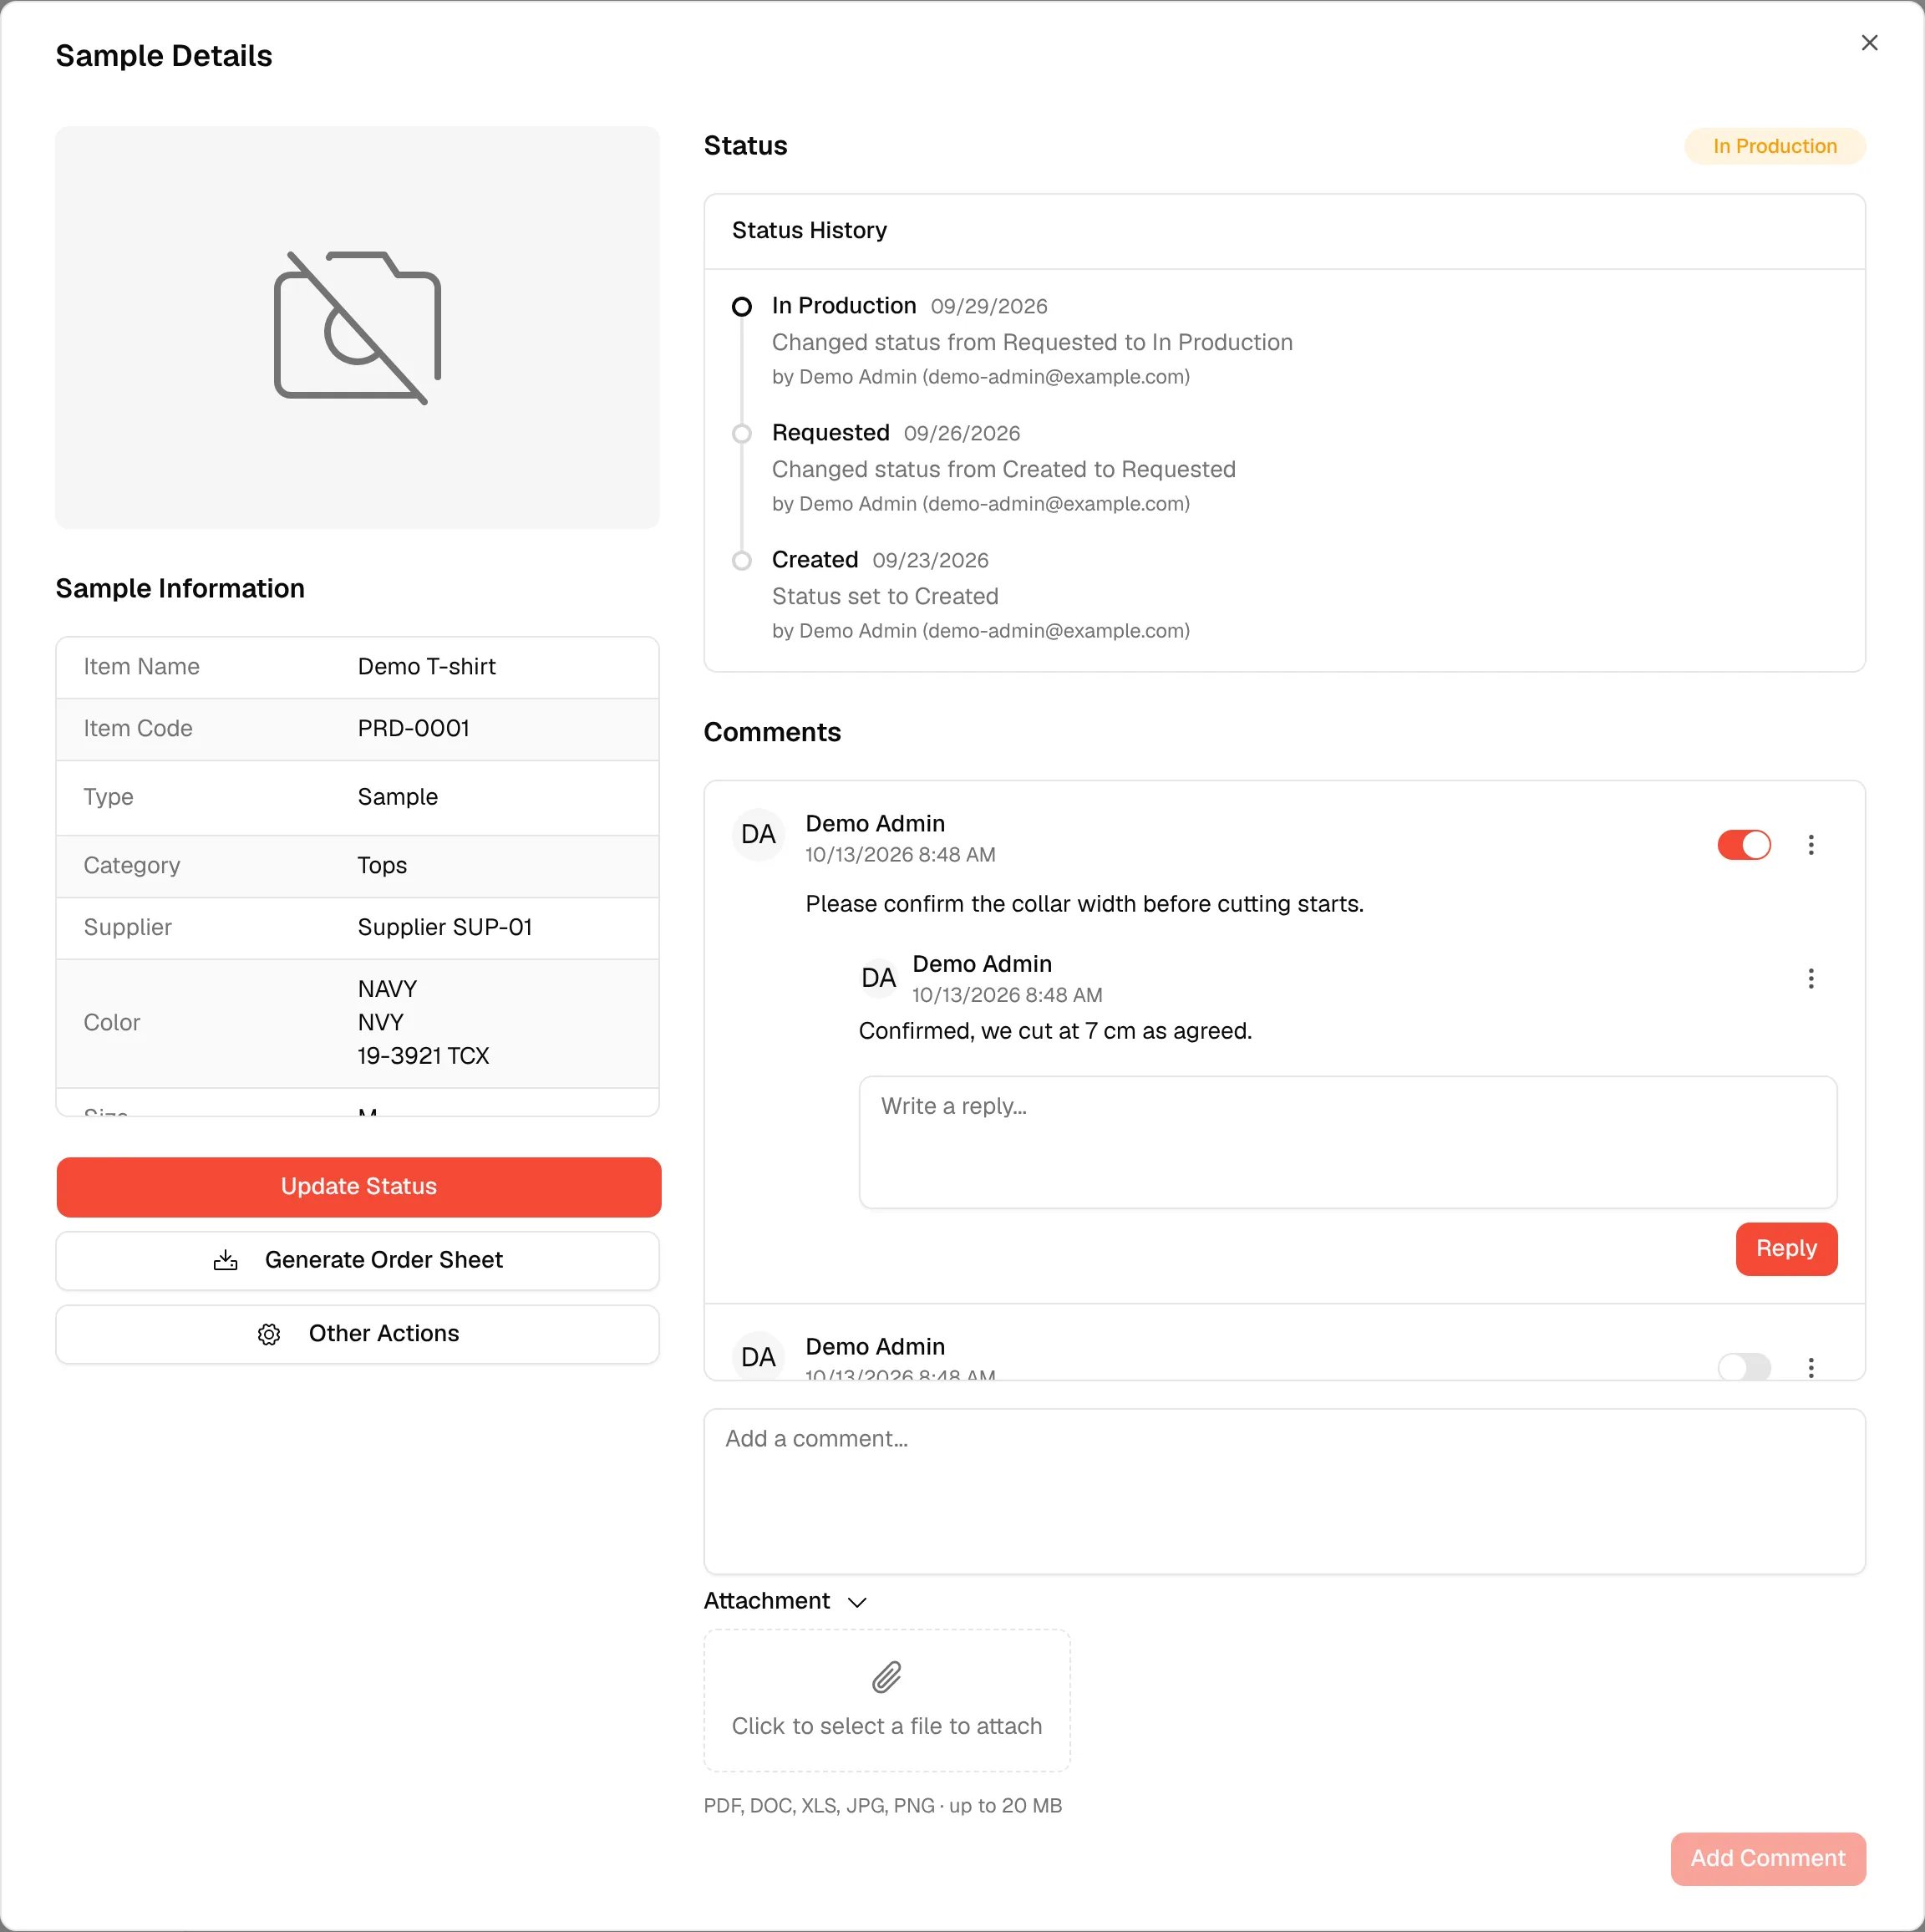
Reply to a comment
Click Reply under a comment, type your answer and click Reply. Click Cancel to close the box.
Edit or delete your comment
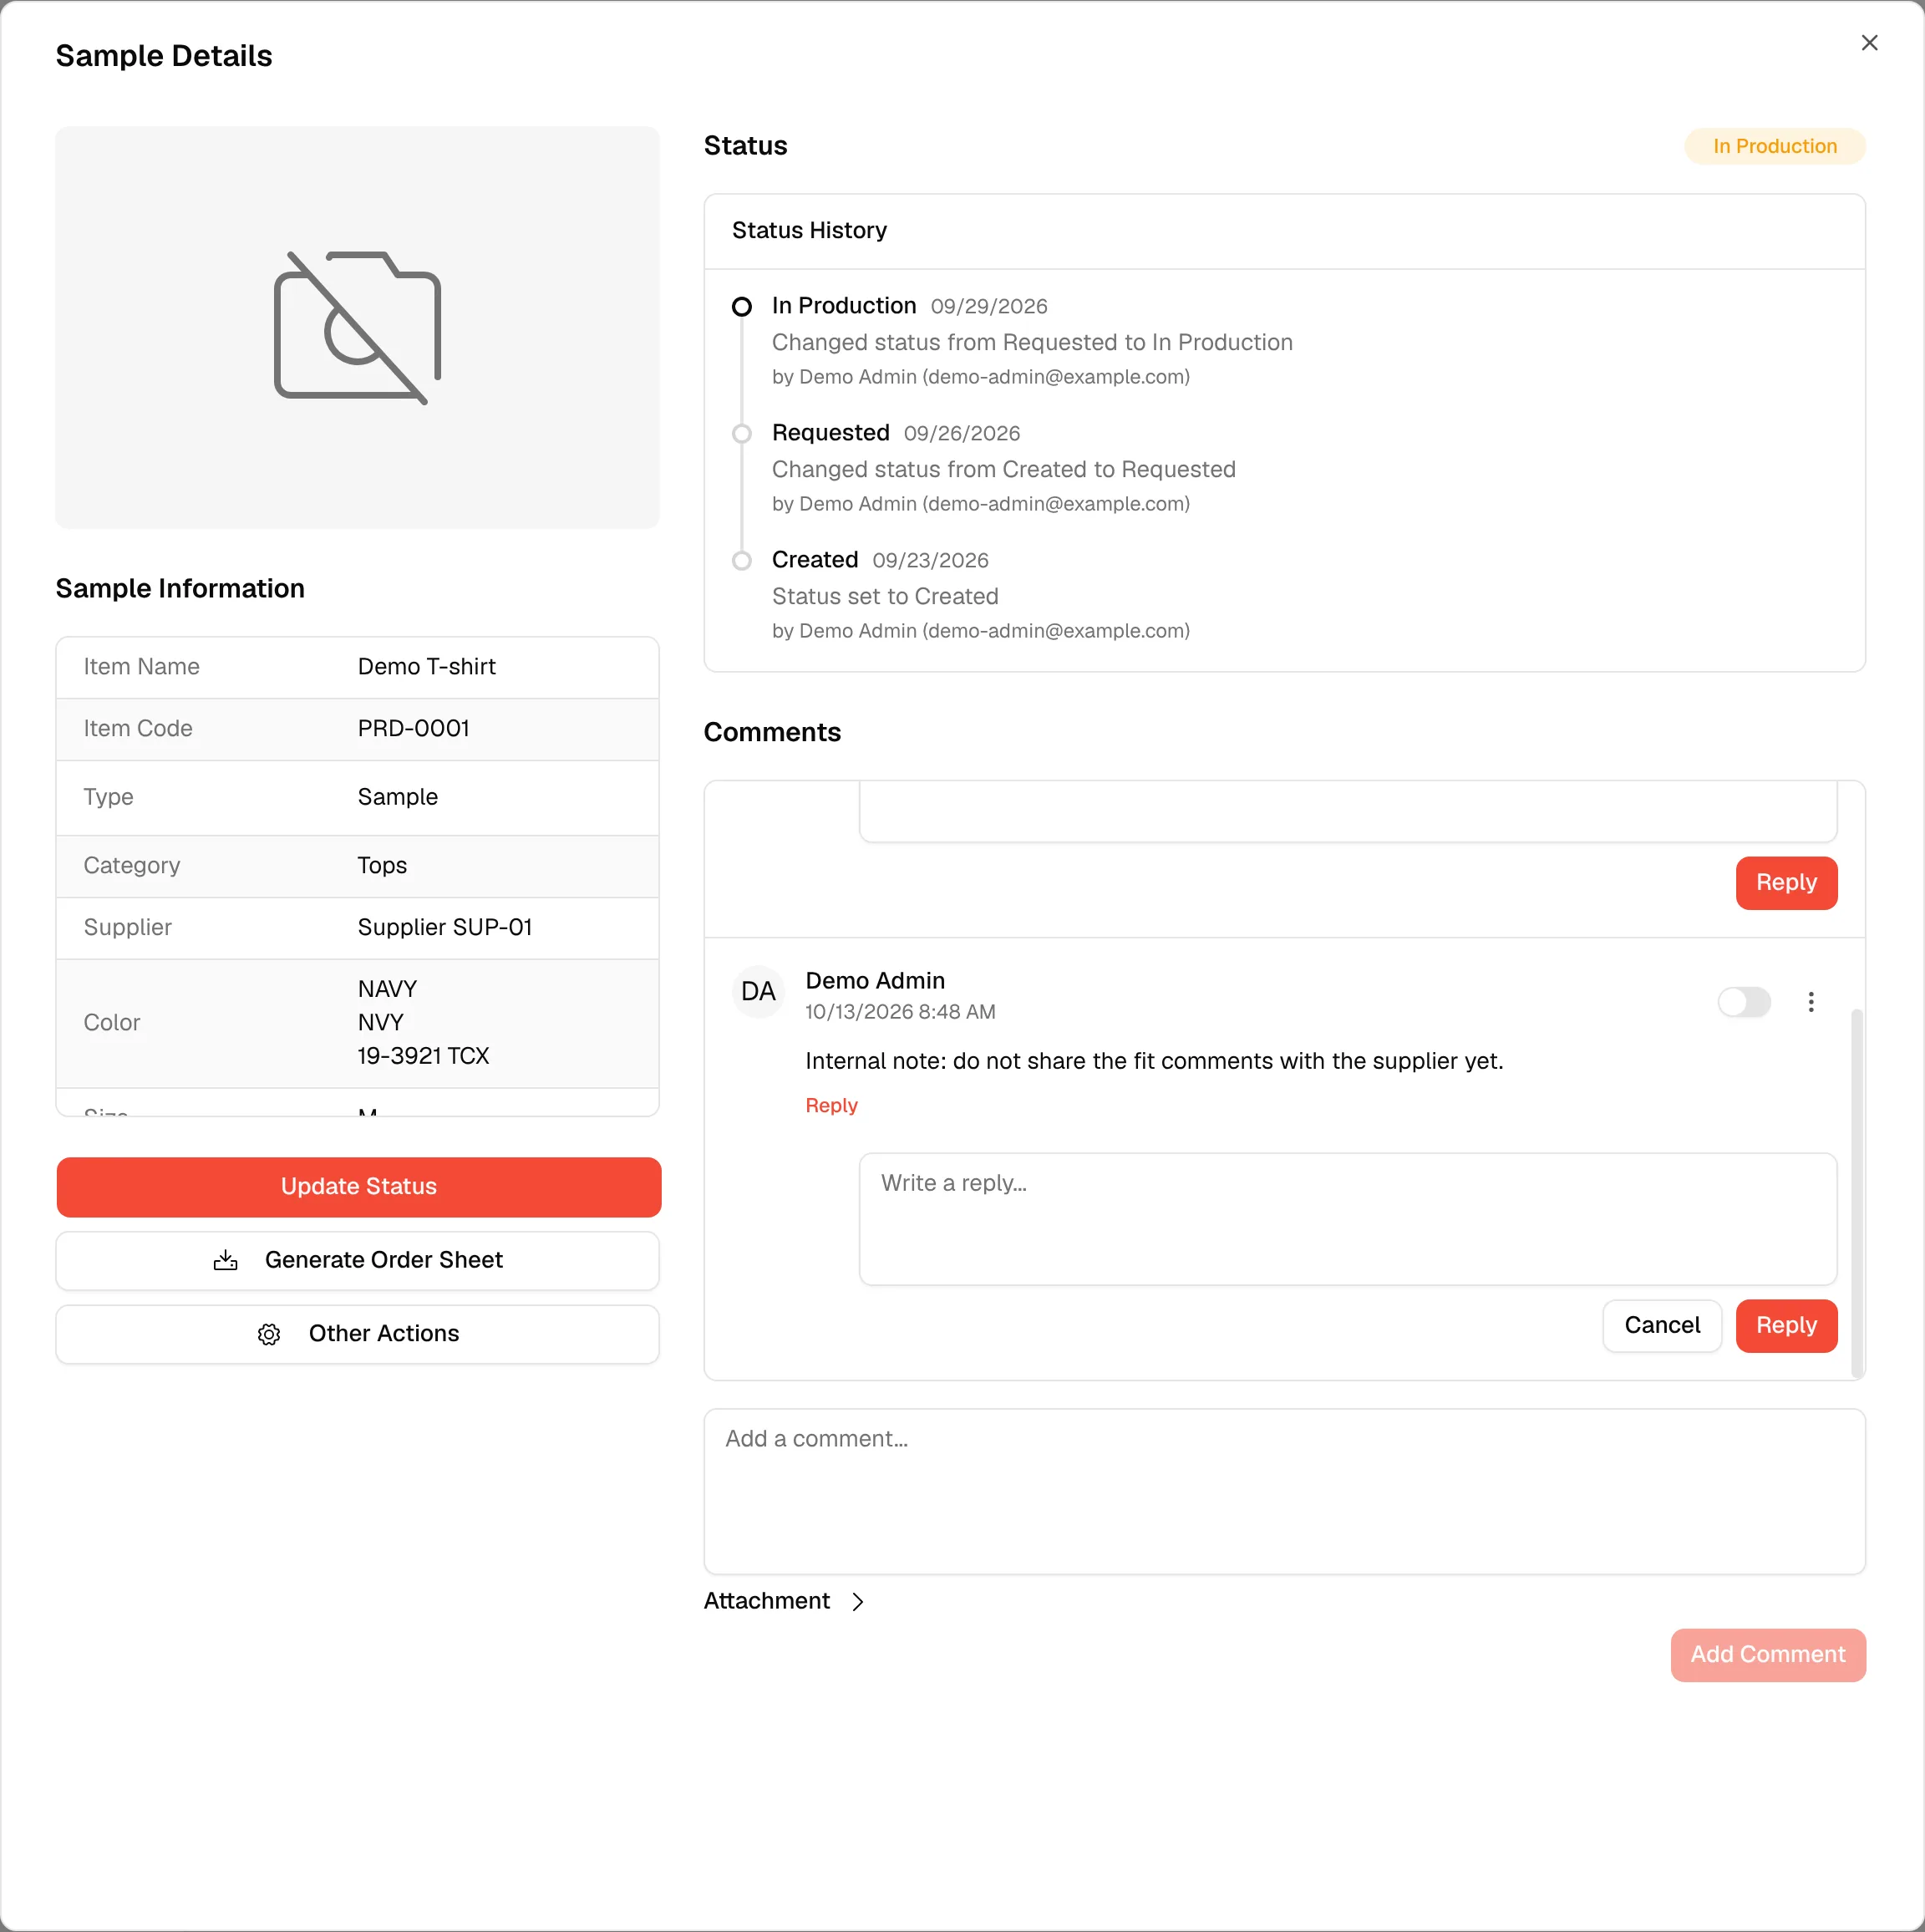
Click the three-dot menu on your own comment and choose Edit or Delete. A deleted comment stays in the list as Comment deleted. Replies have the same menu, and editing a reply has Save and Cancel.
Choose what goes on the order sheet
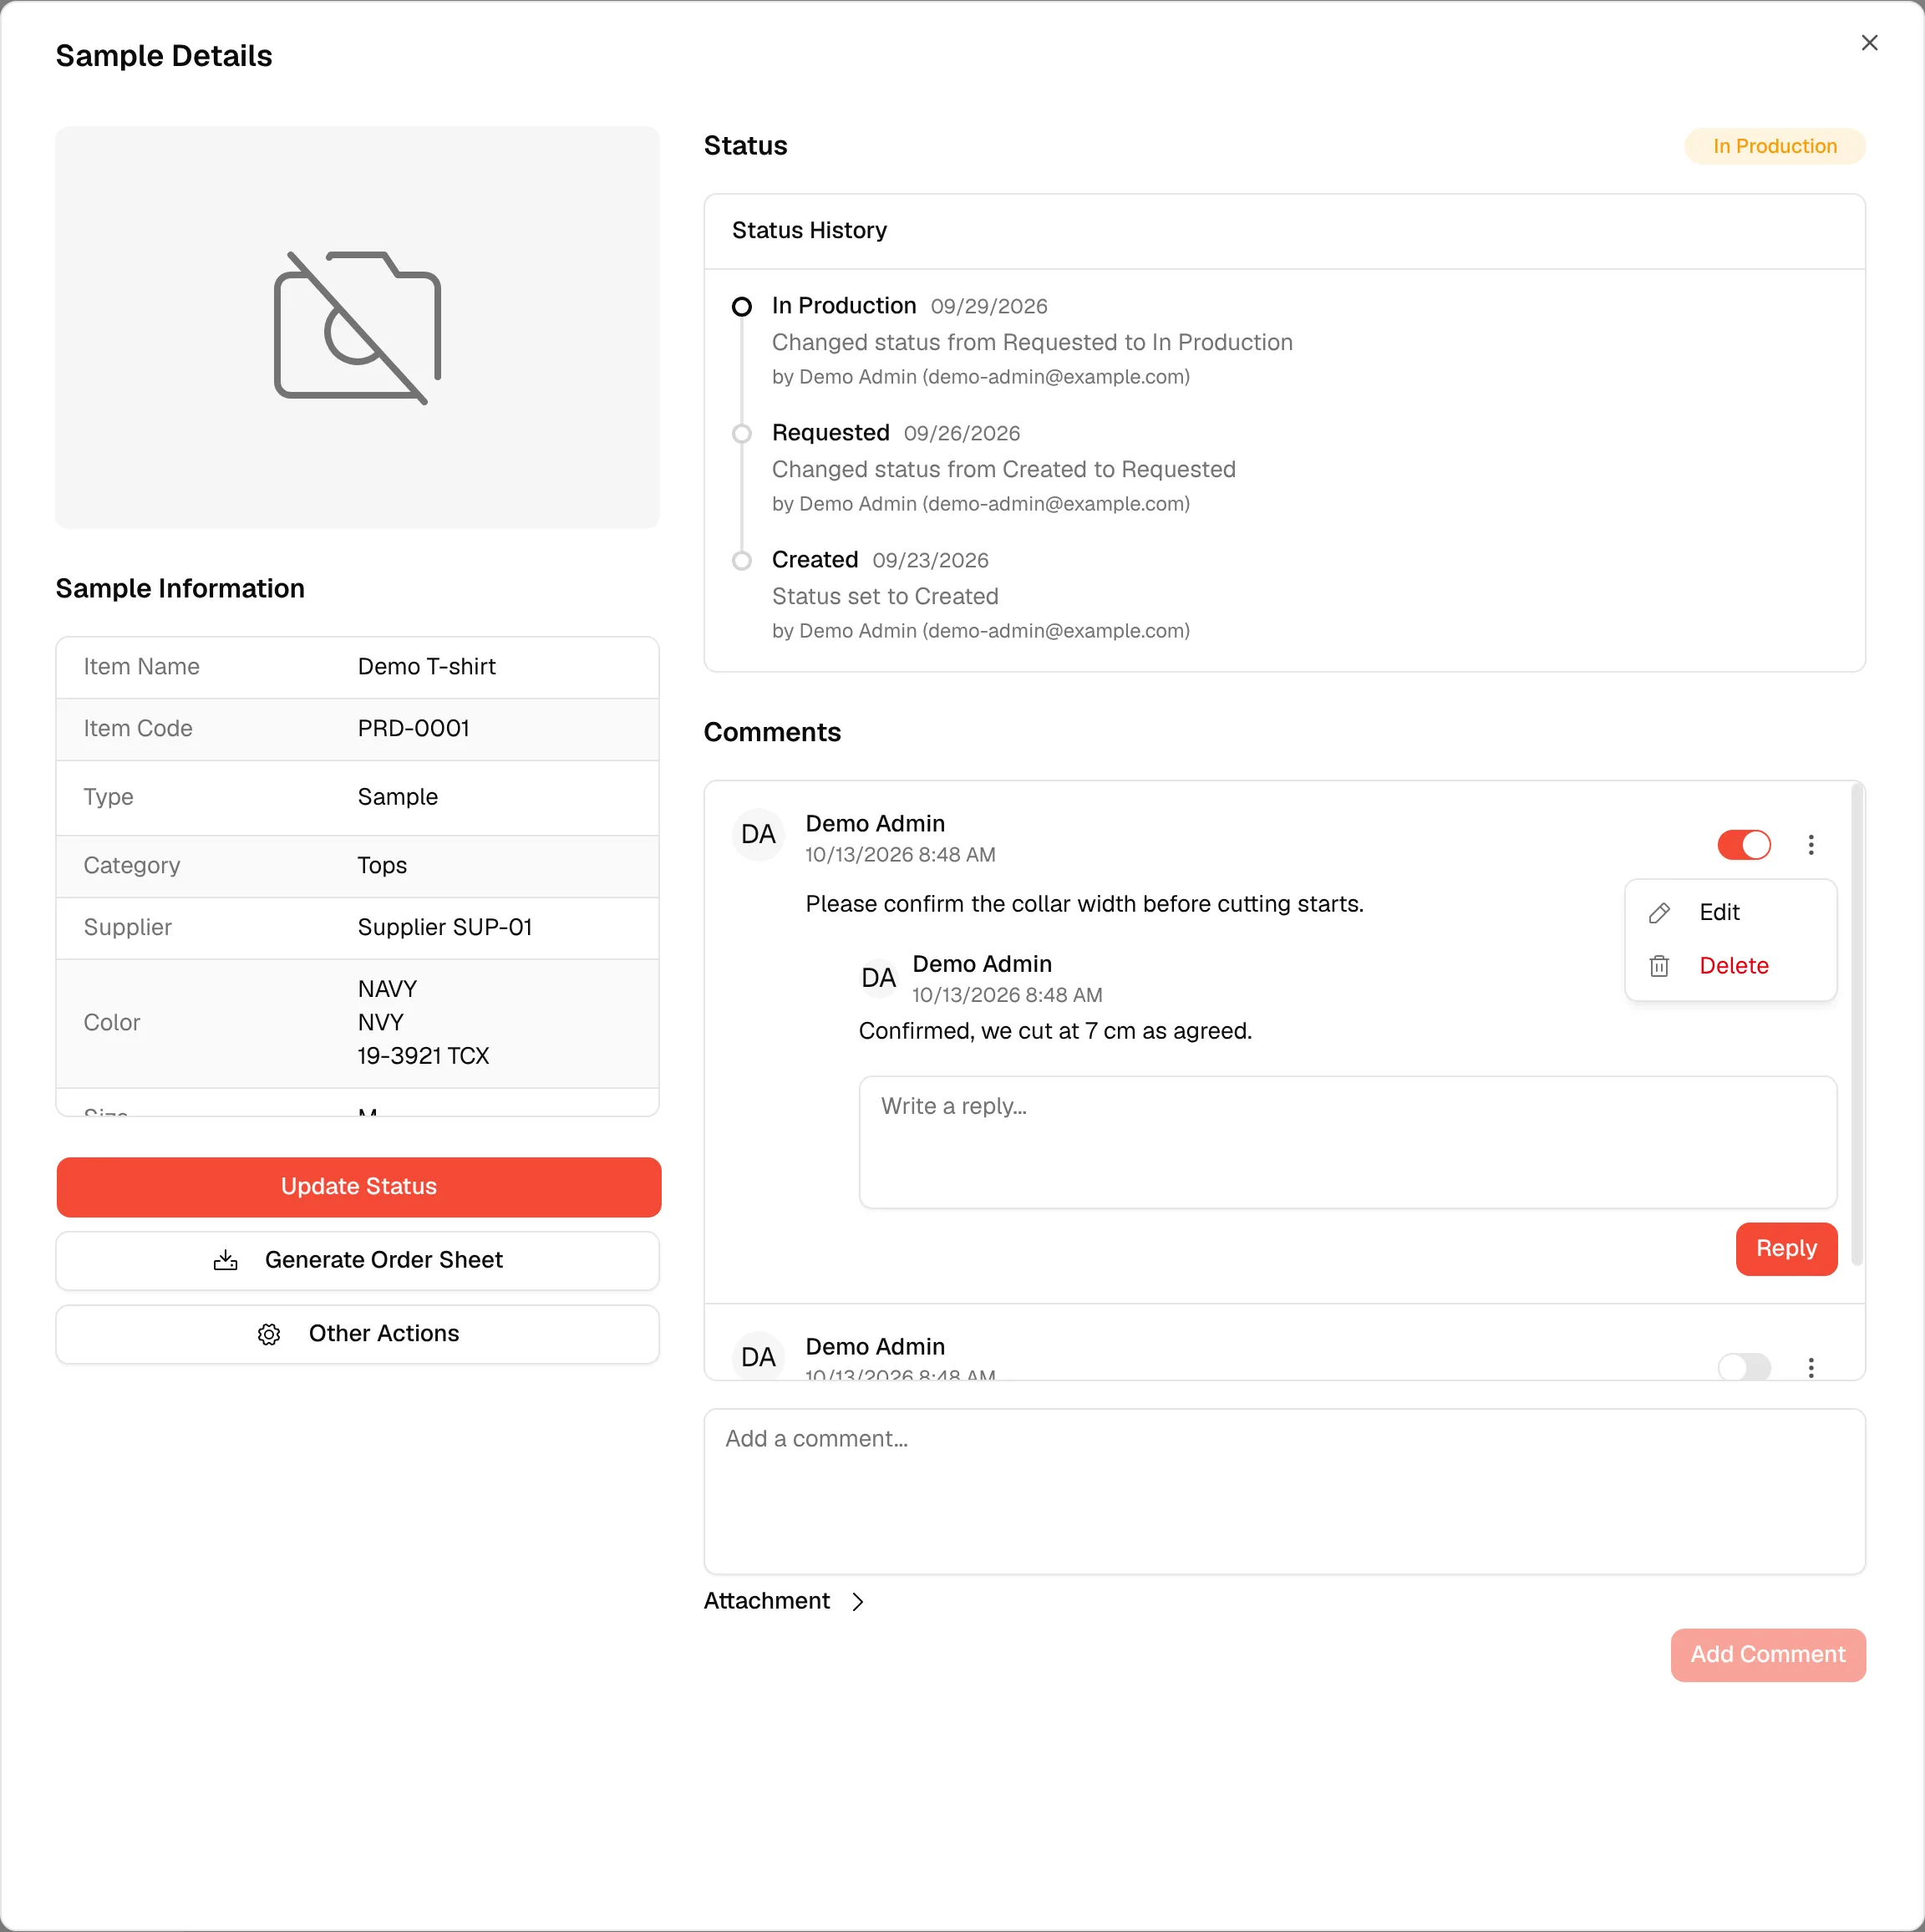
Use the switch on a comment to include or leave out the comment and its attachment in the order sheet email and in the printed order sheet. Hover the switch to read the explanation.
Note
The switch is shown to users who are allowed to update comments. Comments are included on the order sheet by default.
Export the order sheet
Click Generate Order Sheet under the sample information, then choose:
- Export to Excel to download a spreadsheet of the sample.
- Export to PDF to open the printable order sheet in a new tab. See Print the sample order sheet.
Other actions
Click Other Actions for the rest of the actions on the sample:
- Send Request emails the order sheet to your supplier. It is available only while the status is Created.
- Revoke Order Sheet Link ends the access of everyone who still has the link from a request email. A confirmation, Revoke Order Sheet Link, explains that sending the request again creates a new link. The option is grey until a link has been shared.
- Confirm ex-factory records that the sample has left the factory. It is greyed out once confirmed.
- Override health sets the health of the sample by hand.
- Supplier confirmation asks the supplier to confirm the ex-factory date, or records their answer.
Confirm ex-factory and Supplier confirmation appear only for users who have those permissions. Each action is explained in Sampling.