
Step 9 of 12 in Stock materials and finished goods
Inventory stock allocation
The Stock Allocation dashboard provides a real-time overview of how inventory is reserved and distributed.
Under review. This page is published while we check it against the live app, so some details may have changed.
The Stock Allocation dashboard provides a real-time overview of how inventory is reserved and distributed. It separates auto-reserved stock (triggered by production), manual allocations, and total allocated units, alongside visibility into incoming stock. Key stock statuses—available, reserved, critical, and ready to pick—are clearly displayed, supported by performance indicators such as allocation rate, fulfillment rate, and pending actions. Users can manually allocate stock, scan barcodes, filter data, and manage allocation queues efficiently.
InventoryStock Allocation
Permission: VIEW_STYLE_INVENTORY
The page has three parts: the dashboard cards at the top, the Allocation Queue tab and the Picking tab.
Read the dashboard cards
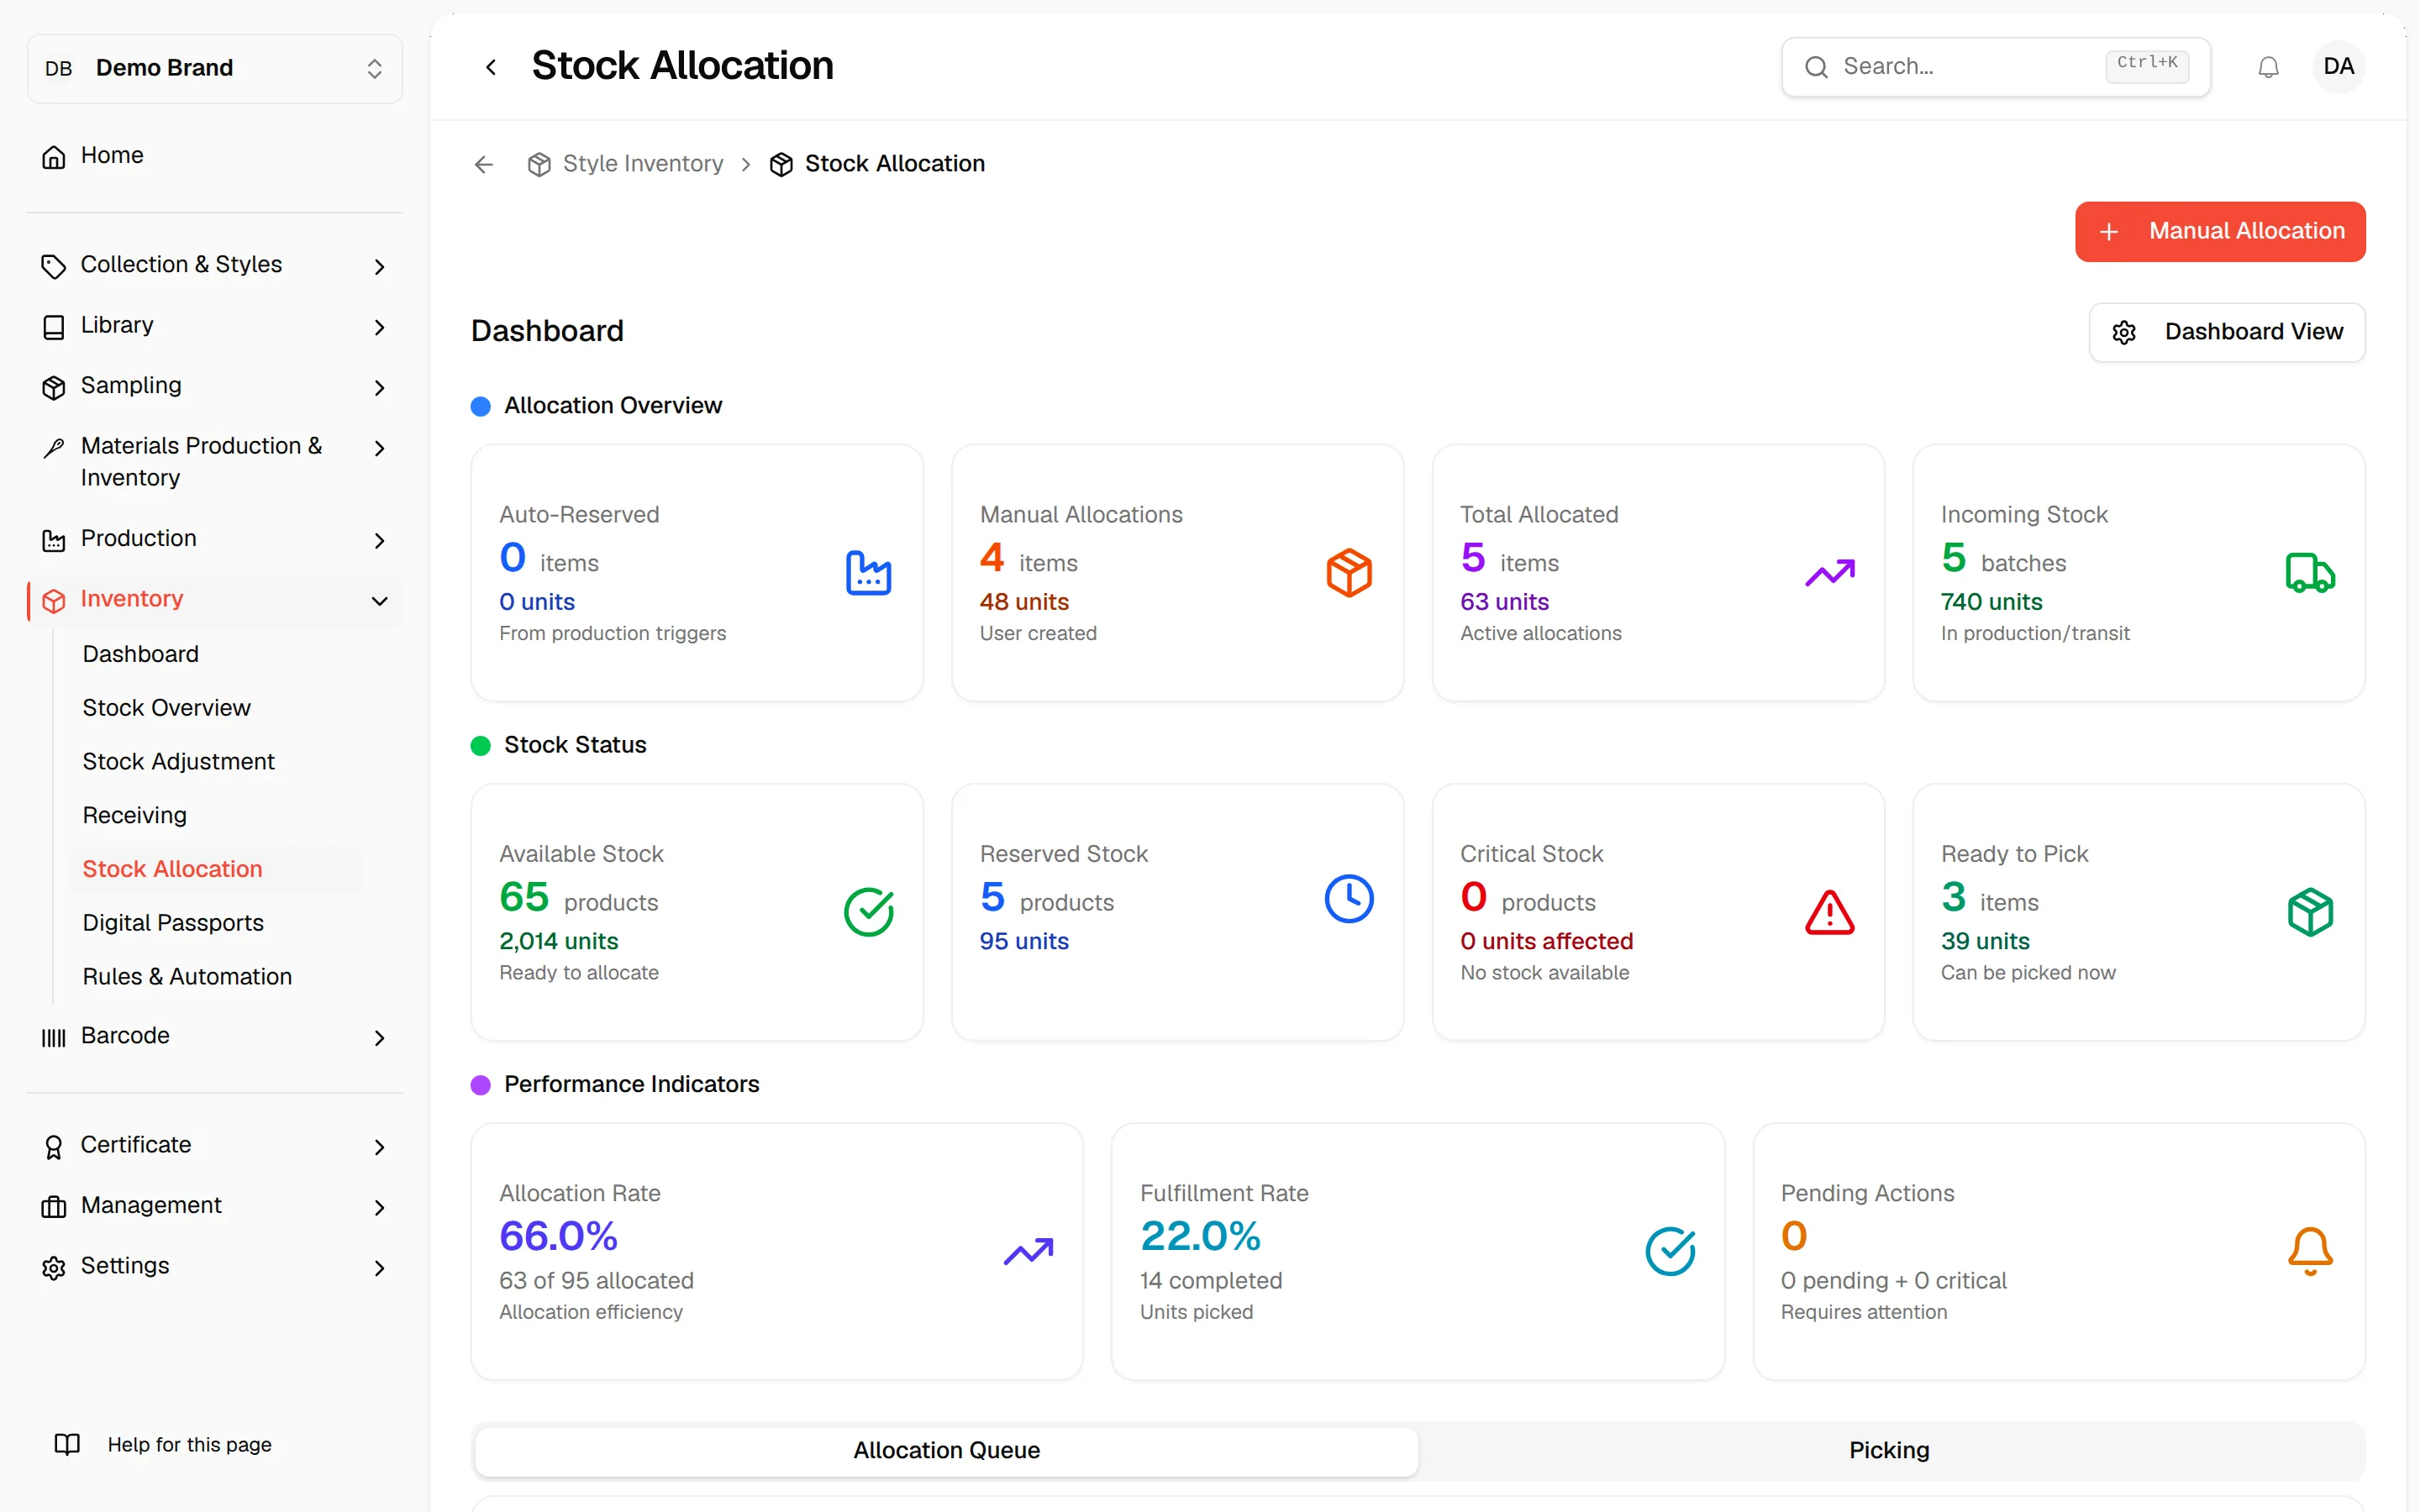
- Allocation Overview: Auto-Reserved (from production triggers), Manual Allocations (user created), Total Allocated (active allocations) and Incoming Stock (in production or transit).
- Stock Status: Available Stock (ready to allocate), Reserved Stock (products and units), Critical Stock (no stock available) and Ready to Pick (can be picked now).
- Performance Indicators: Allocation Rate, Fulfillment Rate and Pending Actions.
Click Dashboard View to choose which of the three rows (Allocation Overview, Stock Status, Performance) to display.
Work in the allocation queue
Open the Allocation Queue tab. The heading shows how many allocations match your search and filters.
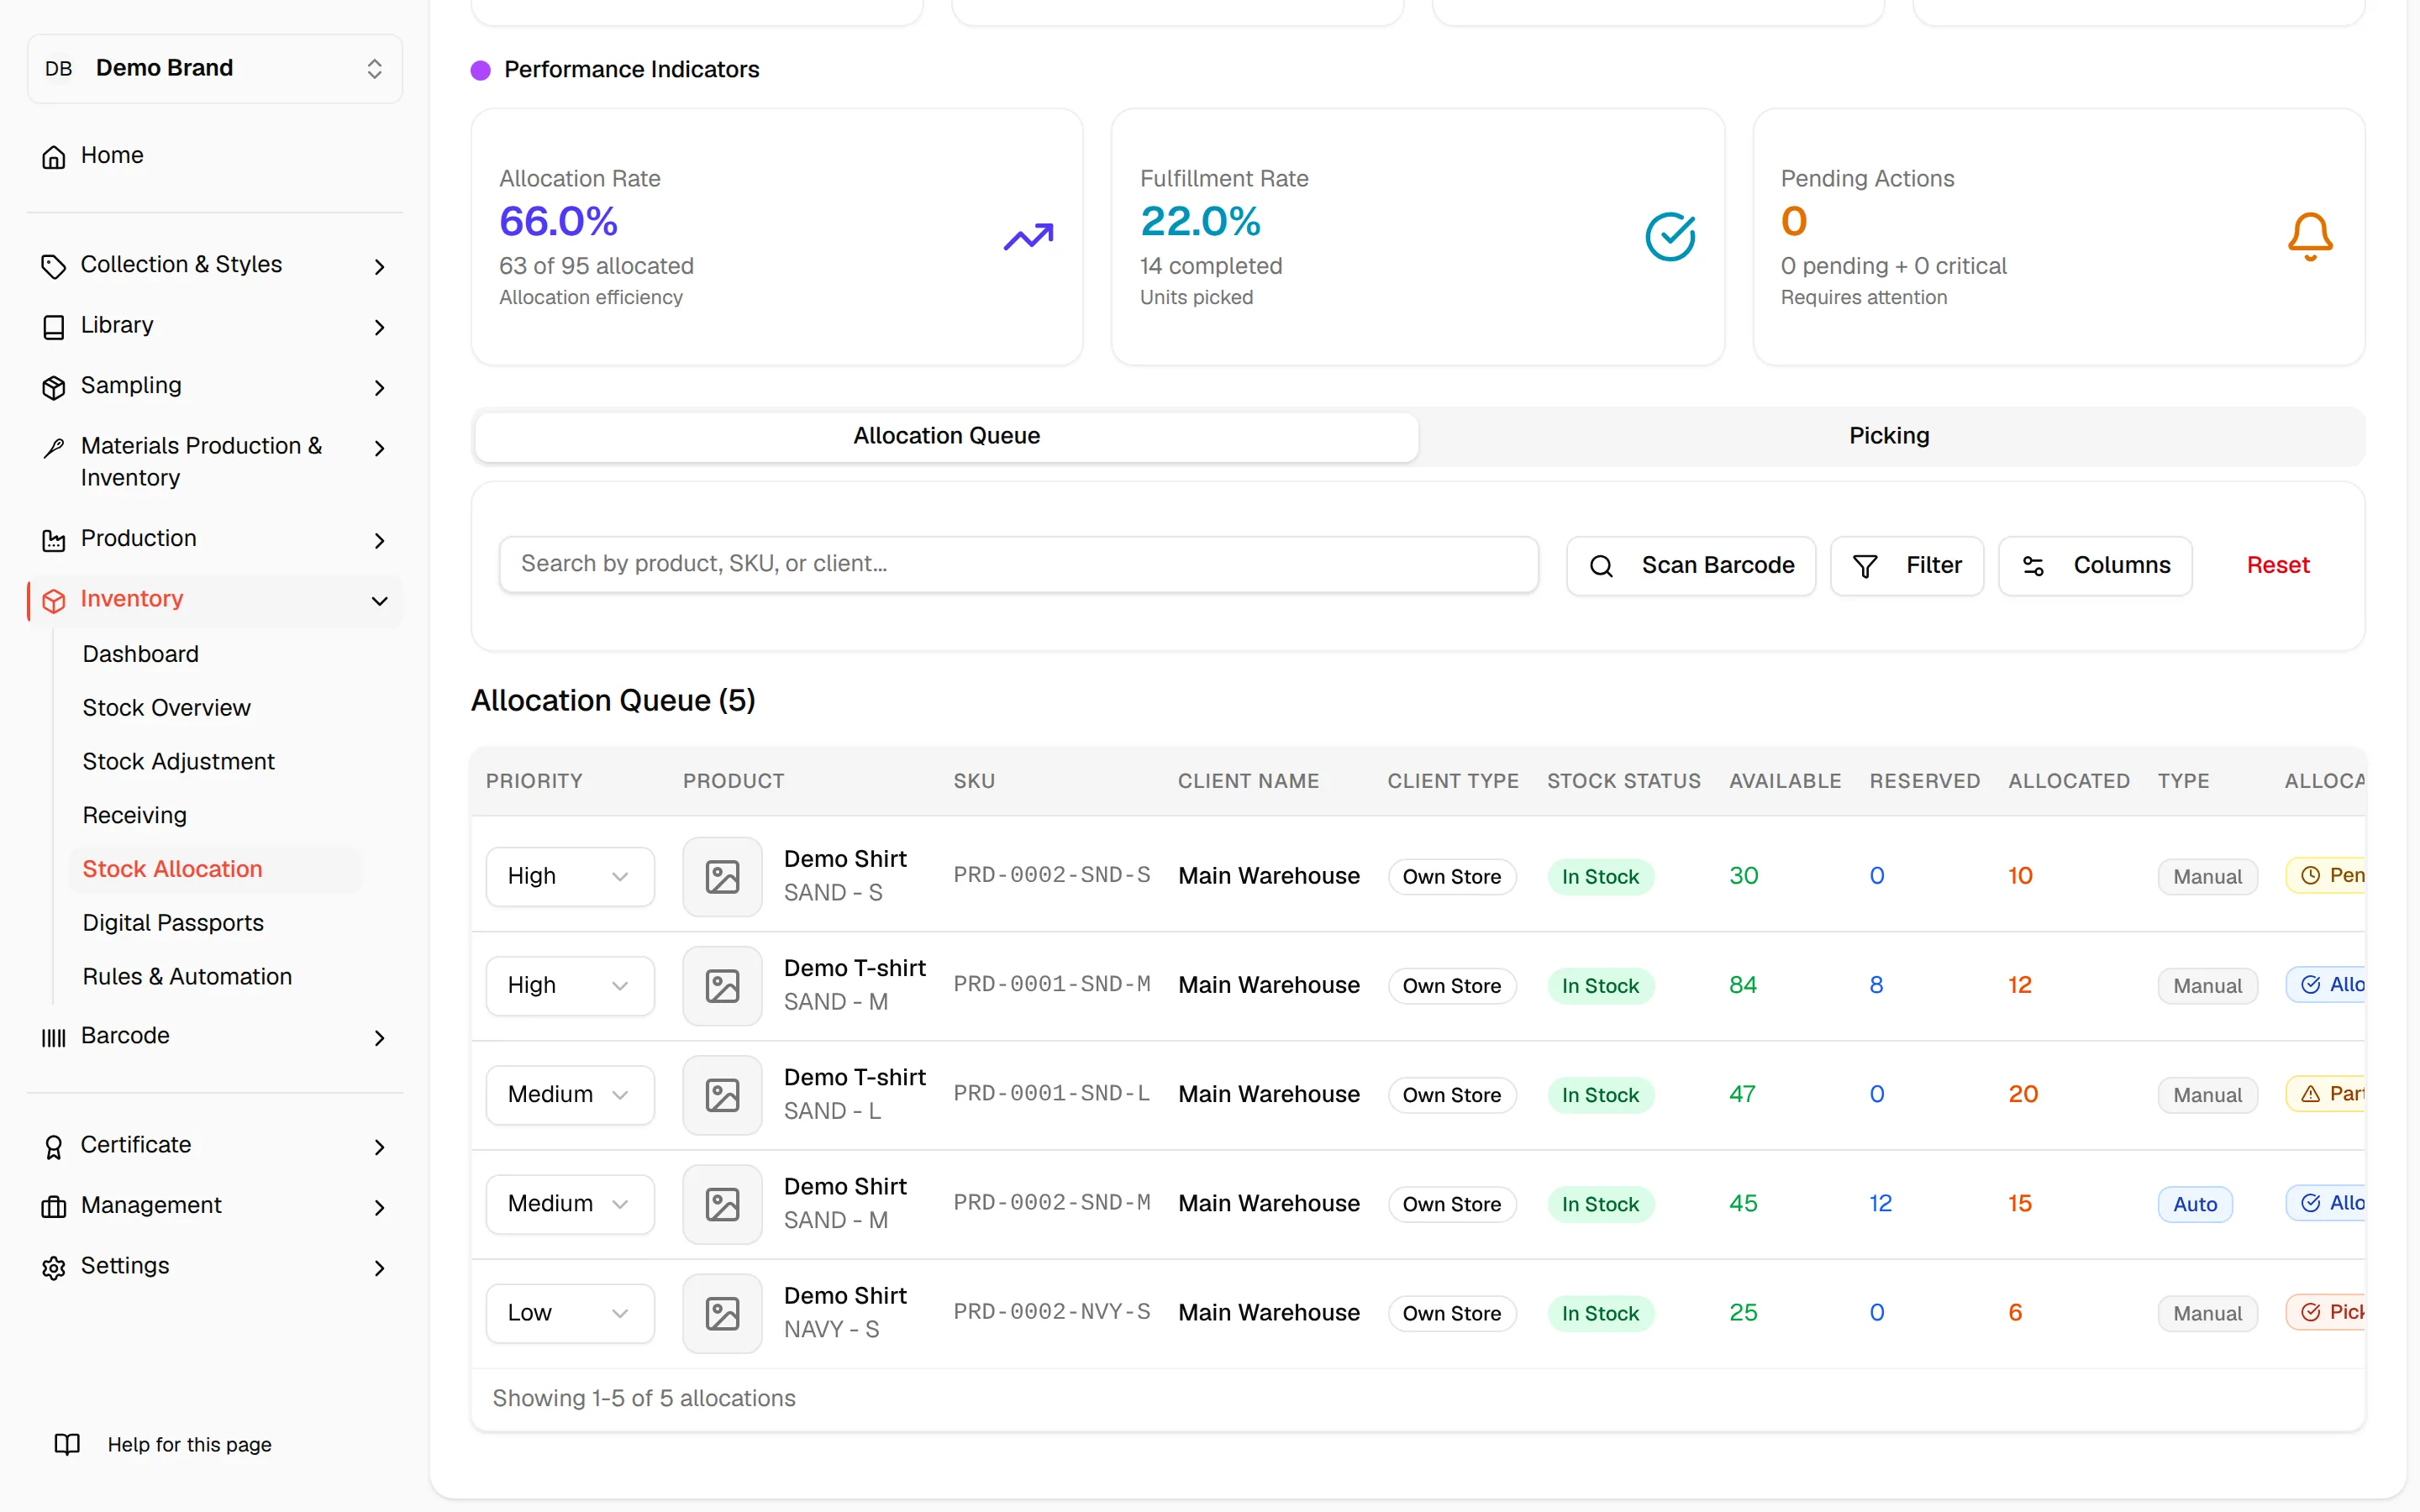
The queue has these columns: Priority, Product, SKU, Client Name, Client Type, Stock Status, Available, Reserved, Allocated, Type (Auto or Manual), Allocation Status, Est. Picked and Actions. Use the columns button to choose which ones to show.
- Search with Search by product, SKU, or client....
- Click Scan Barcode to filter the queue by the SKU of a scanned item.
- Click Filter to narrow by Priority, Style, Style Code, Client Name, Client Type (Wholesale, Own Store, Shopify), Allocation Status (Pending, Allocated, Partially Allocated, Picked, Partially Picked, Cancelled), Type (Automatic, Manual) or Stock Status (In Stock, Low Stock, Out of Stock, Overstock).
- Click Reset to clear everything.
When the queue is empty you see No allocations found, with Create your first allocation to get started or, if filters are on, Try adjusting your filters.
Row actions
Open the row's actions menu:
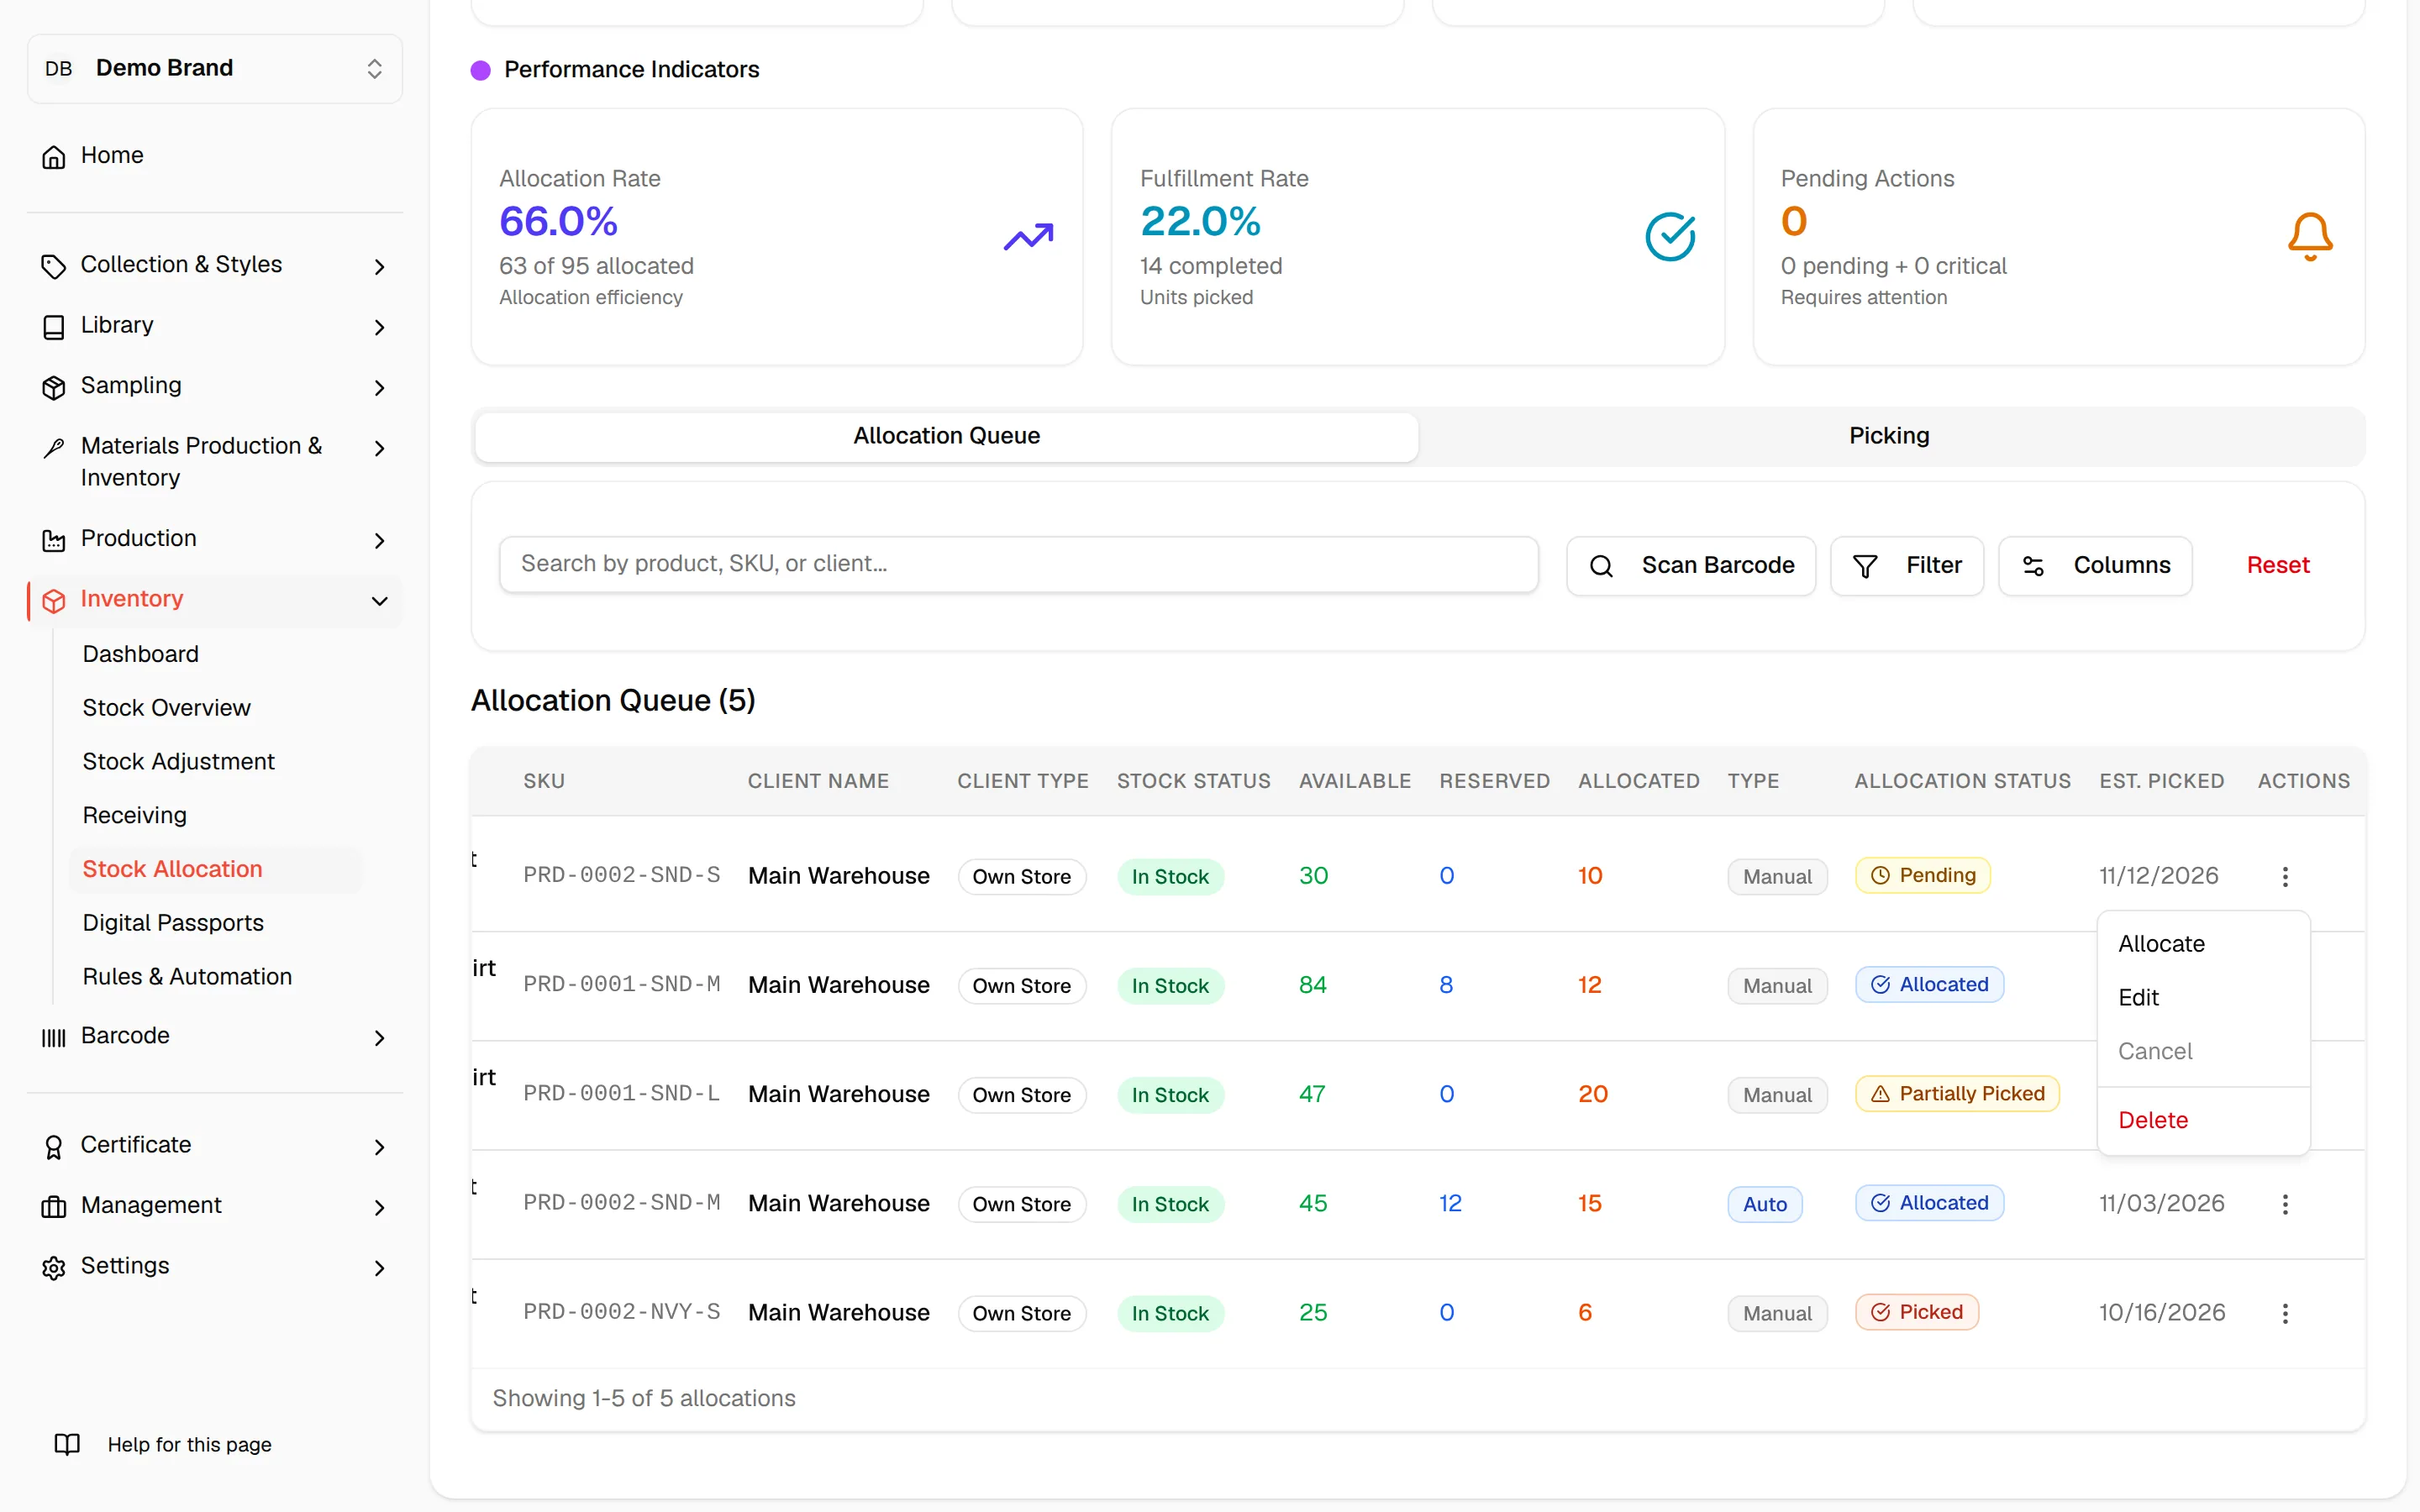
- Allocate: opens Create Manual Allocation with that product selected. Disabled when the product has neither available nor reserved stock.
- Edit: opens Edit Allocation.
- Cancel: cancels the allocation. Only available while the status is Allocated.
- Delete: asks you to confirm in Delete Allocation. Unclaimed units return to available stock and any unclaimed Digital IDs are removed. This cannot be undone.
Create a manual allocation
Click "Manual Allocation"
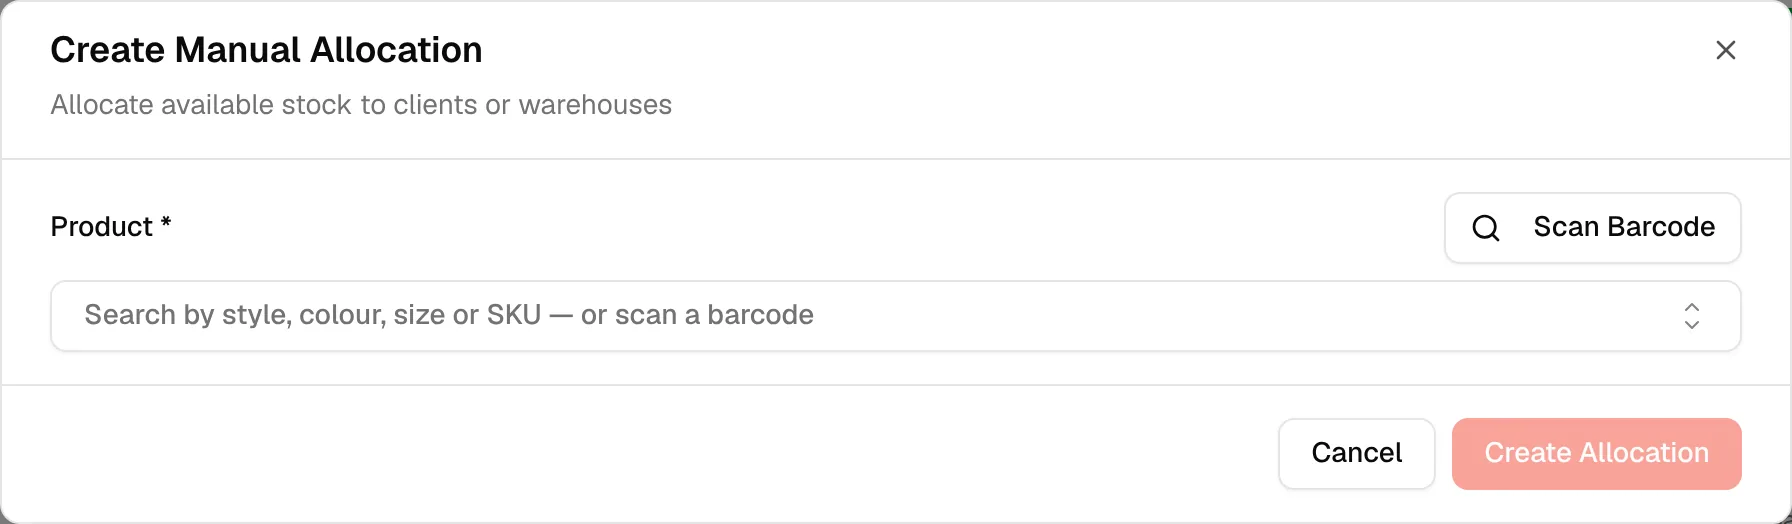
Click Manual Allocation at the top right of the page.
Select the product
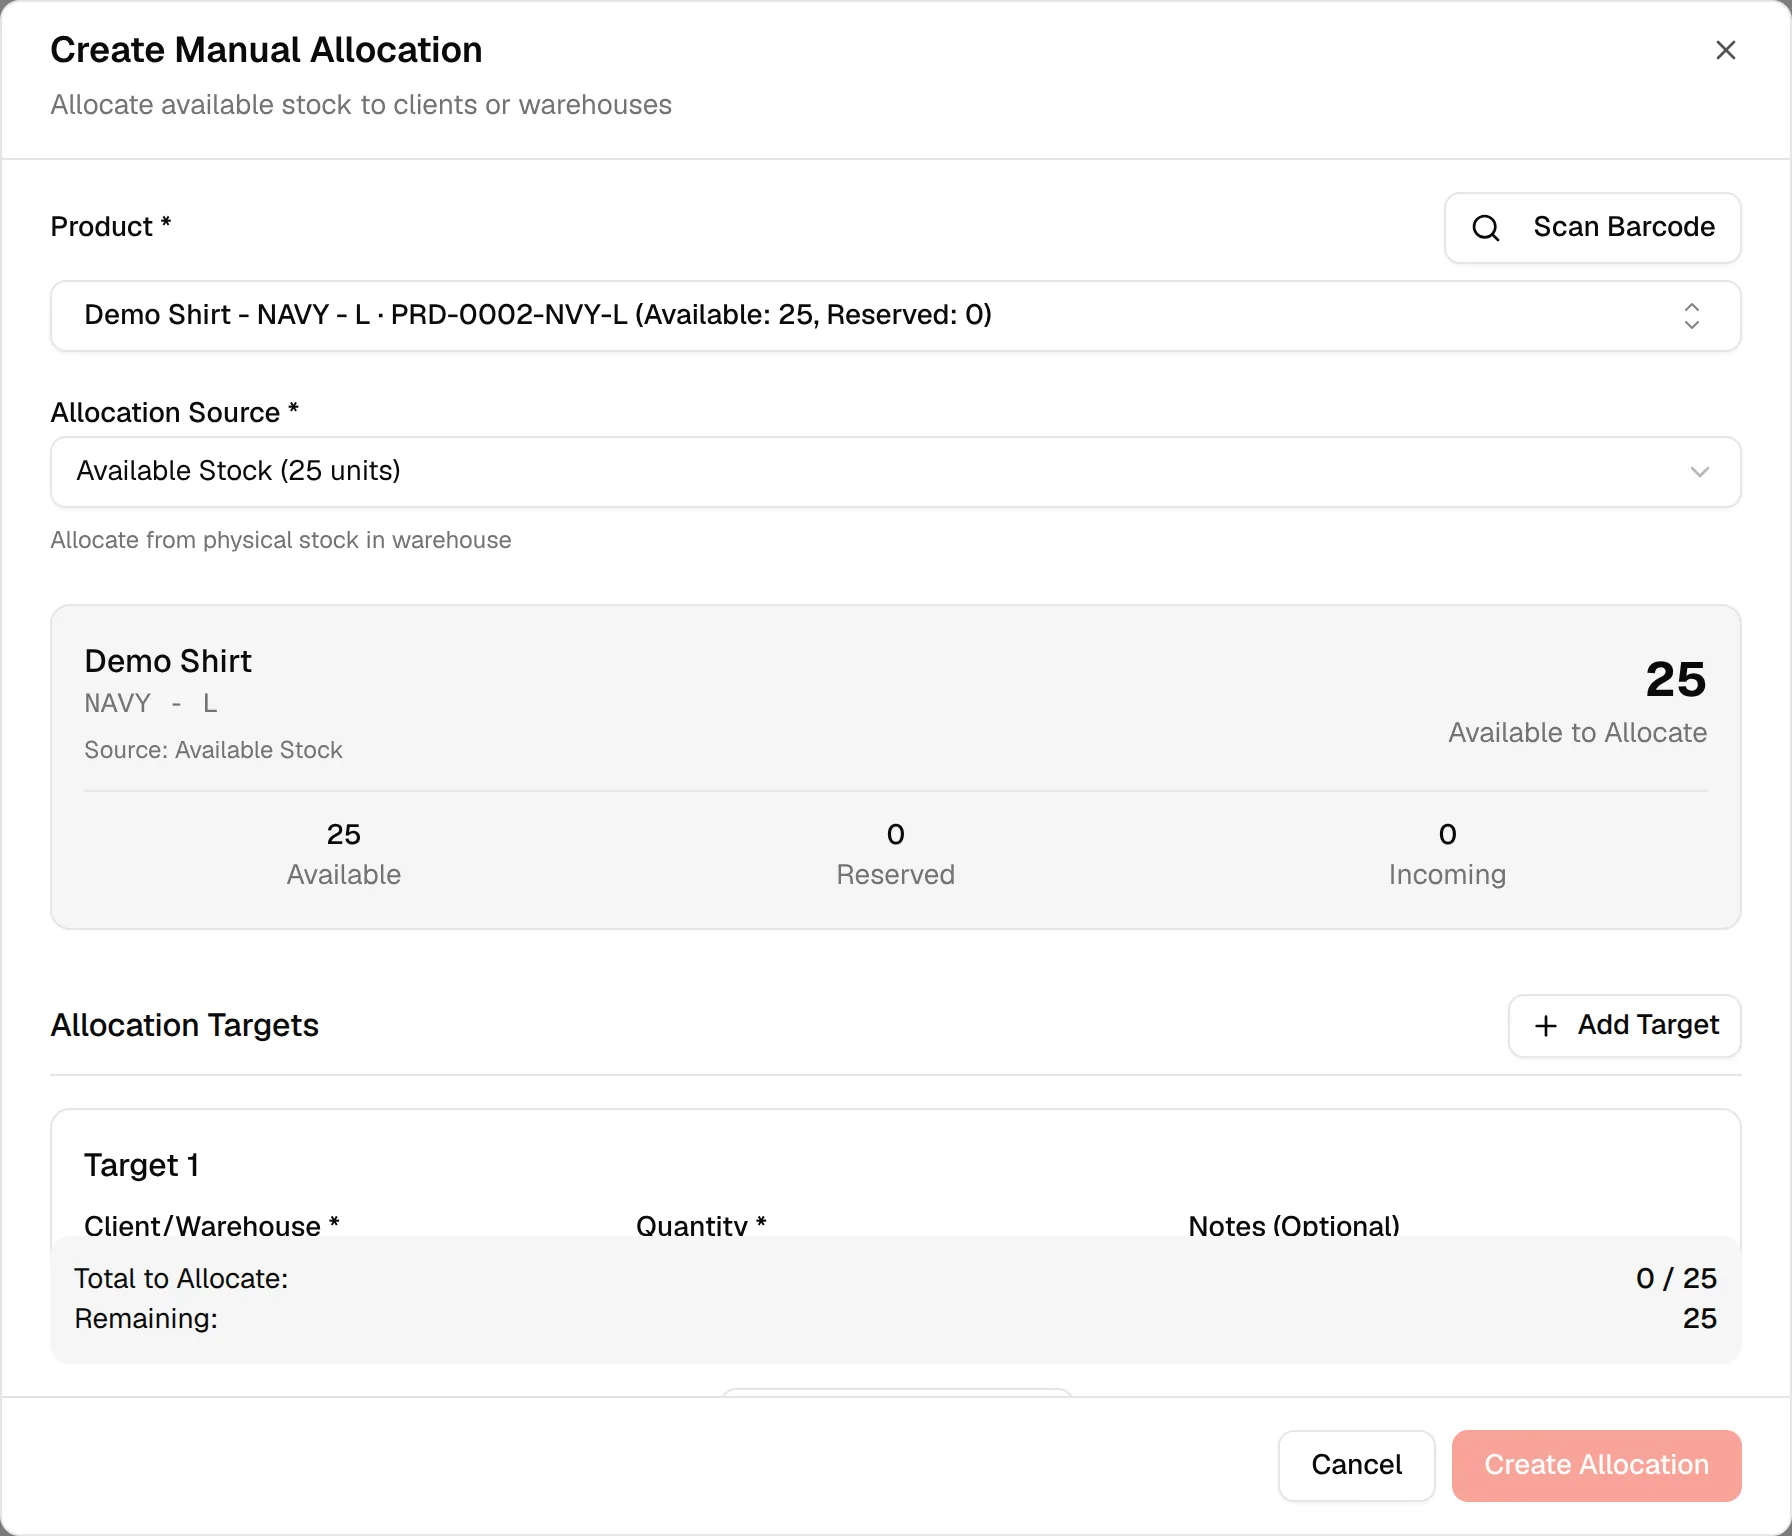
In Product *, search by style, colour, size or SKU, or click Scan Barcode to scan the item.
Select the allocation source
In Allocation Source *, select Available Stock (physical stock in the warehouse) or Reserved Stock (auto-reserved production stock). The units in each are shown.
Note
With Reserved Stock you can only allocate to targets the stock is already reserved for. The valid targets are listed under Valid Targets for Allocation:.
Select the target
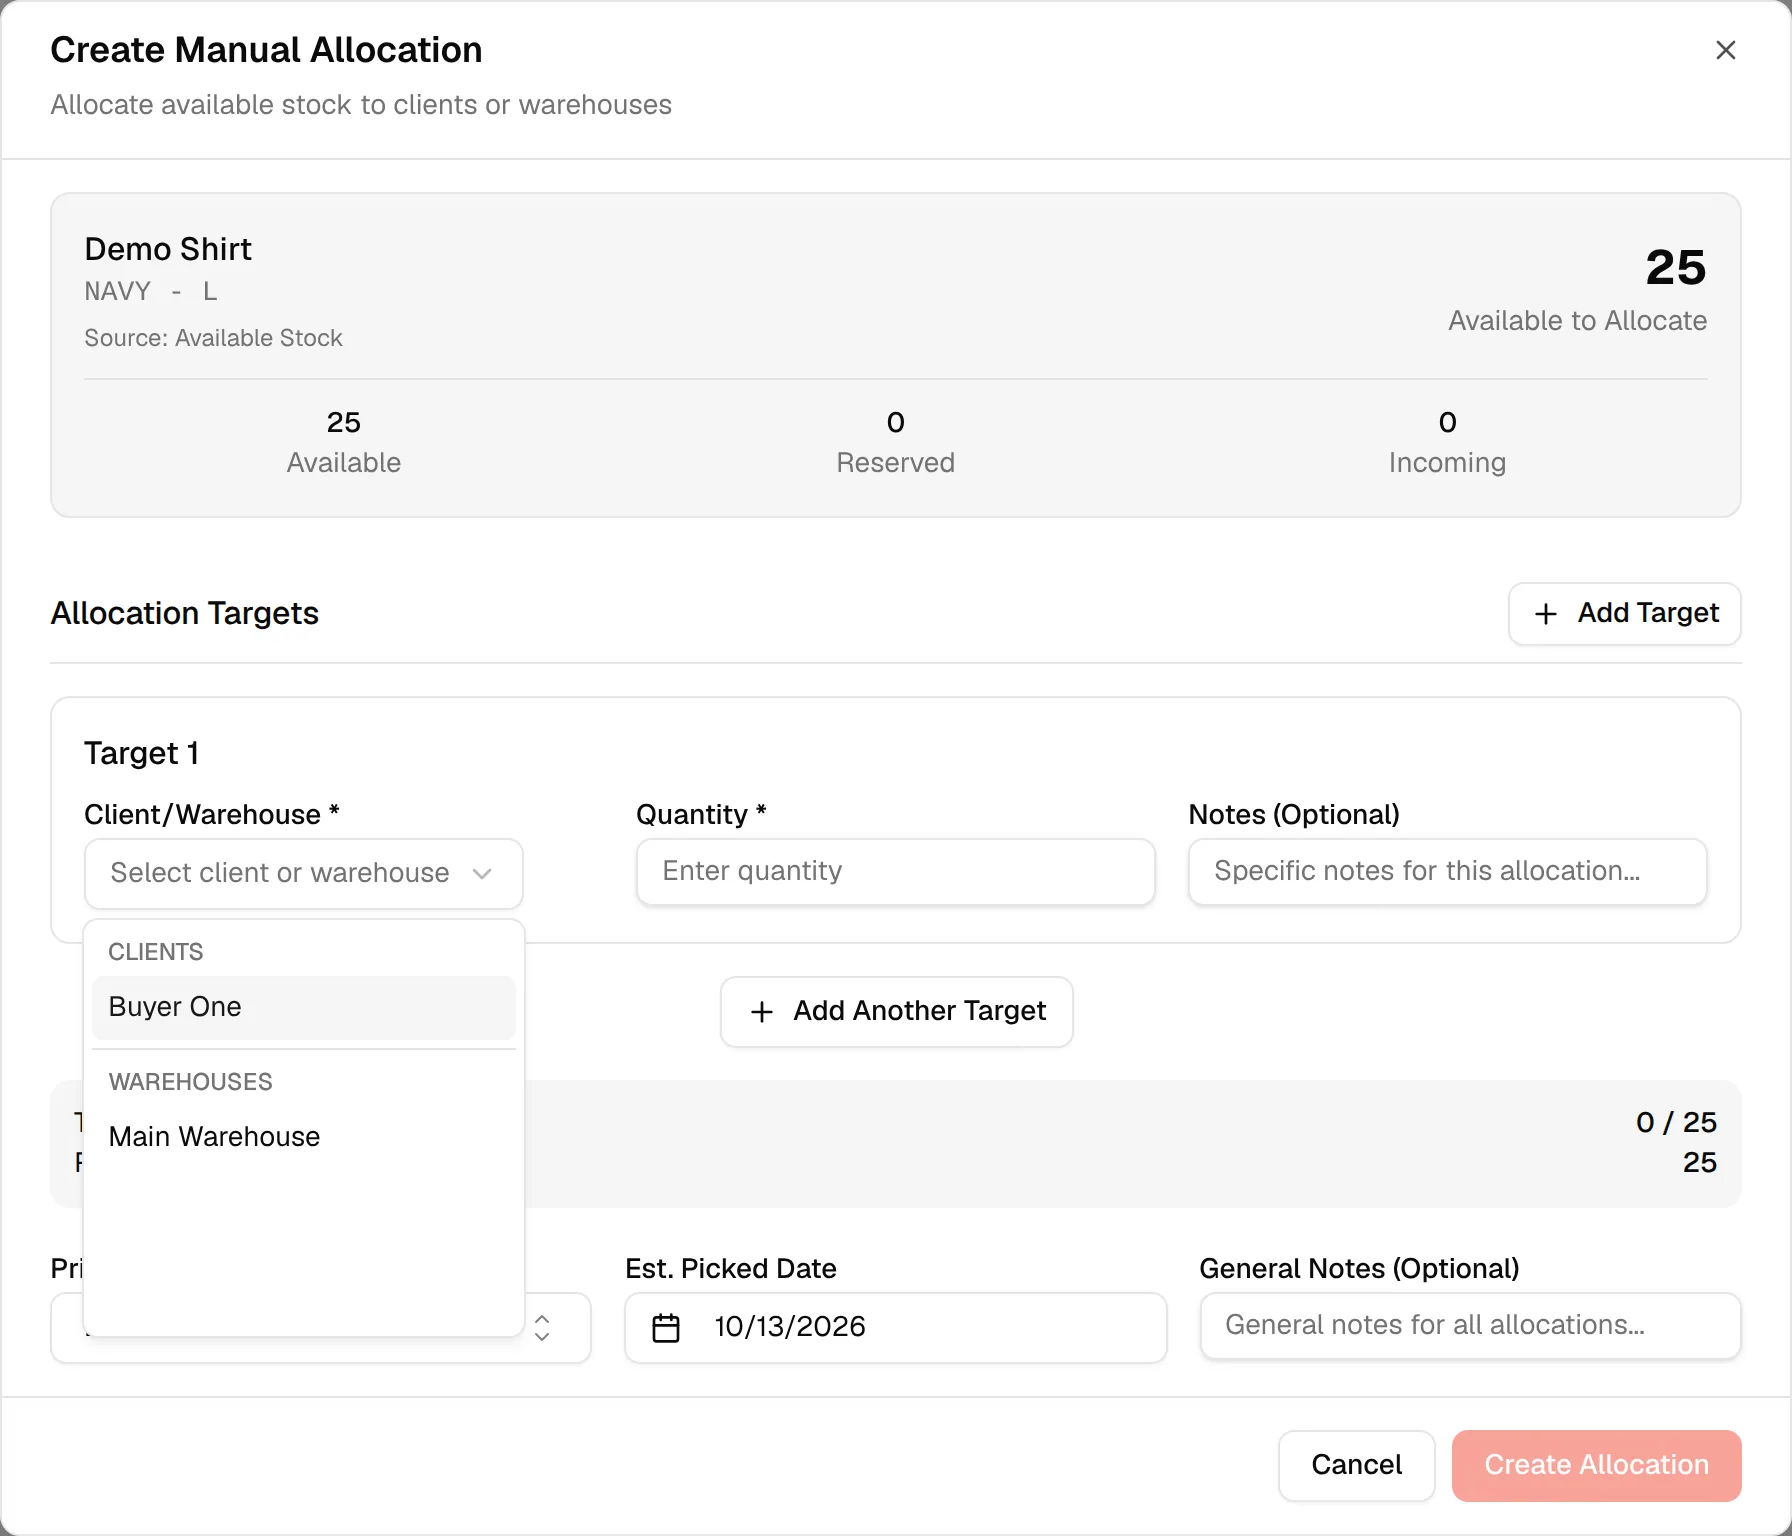
In Client/Warehouse *, select a client under Clients, a warehouse under Warehouses, or Shopify under Sales Channel.
Note
Shopify only appears when Shopify allocation is turned on for your brand, and it is disabled until the style is linked to Shopify (Link this style to Shopify first).
Enter the quantity
In Quantity *, type how many units to allocate. Add Notes (Optional) for this target if you need to.
Add more targets (optional)
Click Add Target or Add Another Target to split the stock between several clients or warehouses. Total to Allocate and Remaining update as you go. You cannot allocate more than the units available to allocate.
Select the priority
In Priority *, select an existing priority or type a new one to create it. You can delete a priority from the list.
Set the estimated pick date (optional)
In Est. Picked Date, click Pick a date. Dates in the past are disabled.
Add general notes (optional)
In General Notes (Optional), add notes that apply to all targets.
Choose whether to issue Digital IDs (Shopify only)
When Shopify allocation is on, turn on Create claimable digital ID to issue one claimable Digital ID per allocated unit. Stock syncs to Shopify either way. Leave it off to track inventory without issuing Digital IDs to buyers.
Click "Create Allocation"
Click Create Allocation. The button stays disabled until a product, a priority and a target with a quantity are set, and the quantities fit.
The allocation appears in the Allocation Queue.
Edit an allocation
In Edit Allocation, you can change the Priority, the Est. Picked Date and the General Notes. The product, client and quantity are shown for reference. Click Save Changes to save.
Pick allocated stock
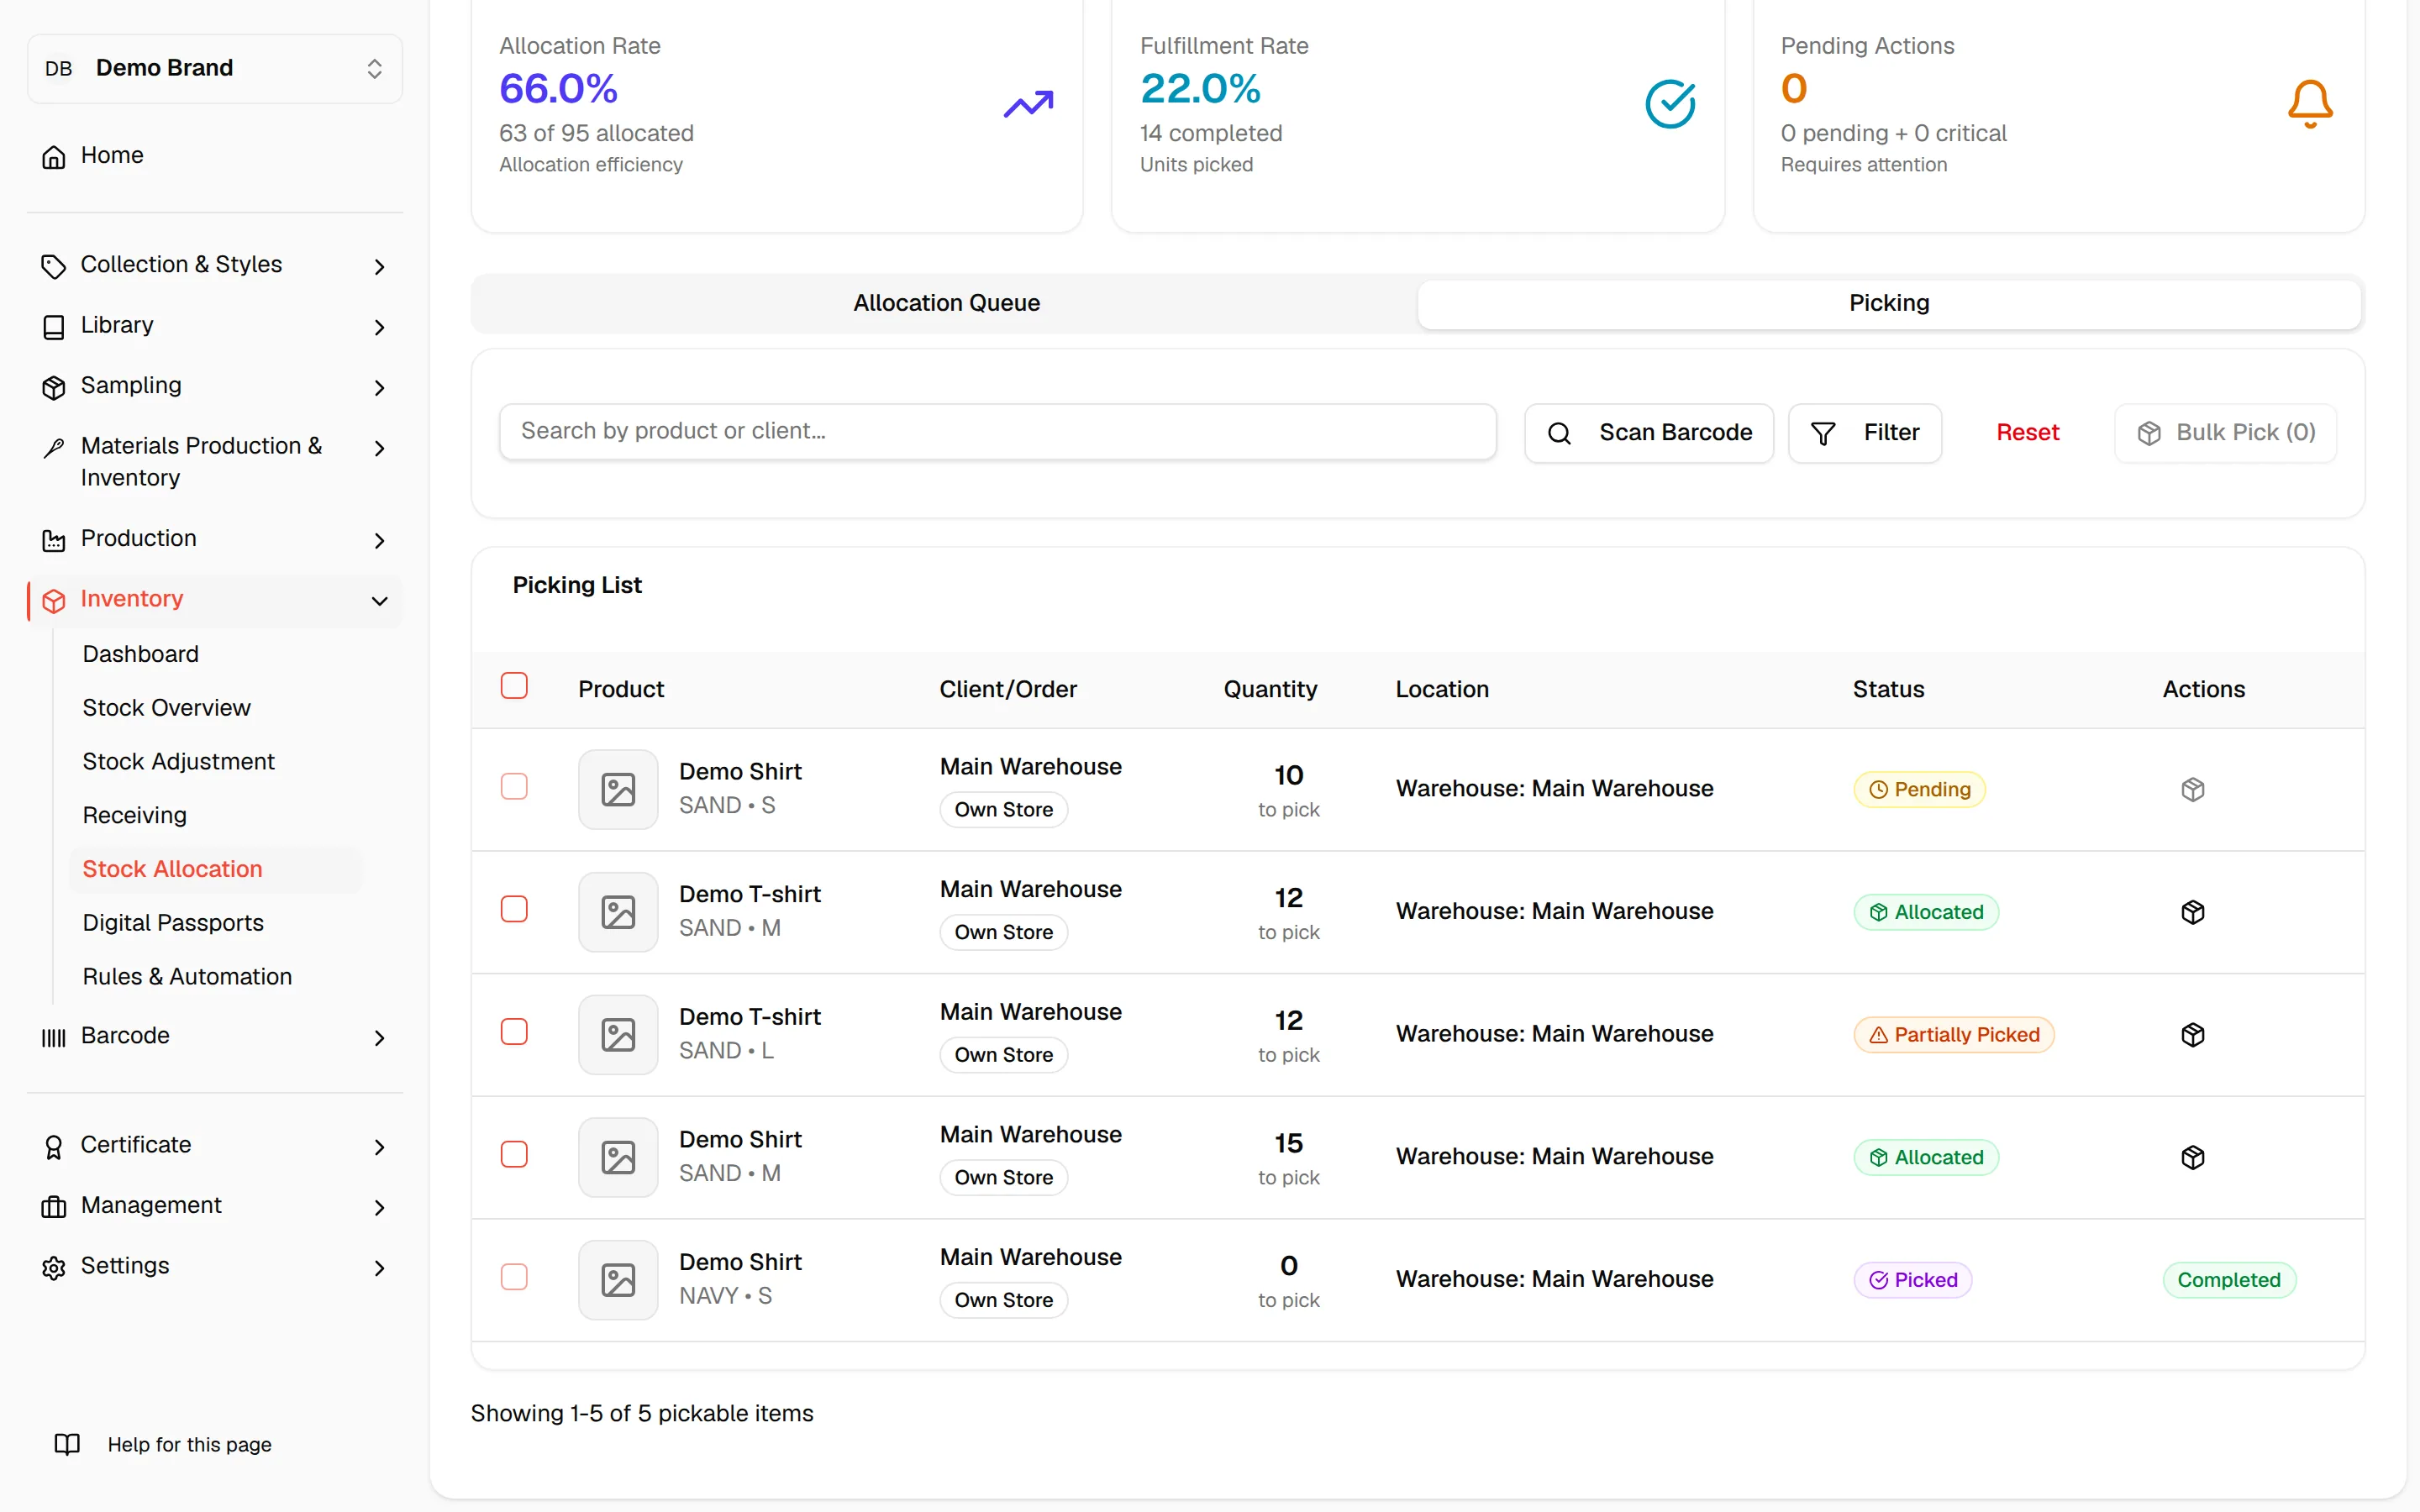
Open the Picking tab to see the Picking List with the columns Product, Client/Order, Quantity, Location, Status and Actions. Search with Search by product or client..., scan a barcode to filter by SKU, filter as in the queue, and click Reset to clear.
Choose an item
Click the pick icon on a row. Only Allocated (ready to pick) and Partially Picked items can be picked. Shopify allocations are fulfilled through the storefront and cannot be picked here.
Enter the quantity
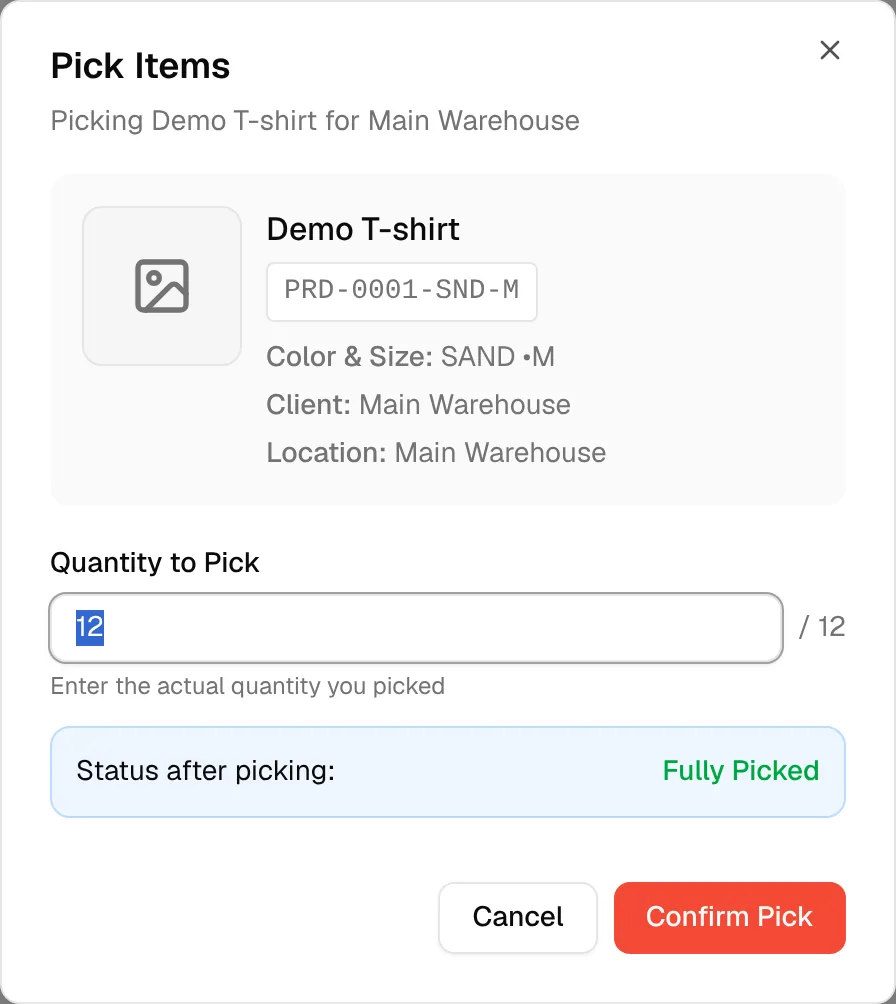
In Pick Items, type the Quantity to Pick, the actual quantity you picked. The dialog shows the Status after picking: Fully Picked or Partially Picked.
Click "Confirm Pick"
Click Confirm Pick. Completed rows show Completed.
To pick several items at once, check them in the list, click Bulk Pick (n), enter a quantity for each item in Bulk Pick Items, and click Pick All Items (n).