
Step 12 of 15 in Publish a Digital ID and product passport
Generate your barcode
Generating style barcode labels allows users to convert product or style data into scannable barcode formats using predefined templates.
Under review. This page is published while we check it against the live app, so some details may have changed.
Screenshots may be out of date.
Introduction & best practice
Generating style barcode labels allows users to convert product or style data into scannable barcode formats using predefined templates. Within the Barcode Dashboard, users can select existing barcode templates and apply them to specific styles or items.
The system automatically generates barcode values using predefined code generators or existing product data, ensuring each barcode is unique and aligned with the configured structure.
Step by step
BarcodeDashboard
Permission: VIEW_BARCODE
Navigate to Barcode > Dashboard on the left bar menu.
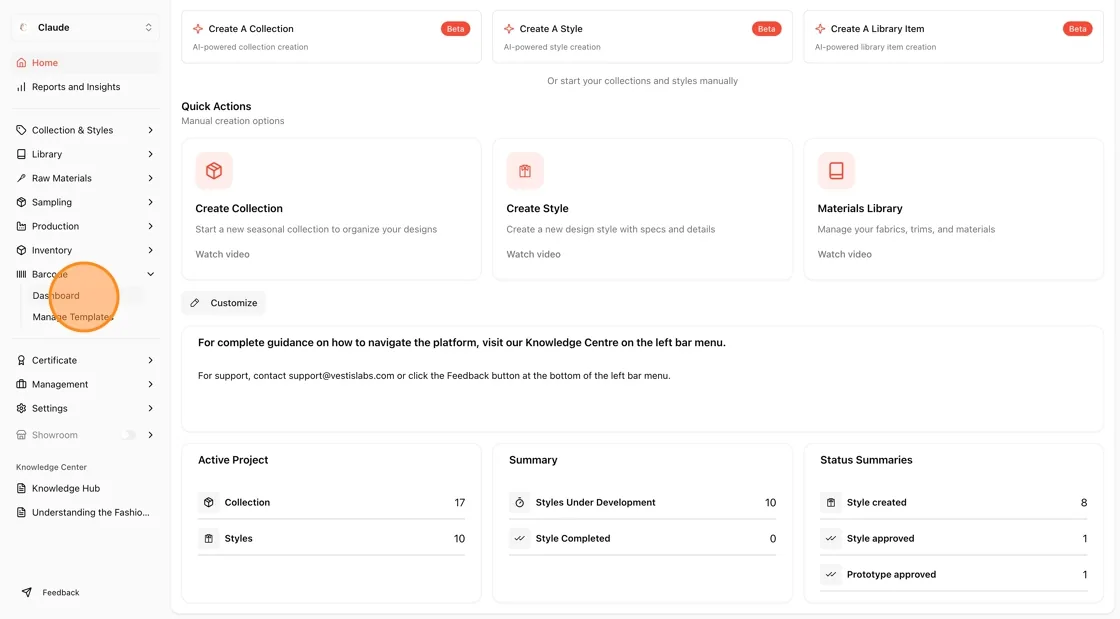
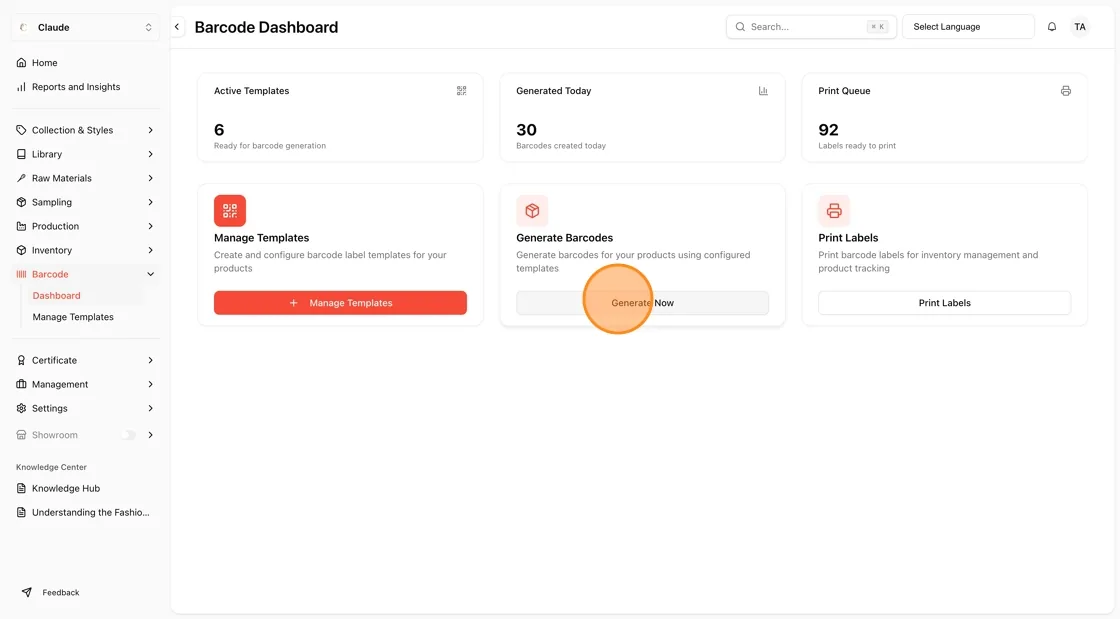
Click Generate Now on the Generate Barcodes card. The Select Styles for Barcode Generation window opens.
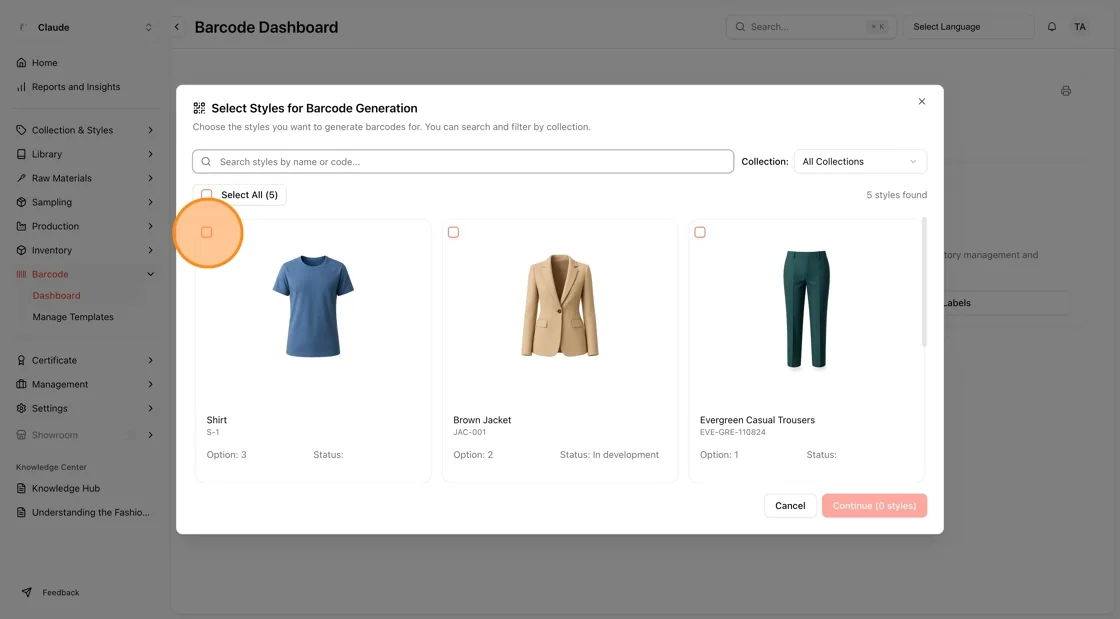
Choose the style(s) you want to generate barcodes for. You can search by name or code, and filter by Collection.
Note: You can select multiple styles in bulk.
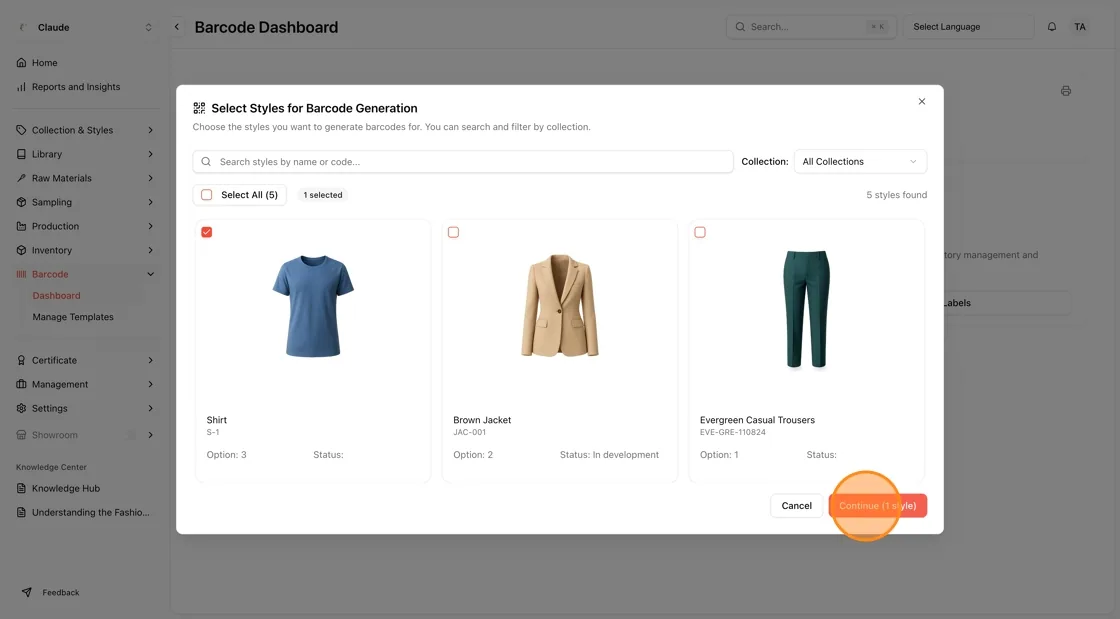
Click “Continue” to proceed to the next section. The button shows how many styles you selected, for example Continue (2 styles).
Select a barcode template. In the Select Barcode Template window, the system preselects your default template, or you can choose another active template from the Barcode Template list. The template details and a preview are shown below the list.
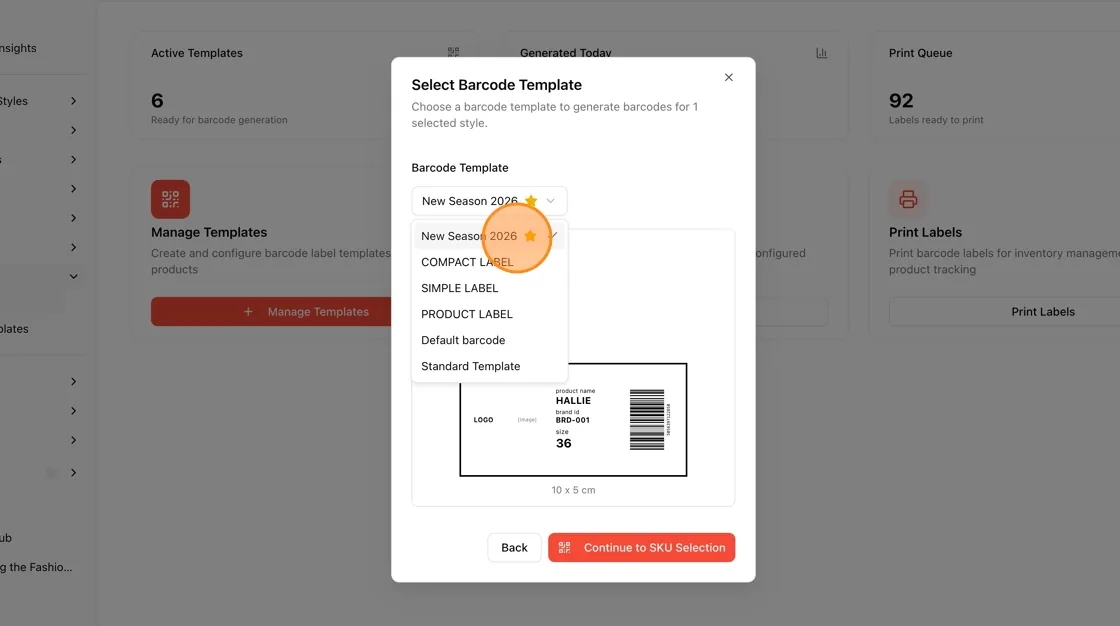
Click “Continue to SKU Selection” to move to the SKU selection page.
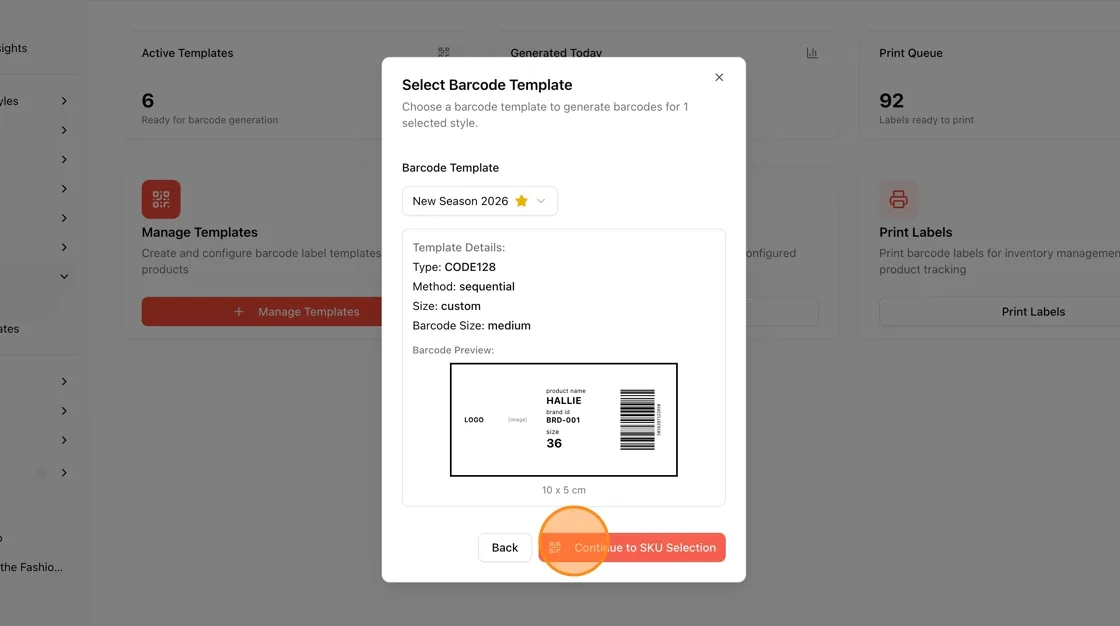
If the style SKU code has not been generated, the style shows SKU codes not generated yet and its SKUs are marked SKU Not Generated. These SKUs cannot be selected.
Follow this instruction to generate your SKU codes
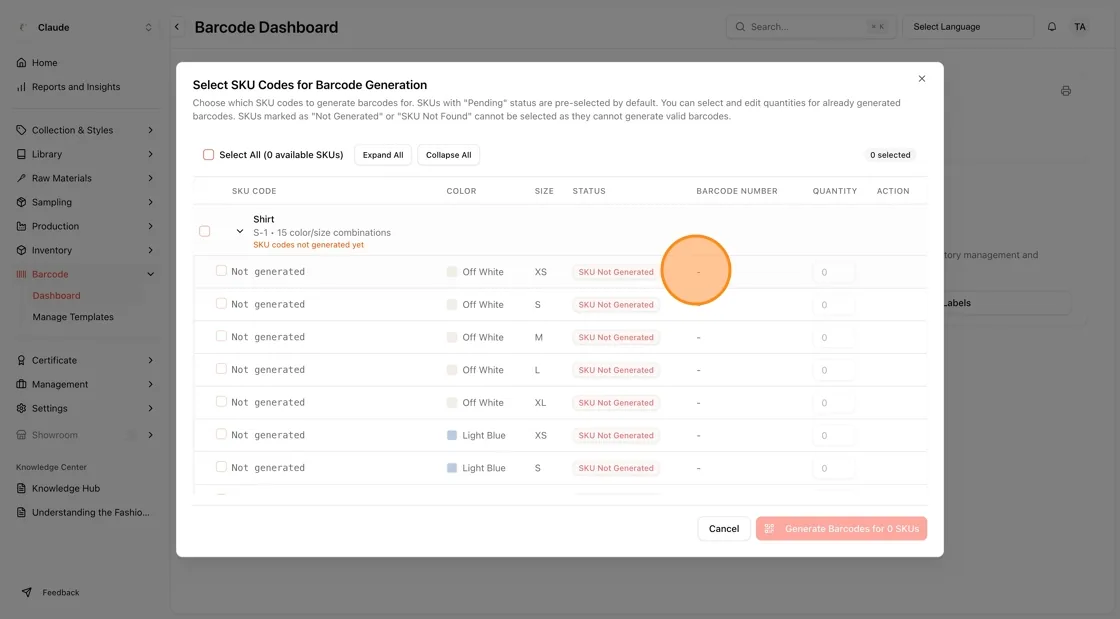
Check that the style SKU code has been successfully generated before generate the barcode in the Style > production > SKU page.
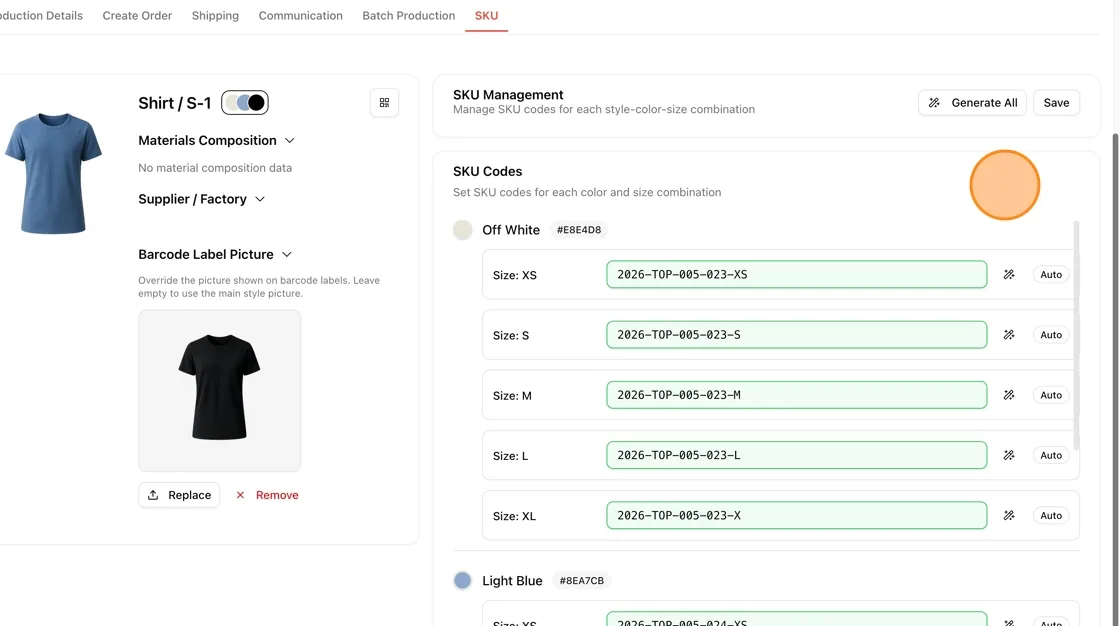
If the SKU code has already been generated:
- Check Select All to include all available SKUs, or
- Expand a style and select only specific SKUs related to the selected style(s).
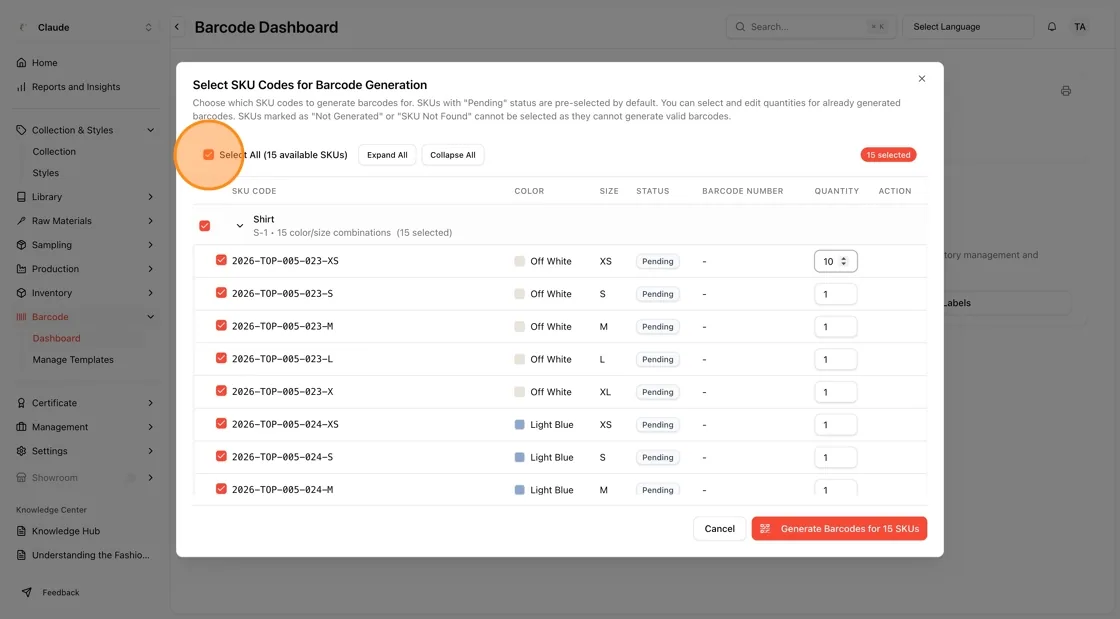
Enter the Quantity for each selected SKU.
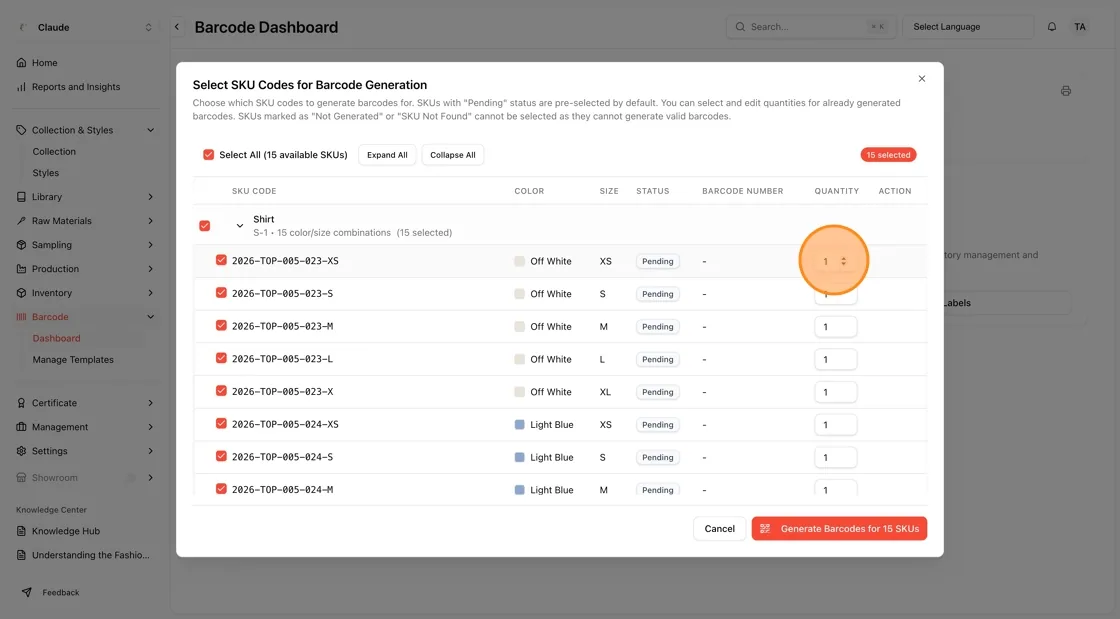
Click “Generate Barcodes for N SKUs” to continue.
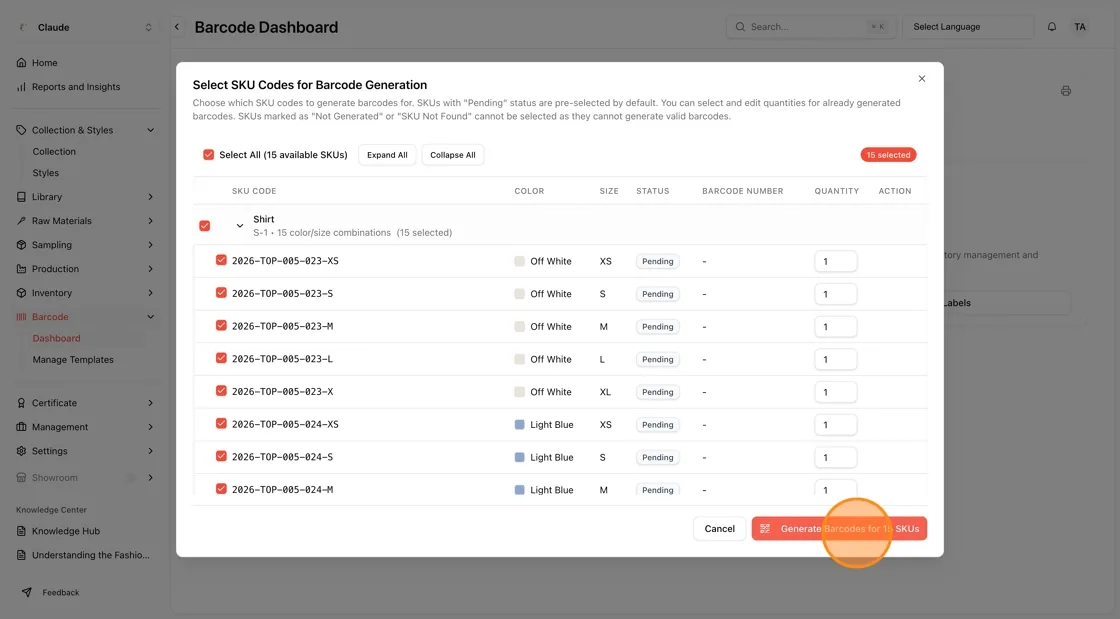
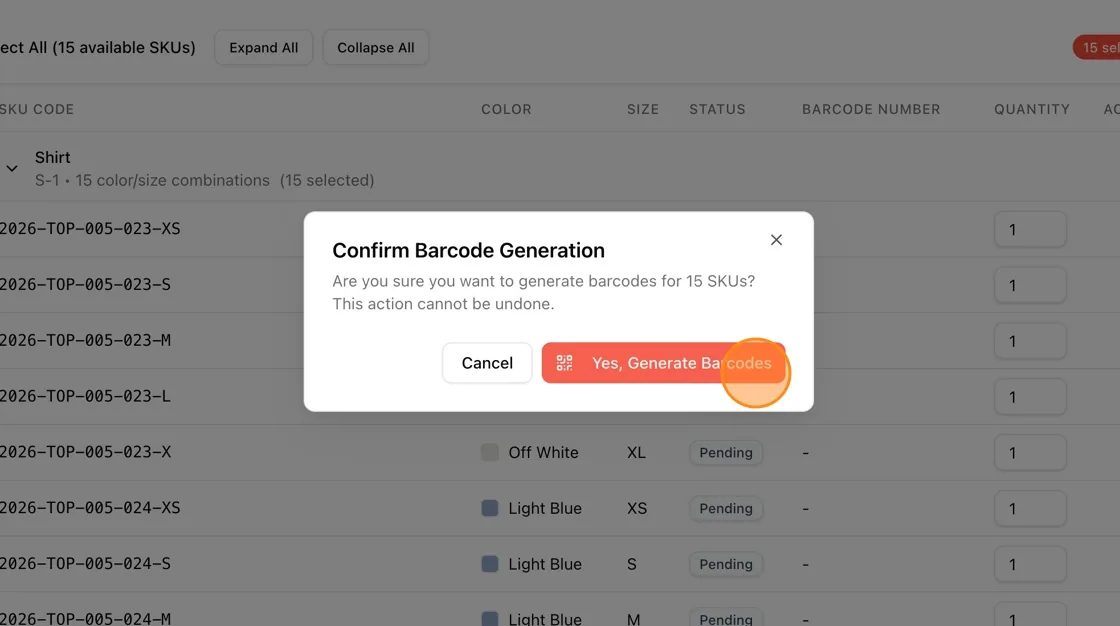
Review your selection in the Confirm Barcode Generation window, then click Yes, Generate Barcodes to confirm.
Understand the SKU list
The Select SKU Codes for Barcode Generation window lists each SKU with its SKU Code, Color, Size, Status, Barcode Number and Quantity. Use Expand All and Collapse All to open or close the styles.
- Pending - Ready for barcode generation. These SKUs are selected by default.
- Generated - A barcode already exists for this template. You can still select the SKU and change the quantity. The bin icon in the Action column deletes that barcode after you confirm in the Delete Barcode window.
- SKU Not Generated - The SKU code must be generated first.
- SKU Not Found - The SKU is not found or is invalid, so no barcode can be generated.
Warning
If you select more SKUs than the template has numbers left, the window shows Not enough barcode capacity and the generate button stays unavailable. Extend the template's end number or deselect some SKUs.
Generate barcodes with a manual template
When the template's generation method is Manual, the Barcode Number column shows an Enter barcode field for each selected SKU. Type the barcode number yourself. If the number does not match the template's barcode type or check digit, the field shows Invalid [type] format or check digit. and you cannot continue until it is fixed.
Note
You can also start from the Styles page: select styles, then choose Generate Barcodes from the actions menu.
Connect your style colour for the barcode label
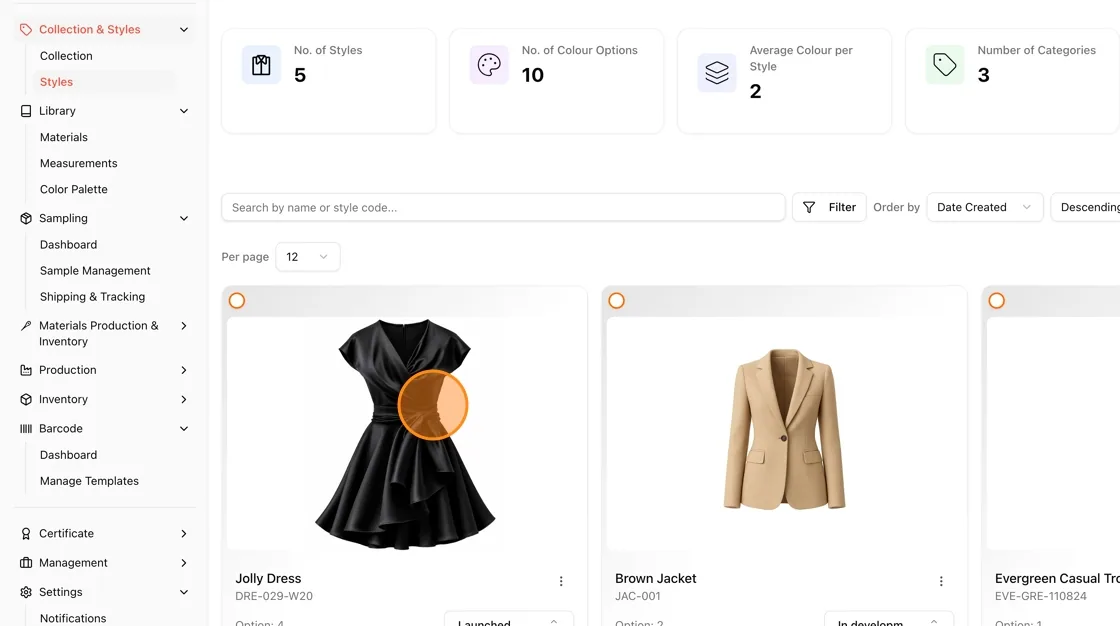
In the left sidebar, go to Collection & Styles → Styles. You'll see a grid of all your styles with summary stats at the top. Click into a style
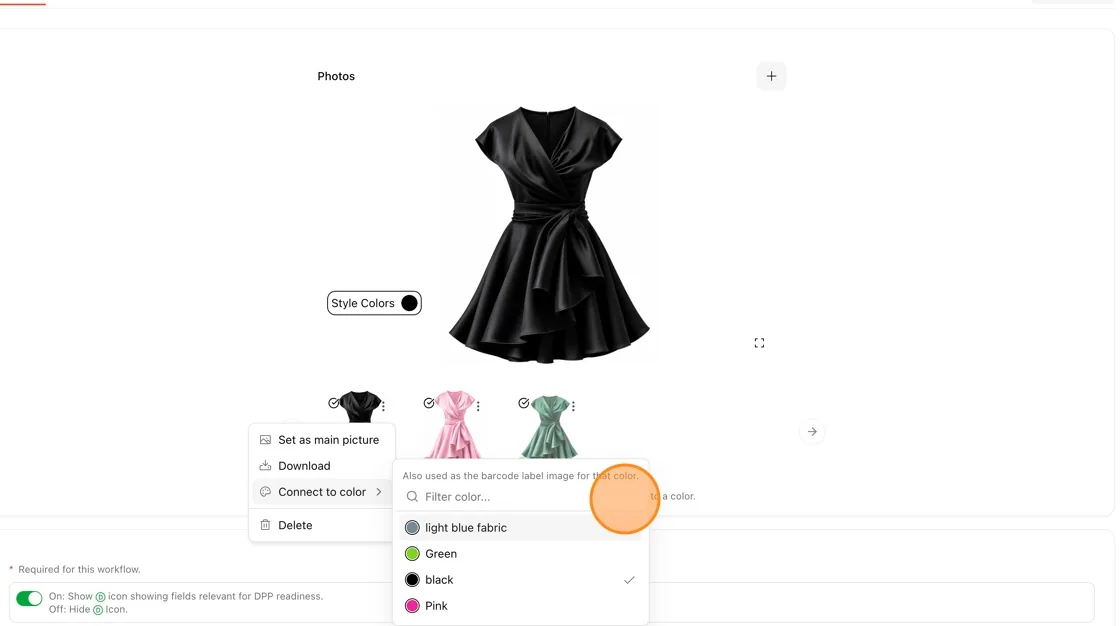
Click the three-dot menu on a photo thumbnail, then choose Connect to color. A dropdown appears — select the matching color. A checkmark confirms the connection.
Print labels from the dashboard
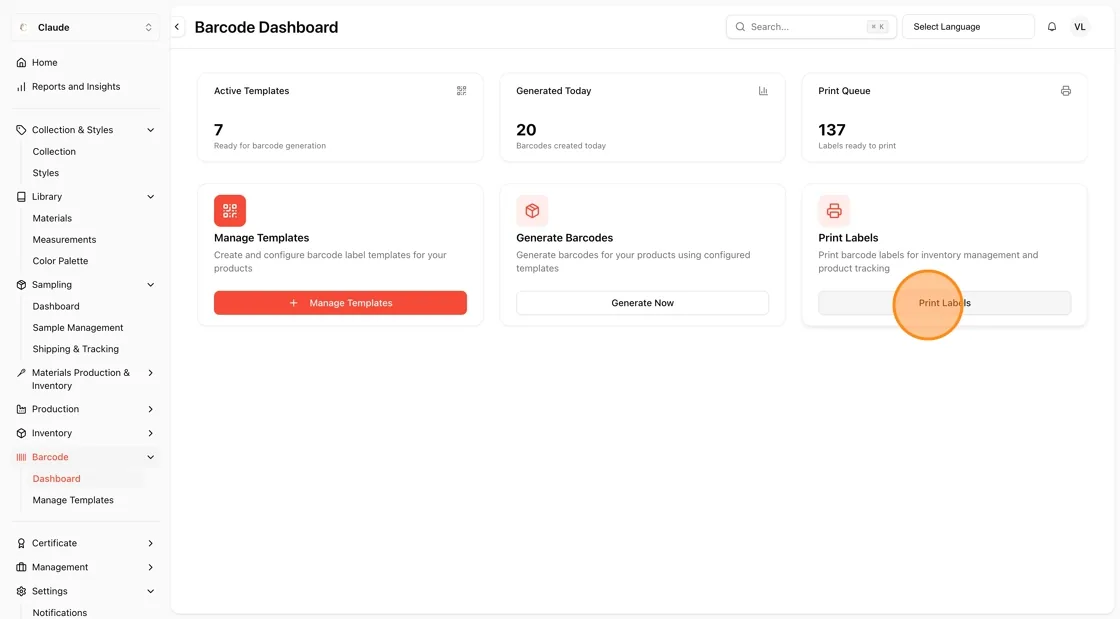
In the sidebar, expand Barcode and click Dashboard. You'll see cards for Active Templates, Generated Today, and Print Queue.
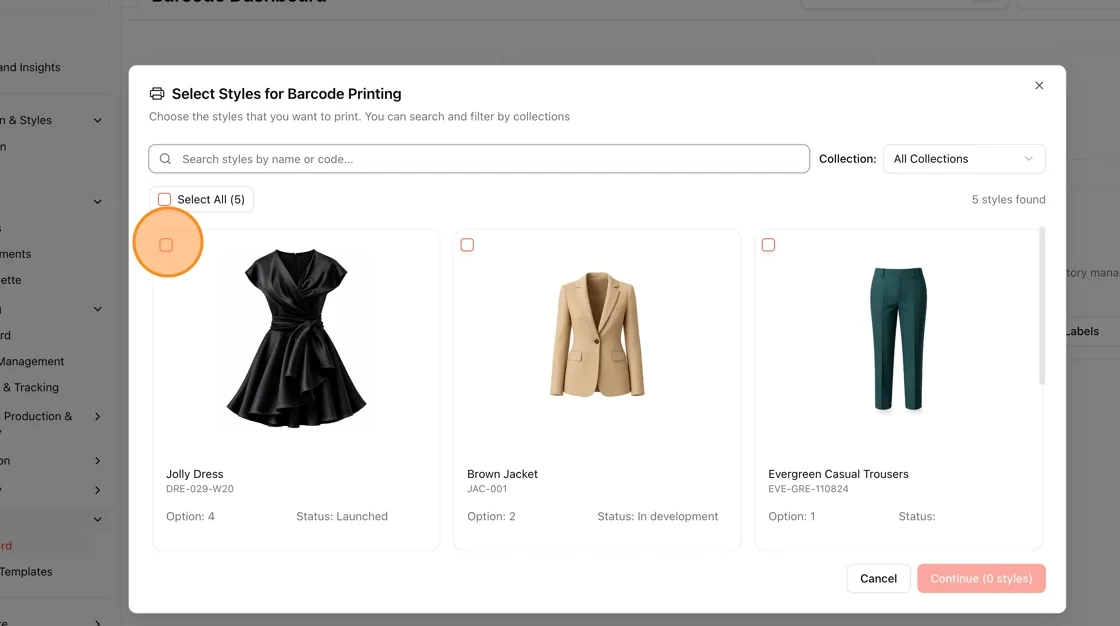
Click Print Labels on the Print Labels card. A modal opens titled "Select Styles for Barcode Printing". The full printing steps are in Print barcode label.
Browse or search for styles. Tick the checkbox on each style you want. You can filter by Collection. The button at the bottom updates to show how many styles are selected.
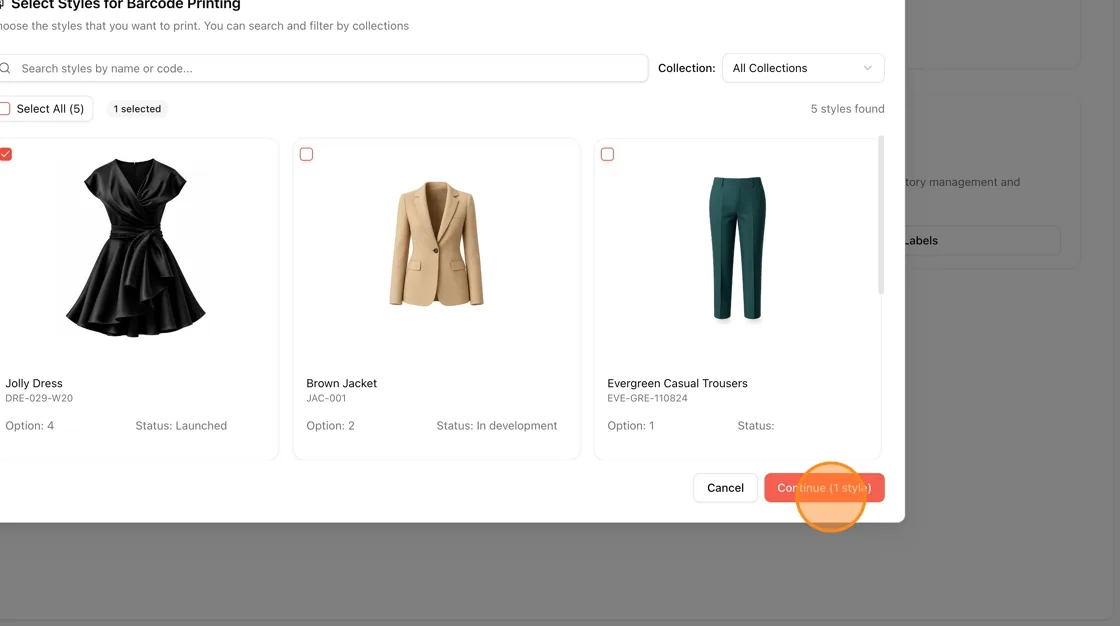
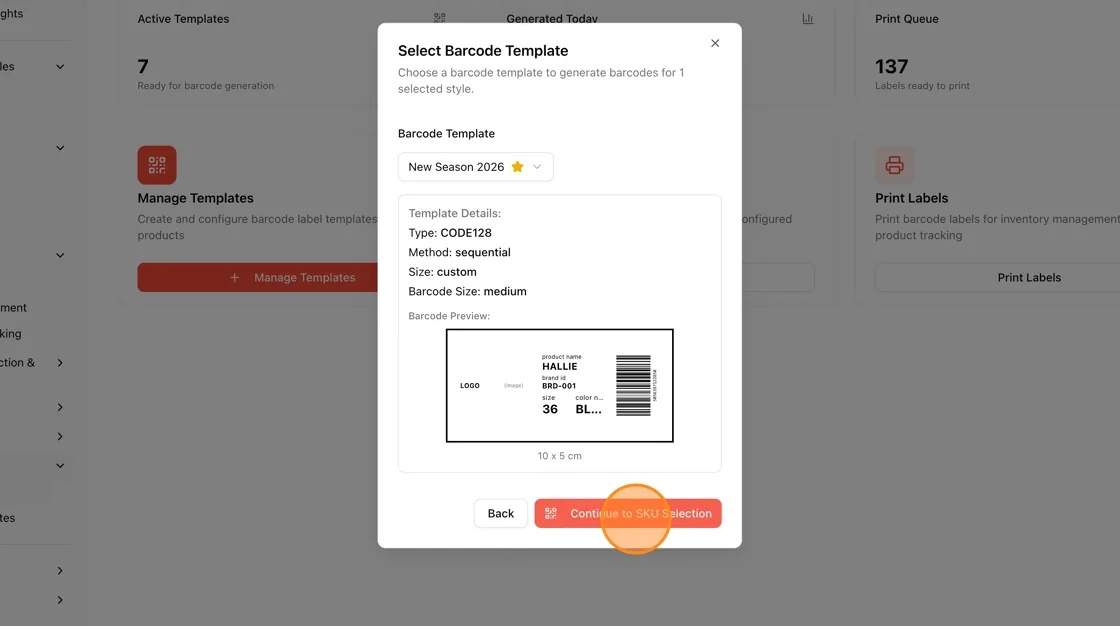
Click Continue. In the next step, pick a Barcode Template from the dropdown. Review the template details — type, method, size — and the barcode preview. Then click Continue to SKU Selection.
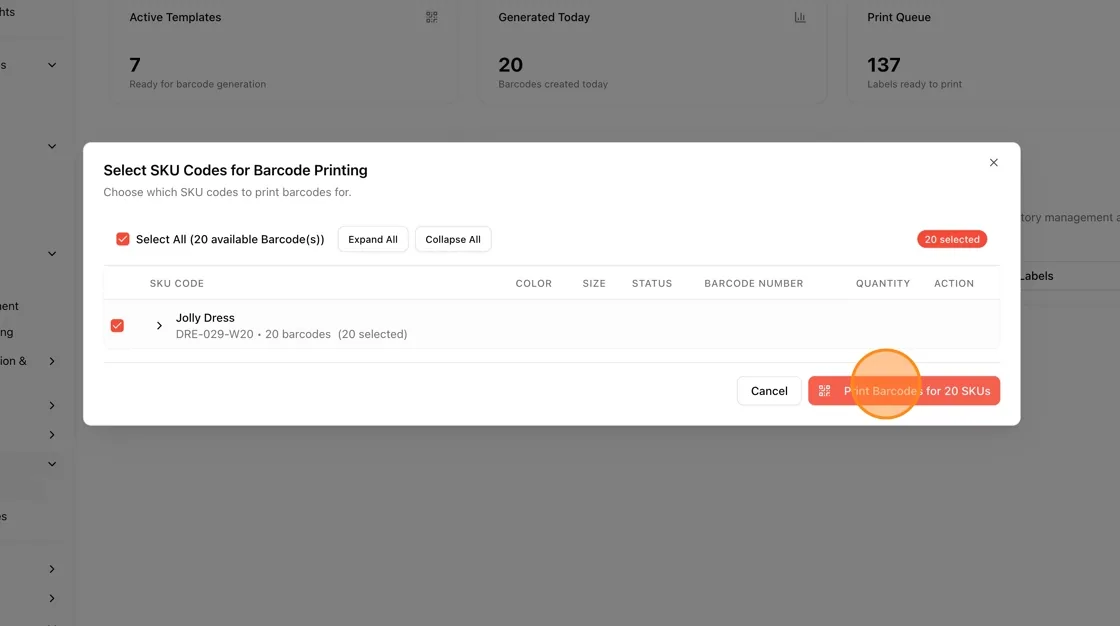
The "Select SKU Codes for Barcode Printing" modal lists all SKUs for the style. Use "Select All" to include all available barcodes, or expand the style row to pick individual SKUs. Click Print Barcodes for N SKUs.
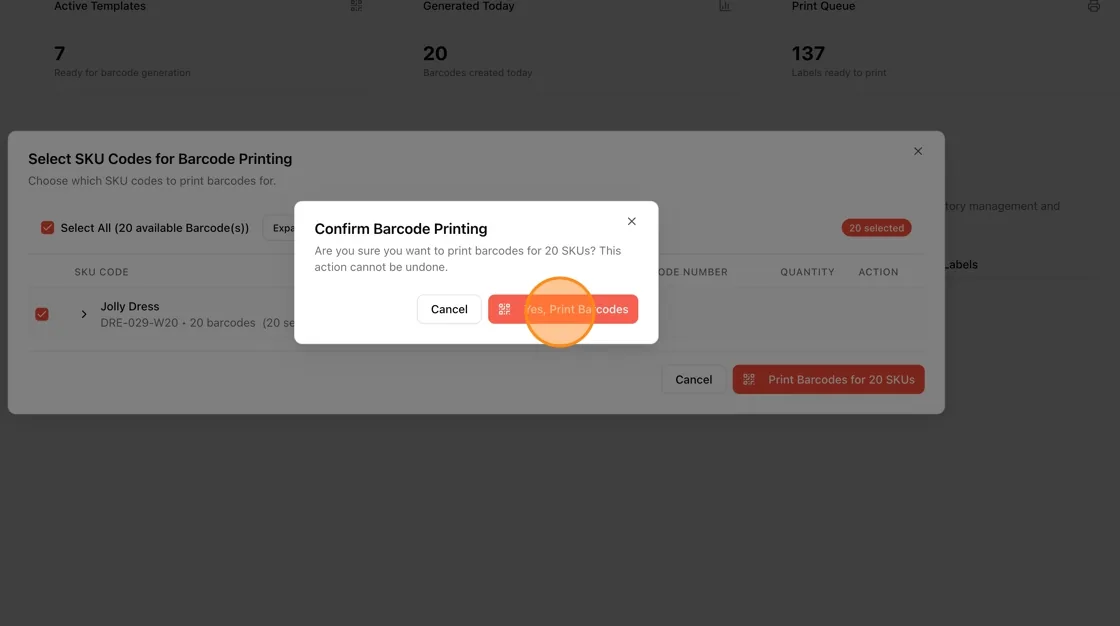
Click Yes, Print Barcodes to confirm.
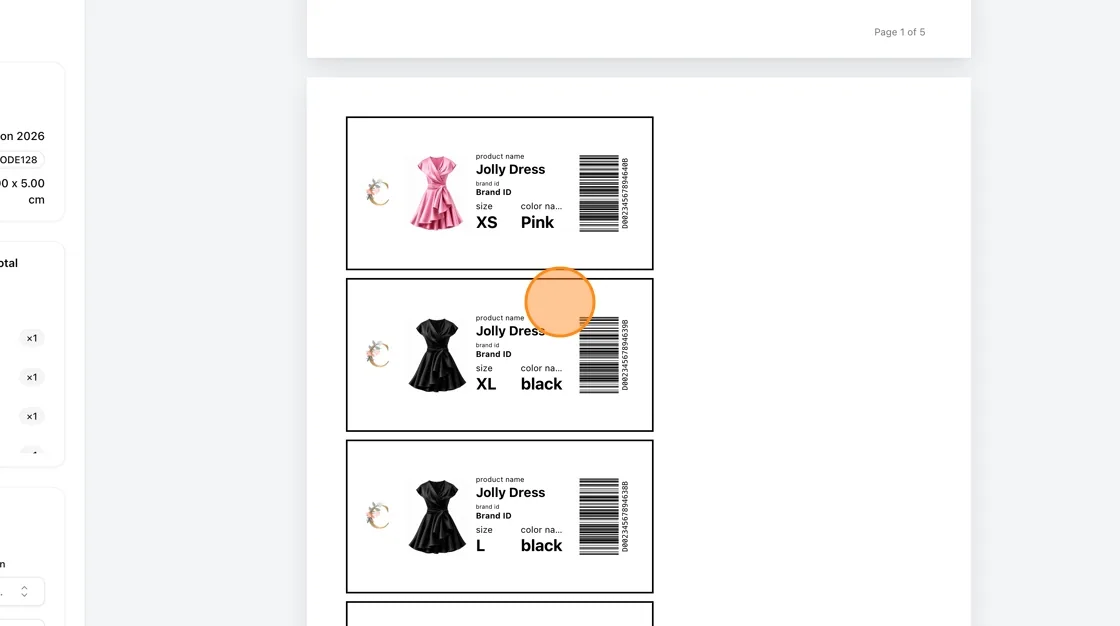
The system generates the labels across multiple pages — each label shows the product name, brand ID, size, color name, and barcode.
Note
For image attachment, only one image can be uploaded at a time.