
Step 13 of 15 in Publish a Digital ID and product passport
Print barcode label
Printing barcode labels allows users to produce physical labels from previously generated barcodes using predefined templates.
Under review. This page is published while we check it against the live app, so some details may have changed.
Screenshots may be out of date.
Introduction & best practice
Printing barcode labels allows users to produce physical labels from previously generated barcodes using predefined templates. This step ensures that digital barcode data is accurately translated into scannable labels for product identification, tracking, and operational processes. In the Barcode Dashboard, users can access generated barcode labels and preview them before printing.
Once all settings are confirmed, proceed to print the labels directly from the system or export them as a file (such as a PDF) for later printing or sharing.
Step by step
BarcodeDashboard
Permission: VIEW_BARCODE
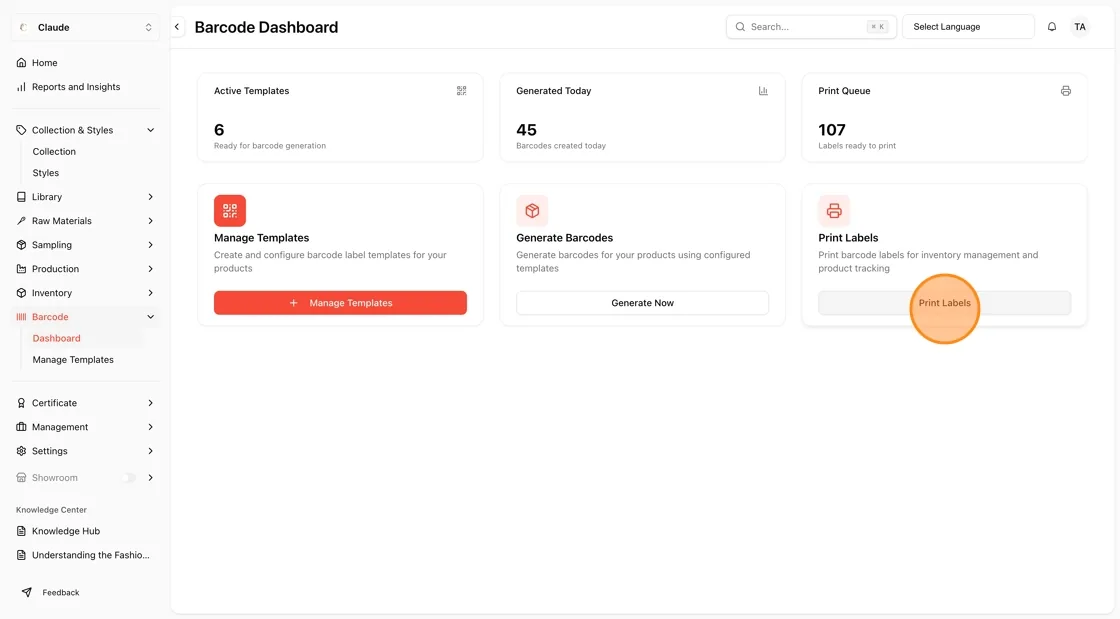
Navigate to Barcode > Dashboard on the left bar menu and click Print Labels on the Print Labels card. The Select Styles for Barcode Printing window opens.
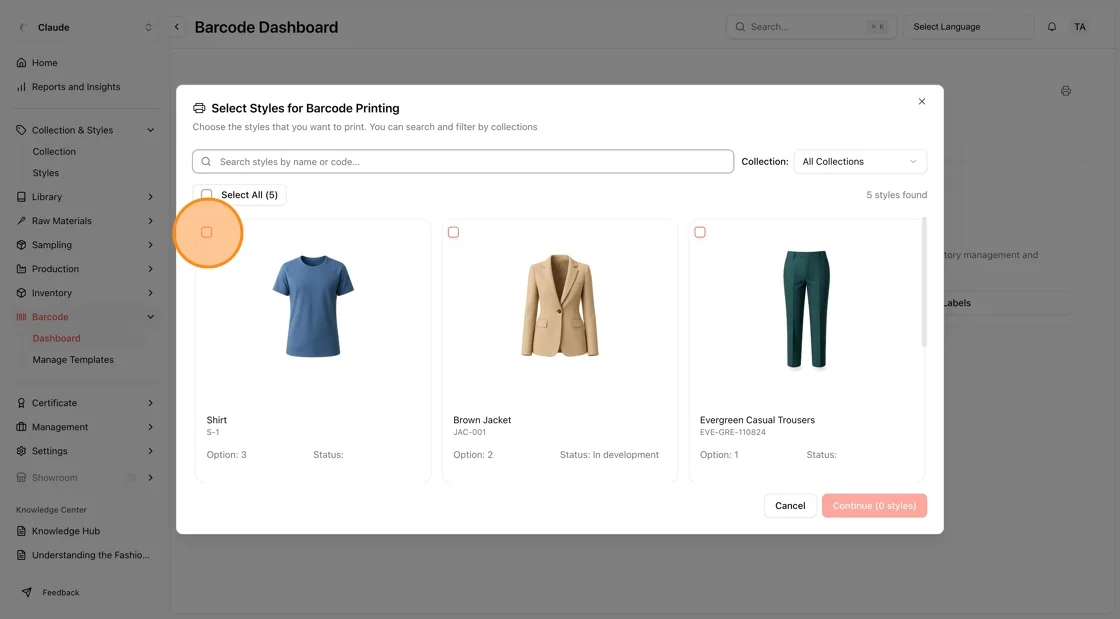
Choose the style(s) you want to print labels for. You can search by name or code, and filter by Collection.
Note
You can select multiple styles in bulk.
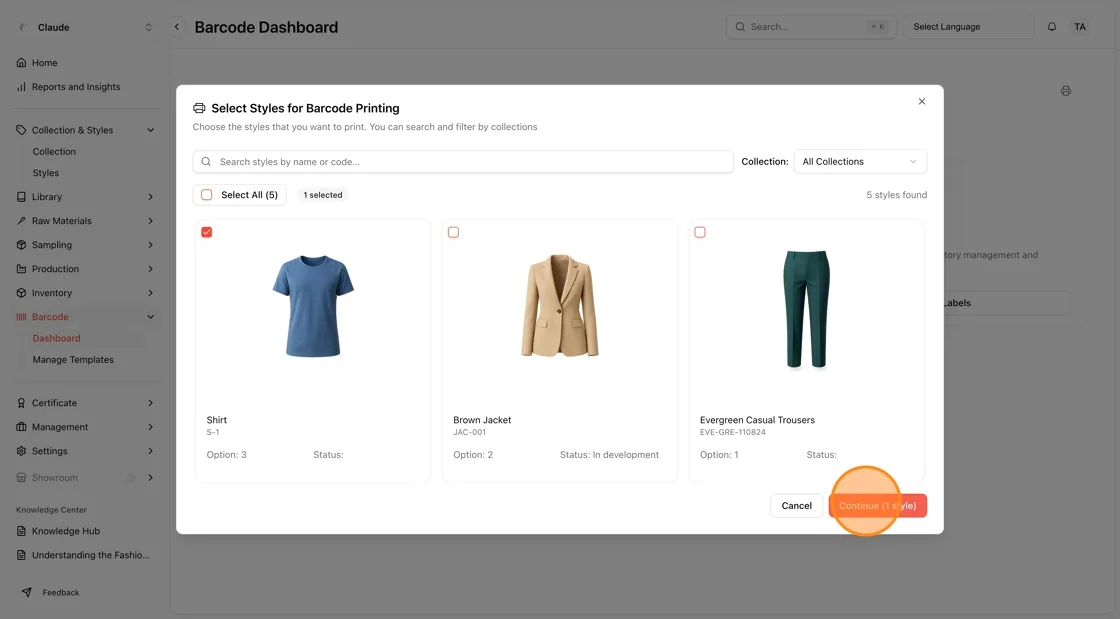
Click “Continue” to proceed to the next section.
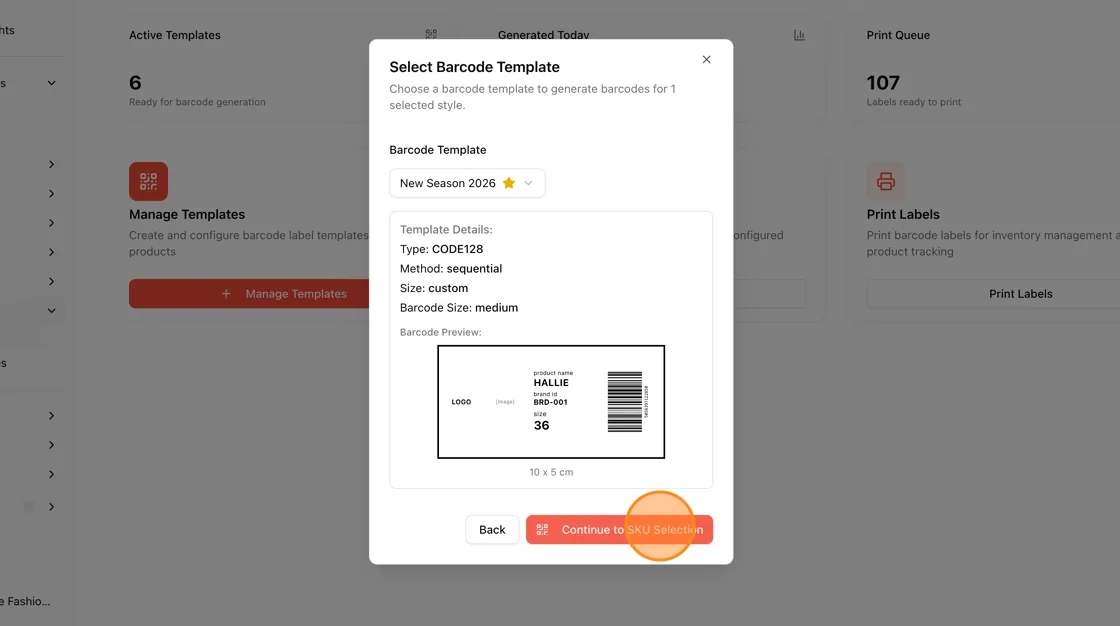
Select a barcode template. The system will display a default label, or you can choose one manually.
Click “Continue to SKU Selection” to move to the SKU selection page.
In the Select SKU Codes for Barcode Printing window, choose all barcodes with Select All, or expand a style and select only specific ones. A style without barcodes shows No Barcode Generated and a Generate button that takes you to barcode generation.
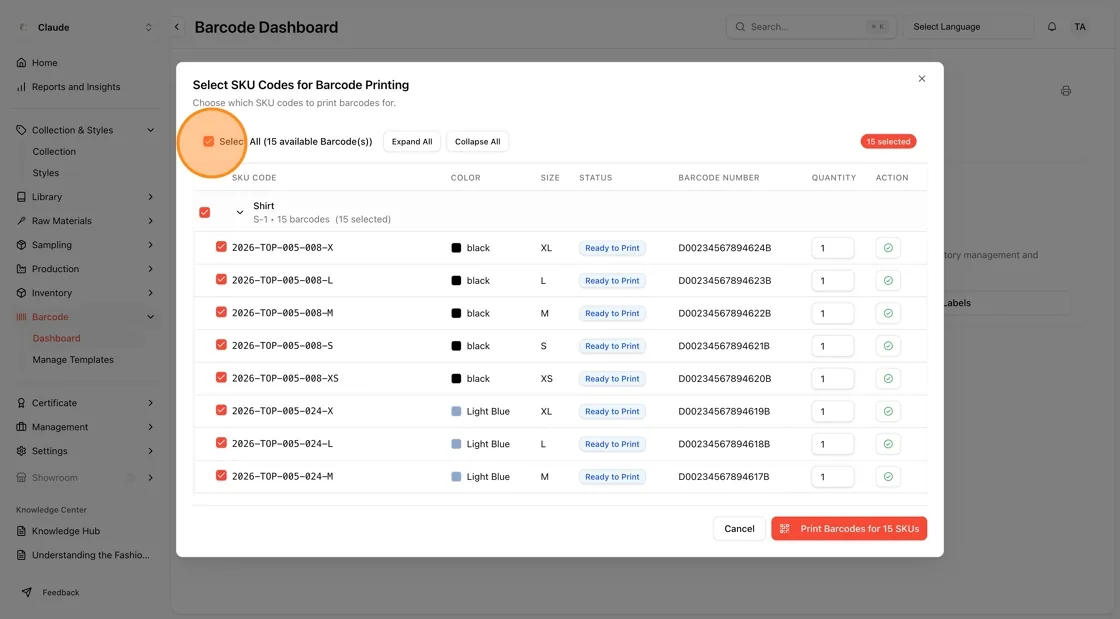
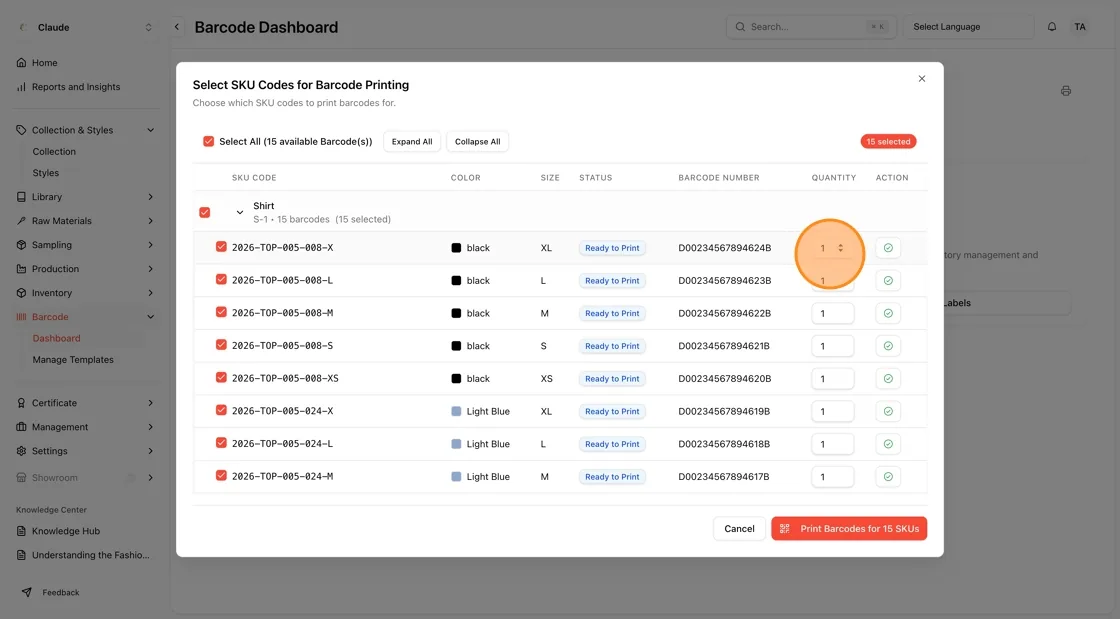
Enter the Quantity (number of labels) for each selected SKU.
Click “Print Barcodes for N SKUs” to continue to print the label.
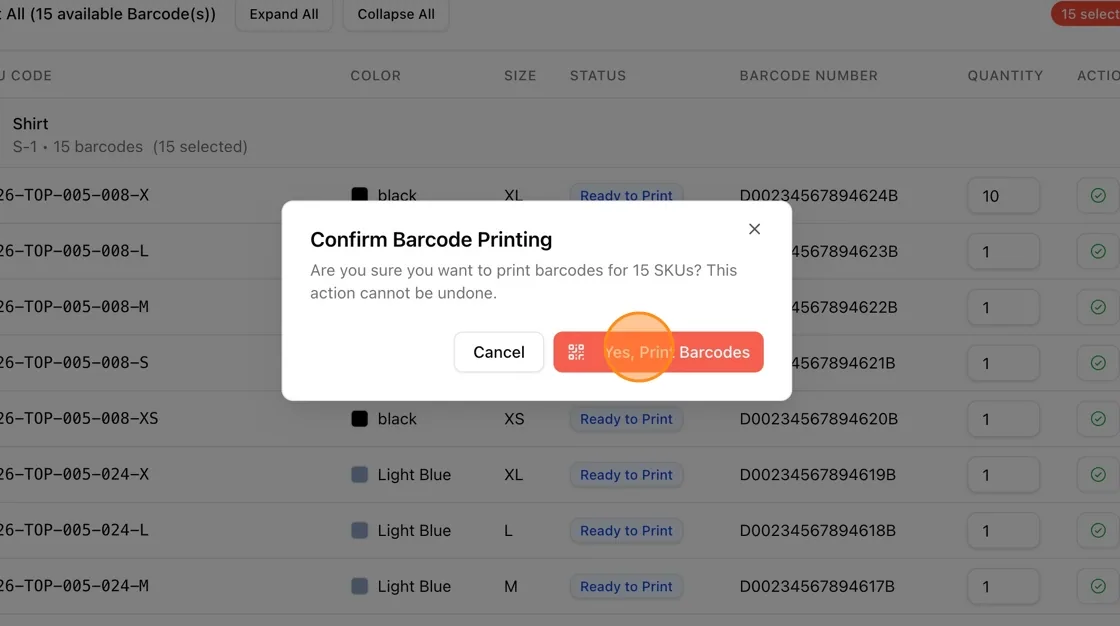
In the Confirm Barcode Printing window, click Yes, Print Barcodes. The print page opens in a new browser tab.
On the print page, check the labels listed under Selected Barcodes and ensure all details are correct.
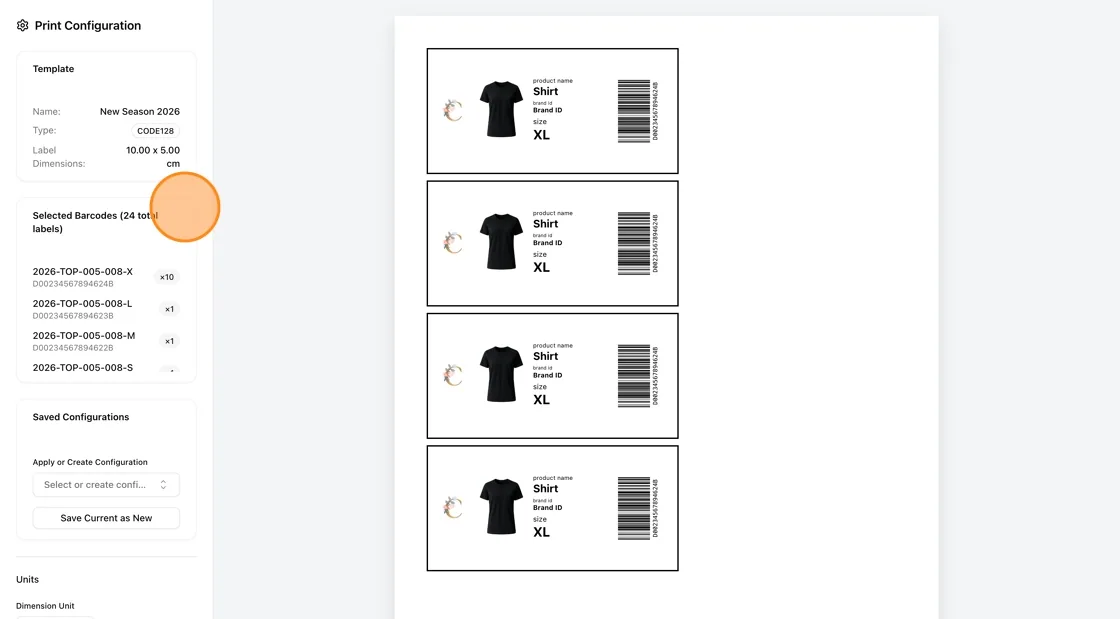
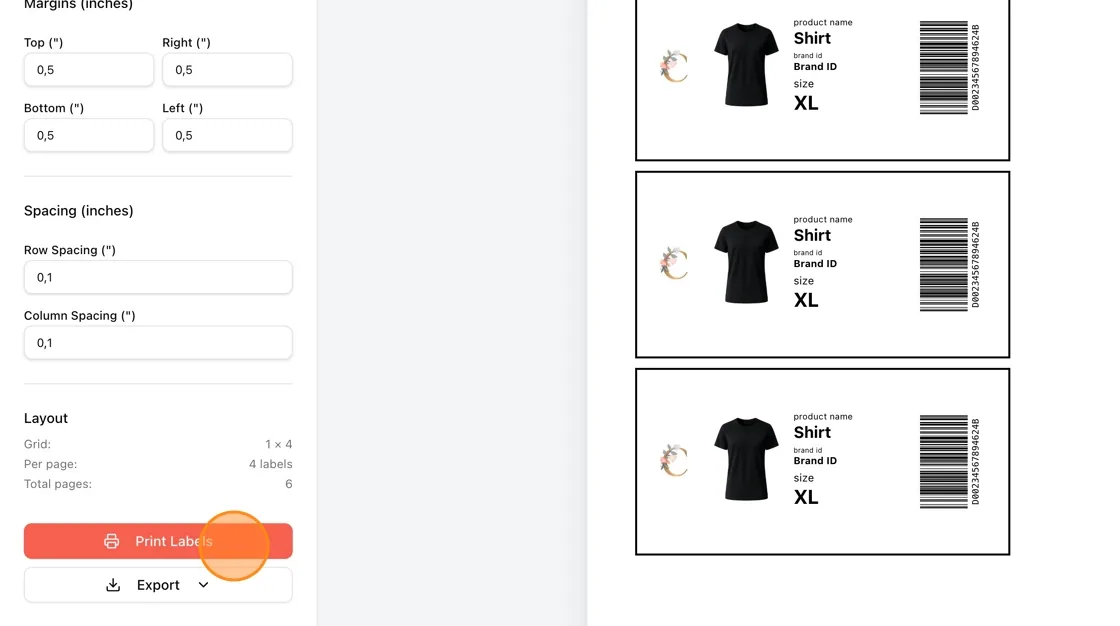
Fill in the paper layout details in the left section of the page: Dimension Unit, Label Orientation (Landscape or Portrait), Paper Size (Letter, A4, Legal or Custom), the margins (Top, Right, Bottom, Left) and the Row Spacing and Column Spacing. For a Custom paper size, enter the Width and Height.
Adjust the settings as needed to match your printing requirements.
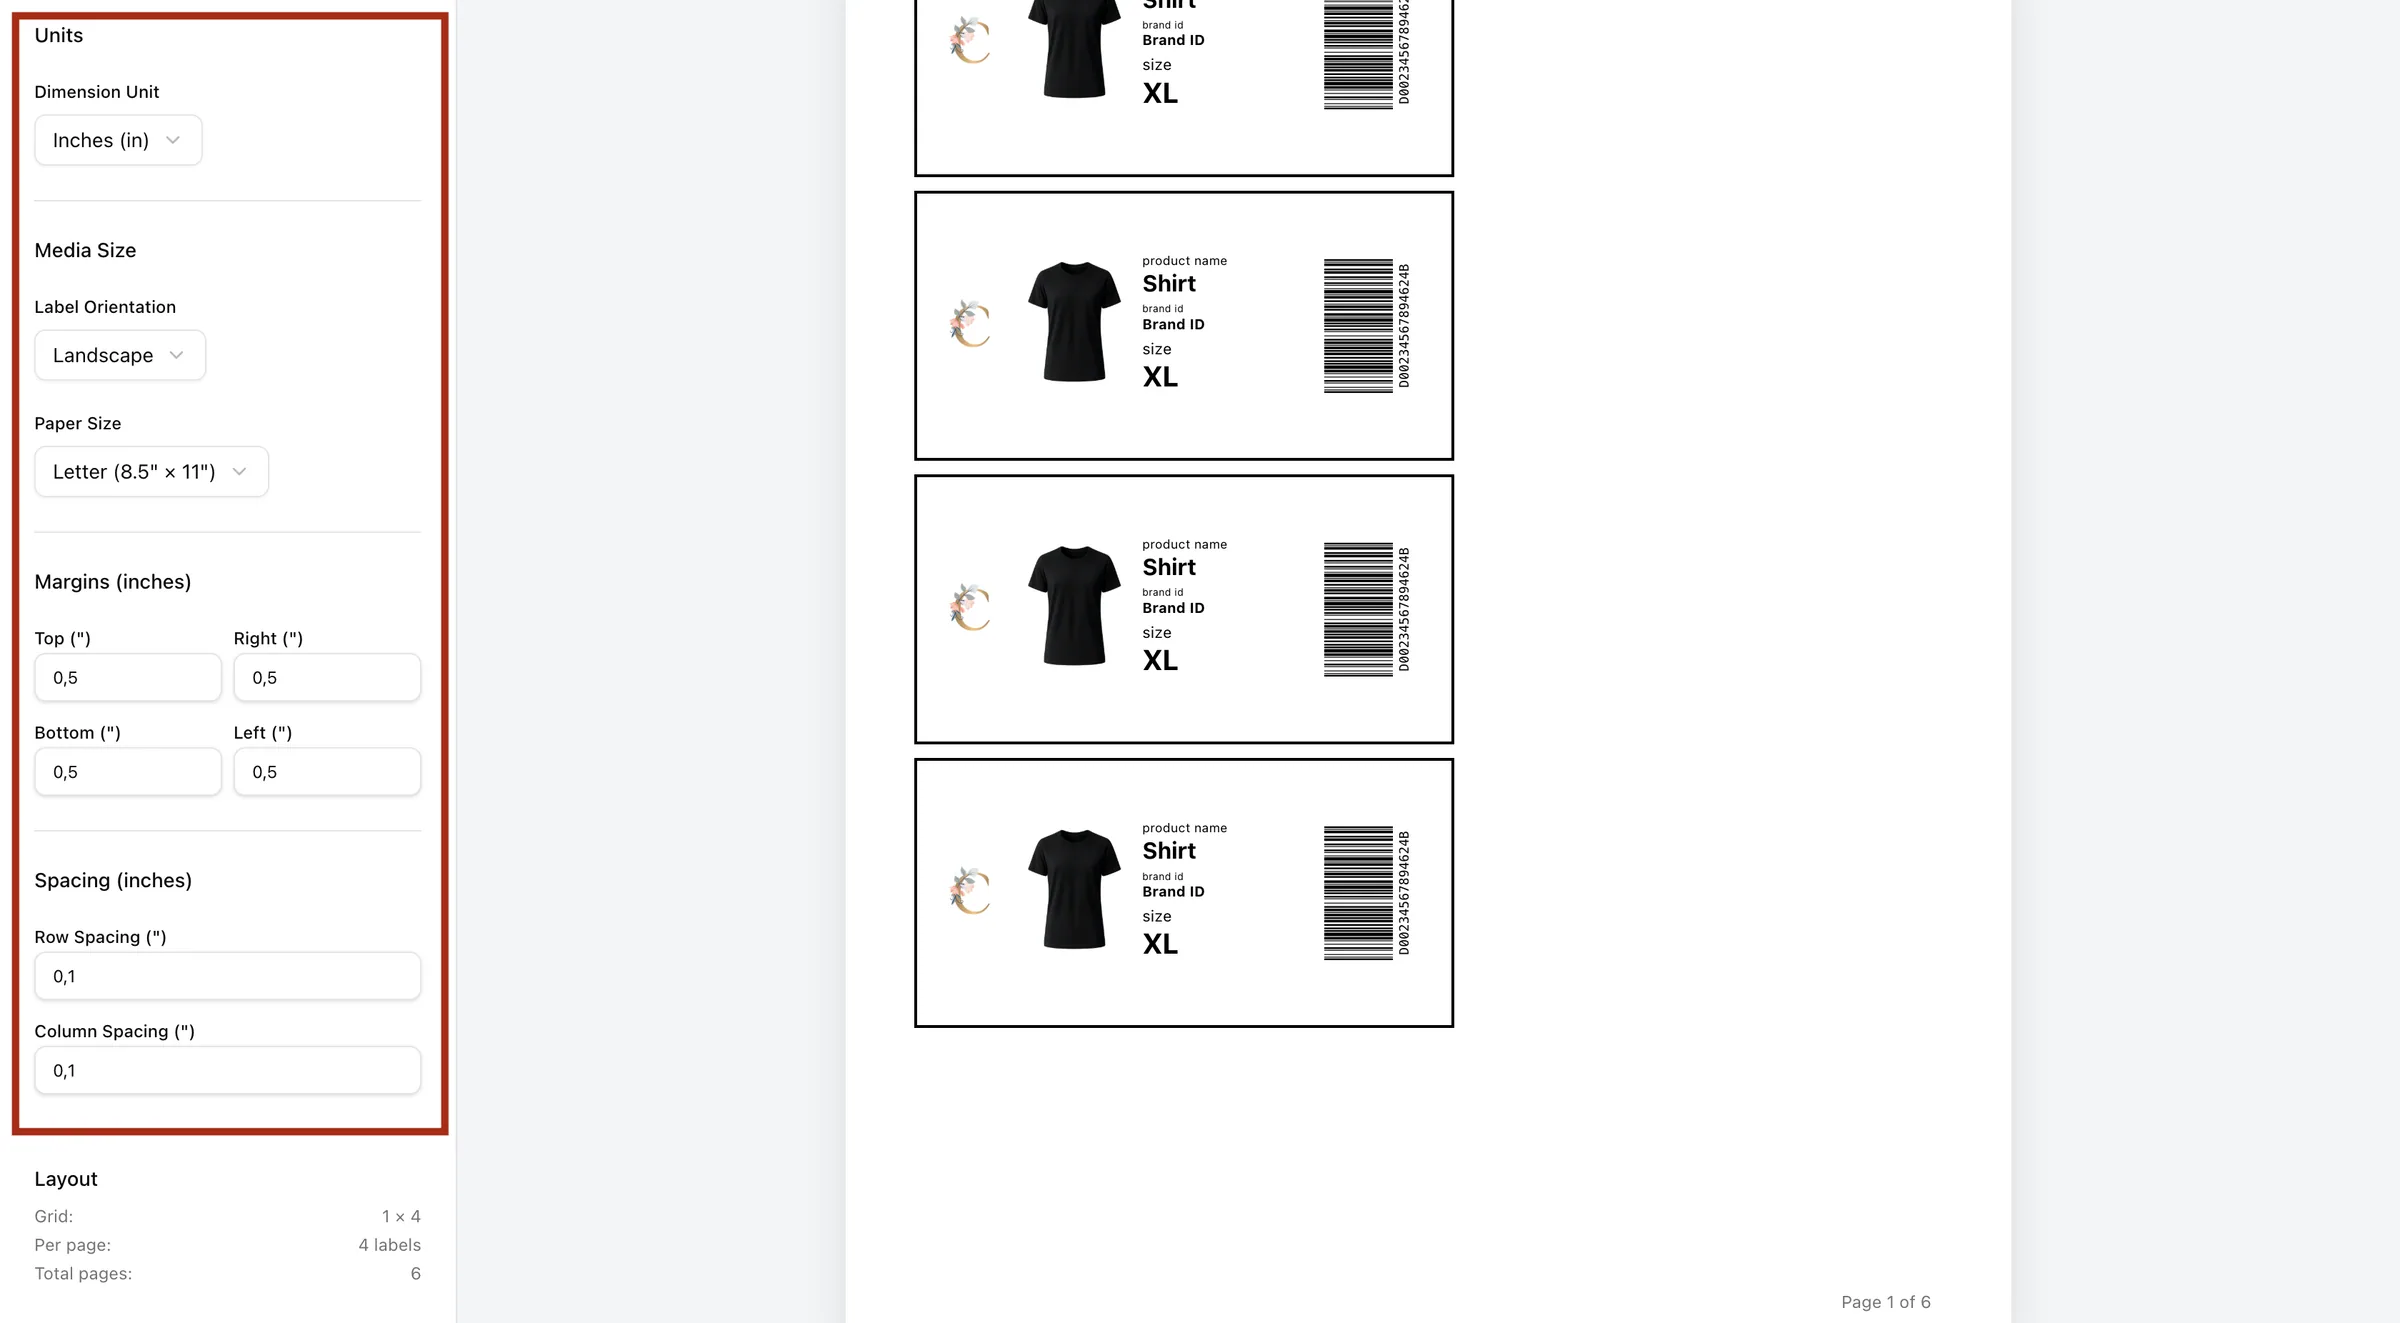
Adjust the layout settings and click “Save Current as New”, enter a Configuration Name (for example "A4 Landscape 2x7") and click Save to store the configuration for future use.
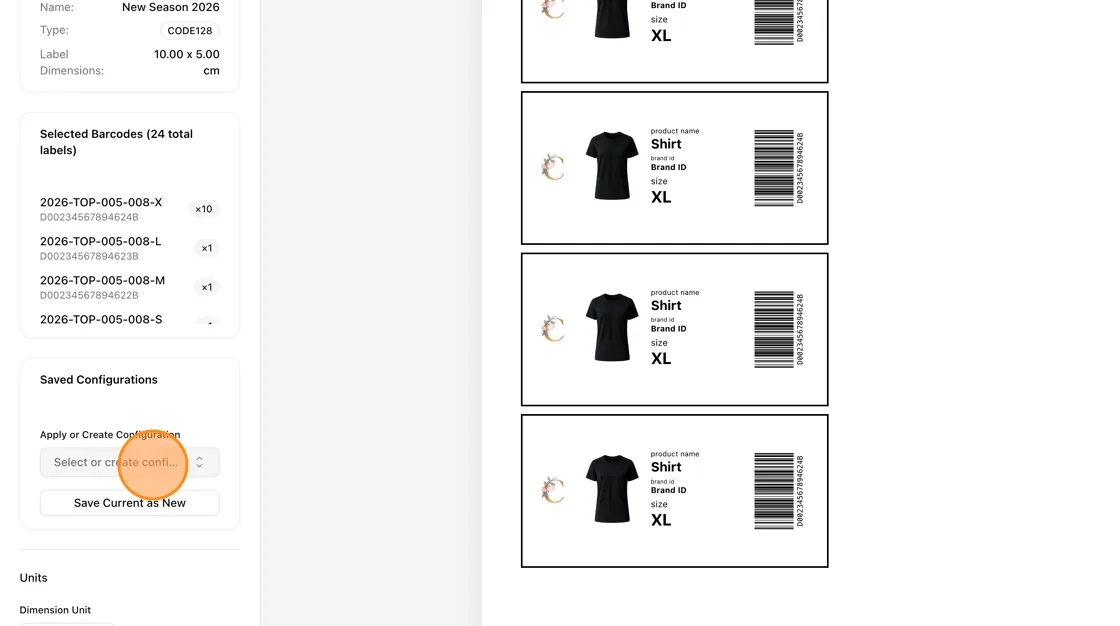
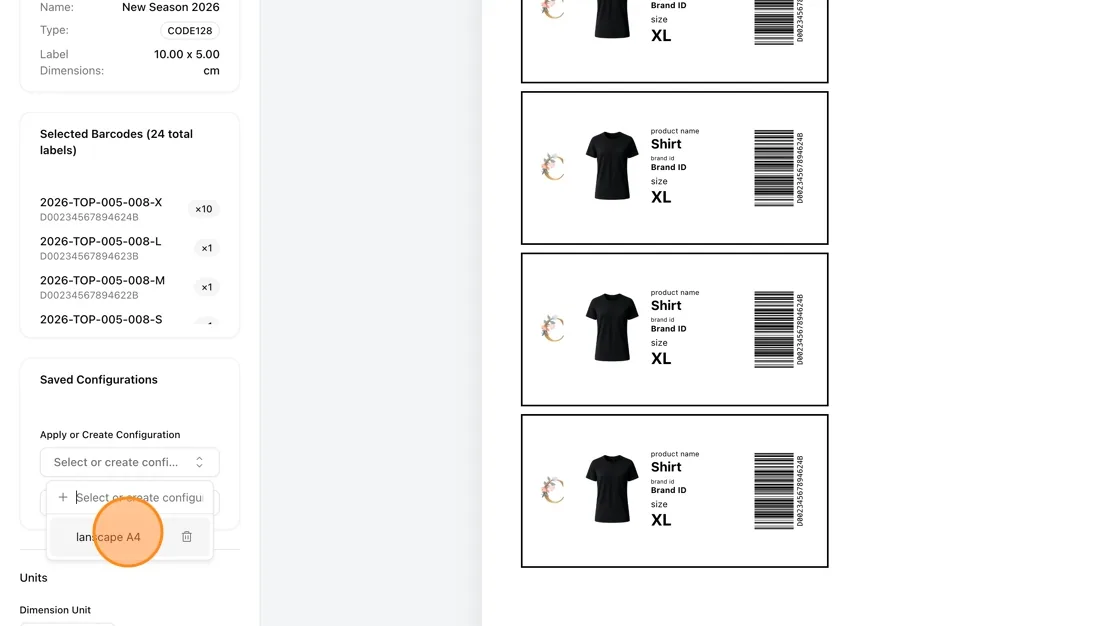
or select an existing layout configuration from Apply or Create Configuration under Saved Configurations
Click “Print Labels” to print directly.
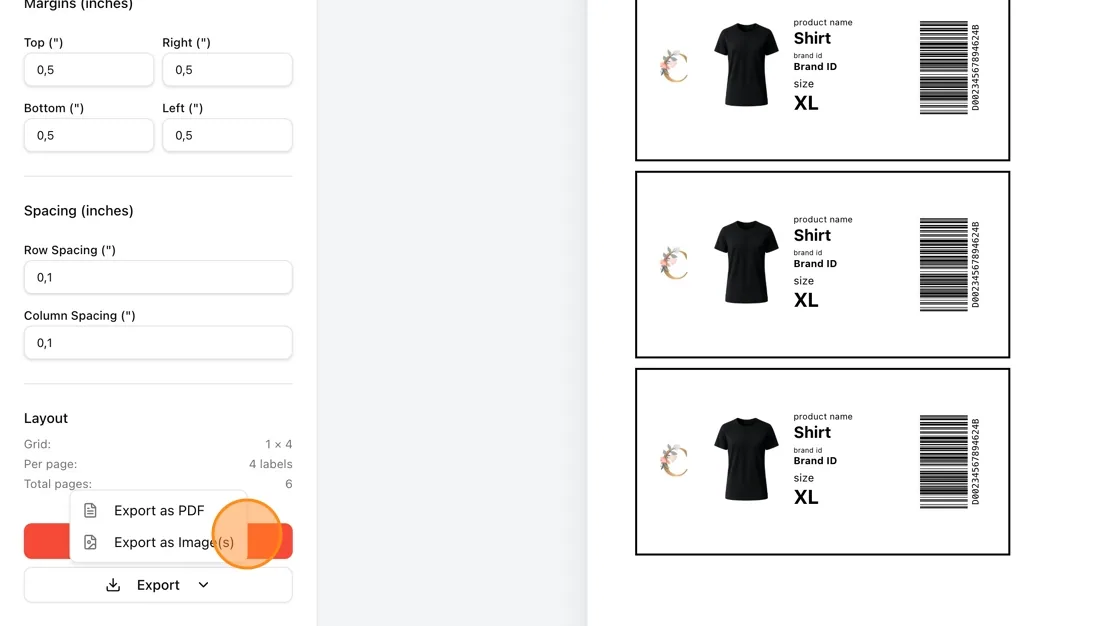
Or select “Export” and choose Export as PDF, Export Images as ZIP or Export Images Individually to download the labels.
Label downloads file names reflect the style name, color, and size (for individual labels), or a size range (for multiple labels on a sheet).
Mark labels as printed
In the Select SKU Codes for Barcode Printing window, each barcode shows a Status of Ready to Print or Printed. Click the status icon in the Action column to switch it (Mark as Printed or Mark as Ready to Print) and confirm.
Correct a barcode number
If you are allowed to update barcodes, a pencil icon (Edit barcode number) appears next to the Barcode Number. It opens Edit Barcode Number, where you type the new Barcode Number and click Save. The new value is validated and must be unique within your brand. If the barcode is already Printed, saving resets its status to Generated so it can be printed again.