
How to integrate and enrich product data in Vestis Atlas
A practical guide for connecting your Vestis account to Atlas, importing your catalogue, fixing low-confidence data, and publishing AI-ready content so AI shopping assistants can find and…
Under review. This page is published while we check it against the live app, so some details may have changed.
Screenshots may be out of date.
A practical guide for connecting your Vestis account to Atlas, importing your catalogue, fixing low-confidence data, and publishing AI-ready content so AI shopping assistants can find and cite your products.
How the process works
- Connect your Vestis account to the Atlas platform.
- Sign in to Atlas and import your catalogue from Vestis PLM.
- Open a product Atlas flagged as "Needs review" and check its photos and score.
- Fix any low-confidence or missing fields, then save and approve.
- Review the AI-ready content, publish it, and check its AI visibility settings.
- Send the Atlas enrichment back into Vestis and publish it to your storefront.
- Repeat the review-approve-publish cycle for each remaining product.
Before you start
- Use a Vestis account with permission to edit Settings and Integrations.
- Have your Atlas sign-in details ready, or know that you will create an account.
- Know which products in Vestis PLM are ready to be imported and enriched.
- Keep any certificates on hand for sustainability or similar claims — Atlas will not publish a claim it cannot verify.
Goal: Each product's enriched data must be approved in Atlas and published, both back into Vestis and to your storefront. Content that stays in "Needs review" or unapproved is never sent anywhere.
Connect Vestis to Atlas
In Vestis, open Settings and connect the Vestis Atlas integration. This links your Vestis account so Atlas can read your catalogue and send enriched drafts back.
Go to your Vestis dashboard Home screen. In the left sidebar, click Integrations (under Settings).
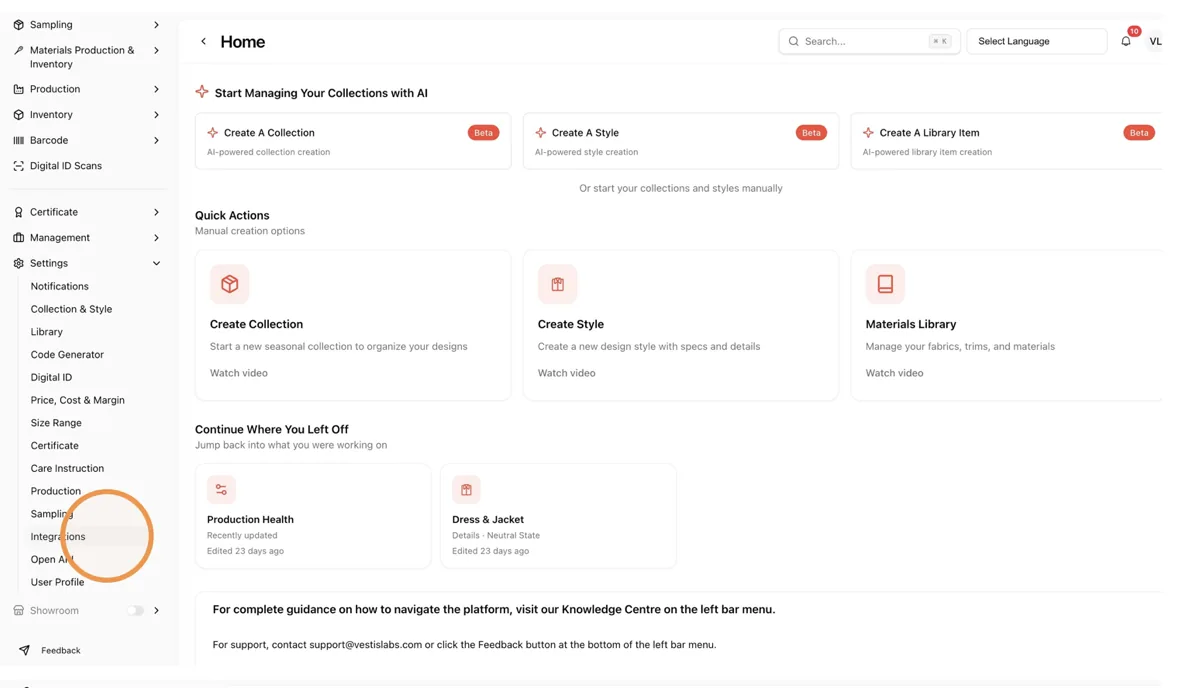
Click the Vestis Atlas tile alongside Shopify and Ecobalyse.
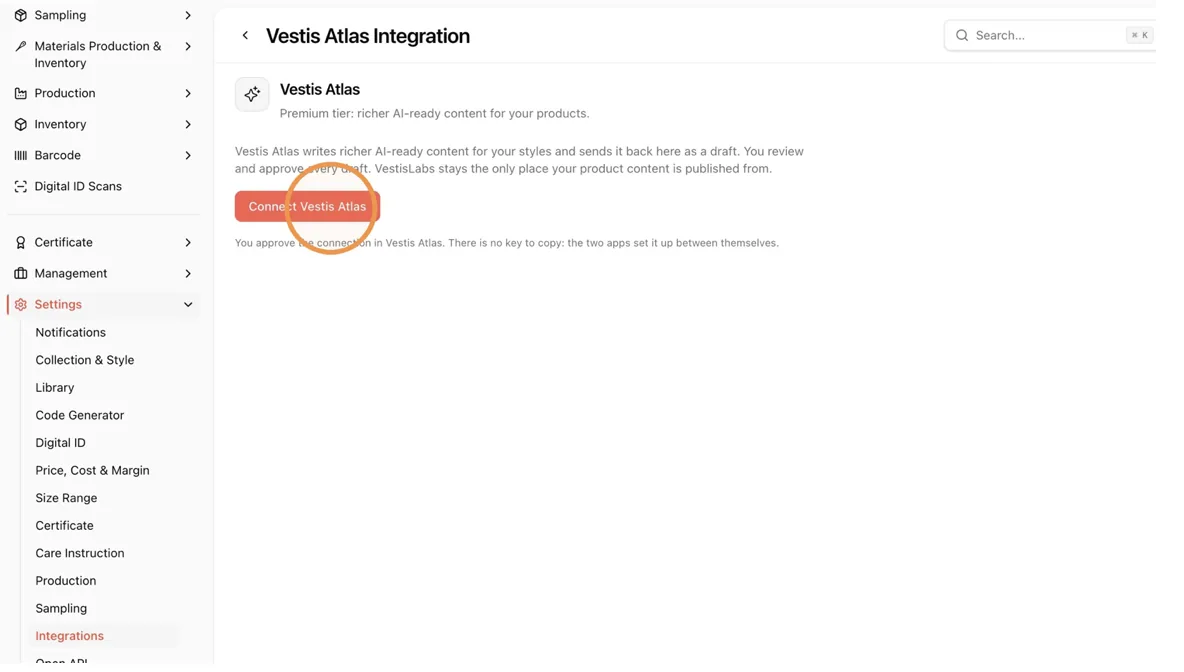
Click Connect Vestis Atlas.
Note
There is no key to copy. The two apps set up the connection between themselves once you approve it in Atlas.
Sign in and confirm the connection
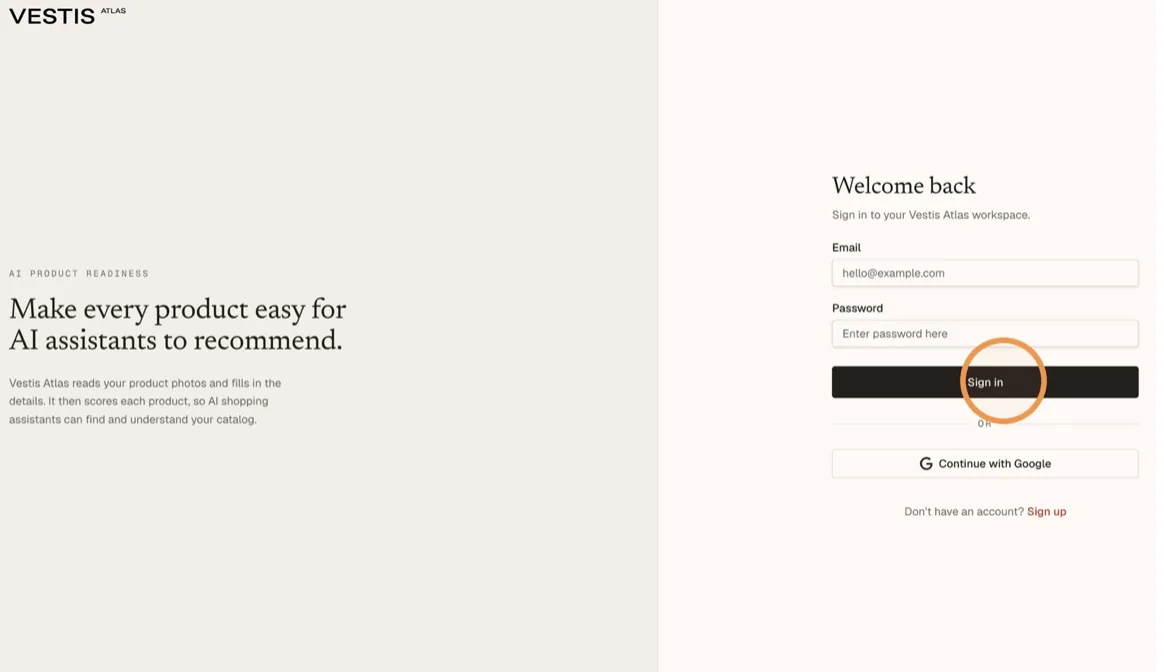
Connecting opens the Atlas sign-in screen. Sign in (or create an account), then confirm the connection shows as Connected in Vestis before continuing.
Click the Email field and enter your Atlas address and password, or use Continue with Google. Click Sign in.
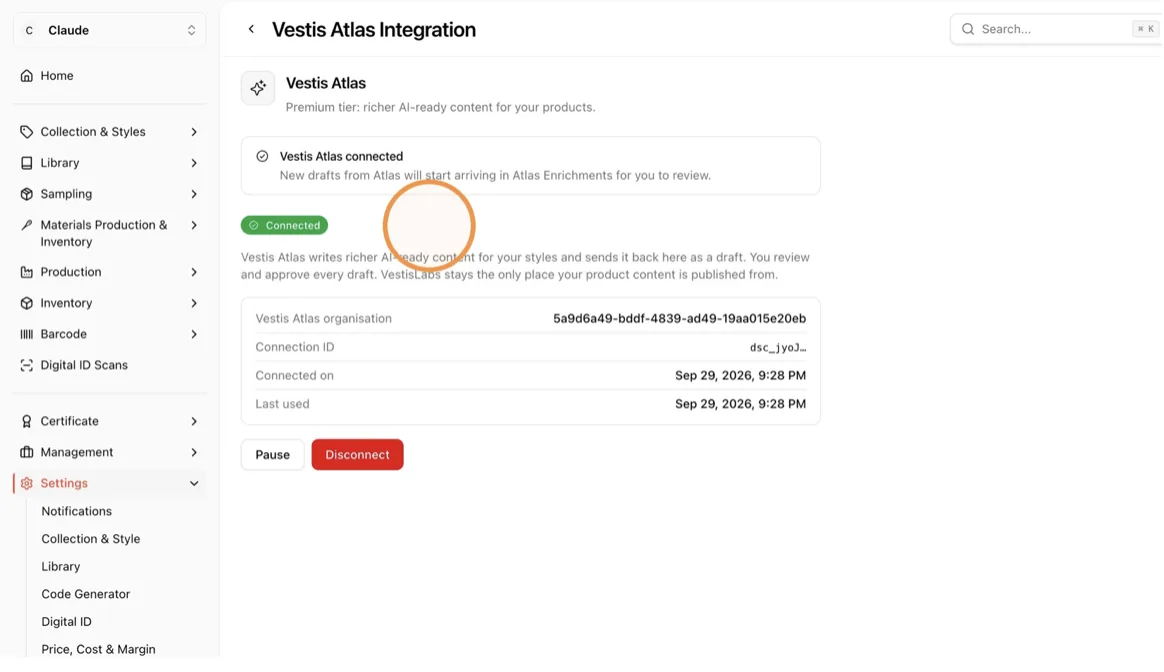
Back in Vestis, check the integration panel — it should read "Vestis Atlas connected" with a green Connected status.
Note the organisation ID, connection ID, and connected/last-used timestamps for reference.
Tip
Pause and Disconnect controls sit on the same panel if you ever need to stop the connection.
Import your catalogue
Switch to the Atlas tab and sign in there too. Atlas shows a banner when products are waiting in Vestis PLM, ready to import.
On the Products page, click Import from Vestis PLM.
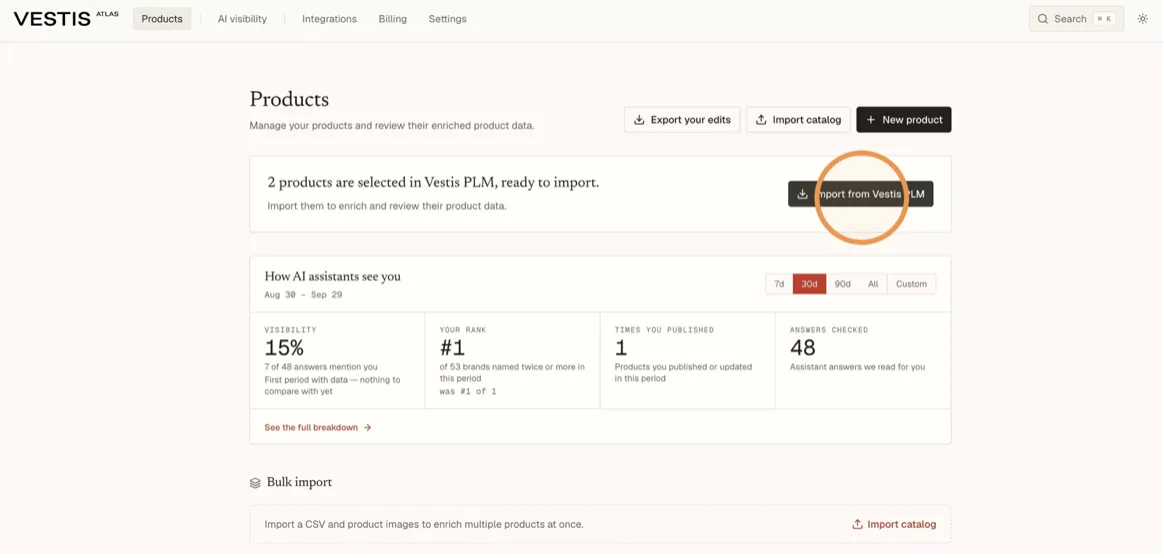
Wait for the imported products to finish enriching, then click Review products.
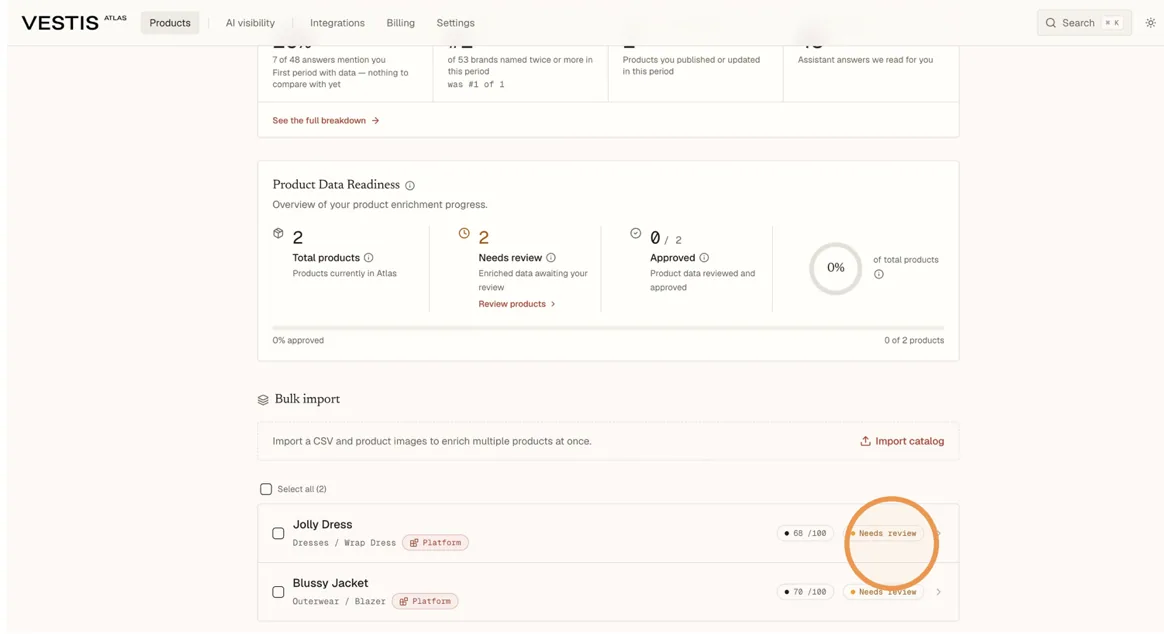
Also on this page: "How AI assistants see you" summarises visibility, your rank, how many products you've published, and how many AI answers were checked. Bulk import lets you upload a CSV and images to enrich many products at once.
Review a flagged product
A product with a "Needs review" status has one or more fields Atlas could not confidently fill in. Open it, check the photos, and read the readiness score before making any changes.
Open the product marked Needs review.
Review the Atlas Readiness Score: Completeness, Specificity, Evidence and Channel readiness.Read the "Top actions" list and the "Still missing" fields below it.
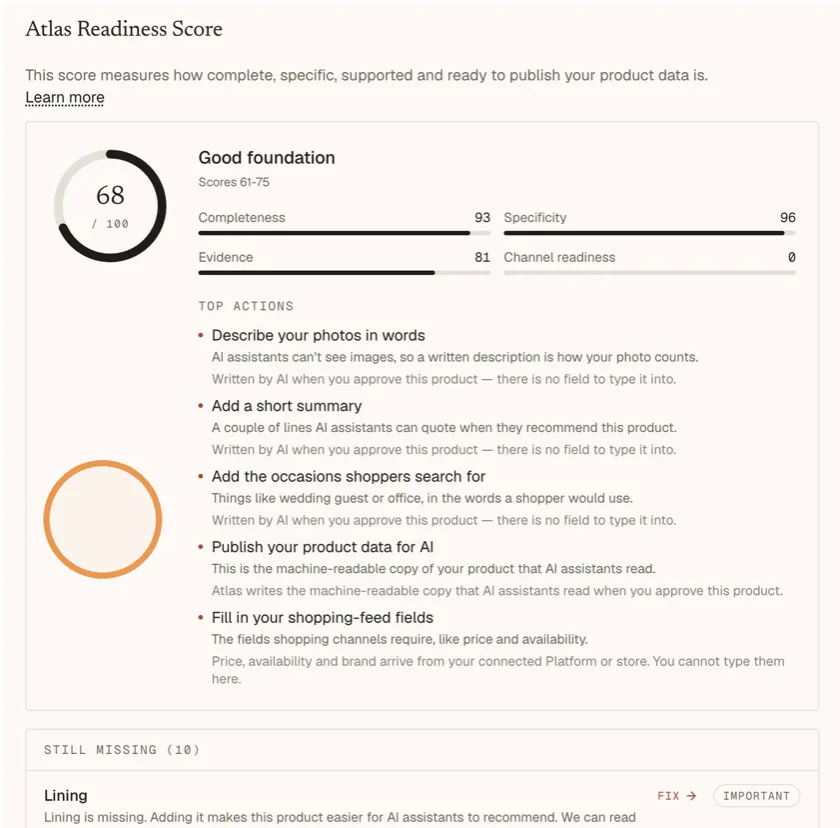
Important: Correct anything wrong before you approve. Approving sends the data onward as a draft — it is not the same as publishing it live.
Fix low-confidence fields
Each missing or flagged field has a Fix link that opens a dropdown of suggested values drawn from the product photos or your supplied data.
Click Fix next to a missing field, such as Lining.
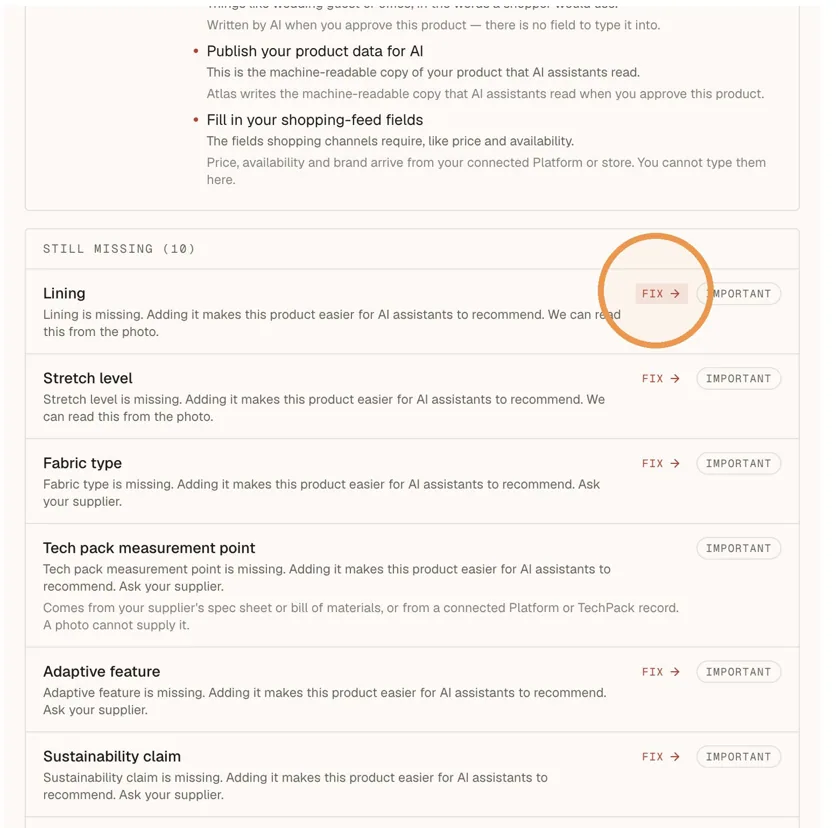
Choose the correct value from the dropdown, for example "Fully Lined". Repeat for each flagged or missing field that needs a correction. Click Save changes once you are done. Click Approve.
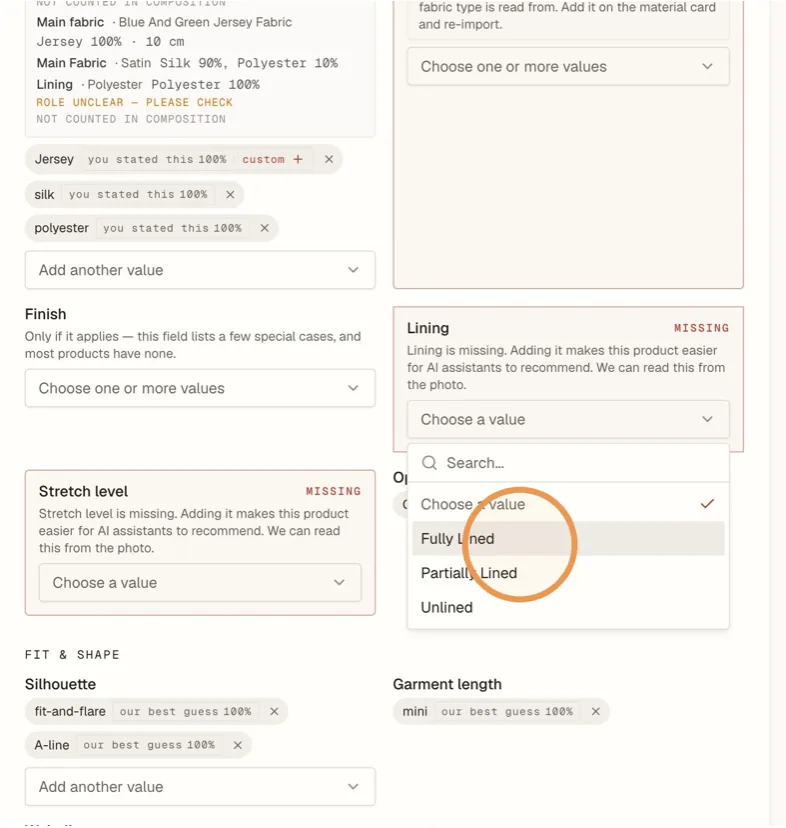
Note: Save changes stores your edits without approving. Approve is a separate, deliberate action — do it only once the data is correct.
Publish the AI-ready content
Once approved, the product is sent to Vestis Platform as a draft, but it is not live anywhere until it is published. Review the generated content and publish it from Atlas.
Confirm the Approved status and the "Sent to Vestis Platform" note. Open the Content tab and review the generated title, summary and descriptions.
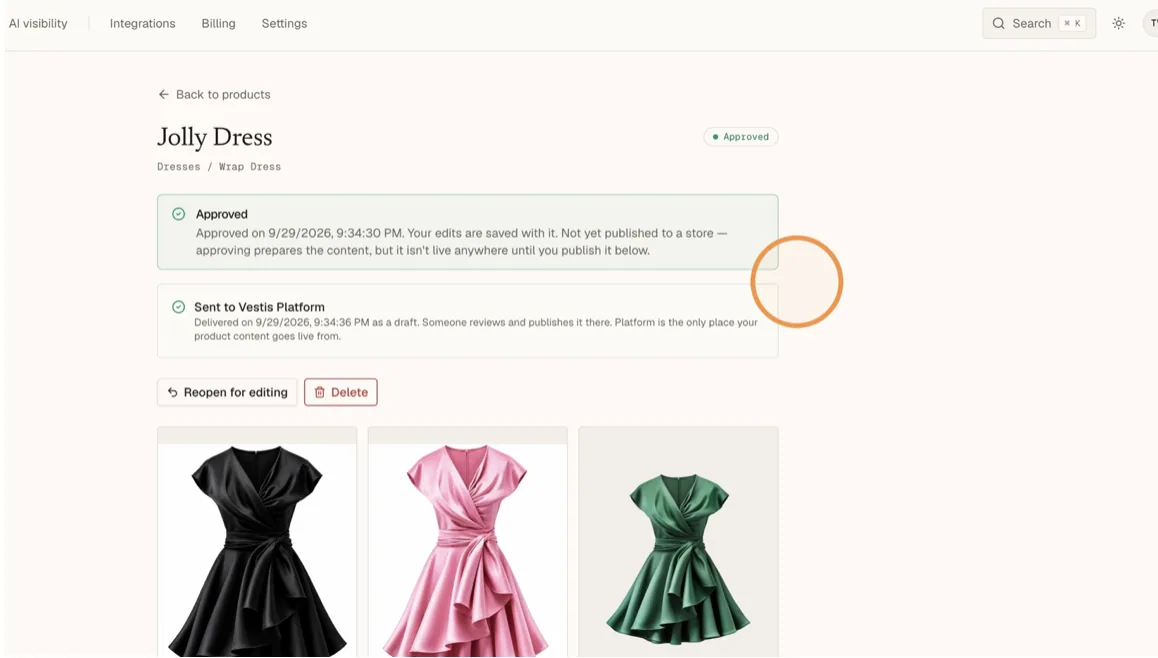
Open the Publish tab and check for any excluded claims.
Open AI visibility to see the product's current readiness score and any items still missing.
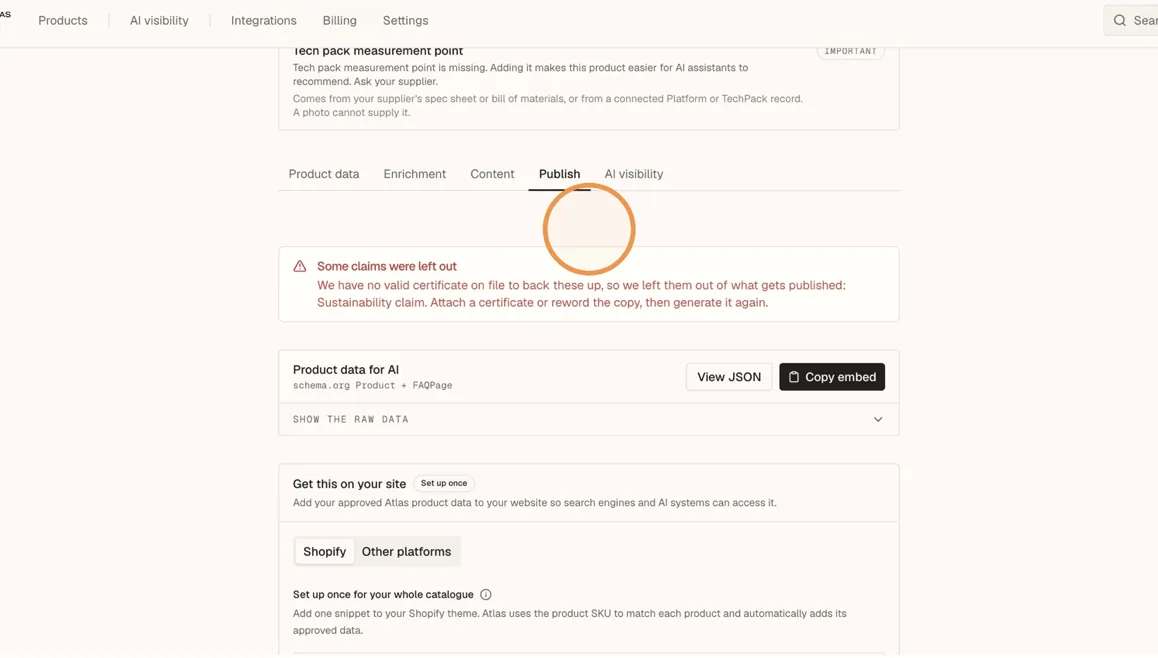
Important: If a claim cannot be backed up — for example a sustainability claim with no certificate on file — Atlas leaves it out of what gets published. Attach a certificate or reword the copy, then regenerate.
Send the enrichment back to Vestis
Publishing in Atlas prepares the AI-ready content. To make it live on your storefront, you still need to publish the enrichment back into Vestis.
Switch to the Vestis Atlas Integration tab in Vestis and confirm the connection is still active.
In the sidebar, click Collection & Styles, then Atlas Enrichments.
Review the styles marked "Ready to publish" and their readiness scores.
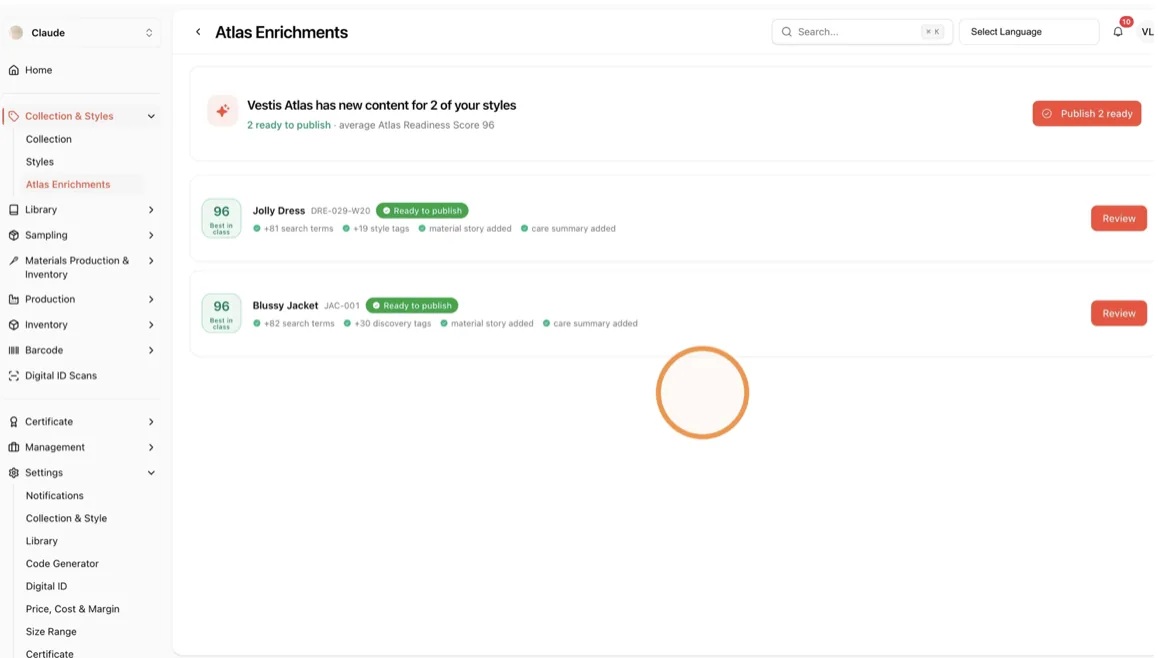
Switch to Atlas Enrichments in Vestis, click Review, and read the proposed content.
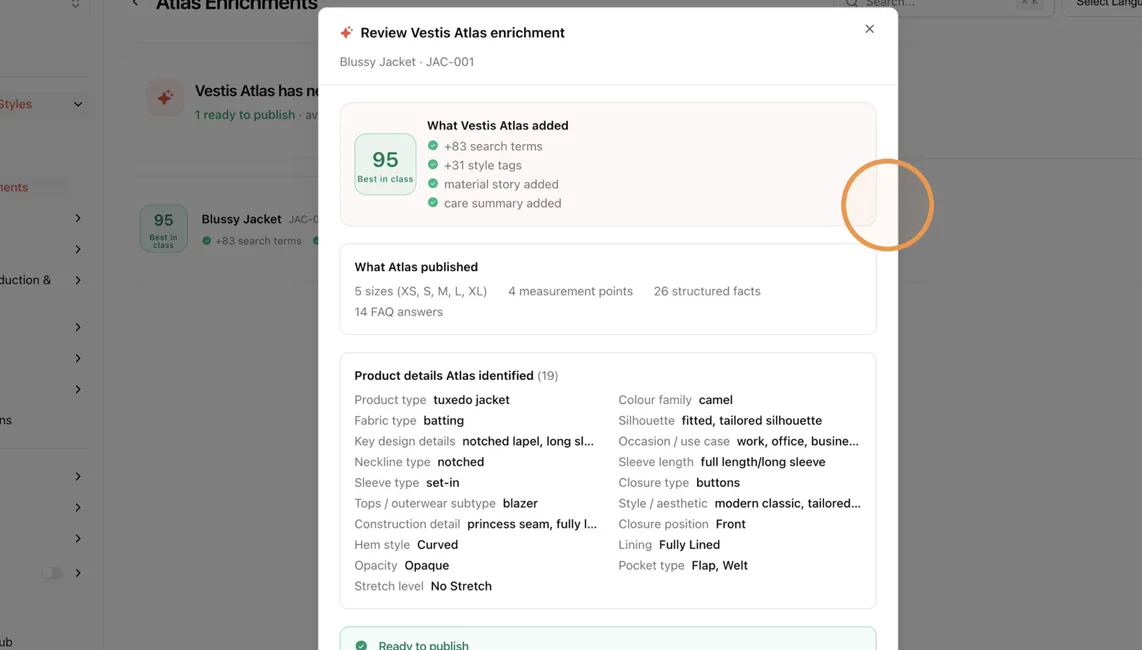
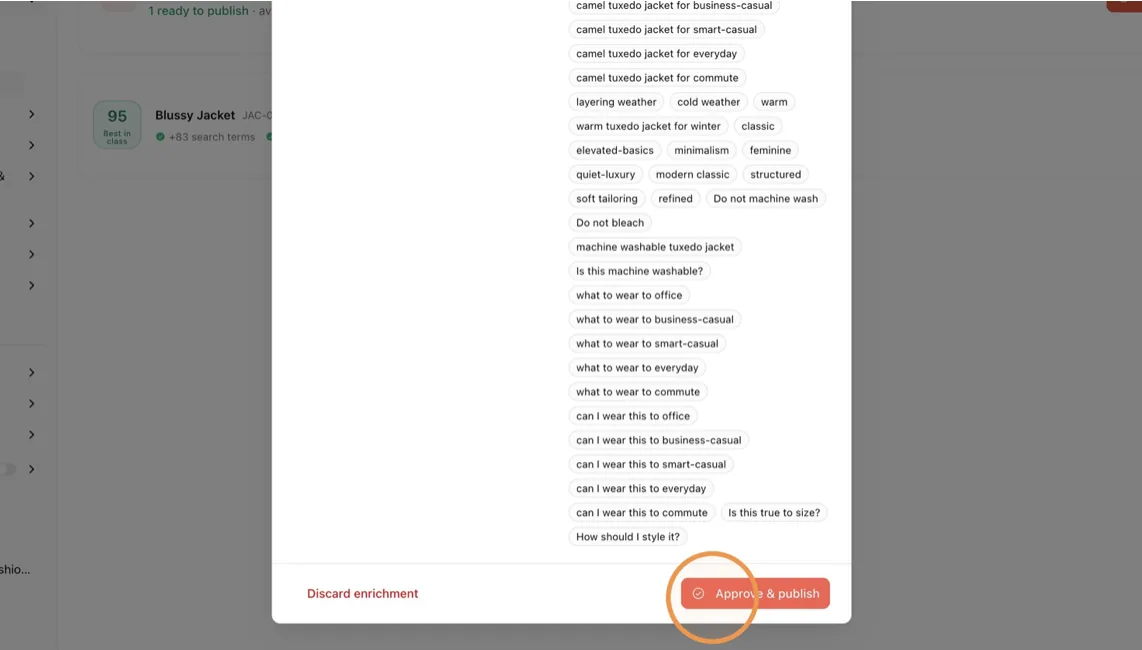
Click Approve & publish to finish, or Discard enrichment to reject it.
Click "Publish X ready" to publish everything at once, or click Review to check one item first. Confirm the dialog by clicking Publish.
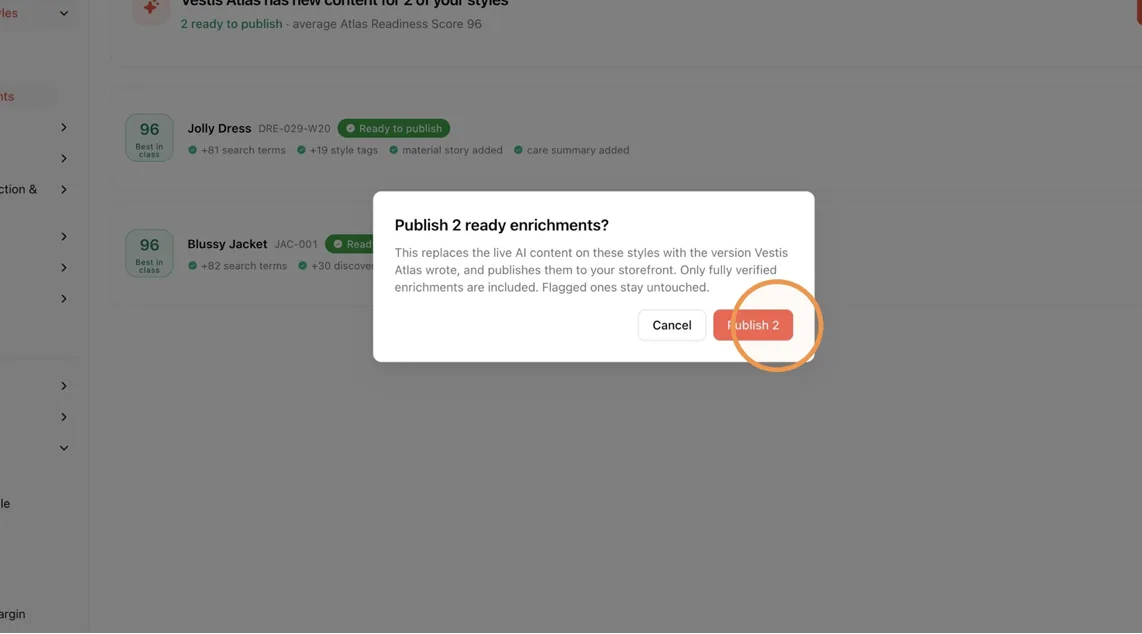
Note: Publishing replaces the live AI content on these styles with the version Atlas wrote. Only fully verified enrichments are included — flagged ones stay untouched.