
Care instruction management
The Care Instructions section in Settings allows users to manage care instruction values used throughout the system.
Under review. This page is published while we check it against the live app, so some details may have changed.
Screenshots may be out of date.
The Care Instructions section in Settings allows users to manage care instruction values used throughout the system. Users can view all available categories, define the display order of categories, and review default care instruction values grouped by category. Users can choose which default values appear in dropdown lists by selecting or deselecting them, as well as activate or deactivate values as needed. In addition, users can create custom care instruction values and assign them to specific categories. To maintain data consistency, the system prevents the creation of duplicate values, and default care instruction values cannot be deleted.
Best practice
The Care Instruction selector displays only values that are both active and included for selection. Values are organized by category, and categories are displayed according to their configured placement order. Categories that do not contain any available values are automatically hidden from the selector. If a value has been deactivated, it remains visible on existing products and styles where it is already assigned, but it cannot be selected for new products or updated assignments.
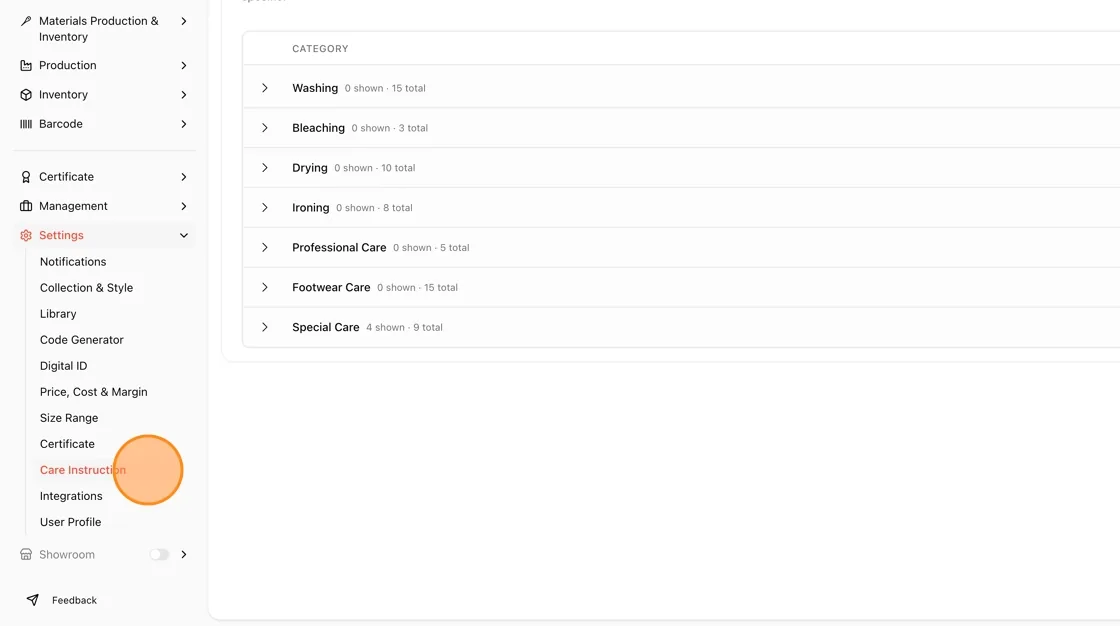
Navigate to Settings in the left bar menu, select Care Instruction from the dropdown menu under Settings.
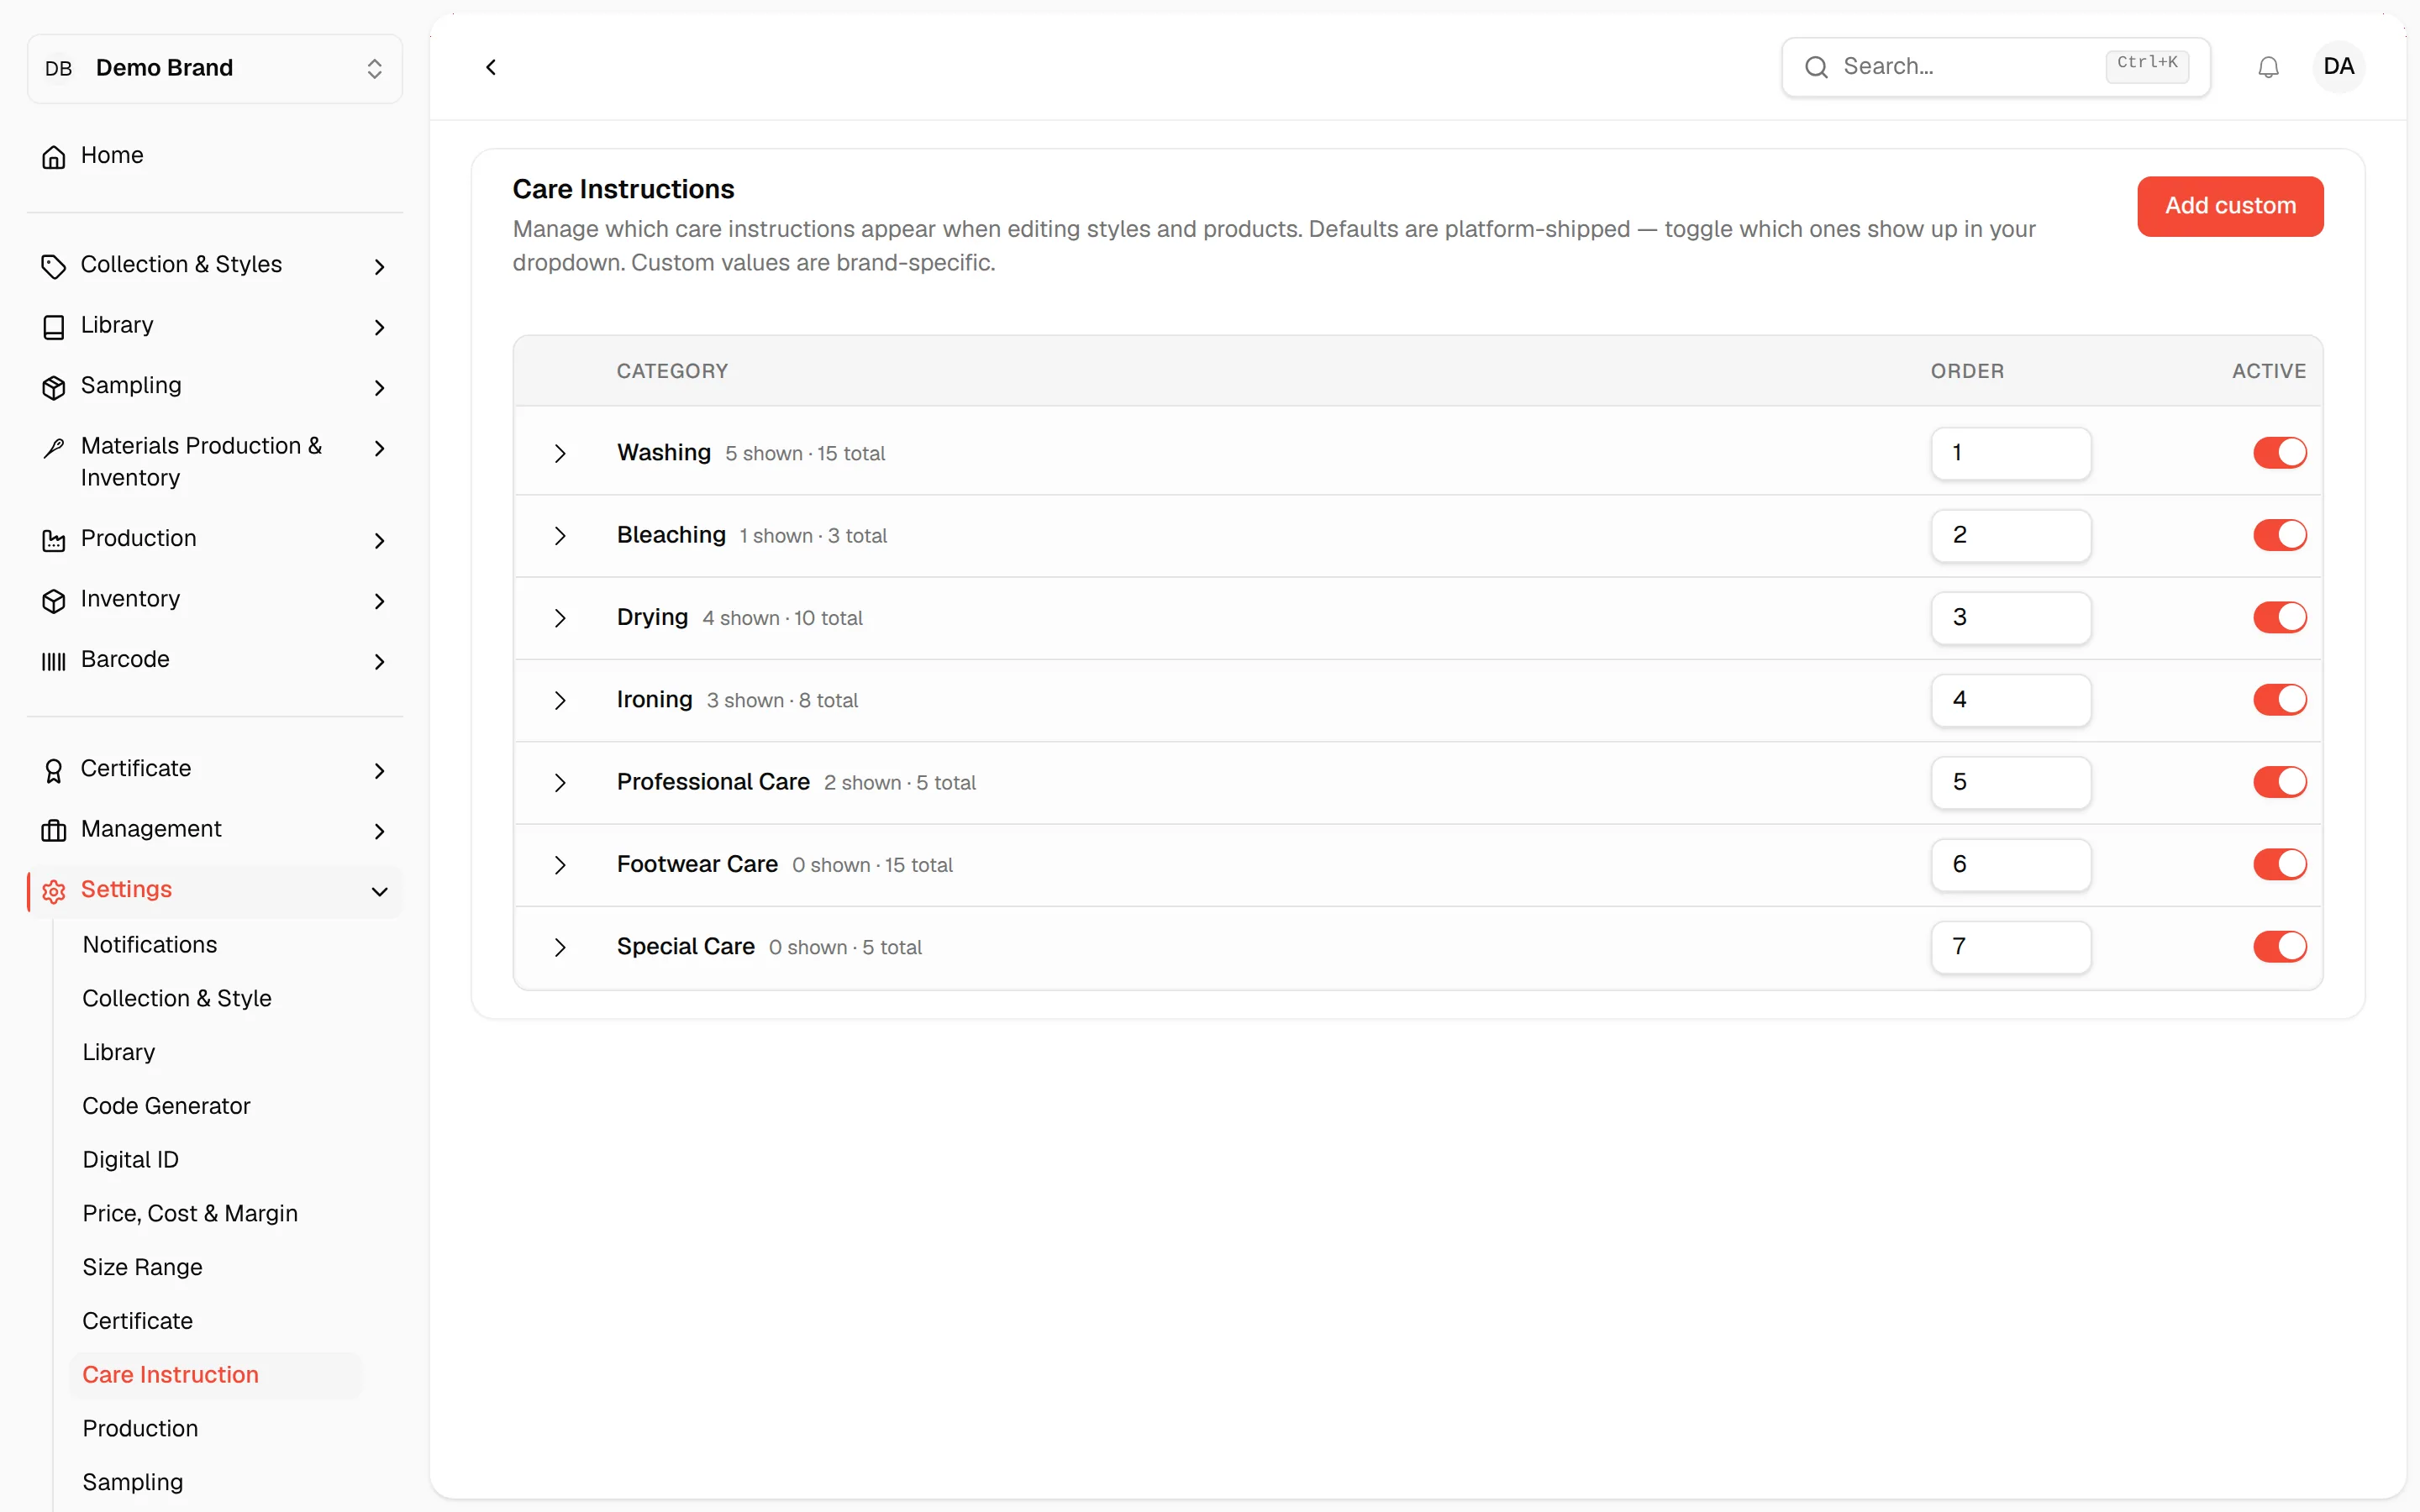
All care instruction categories are displayed in a collapsible list.
Click the arrow icon next to a category name to expand and view all instructions in that category.
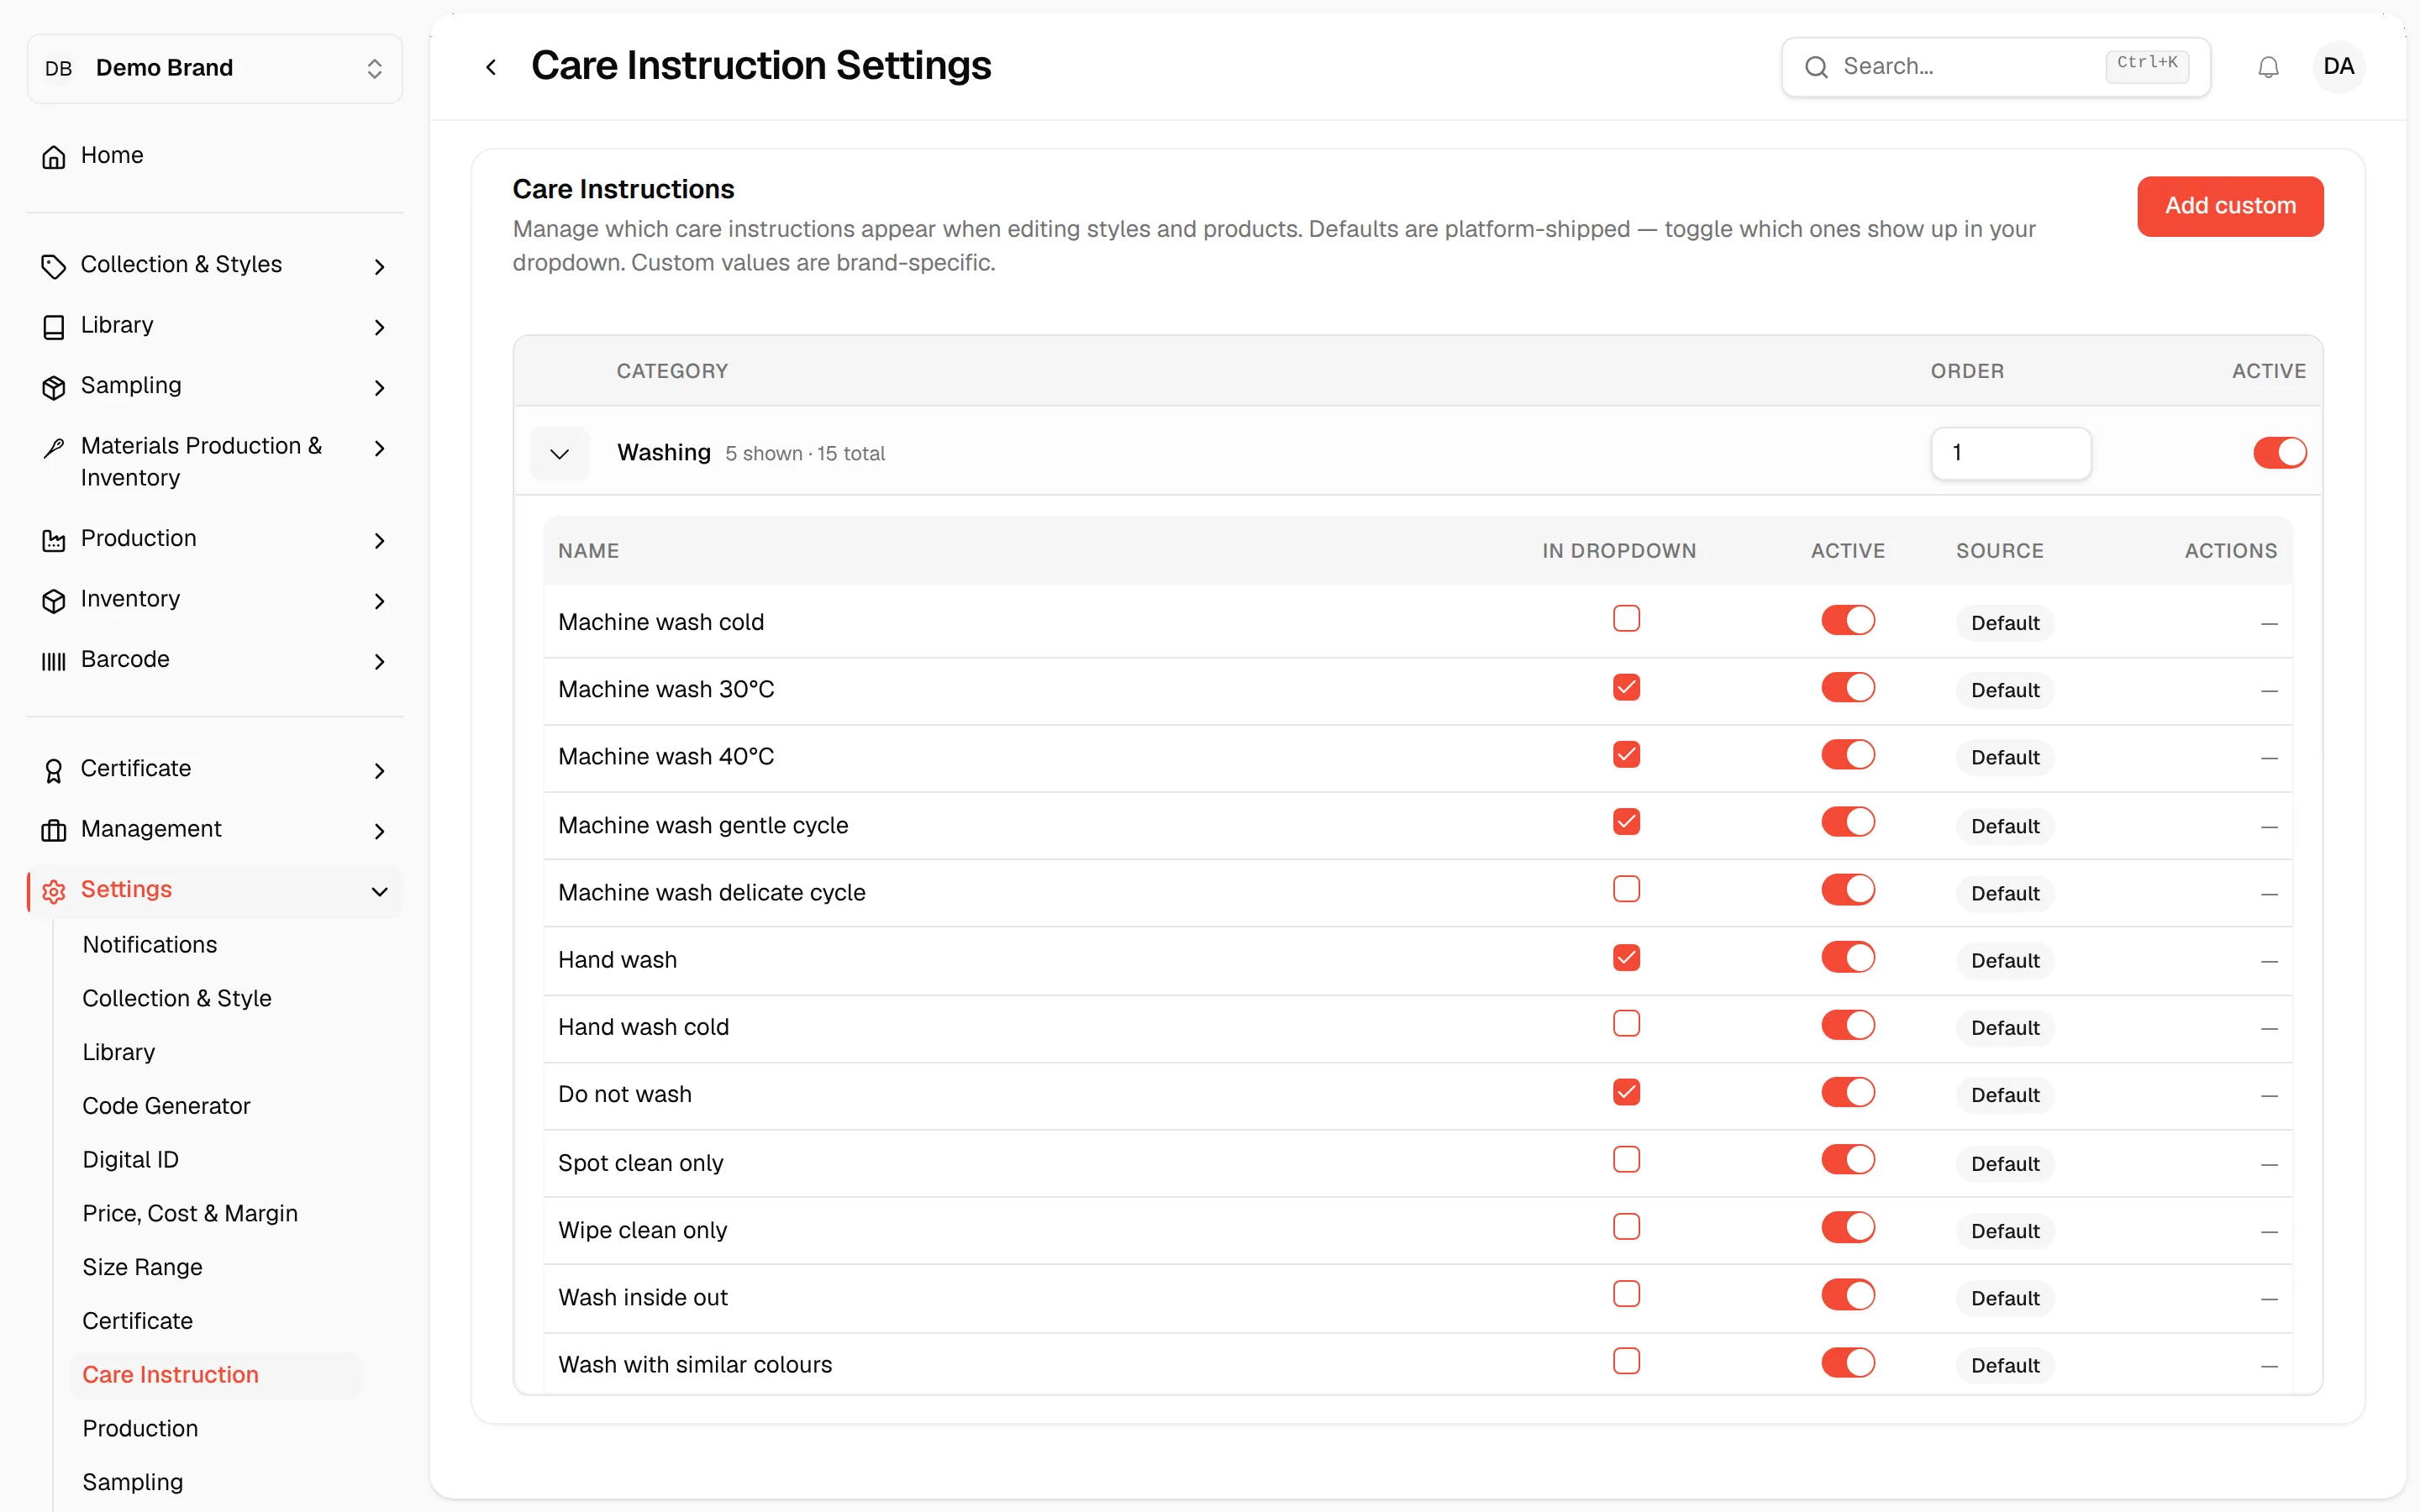
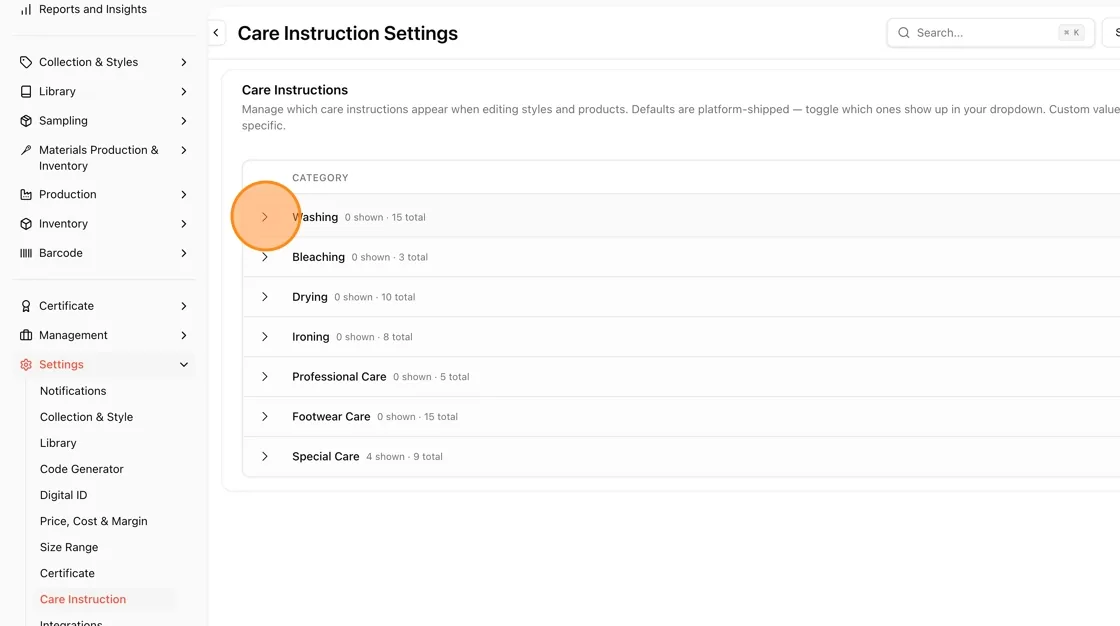
Check the box to include the instruction in your dropdown menus
Uncheck to hide it from selection menus.
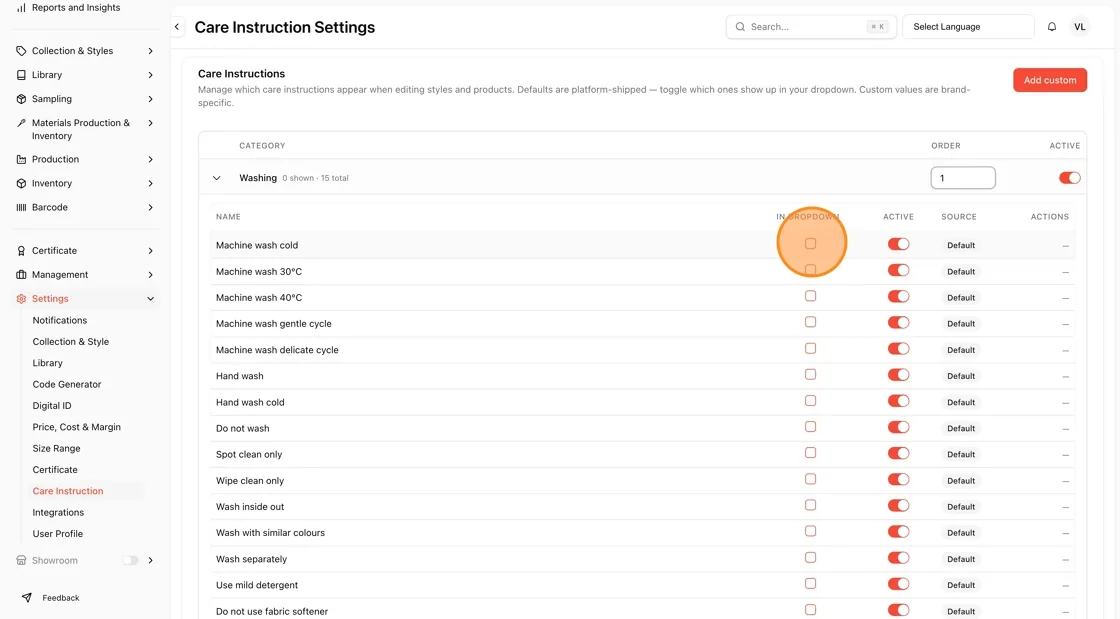
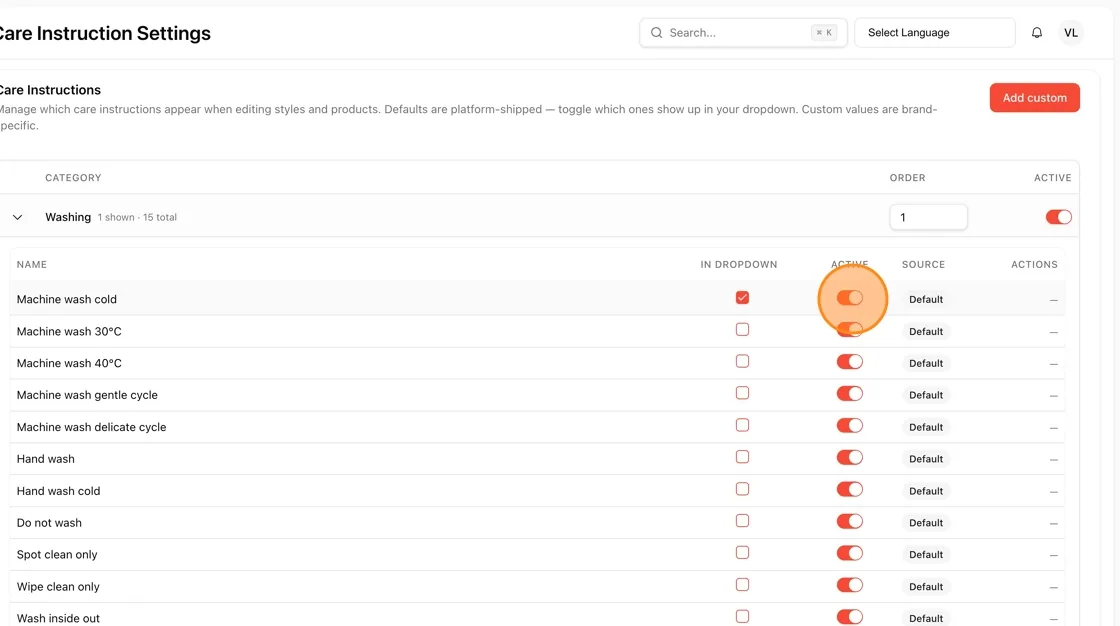
Turn ON (red toggle) to activate the instruction
Turn OFF (gray toggle) to deactivate it
Active instructions are available when editing styles and products.
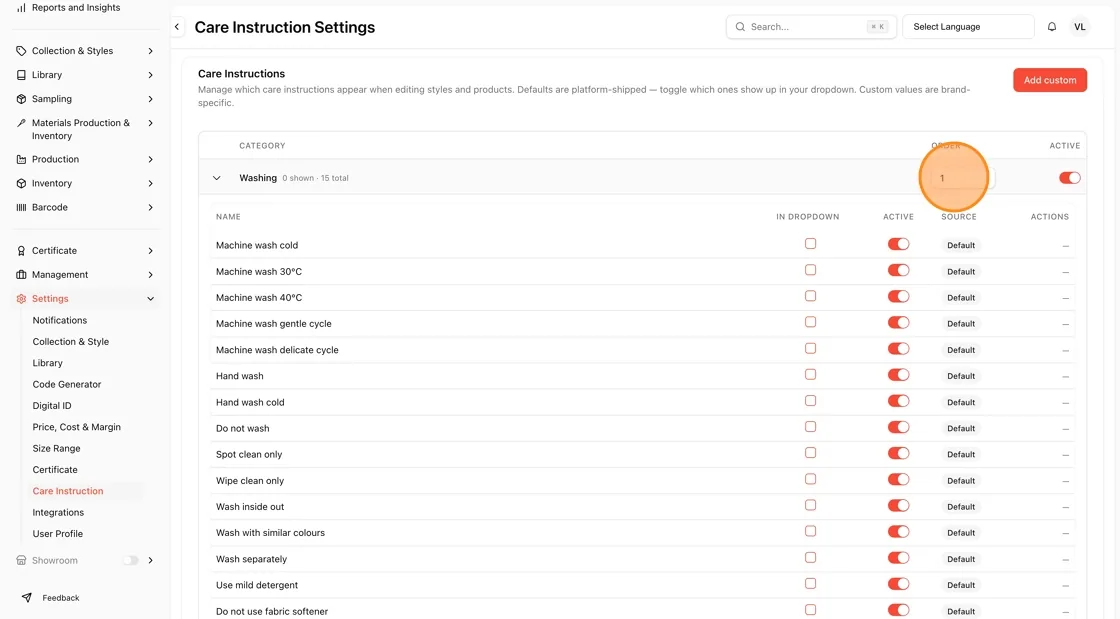
Edit the Order number on a category row to control the sequence of categories
Categories appear in ascending order (1, 2, 3, etc.). Each category needs its own number, otherwise the page shows "Order 2 is already used by another category".
Click the field and type a number to change the order
Default: Platform-provided standard care instructions
Custom: Brand-specific custom instructions you've created
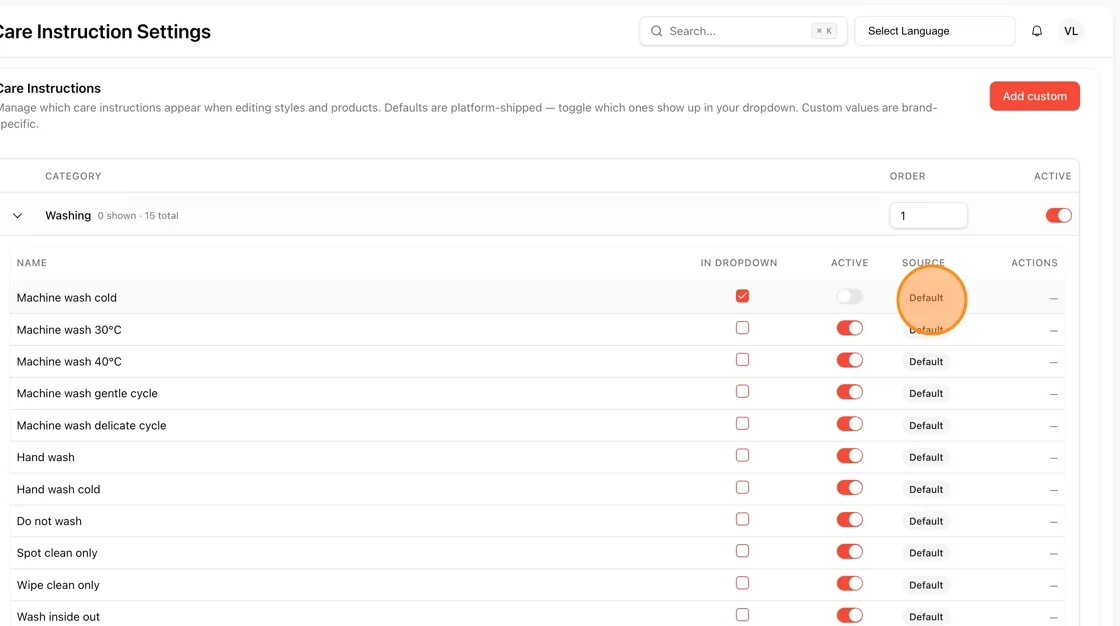
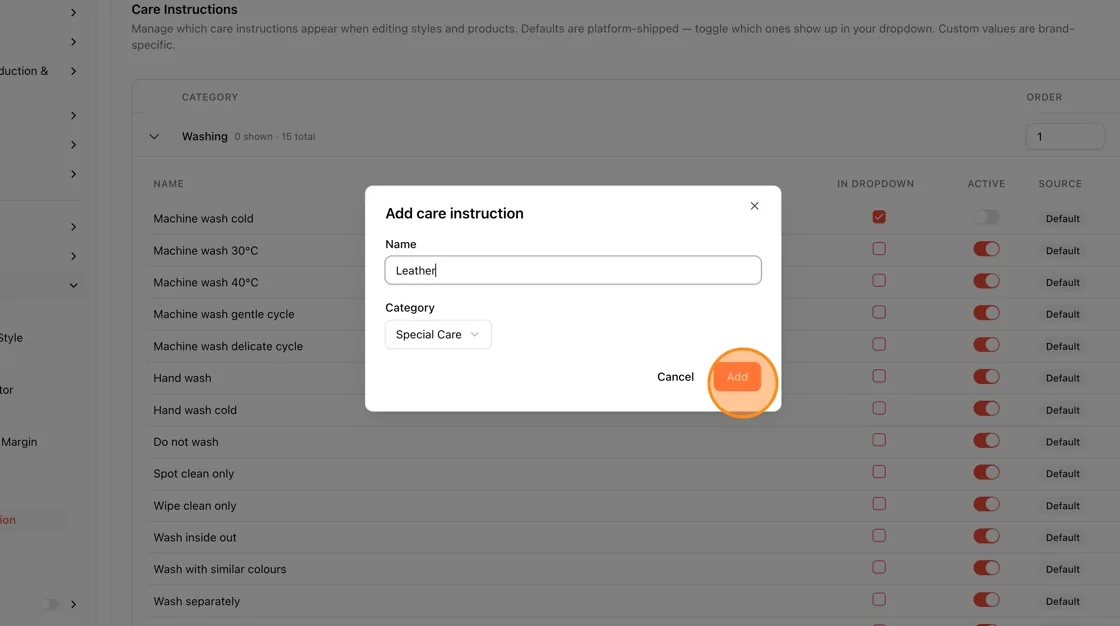
Click the "Add custom" button (red button, top right).
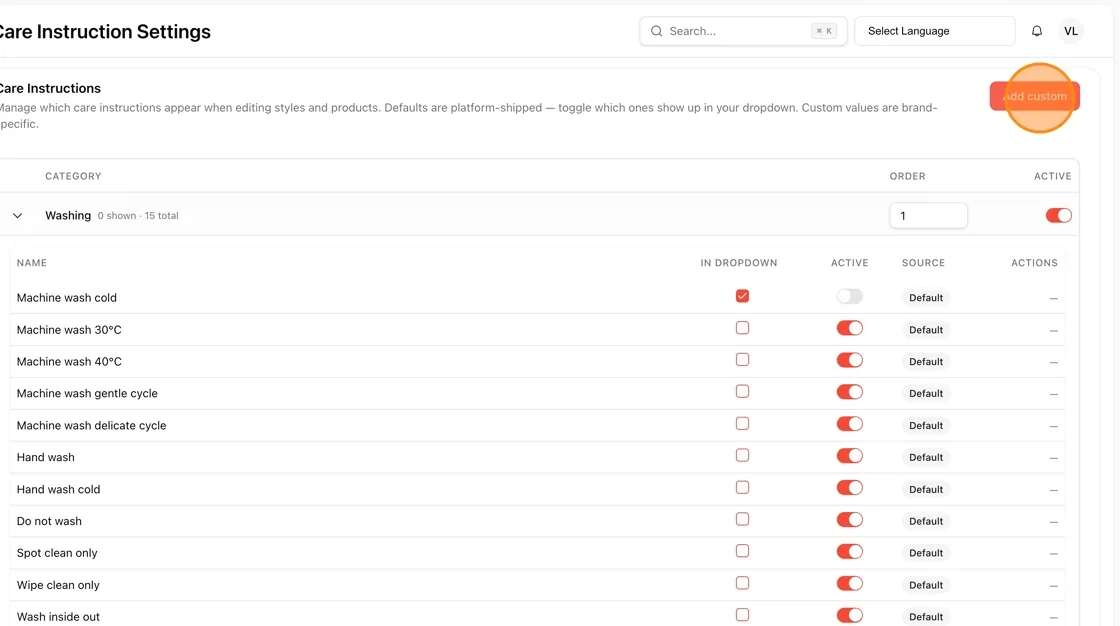
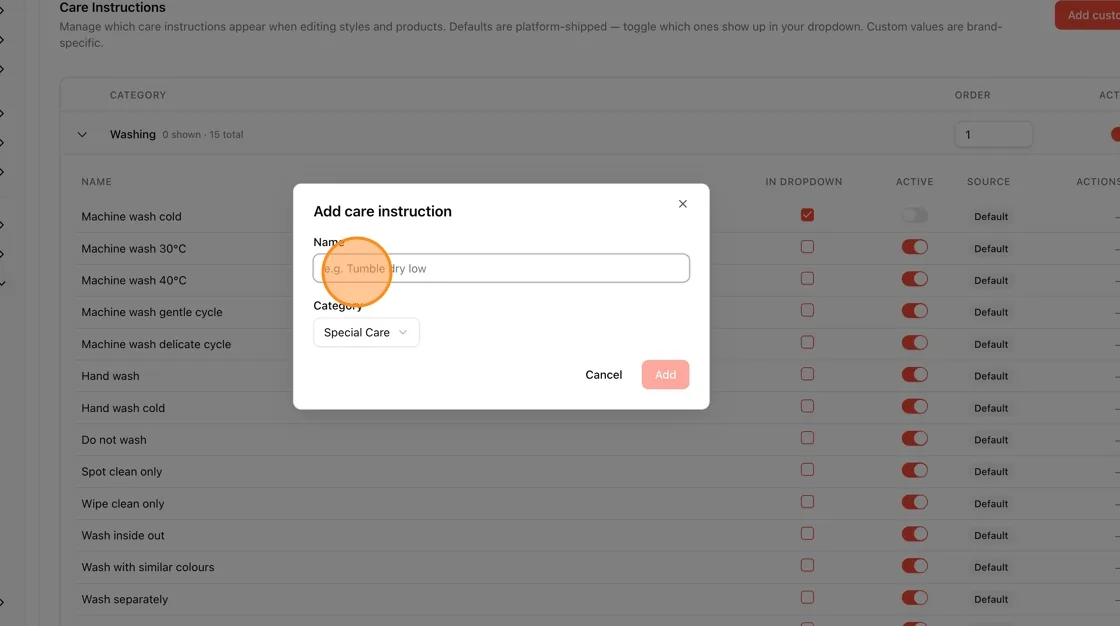
In the field, complete the following fields:
Name Field : Enter a descriptive name for the care instruction
Category Dropdown
Select which care category the instruction.
Choose the most relevant category for your instructions
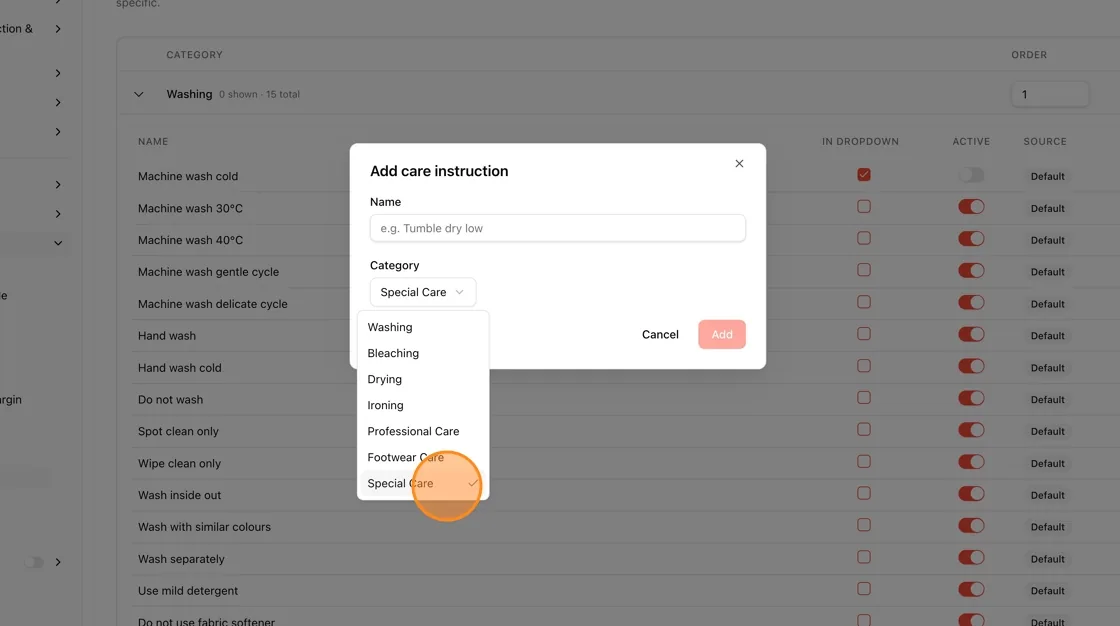
Click "Add" (red button) to save the new instruction
The new instruction will appear in its category with the source marked as "Custom"
Rename or delete a custom instruction
Custom instructions have an edit (pencil) and a delete (bin) icon in the Actions column. Default instructions show a dash instead, so they cannot be renamed or deleted.
Click the edit icon
Click the pencil icon on the custom row, enter the new name in the Name field of the Rename care instruction window and save.
Click the delete icon
Click the bin icon on the custom row and confirm in the Delete care instruction window.
Note
Styles that already use a deleted instruction keep showing it, but it no longer appears in the dropdown for new selections.
Reference
| Column | What it does |
|---|---|
| Order (category row) | Position of the category in the selector. Each category needs a different number. |
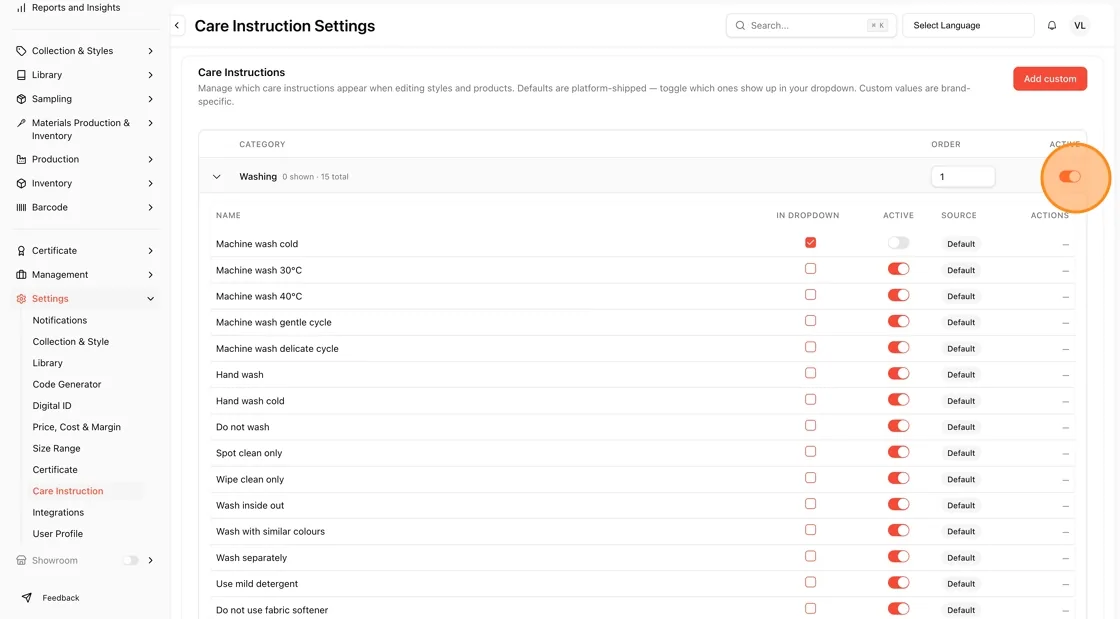
| Active (category row) | Switch for the whole category. |
| In dropdown | Checkbox on default instructions. Custom instructions show Always. |
| Active (instruction row) | Switch for a single instruction. |
| Source | Default or Custom. |