
Step 6 of 12 in Stock materials and finished goods
Inventory receiving
The Receiving module focuses on managing incoming inventory from production.
Under review. This page is published while we check it against the live app, so some details may have changed.
The Receiving module focuses on managing incoming inventory from production. It categorizes stock into In Transit, Ready to Receive, and Overdue, providing quick visibility into purchase orders, items, and quantities at each stage. Barcode scanning and batch receiving features support fast and accurate intake, while empty-state messaging keeps the interface clean when no orders are present.
InventoryReceiving
Permission: VIEW_STYLE_INVENTORY
Understand the three stages
Three cards at the top count the production orders in each stage, with the number of POs, Items and Qty:
- In Transit: shipments on their way.
- Ready to Receive: shipments marked as delivered, waiting to be received into stock.
- Overdue: shipments whose expected delivery date has passed.
Below the cards, use the two view icons to switch between the kanban view (one column per stage, No orders when a column is empty) and the table view. The table has the columns Tracking Number, Production Order, Expected Date, Items, Qty, Status and Actions, and shows No data available when empty.
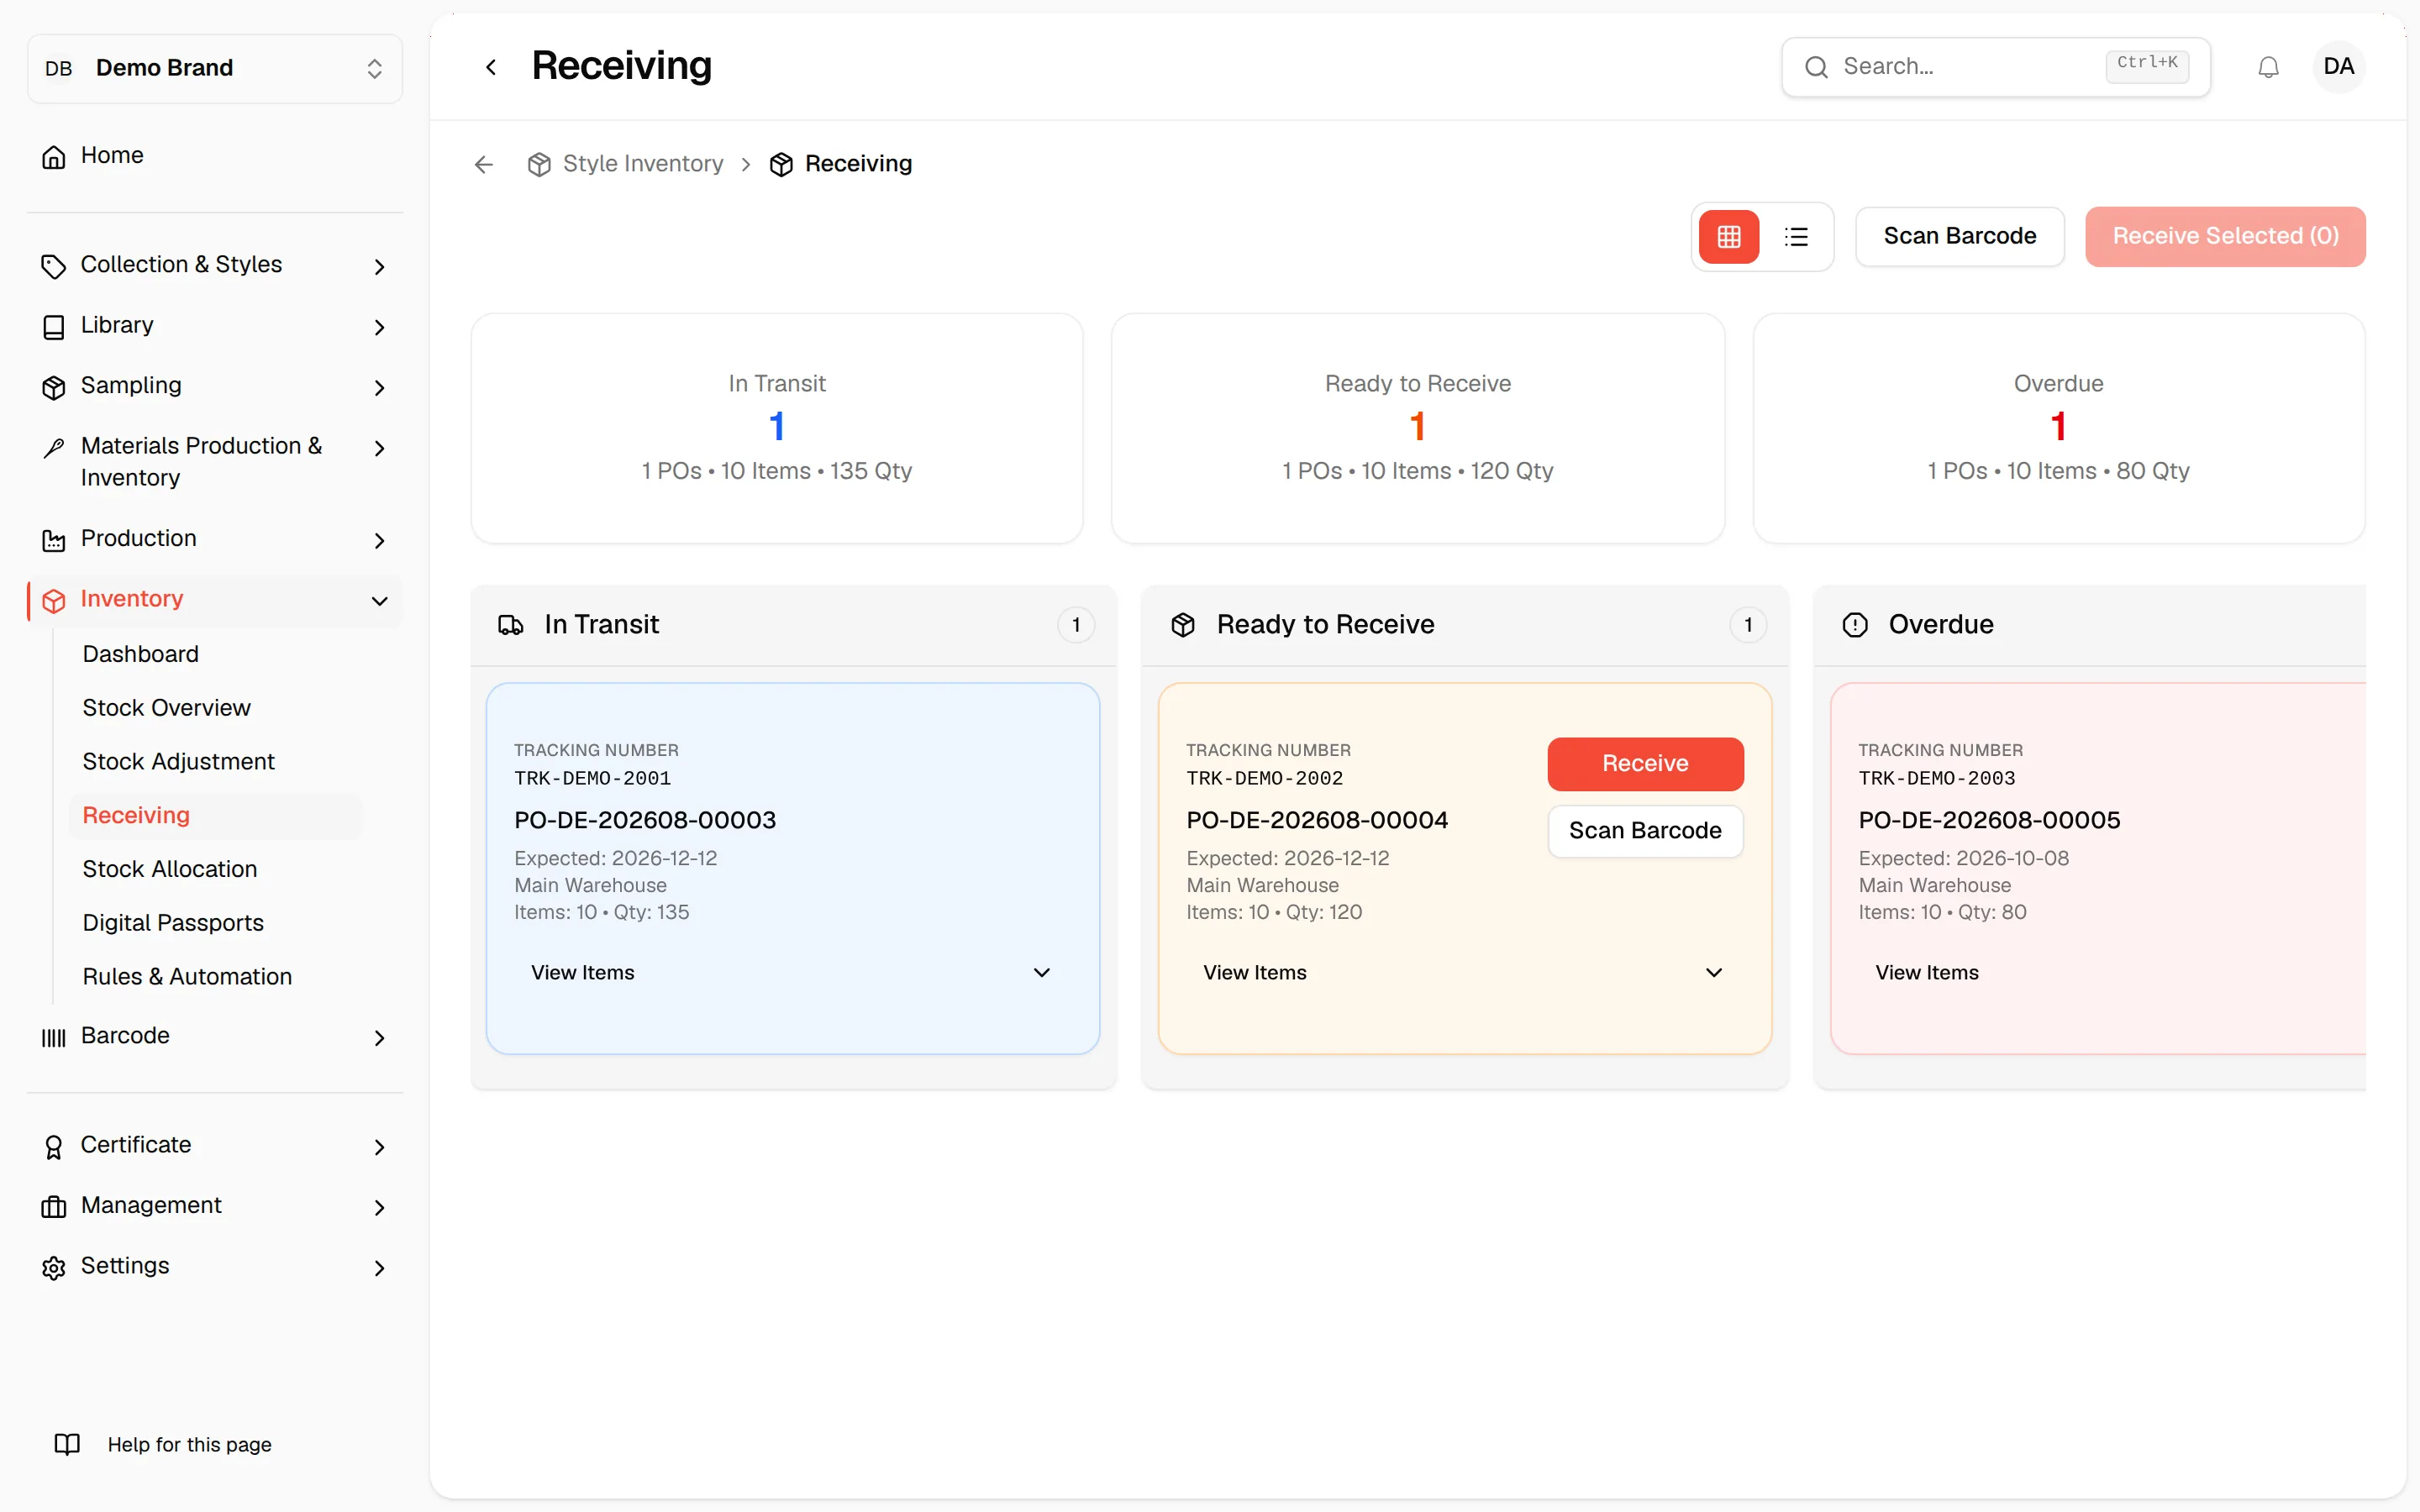
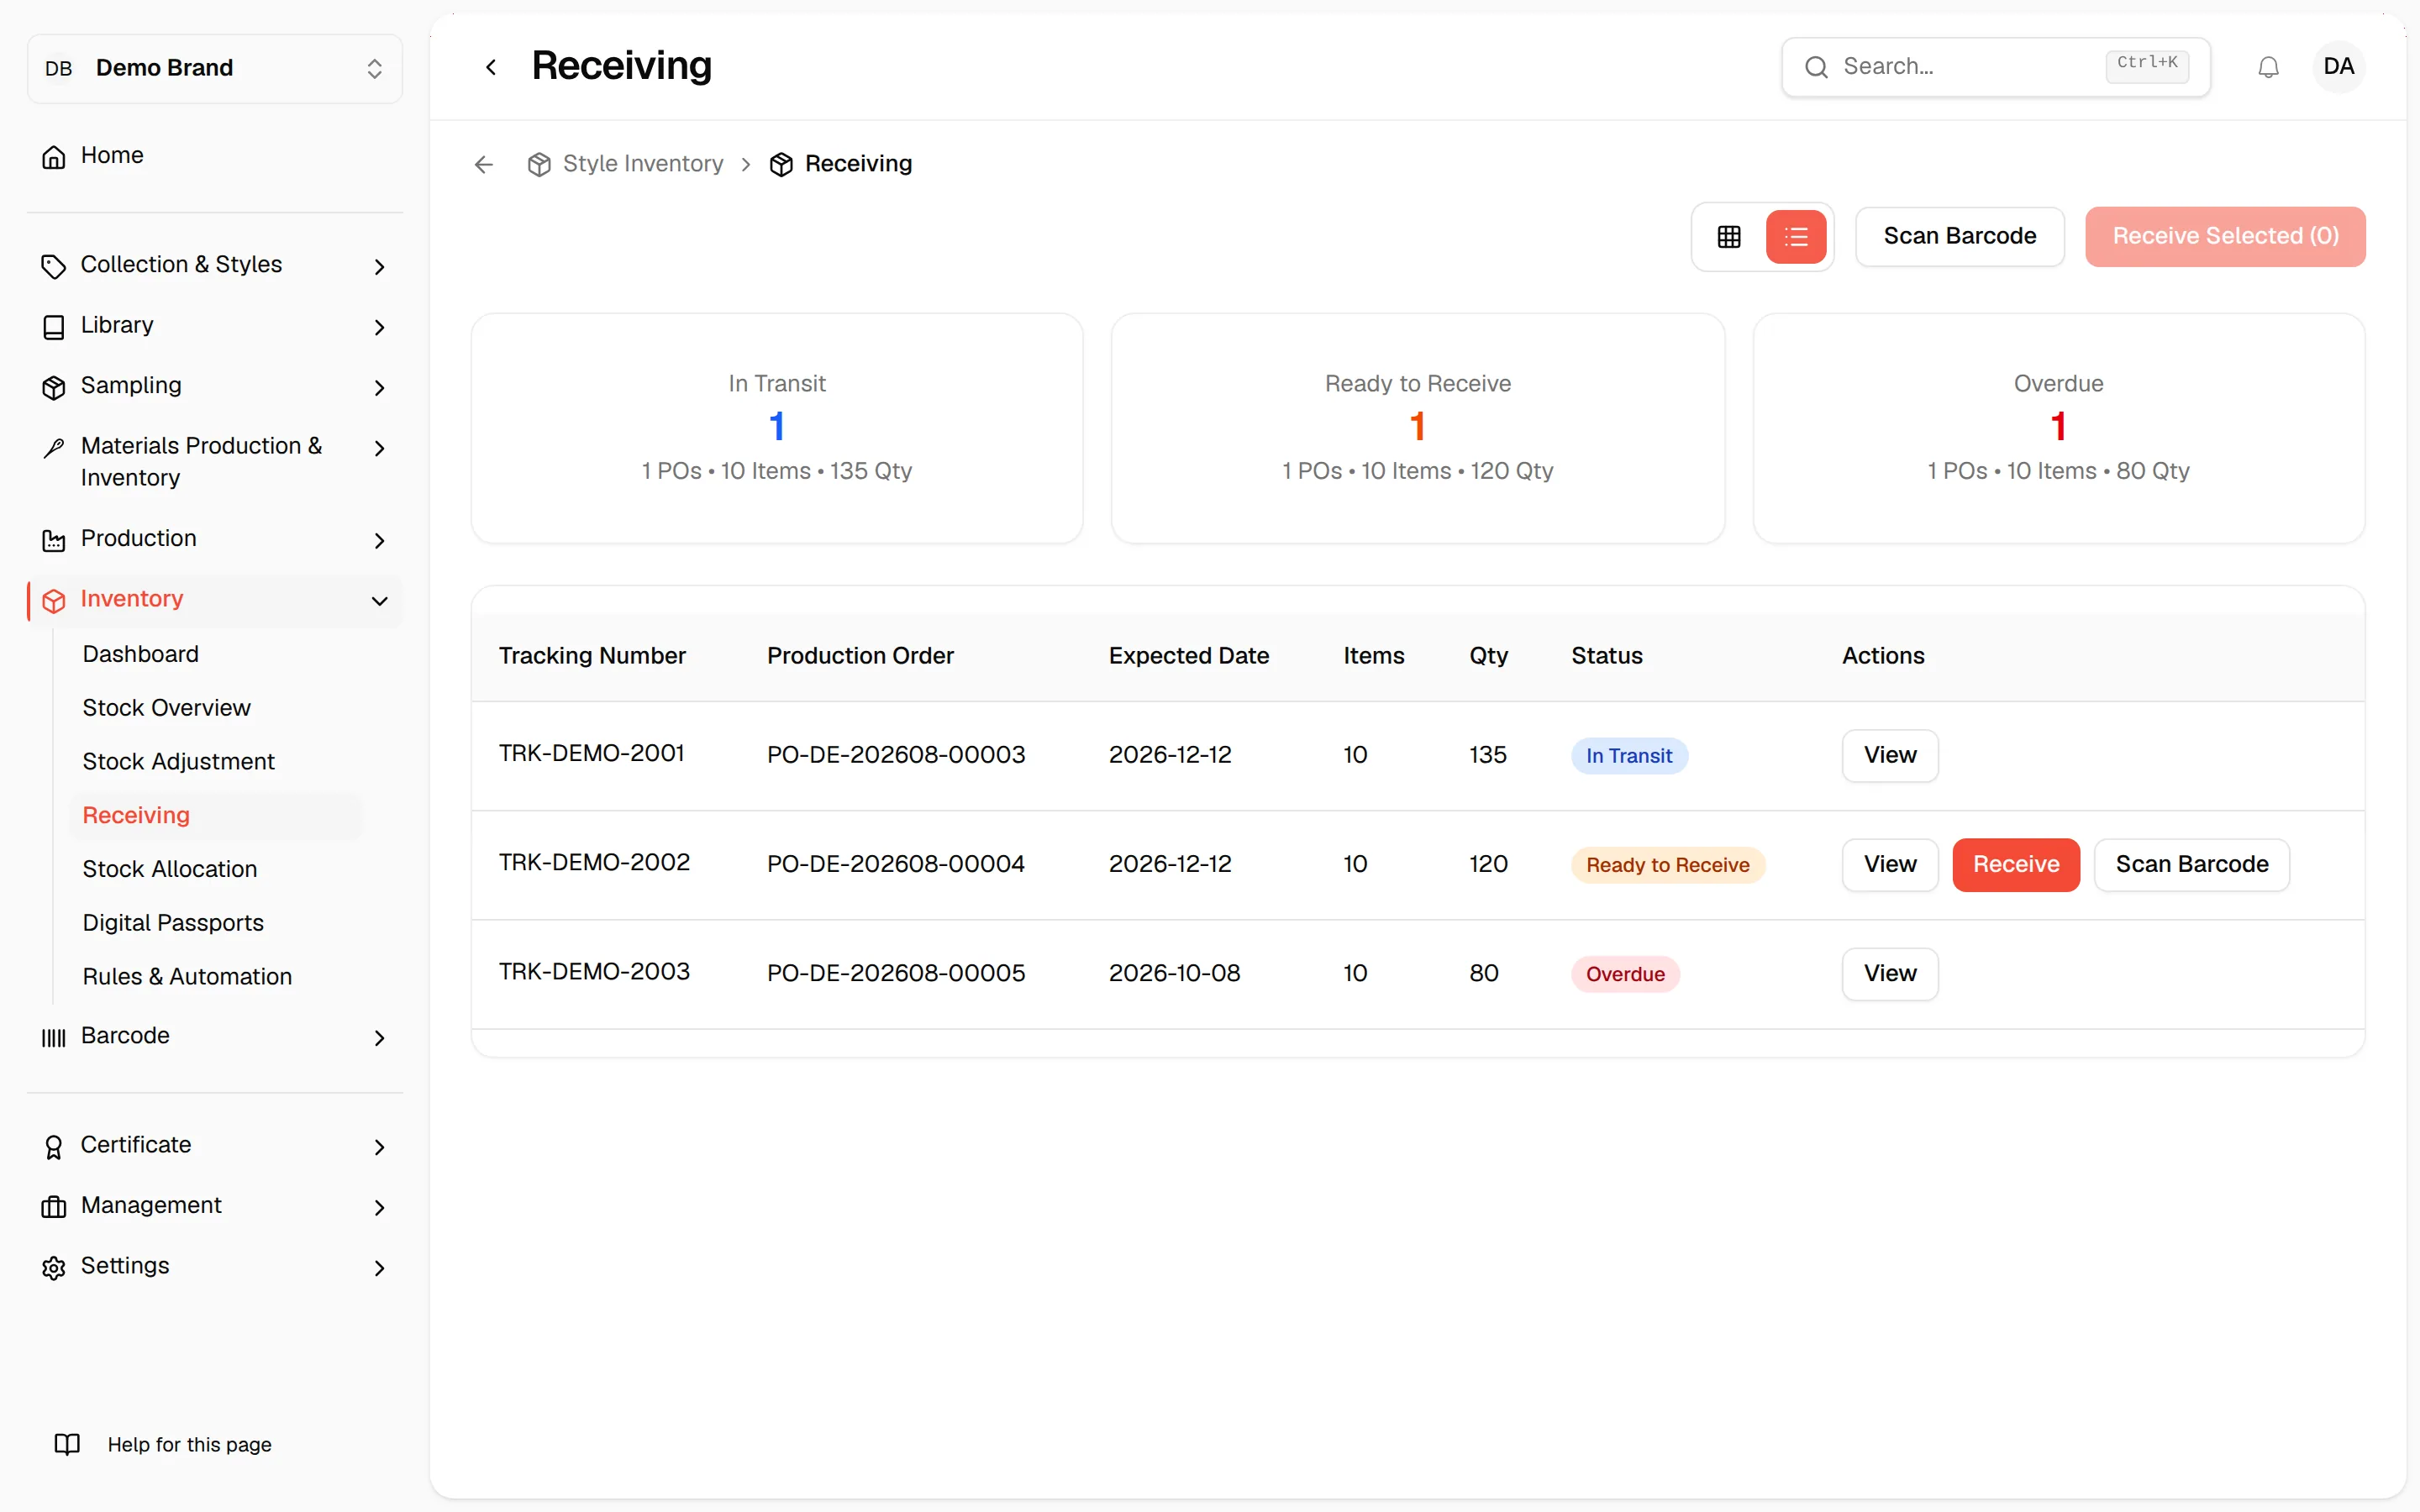
Click View Items on a card (or View in the table) to expand an order and see its items, with product, variant and expected quantity. Click it again (Hide in the table) to collapse it.
Receive stock
Only orders in Ready to Receive can be received.
Choose what to receive
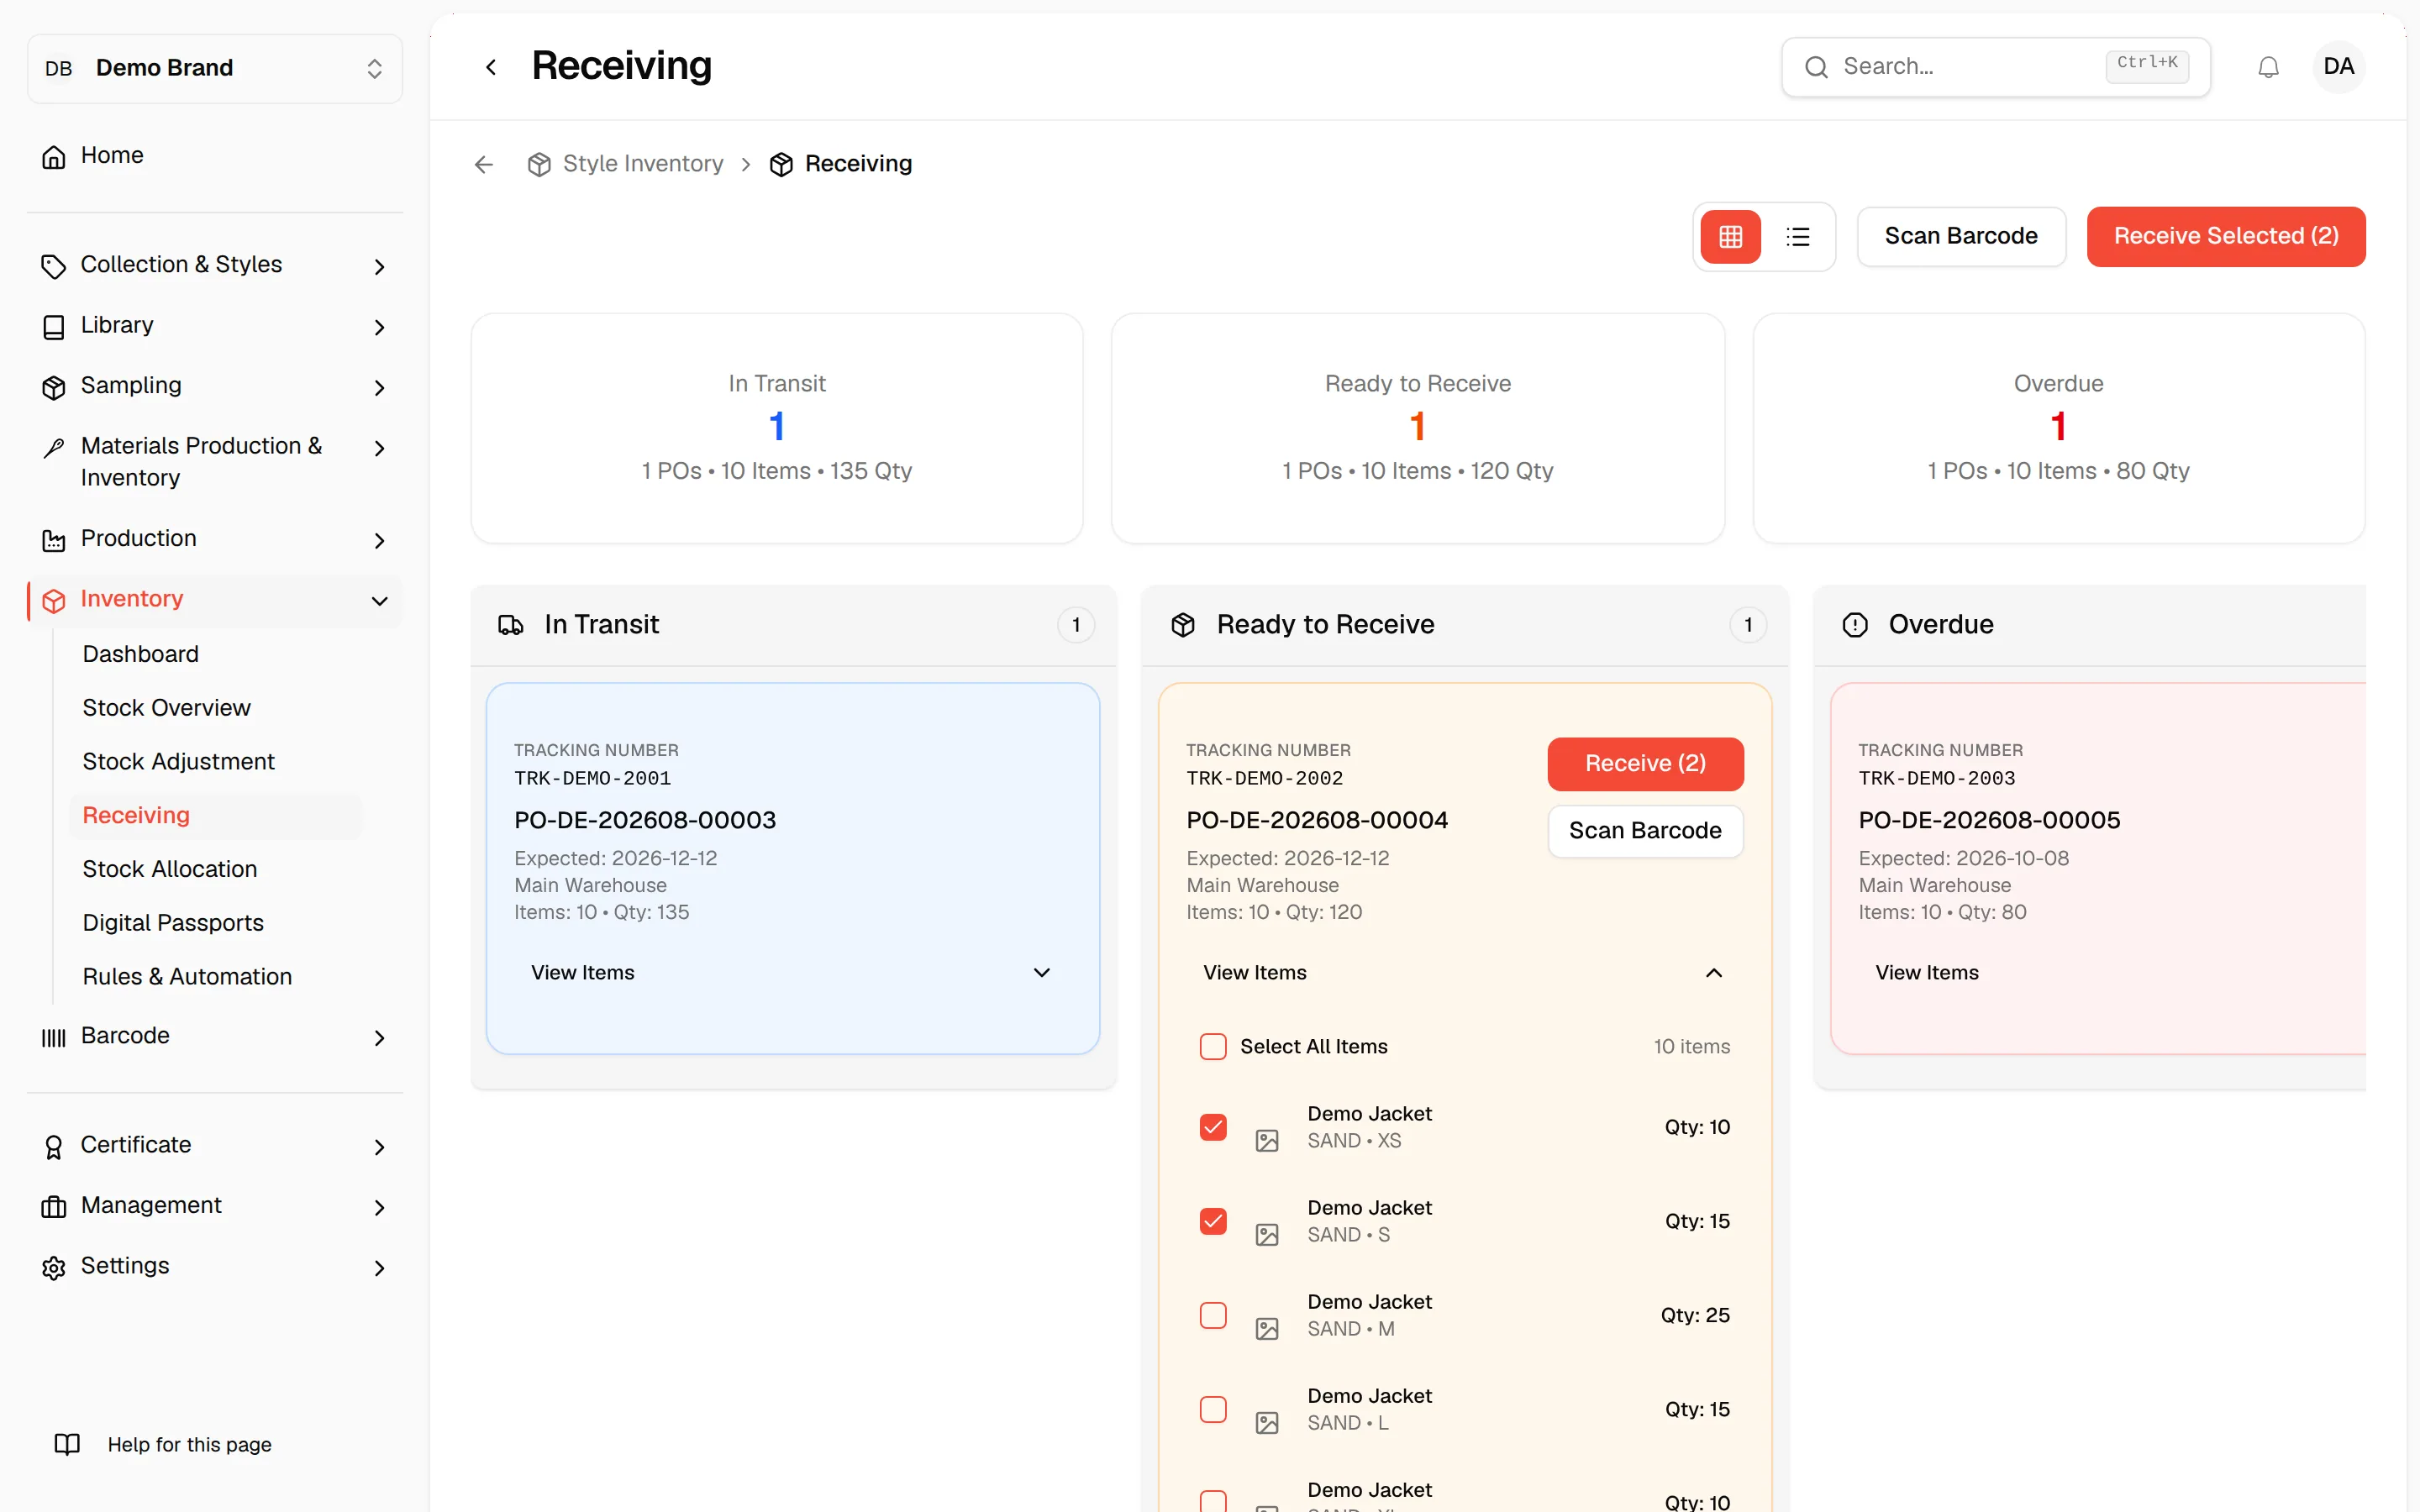
Expand an order and check the items you want, or check Select All to take every item in the order. Leave everything unchecked to receive the whole order.
Click "Receive"
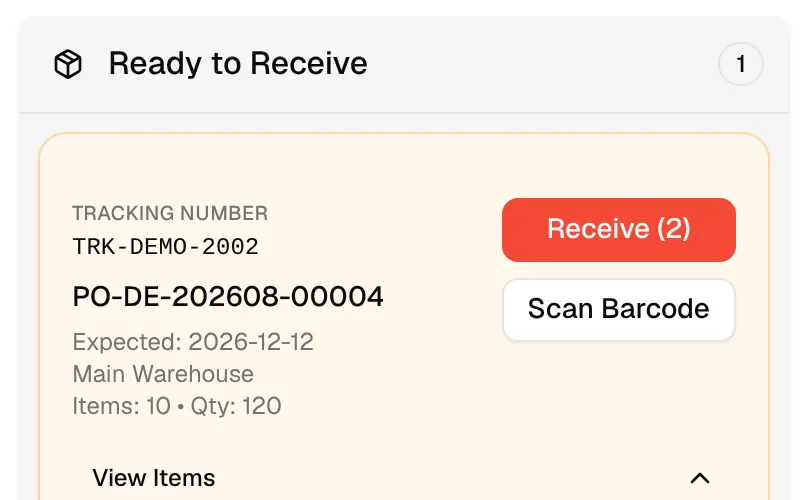
Click Receive on the order. When items are checked, the button shows how many, for example Receive (2). The Receive Selected (n) button at the top receives everything you have checked across orders.
Check the quantities
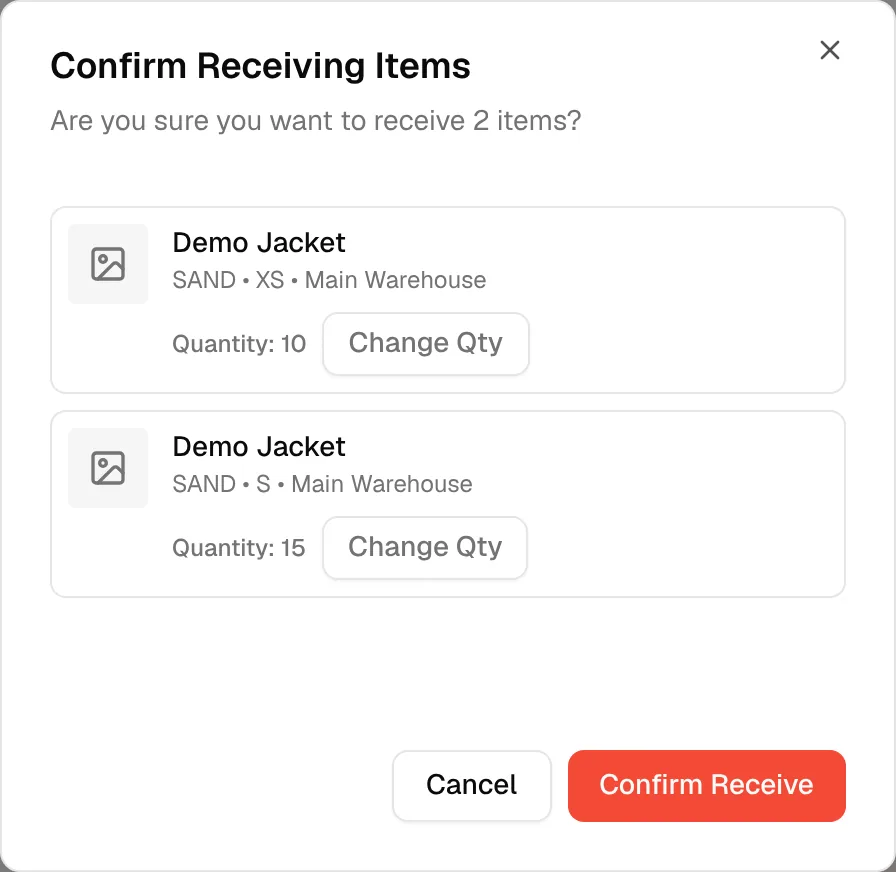
Confirm Receiving Items lists each item with its style, colour, size, warehouse and quantity. Click Change Qty to receive less than expected, enter the number and confirm it with the tick. The quantity cannot be more than the expected quantity (Max).
Click "Confirm Receive"
Click Confirm Receive to add the stock. Click Cancel to close without receiving. The button is disabled while a quantity is being edited.
The received quantities are added to your inventory for the warehouse shown on each item.
Receive with a barcode scanner
When barcode scanning is turned on for your brand, Scan Barcode appears at the top of the page and on each order that is ready to receive. Scanned items are added to the same Confirm Receiving Items list, where you confirm as above. See the Barcode guides for how scanning works.