
Step 6 of 13 in From idea to a production-ready tech pack
How to do collaboration (comment & communicate)
Users can add comments and annotations to specific areas of an image, activate and deactivate annotations, create multiple annotations on one comment box, add general comments, edit and…
Under review. This page is published while we check it against the live app, so some details may have changed.
Screenshots may be out of date.
Users can add comments and annotations to specific areas of an image, activate and deactivate annotations, create multiple annotations on one comment box, add general comments, edit and delete comments and annotations, and reply to comments and annotations.
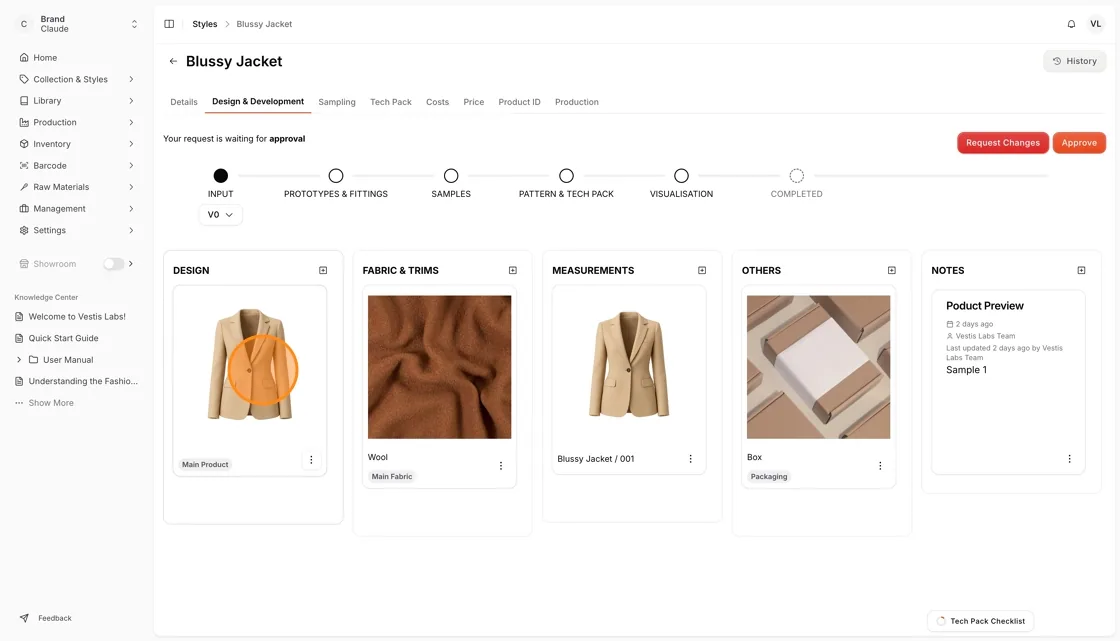
Collection & StylesStyles(open a style)Design & Development(click a card)
Permission: VIEW_FILE_MANAGEMENT,CREATE_COMMENT
Each communication can be accessed by Users with permission in real time.
Before creating the comments and annotations on your workspace, make sure to set your notification and turn on the comment and annotation notification so that you will get notified if there are comments and reply to ensure you do not miss any messages. You can set to receive notifications on the platform and by email, or on the platform only, or by email only.
You may click on the attachment in each development stages to view the attached file .
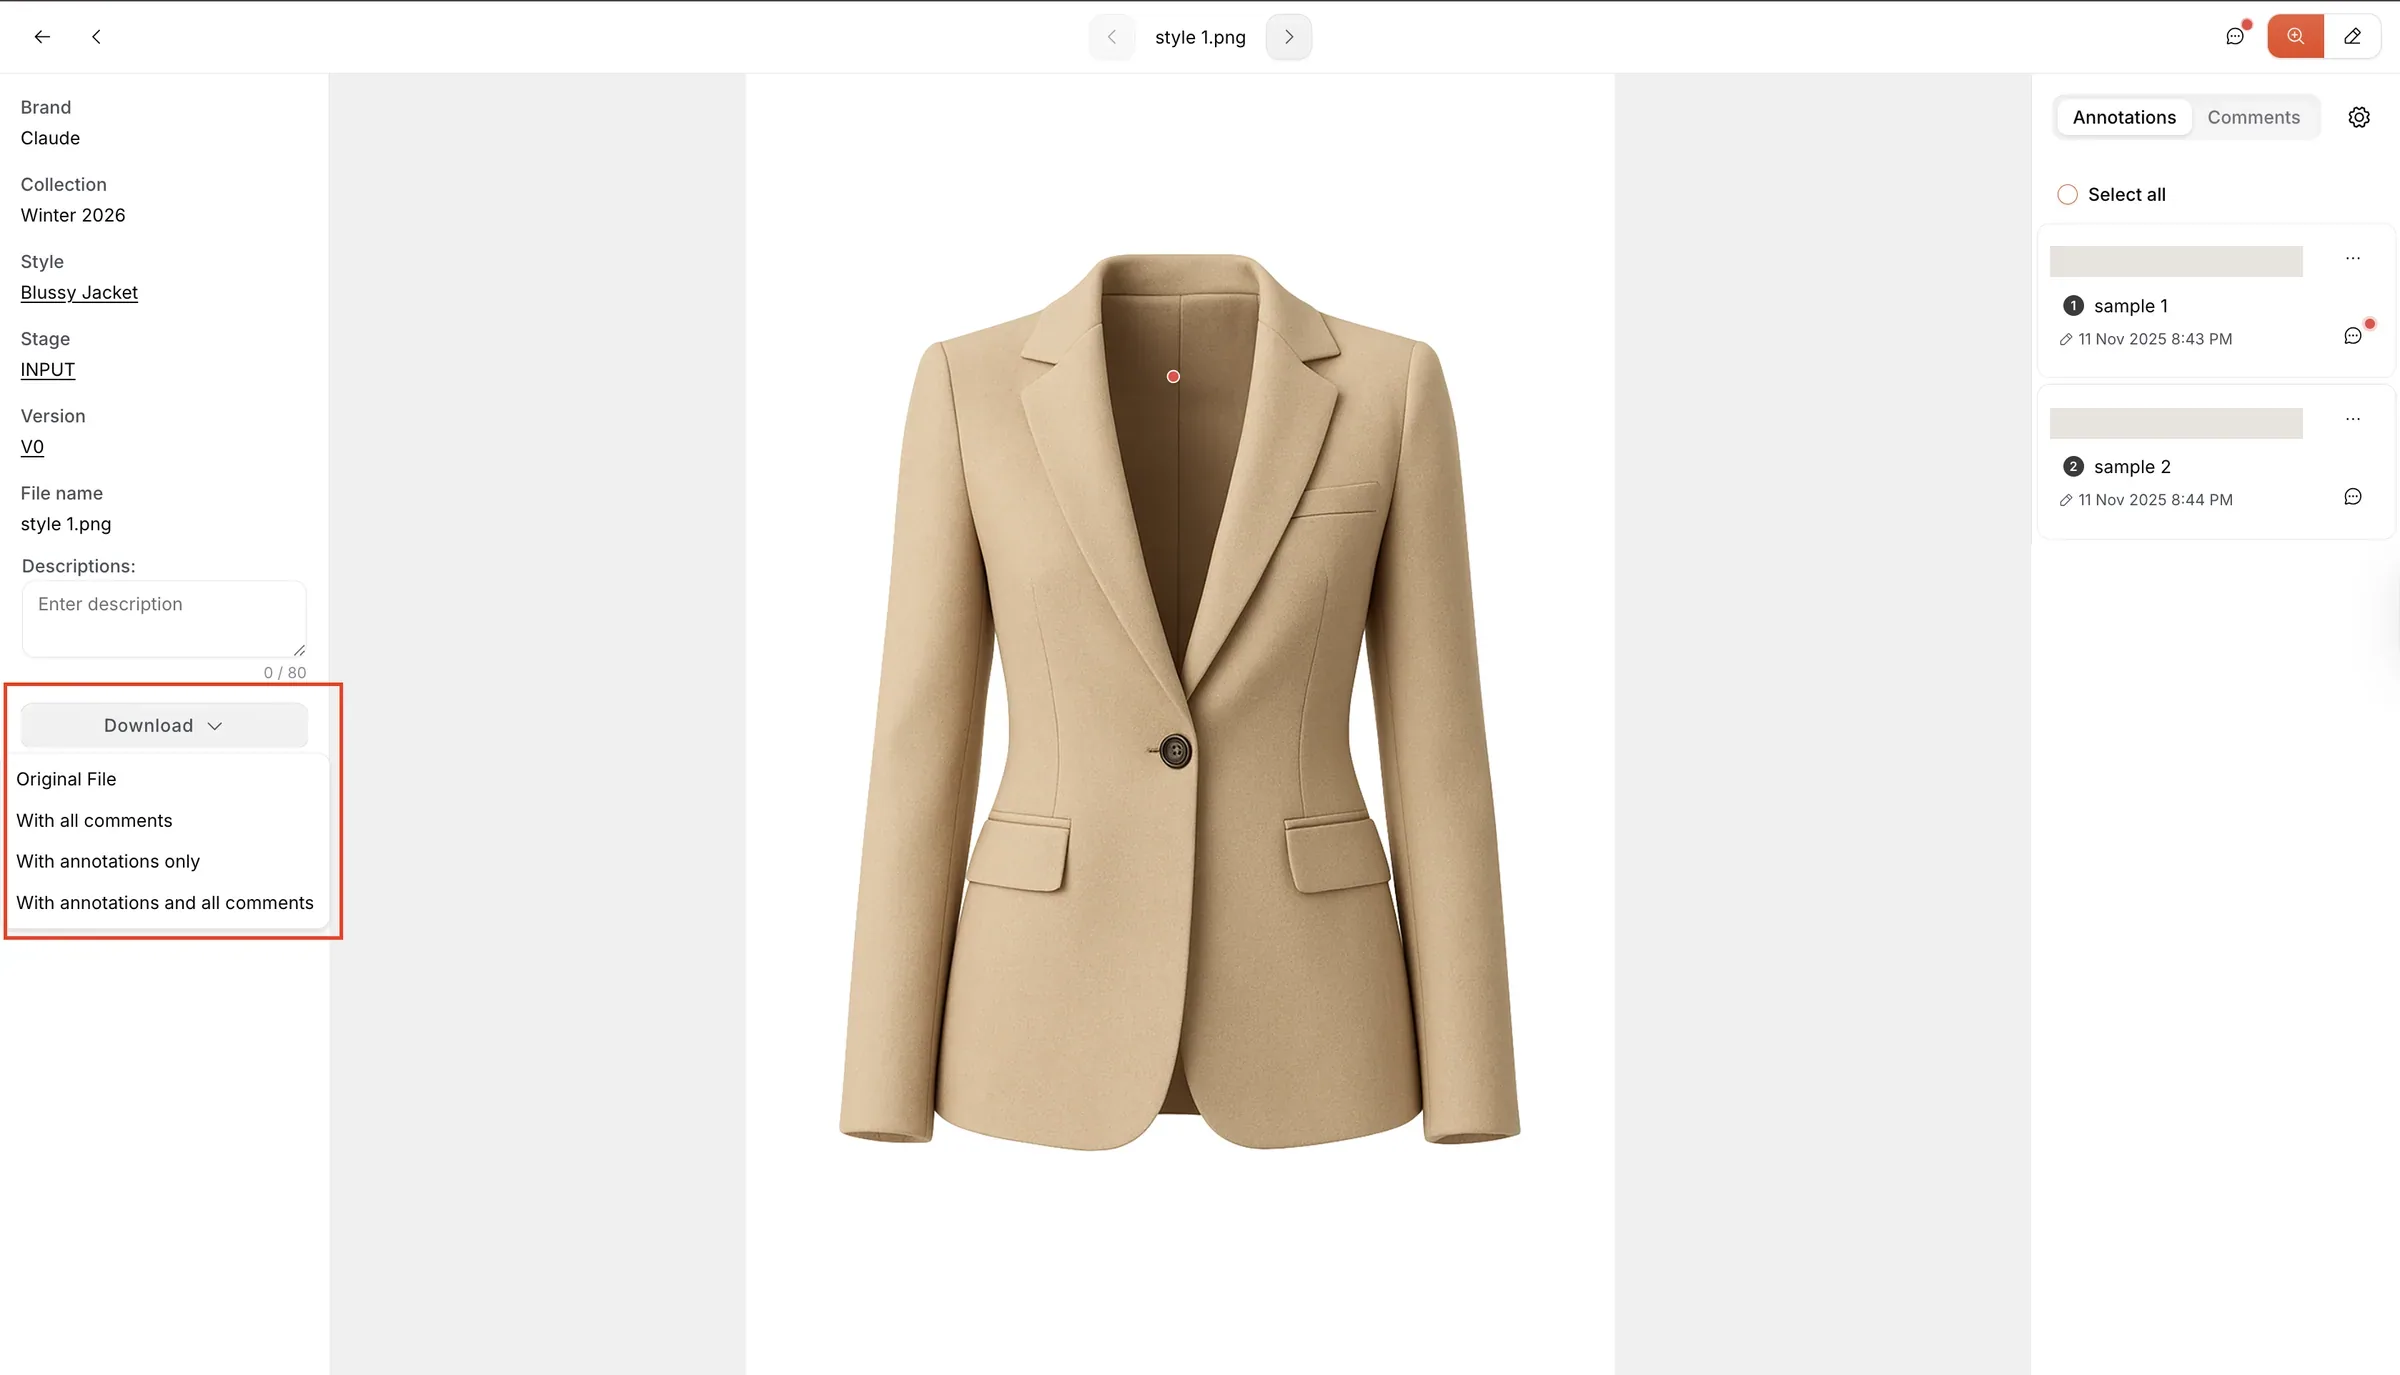
Users candownload the annotation and comments through your workspace.
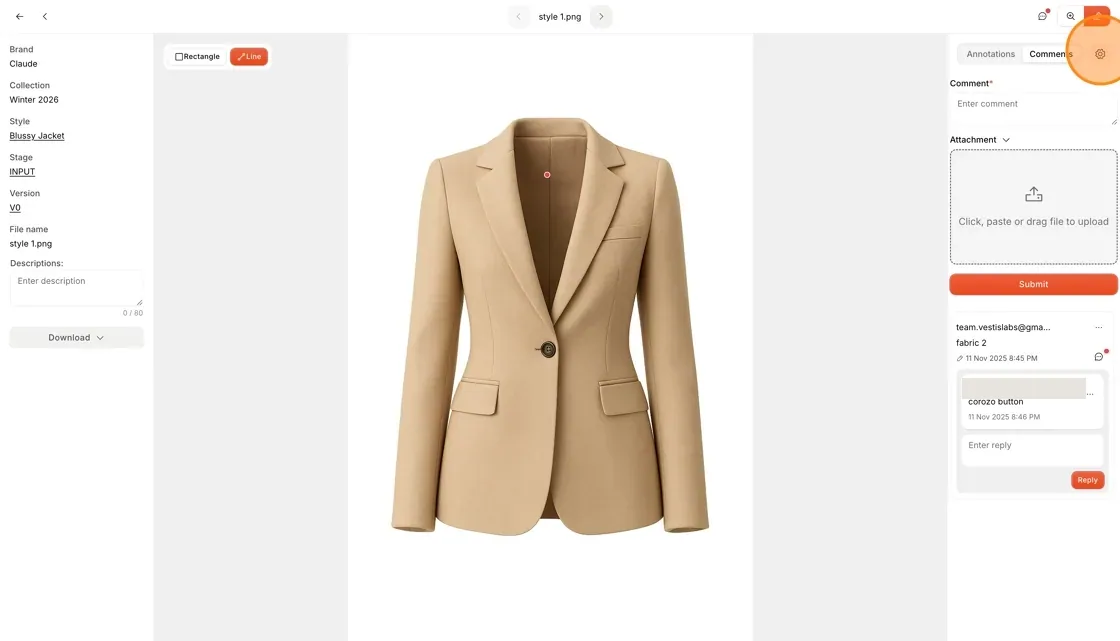
Select the Settings icon at the top right of the page to manage the comment and annotation display.
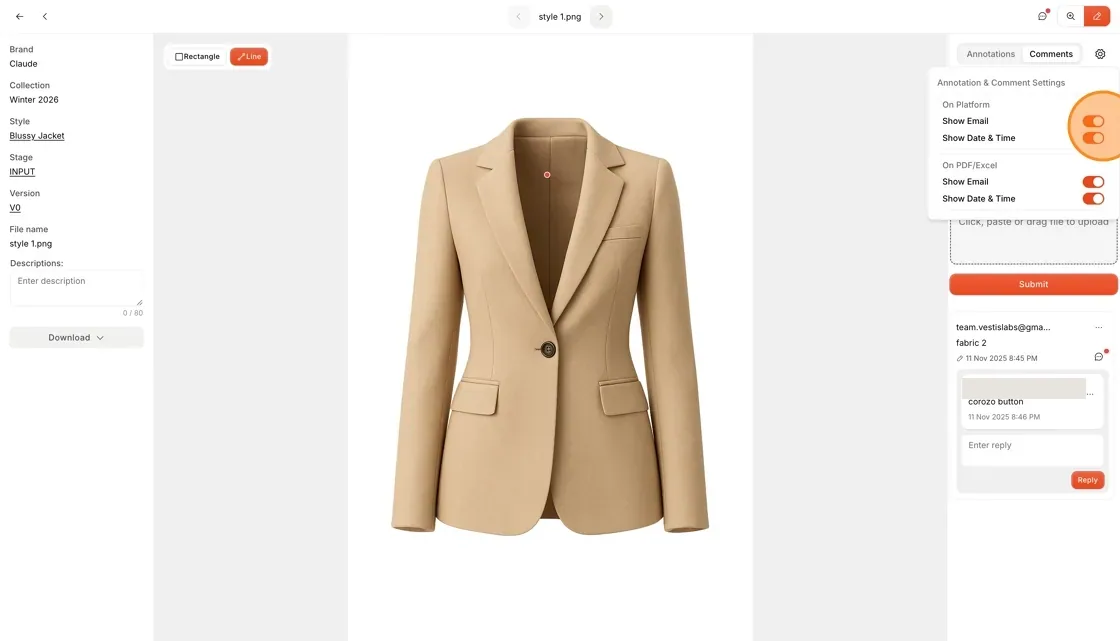
Use the toggle to hide the email, time, and date shown on the platform. Users can also hide the email, time, and date on the PDF when the work is downloaded.
How to create annotations on your workspace
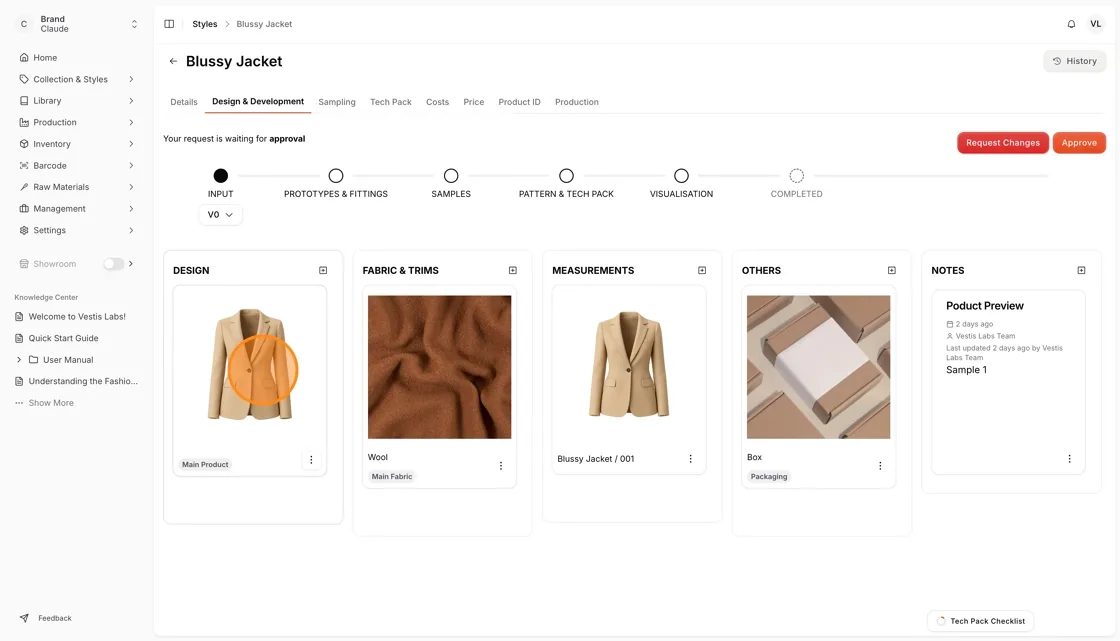
Navigate to your workspace, by selecting a card (eg.
on input and/or on the design and development page) that you want to collaborate with your team.
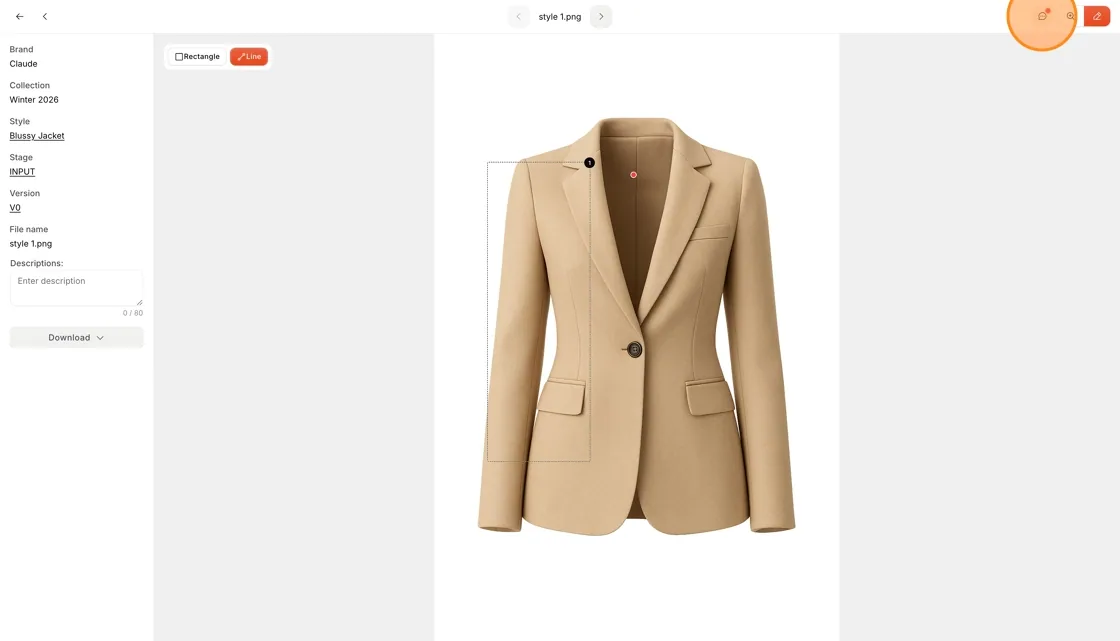
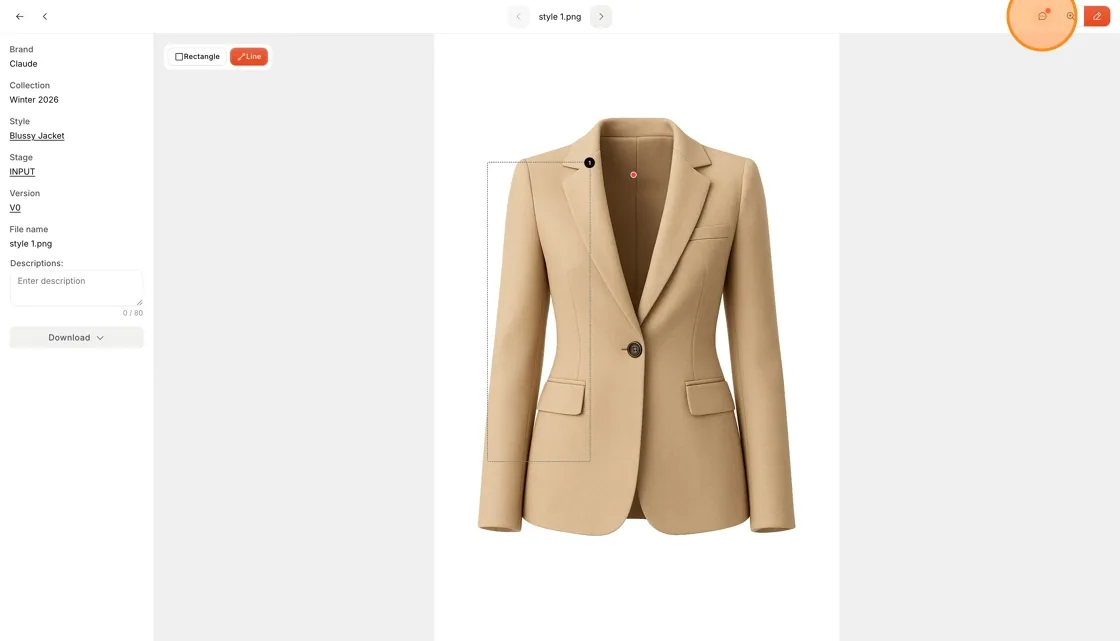
The bubble chat icon on the upper right…
The bubble chat icon on the upper right side corner of your workspace is to show or hide the created annotation and comments. There will be a flashing red dot on the bubble chat when there are comments and annotations.
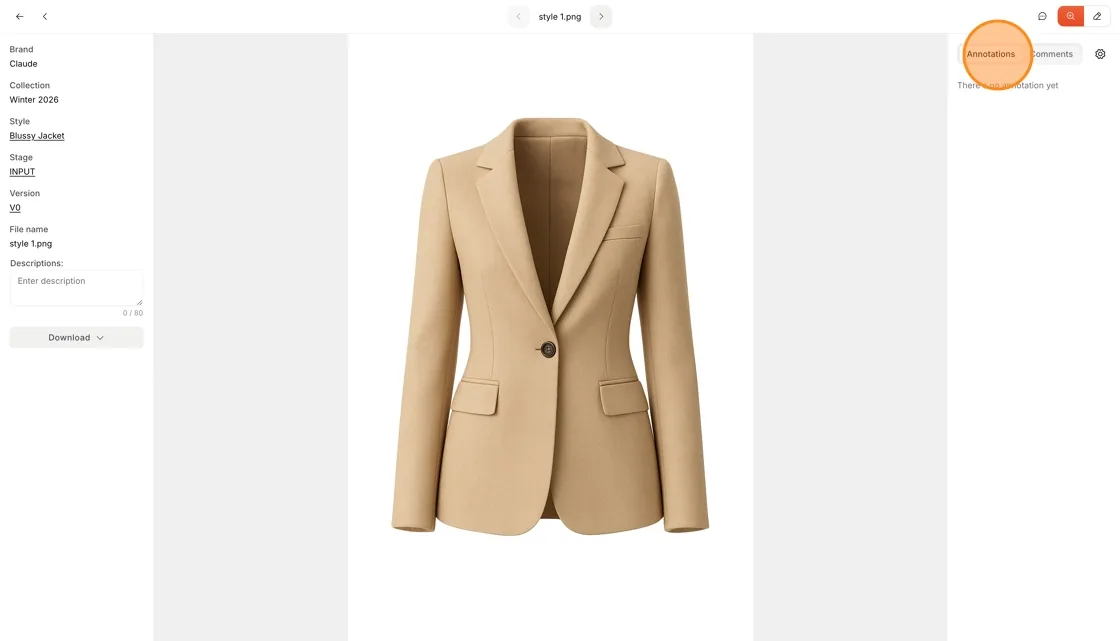
To start annotating on an image, select the…
To start annotating on an image, select the Annotations section on the top right side of the workspace to ensure that you are in the annotation space.
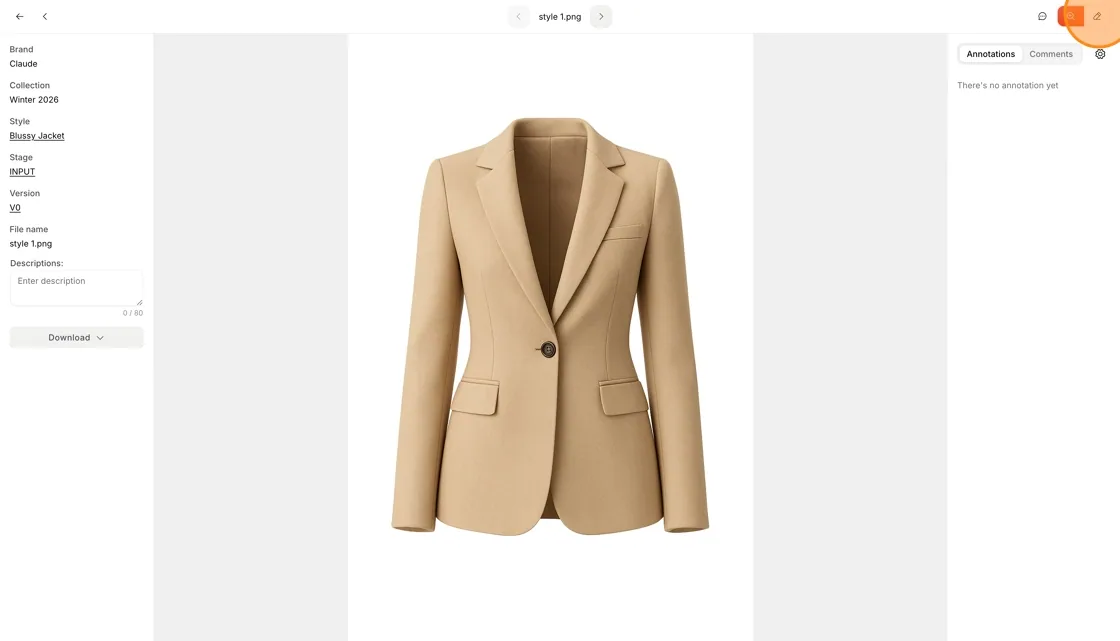
Select the Pencil icon on the upper right…
Select the Pencil icon on the upper right side of the workspace to start creating the annotation.
Select the area on the image where the annotation is to be applied
and choose whether to mark the annotation using a rectangle or a line.
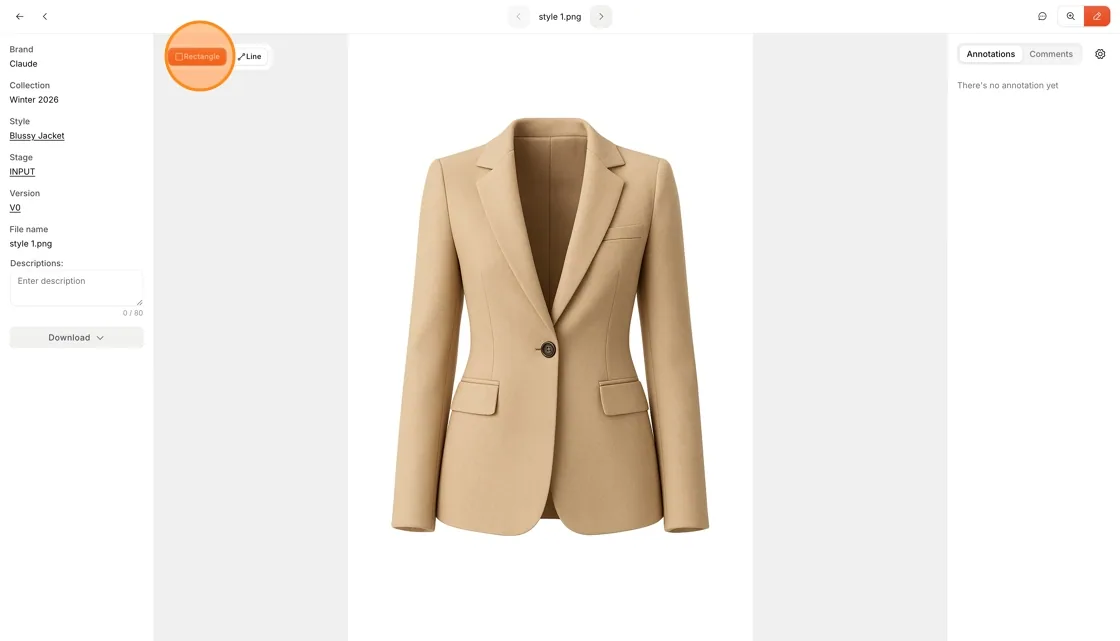
Users can select the area on the image where they would like to annotate.
Use the mouse to hover over the area you would like to annotate, then click the left mouse button. A dialogue box appears and type your comments and add an attachment once finished, Select Comment.
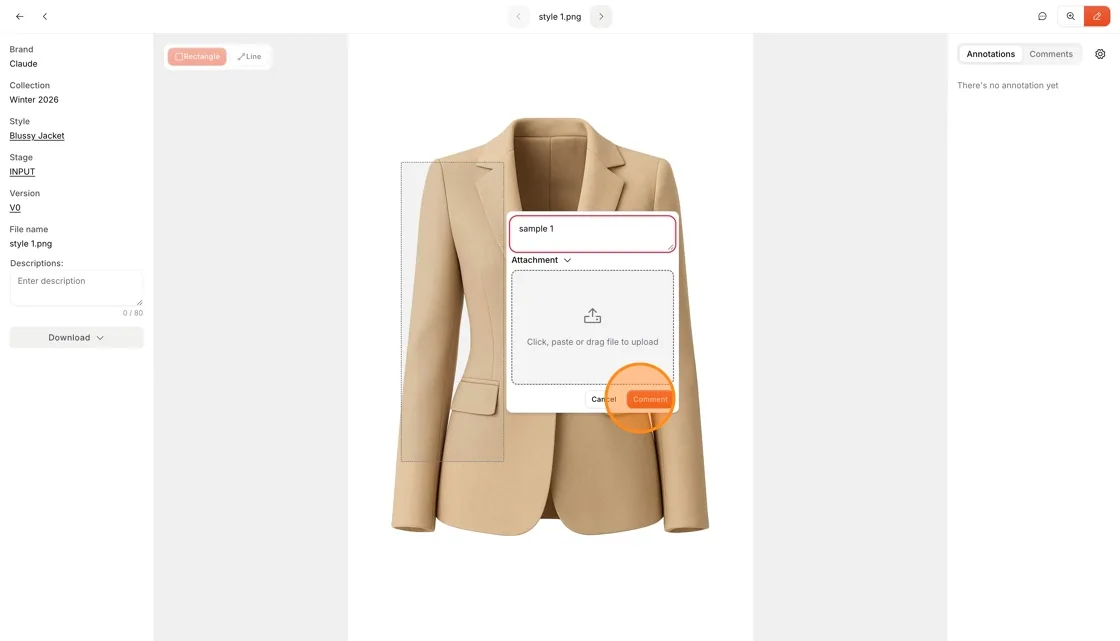
Size adjustable selection area: users can control to be horizontal, vertical, or boxy in shape to type the comment.
**
**
Comment box: users can type their comments.
Attachment: Upload an image that related to the comment
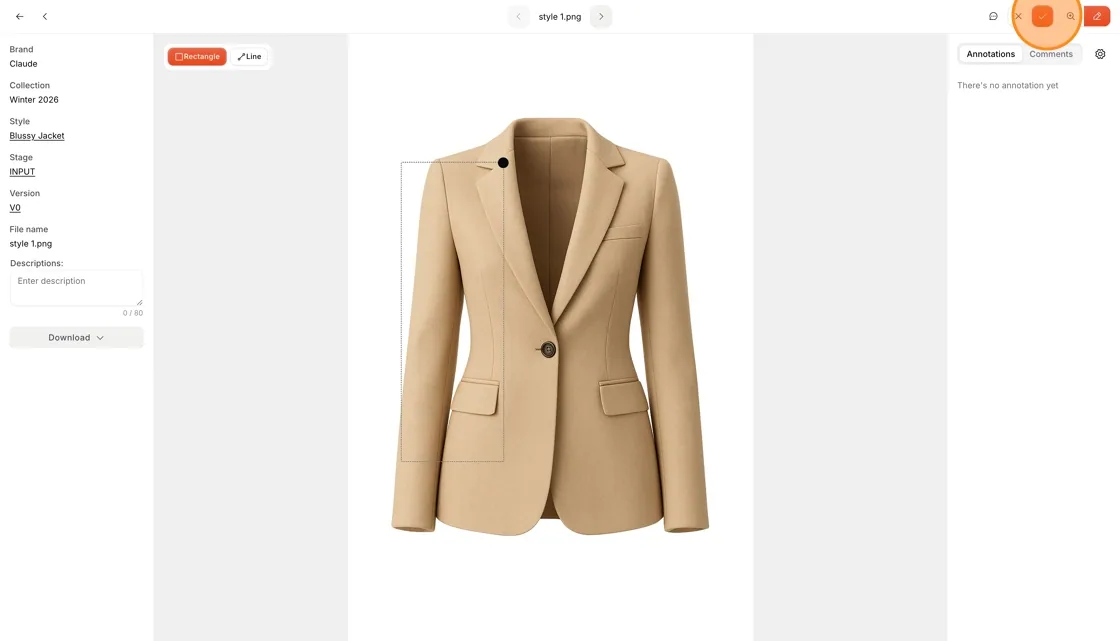
Click the tick icon to post the annotation.
Nb: Users can annotate and comment on the image multiple times before clicking the tick icon.
The annotation will be posted on the right-hand…
The annotation will be posted on the right-hand side and the bubble chat will have a flashing red dot to sign a new annotation location.
Users can reply to the annotation or comment on your workspace.
Select the bubble chat icon inside the annotation or comment column.
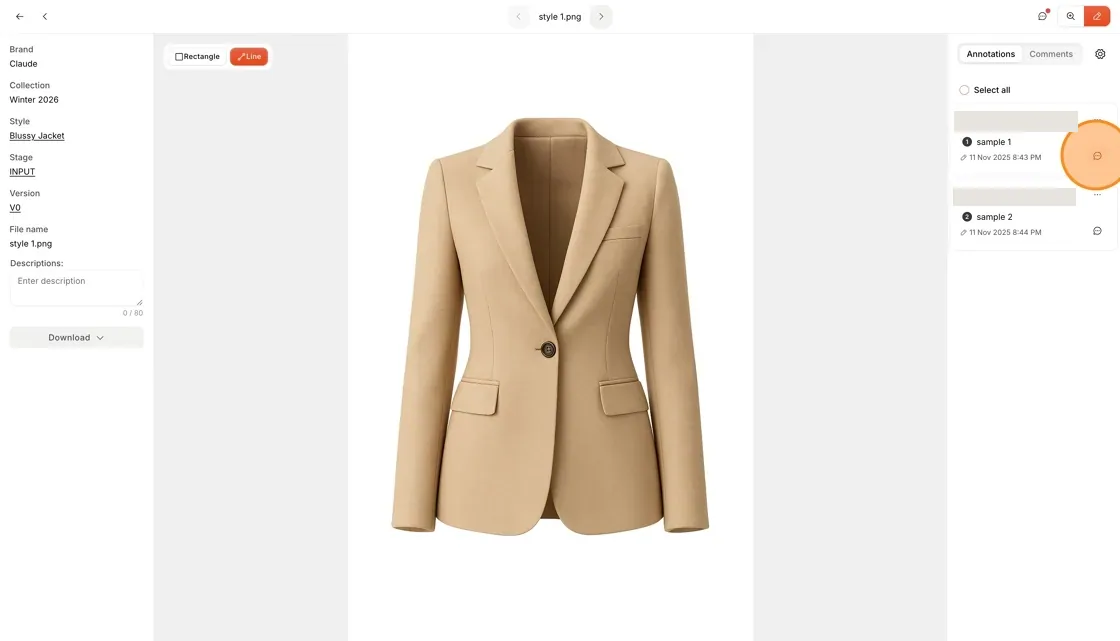
To reply, type your comment inside the comment box once finished, Select Reply.
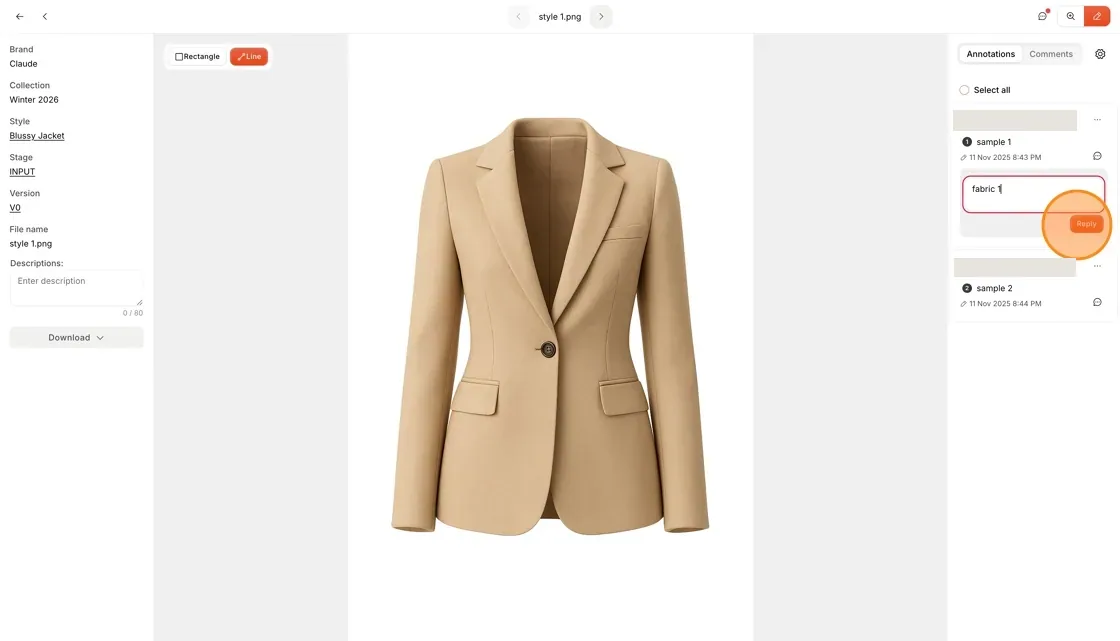
The annotation reply will be posted on the…
The annotation reply will be posted on the right-hand side and the bubble chat will have a flashing red dot to signal a notification reply.
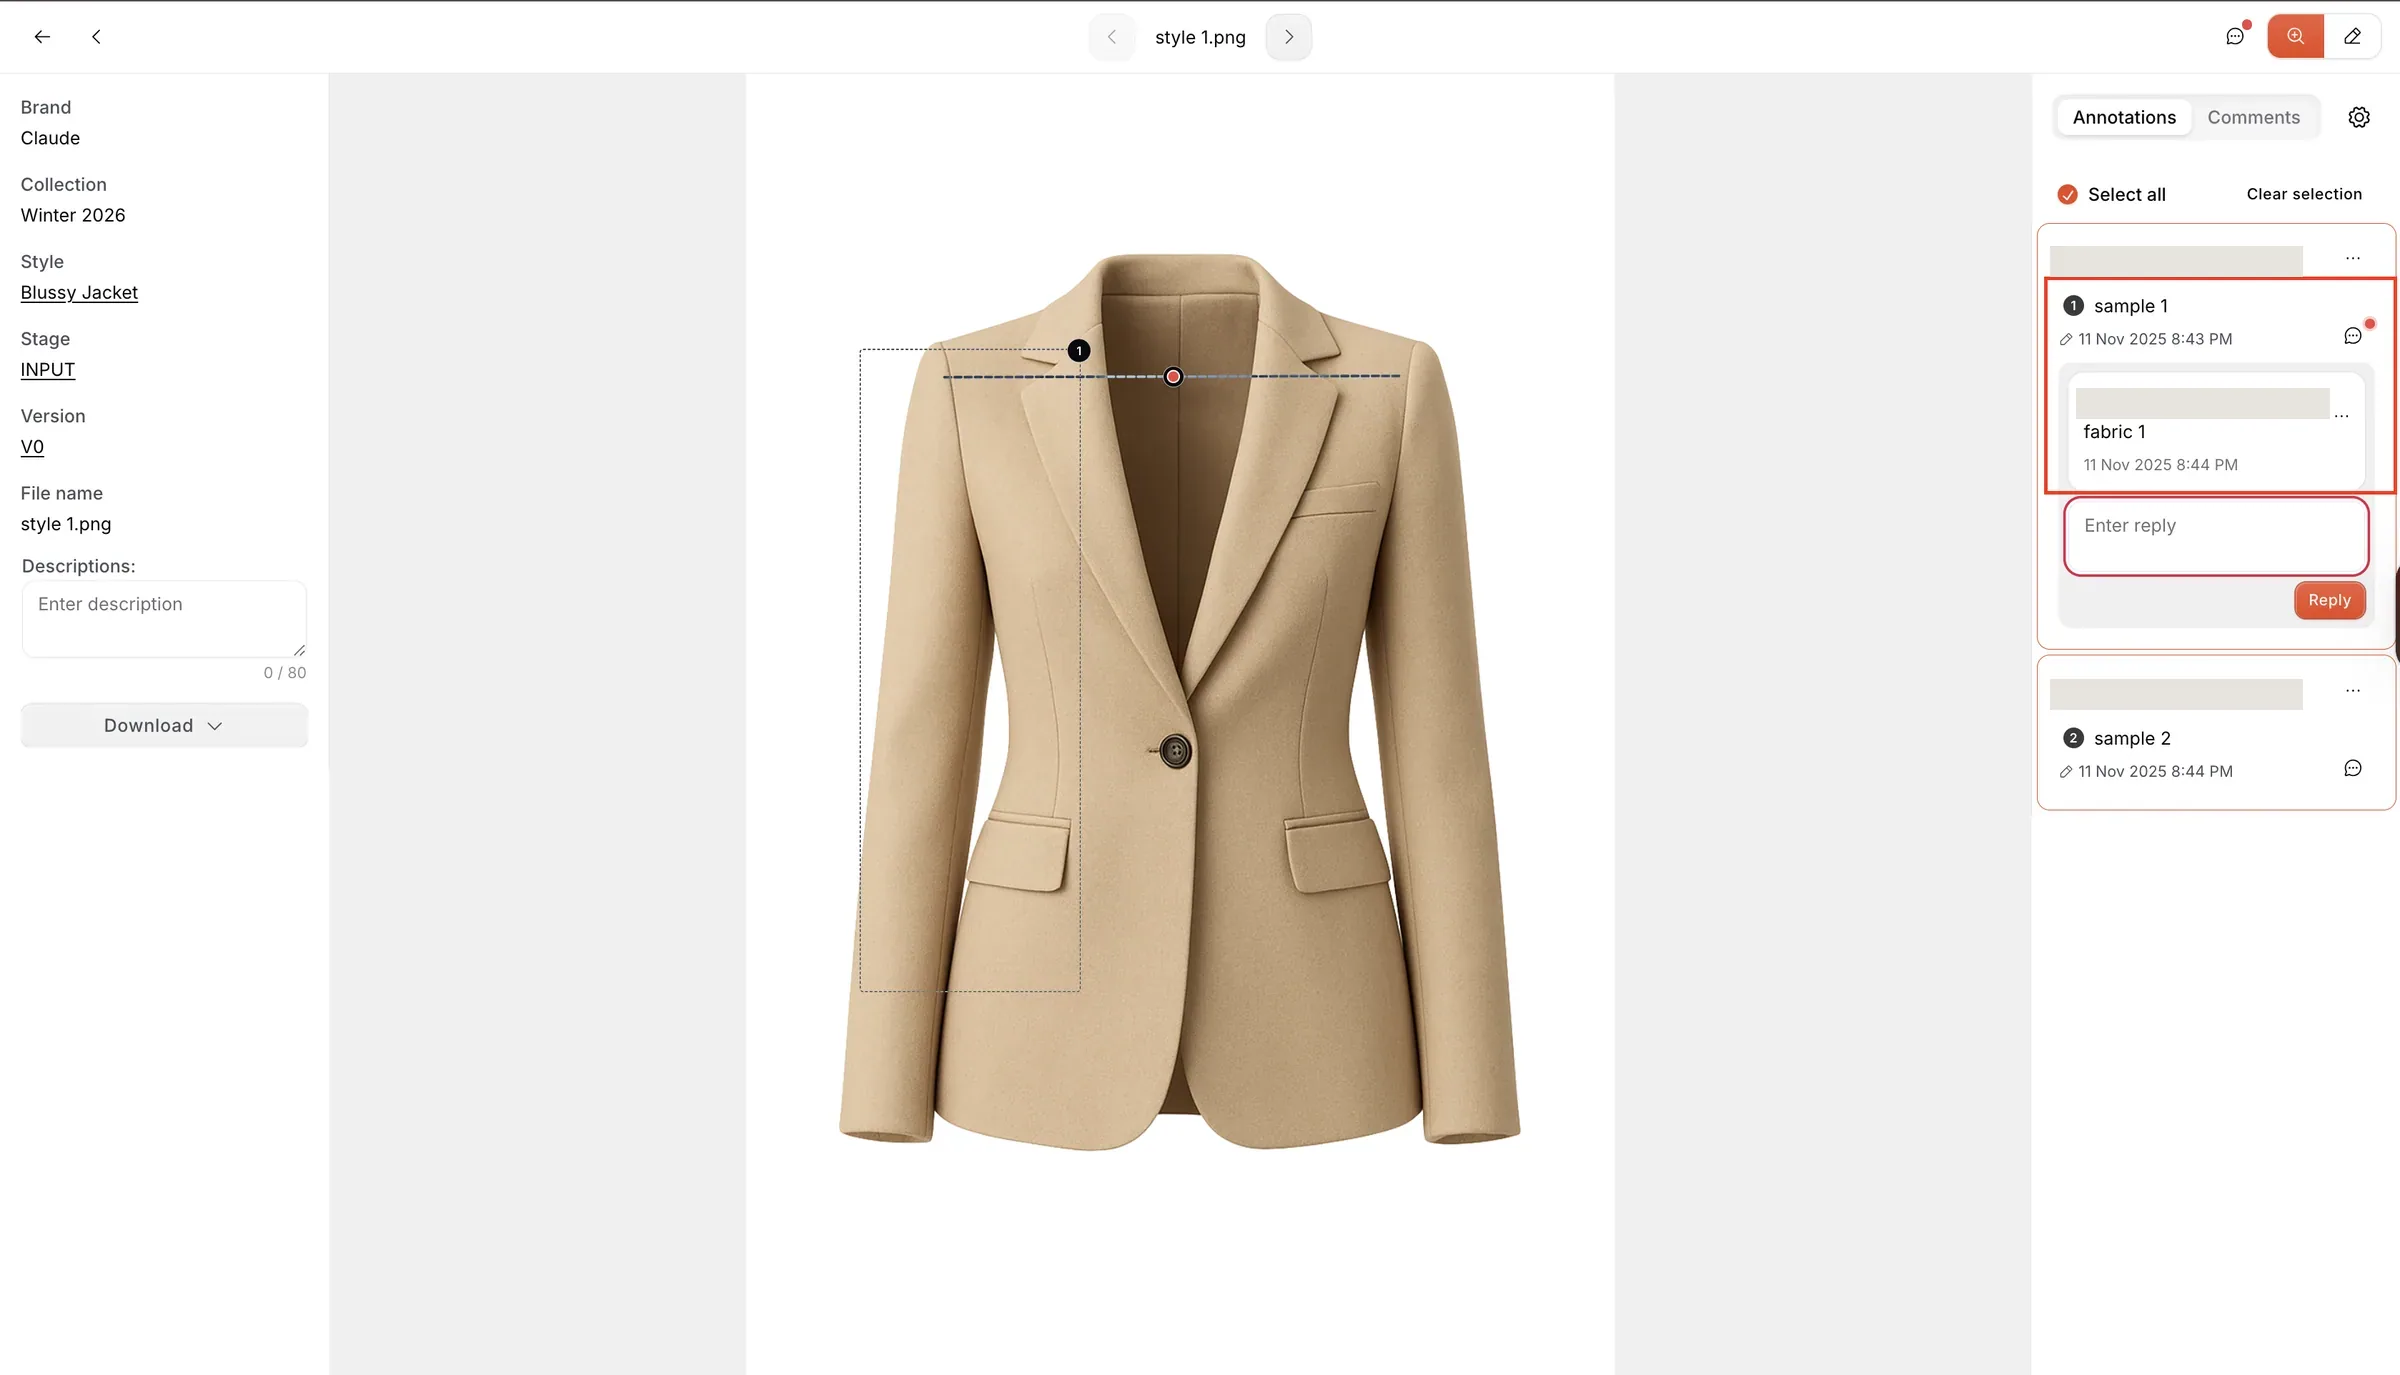
To activate and deactivate the annotation on the…
To activate and deactivate the annotation on the image, click Select all on the right-hand side. The comment box will have an orange outline around the box, and you can see the annotation and comment on the image. Select Clear selection to deactivate the annotation on the image.
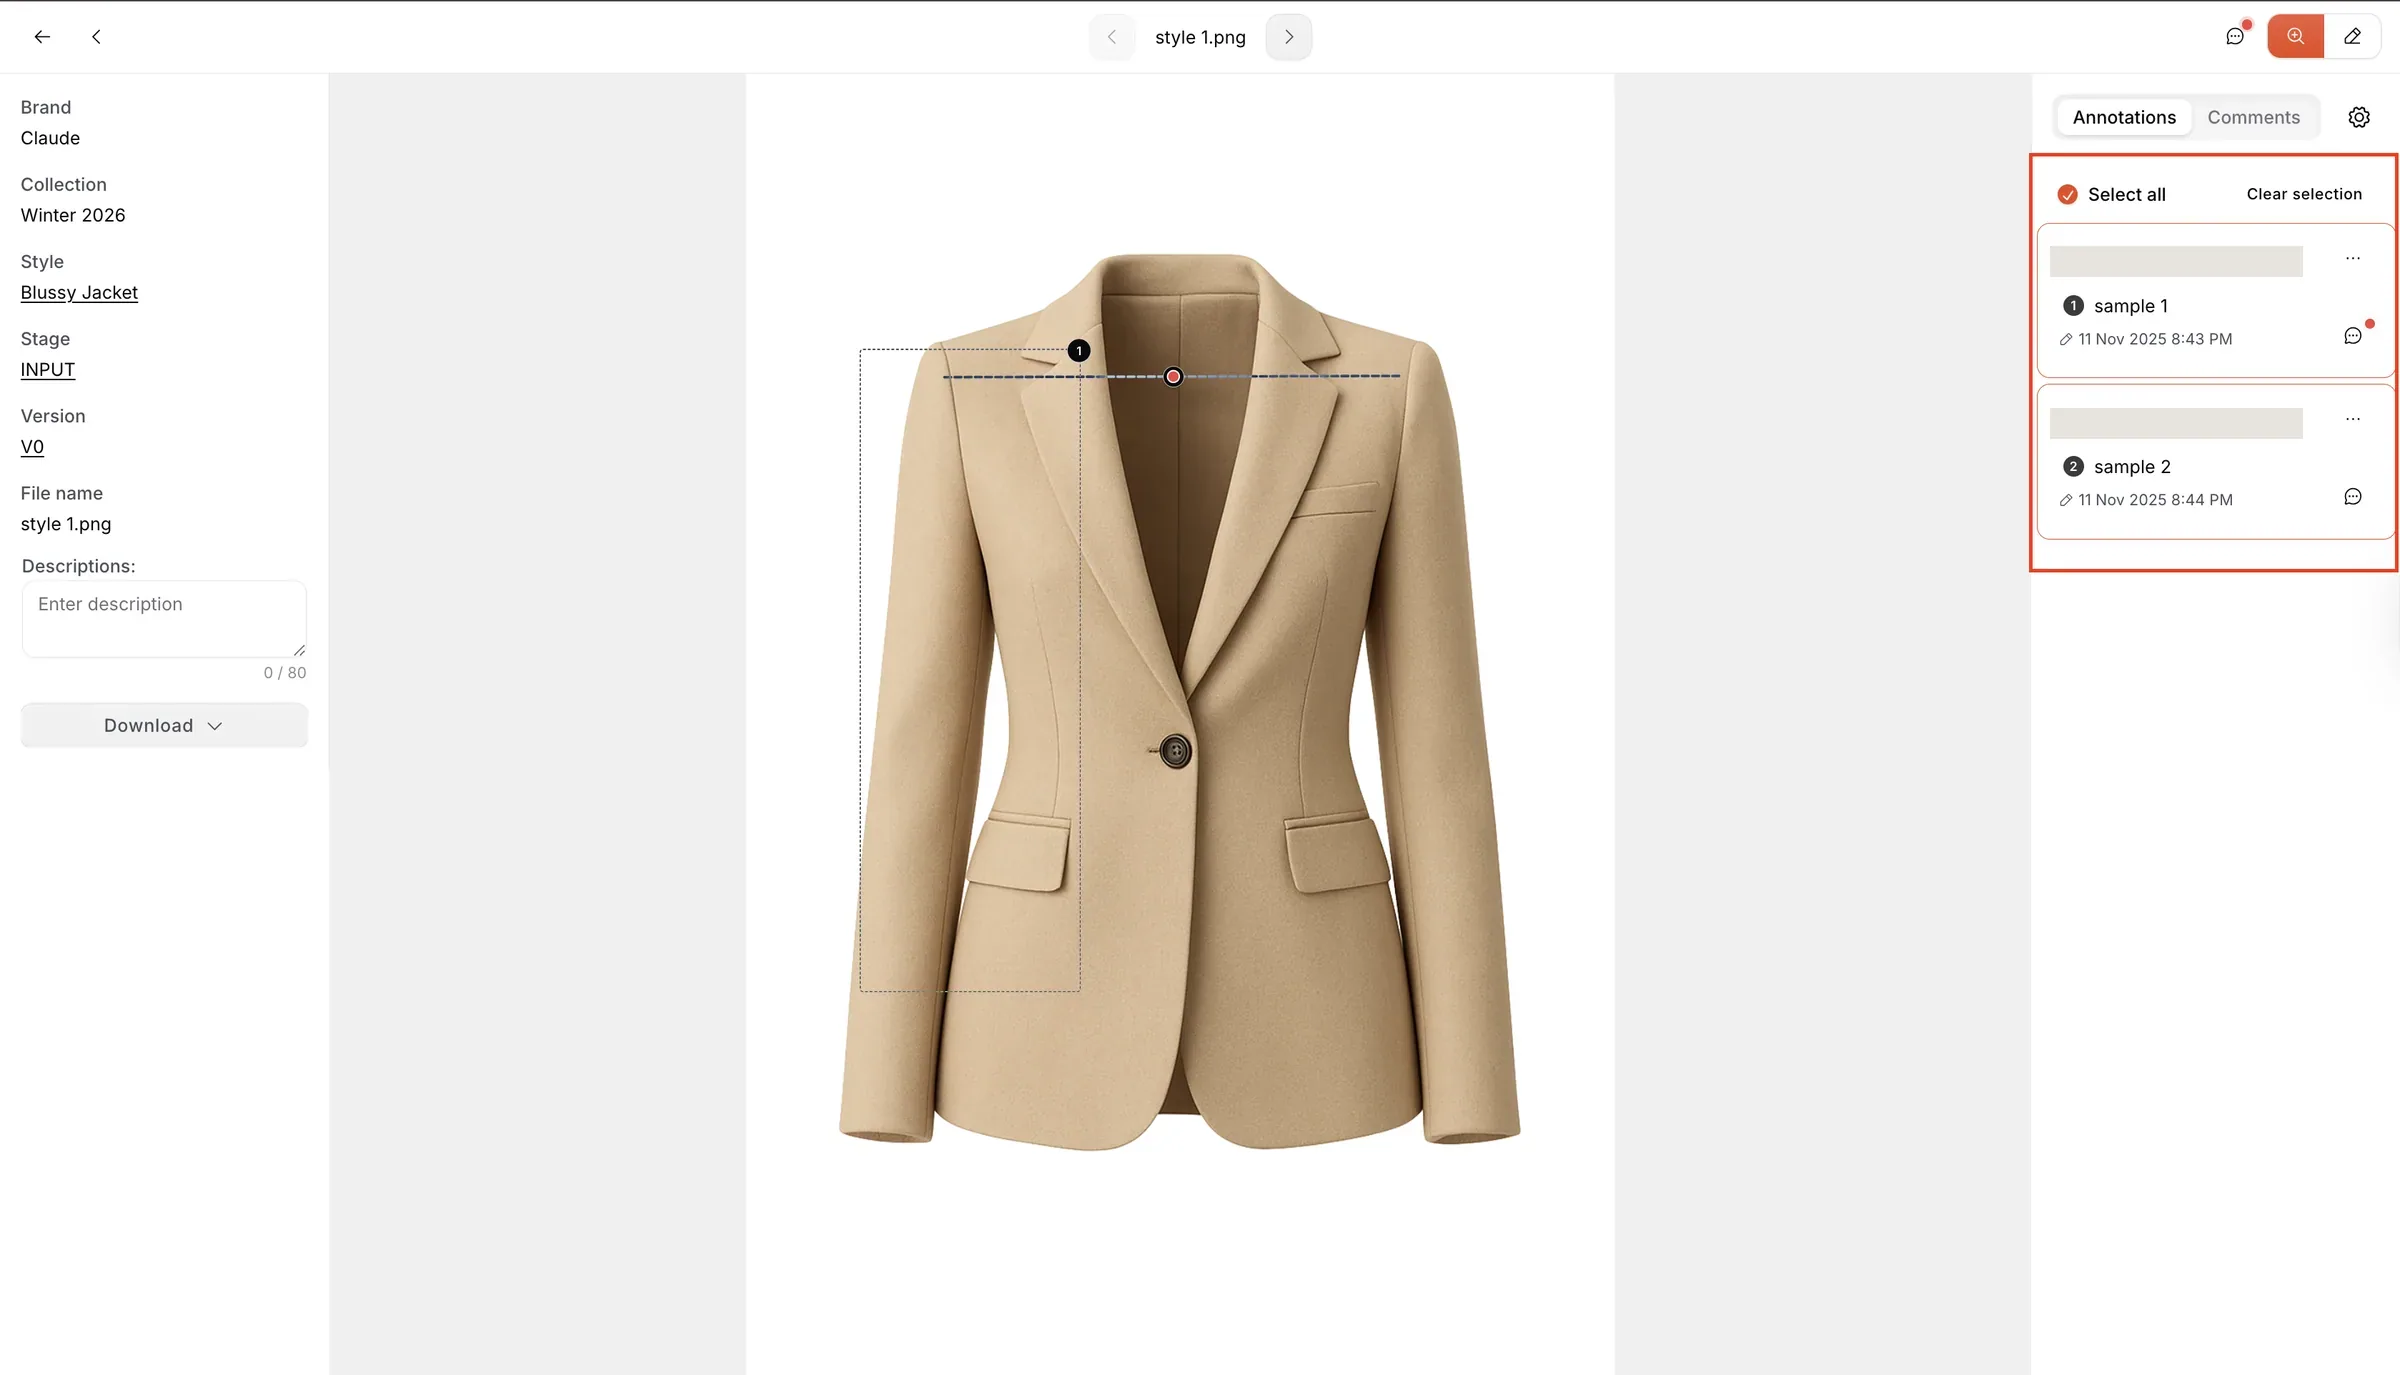
Three dots Action Button represents actions that can be performed by Users.
Users can select an action for the selected annotation to Edit or Delete.
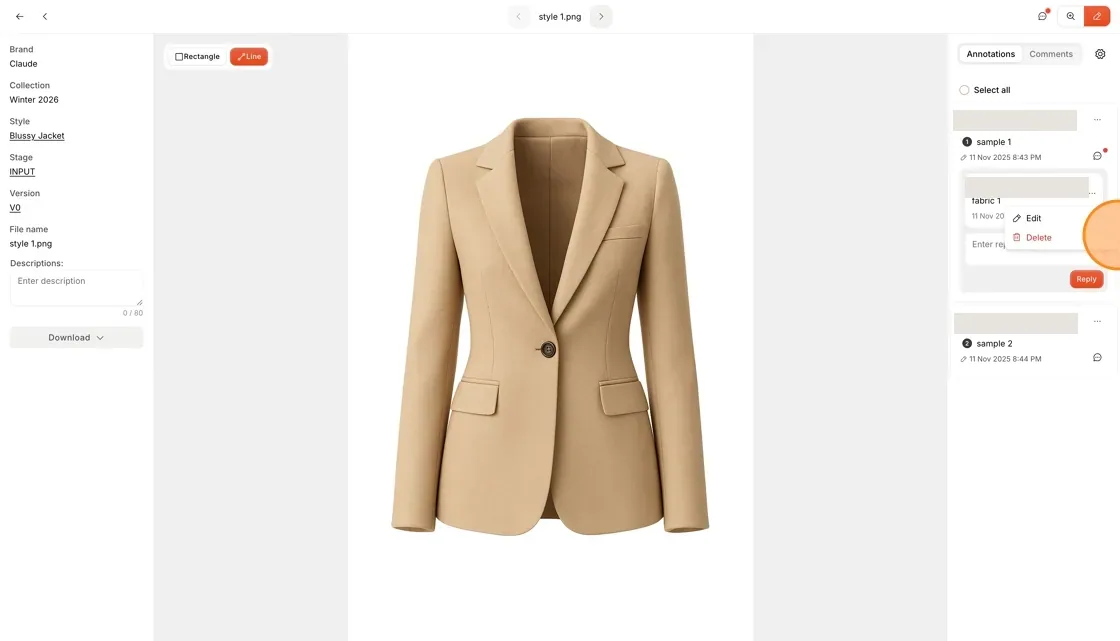
How to create comments on your workspace
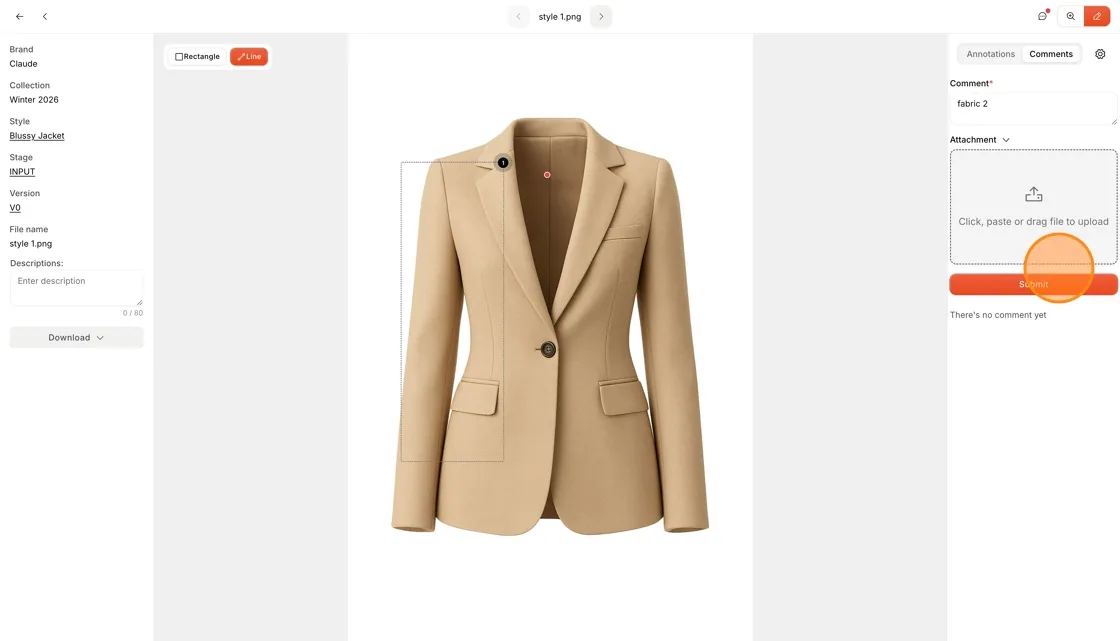
click the comment box on the right side of your workspace to create a comment.
The created comment does not correspond to a specific area on the image.
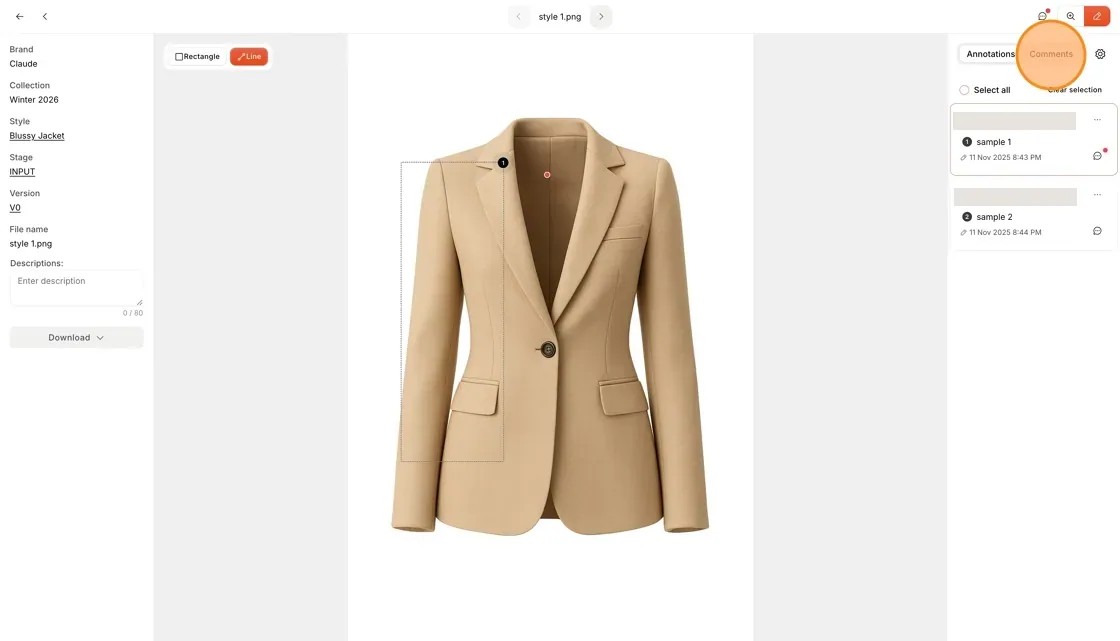
Click the Comment field and type your desired comment in the comment box.
Use the drop-down to upload an attachment related to the comment.
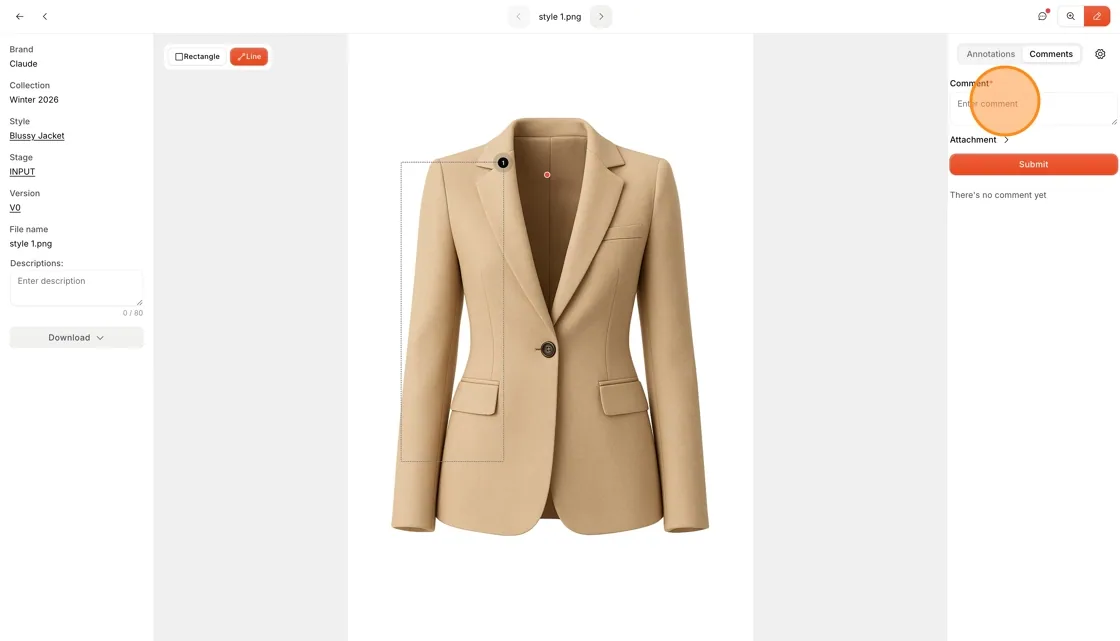
Select the dropdown function to upload the attachment file with the created comment.
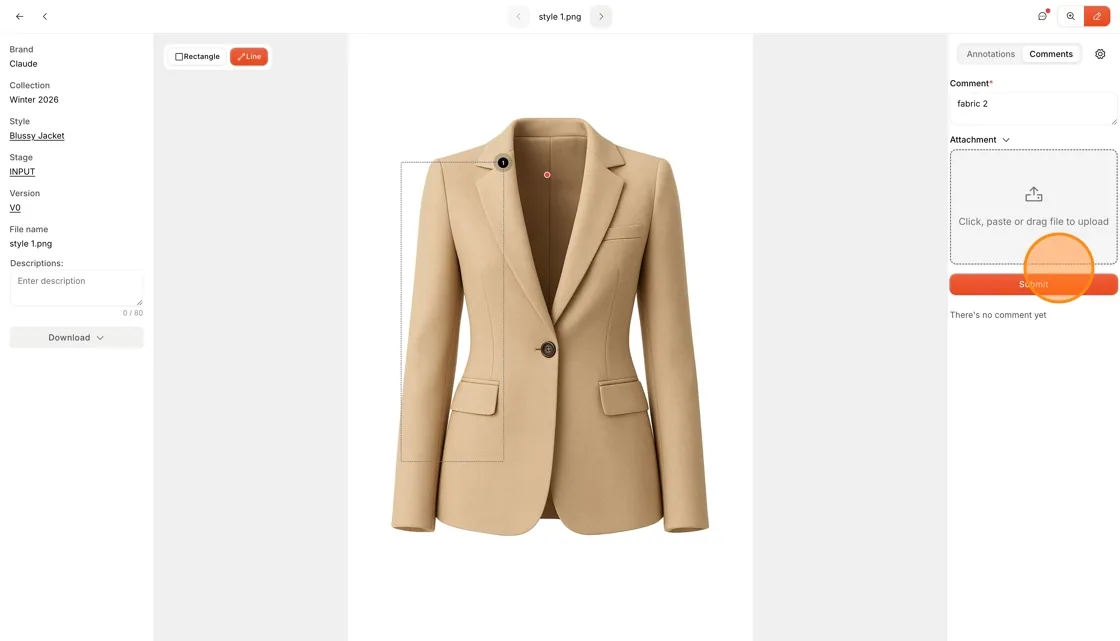
Users can upload a picture or files associated with the comment.
Once finished, select the submit button at the bottom of the comment box.
Attachment specification:
- The files that are allowed are PDF, DOC, XLS, JPG, and PNG.
- The maximum size is 20 MB.
Users can reply to the comment on your workspace.
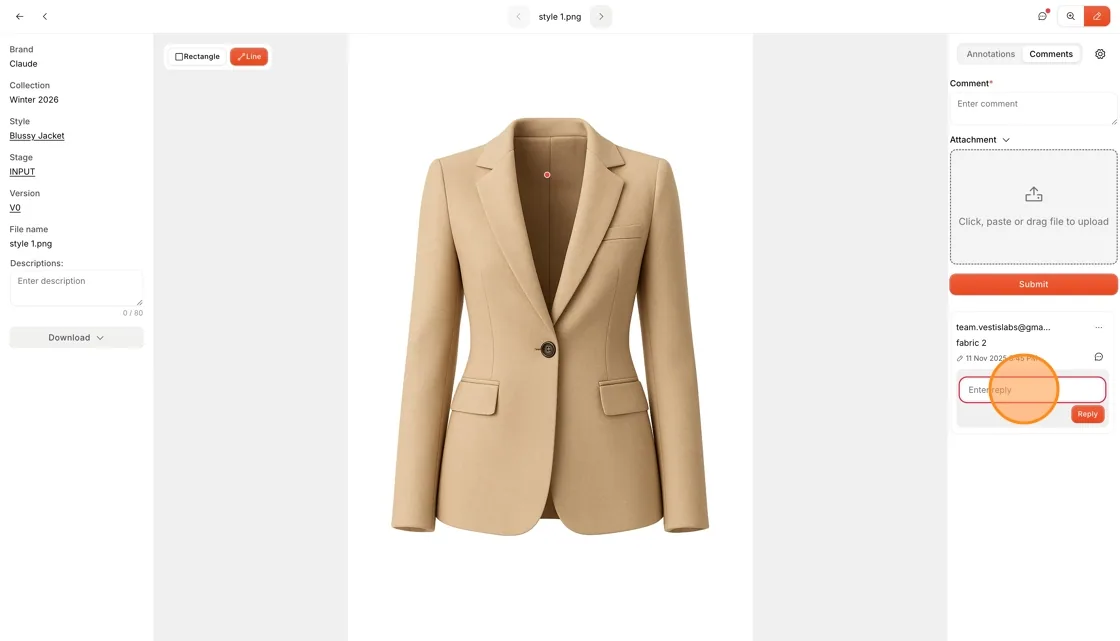
Select the bubble chat icon inside the comment column.
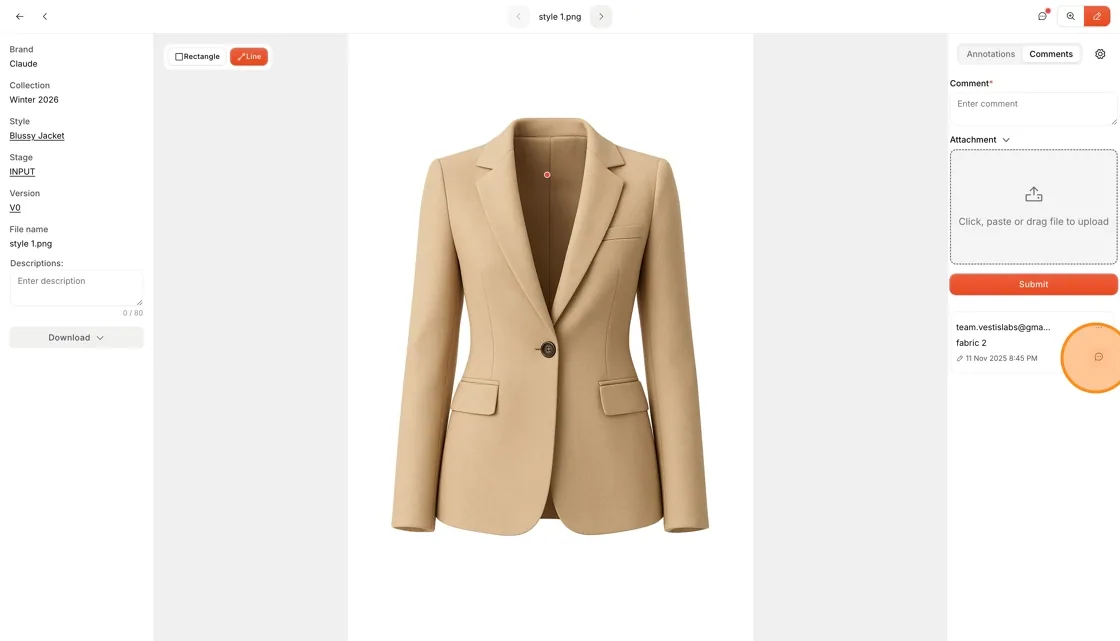
Type your comment inside the comment box once…
Type your comment inside the comment box once finished, Select Reply. The comment reply will be posted on the right-hand side and the bubble chat will have a flashing red dot to sign a new comment reply location.
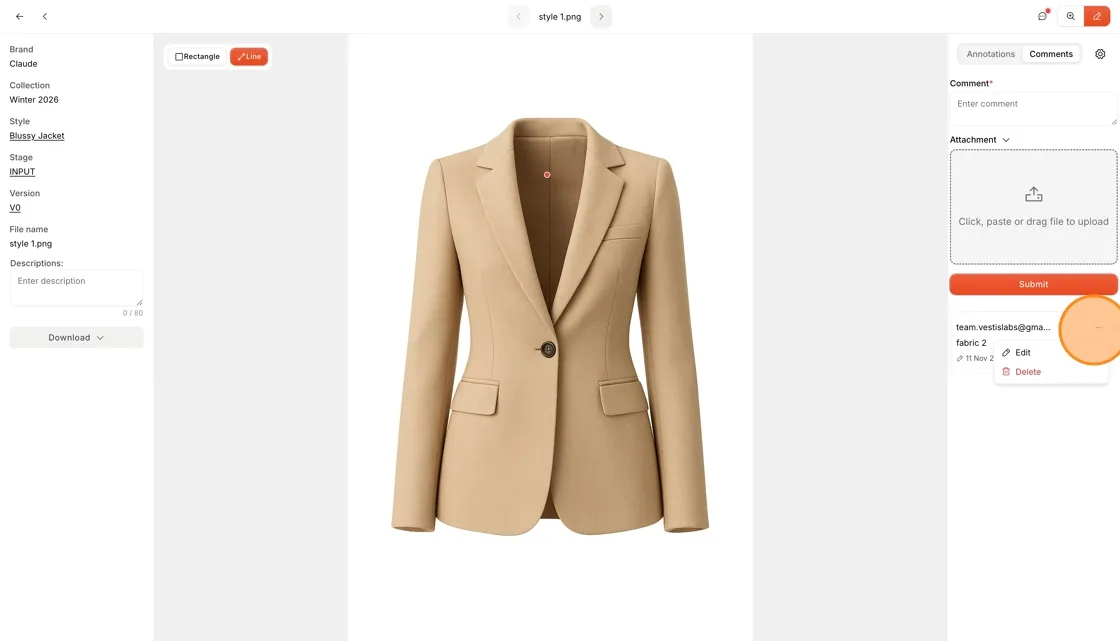
Three dots Action Button represents actions that can be performed by Users.
Users can select an action for the selected comment to Edit or Delete.
Choose what is shown next to comments
Click the gear icon next to the Annotations and Comments tabs to open Annotation & Comment Settings. It has two groups, On Platform and On PDF/Excel, and each has two switches: Show Email and Show Date & Time. The first group changes what you see in the workspace, the second what appears in the downloaded file.
Add a description to a card
In the left panel of the workspace, Descriptions: takes up to 80 characters. It saves by itself a moment after you stop typing, and it is shown on the card in Design & Development. Cards that come from a measurement do not have this field.