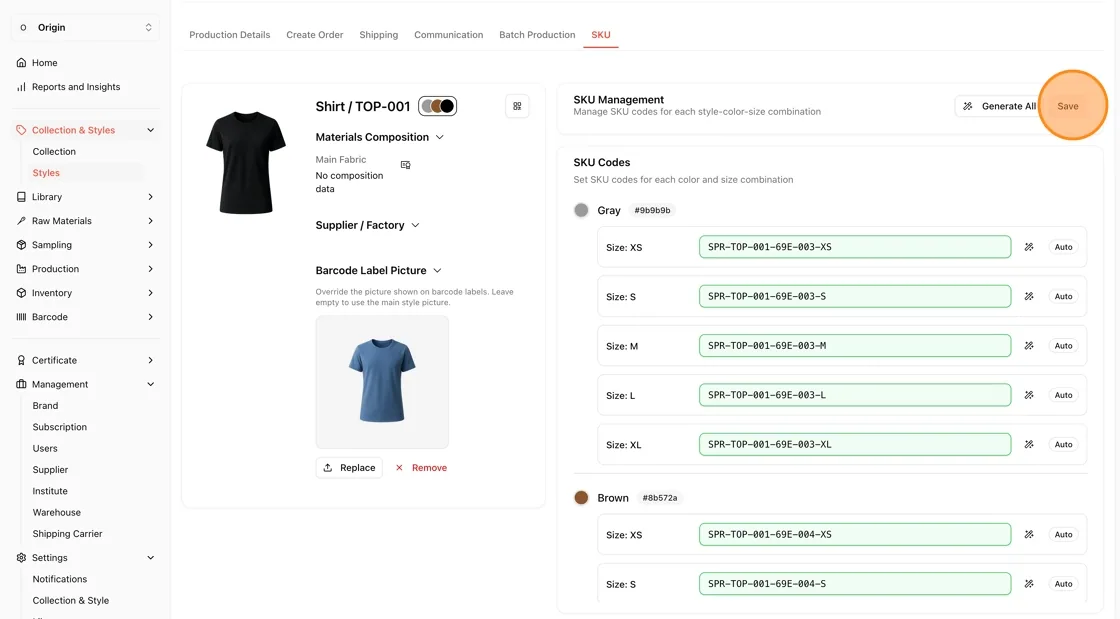
SKU generator: automated product code management
This guide will walk you through setting up your style code system and managing your product categories, sizes, and seasons in Vestis Labs.
Under review. This page is published while we check it against the live app, so some details may have changed.
Screenshots may be out of date.
Open a web browser and navigate to app.vestislabs.com. Make sure users are logged into the account.
SET UP THE FORMULA CODE FOR STYLE
Click on "Settings > Code Generator" in the dashboard menu.
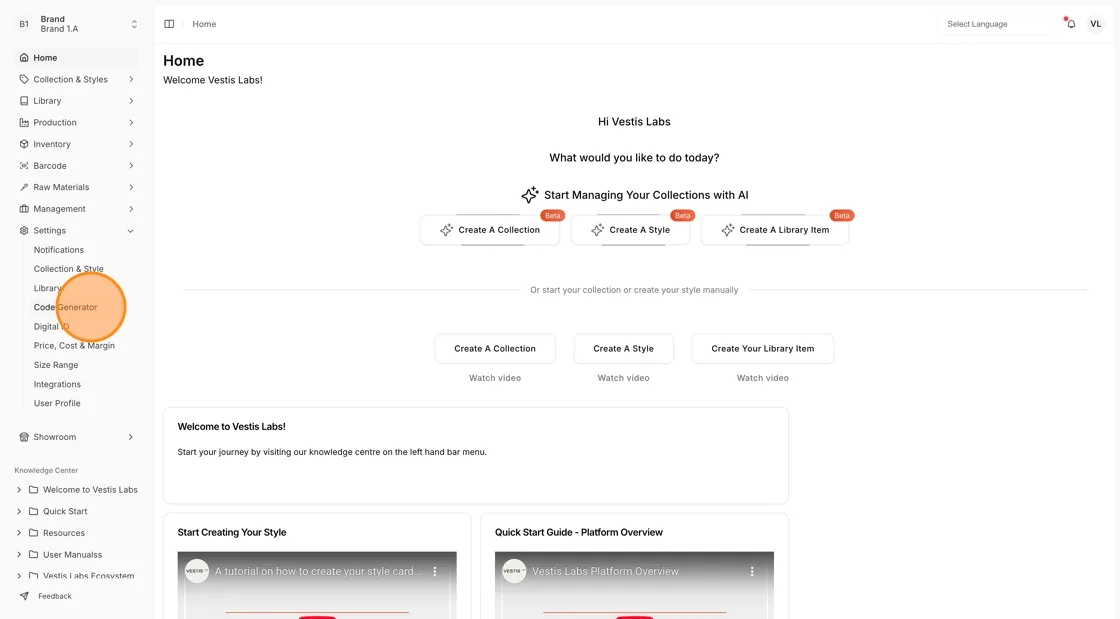
The code design tool determines how your product identifiers will be structured. Please note that this configuration is fundamental to system setup. Once established, this formula will automatically apply to all products, ensuring consistency throughout the inventory.
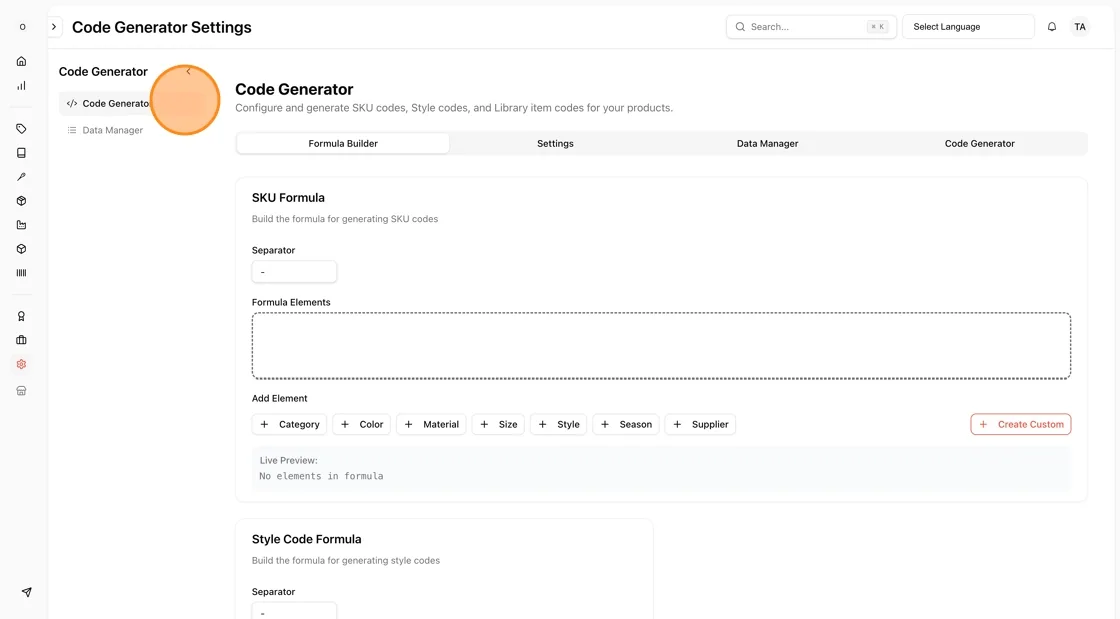
Click on "Formula Builder" to configure the code generation formula.
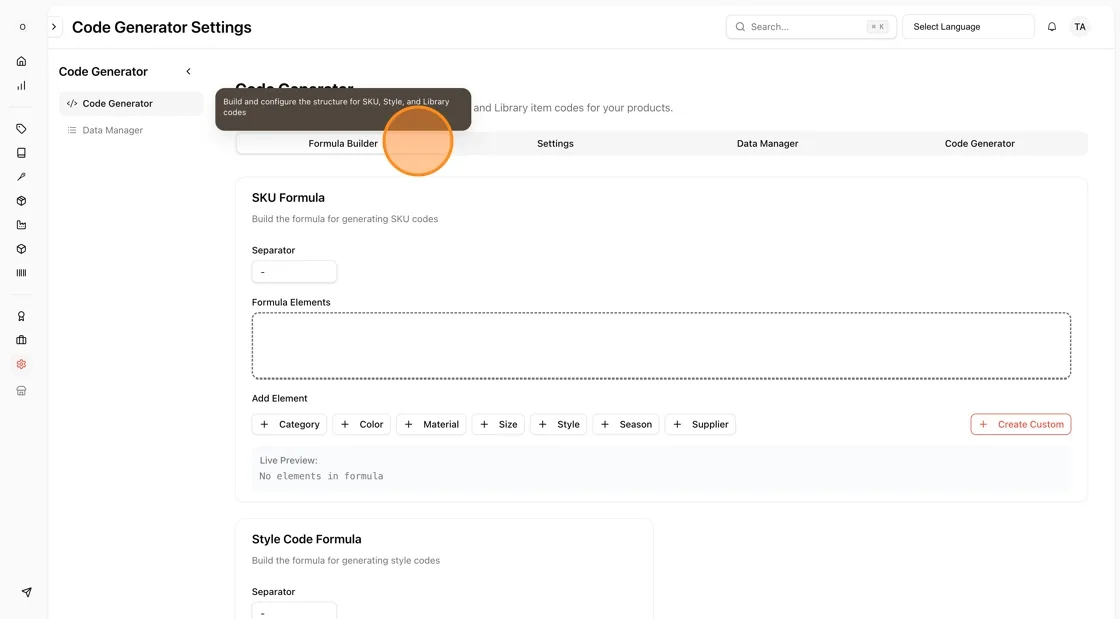
Click on the "Separator" field. Choose the separator character (this is what will go between each part of the code, like a dash "-" or underscore "_")
Suggestions: Most people use a dash "-" because it's easy to read.
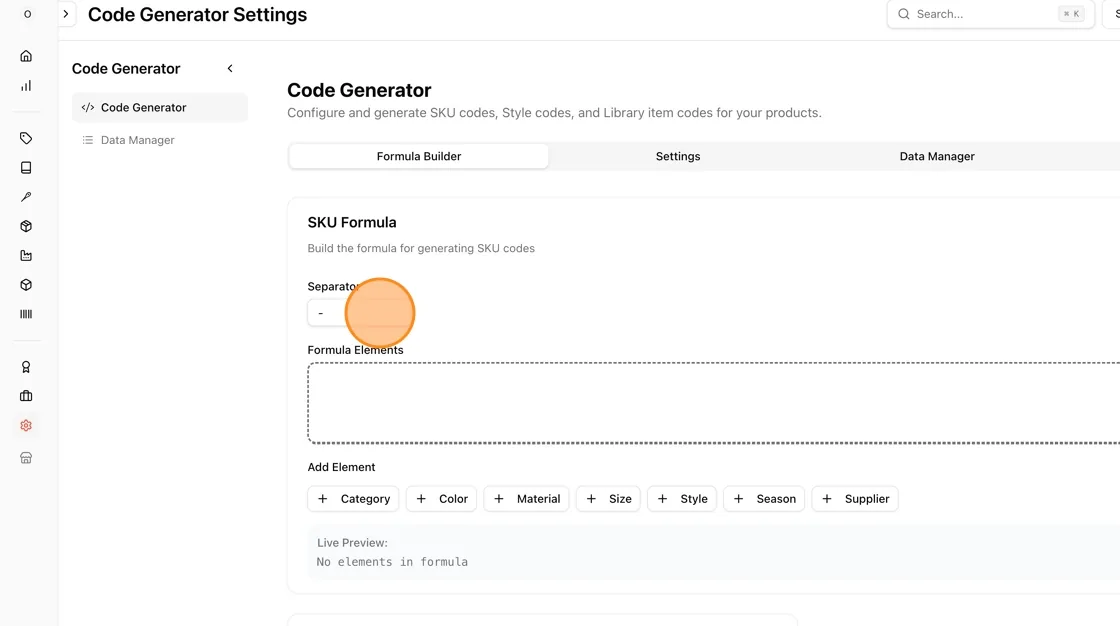
Users will define the information elements to be included in the complete style code format (SKU).
Click the buttons under Add Element (for example Season or Category) to select the format elements of the product code.
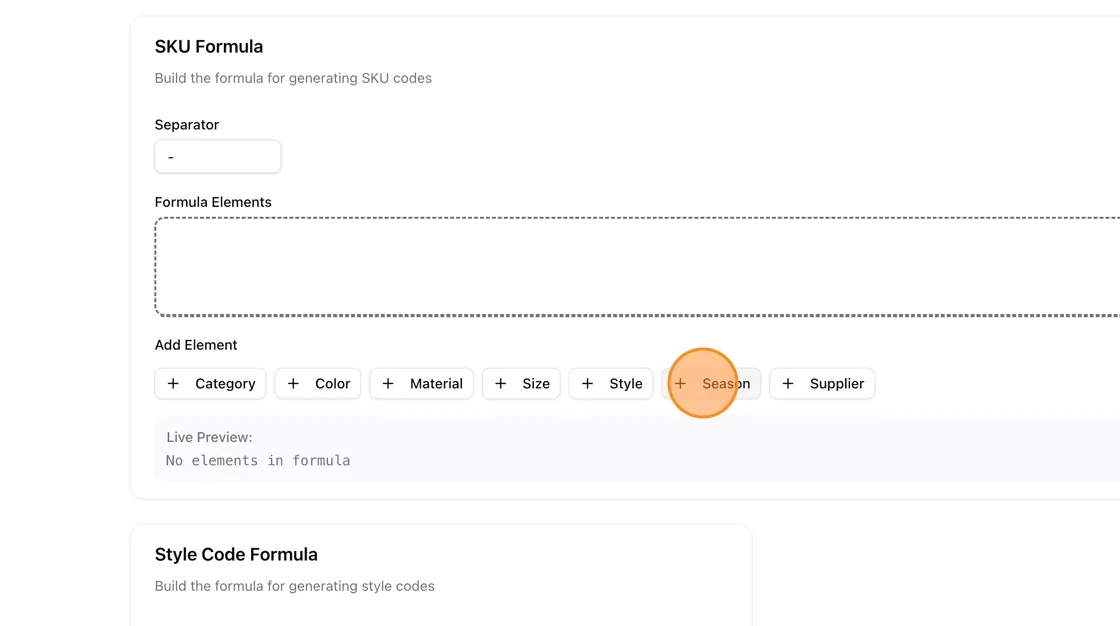
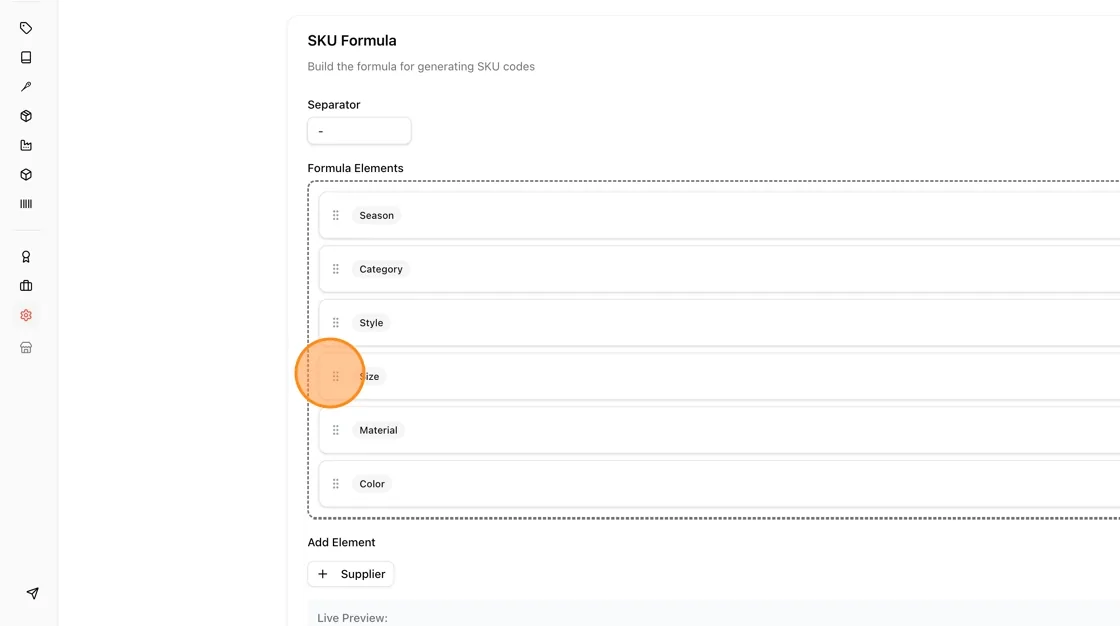
Drag items between lines to organize your formula.
Click and drag an item from one line to another line to rearrange the SKU formula.
Click “X” to remove an item from a row in the SKU formula.
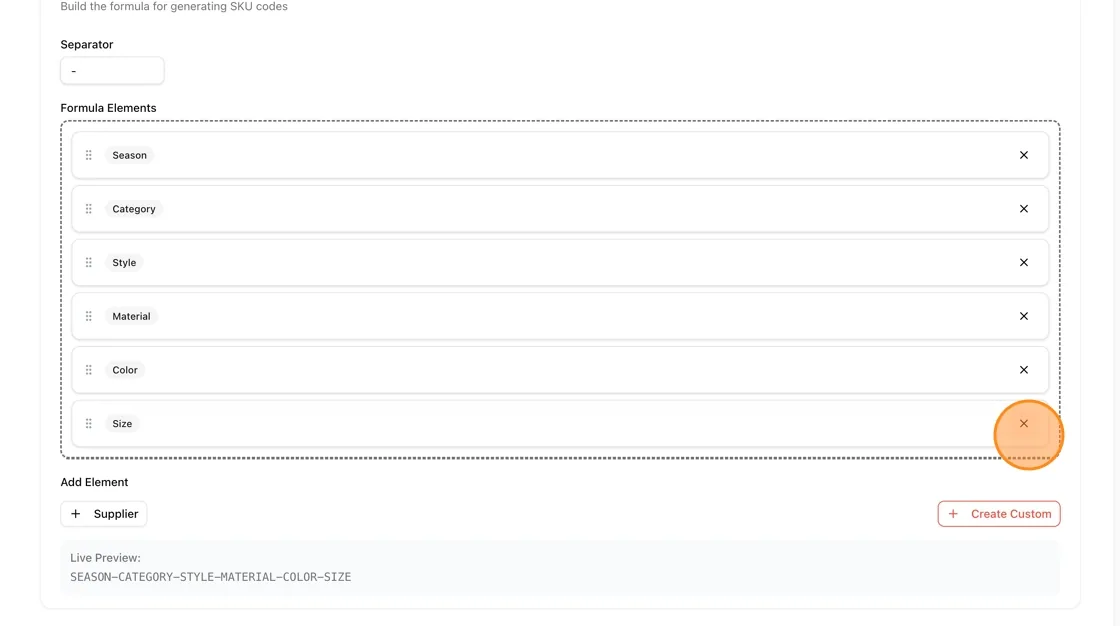
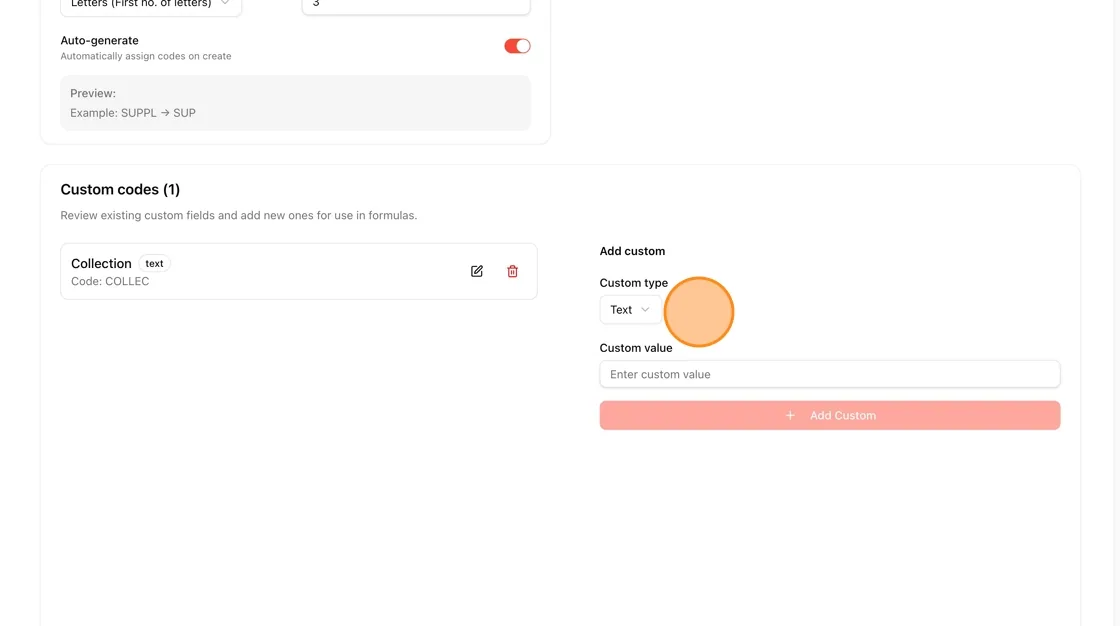
Click Create Custom to create custom content.
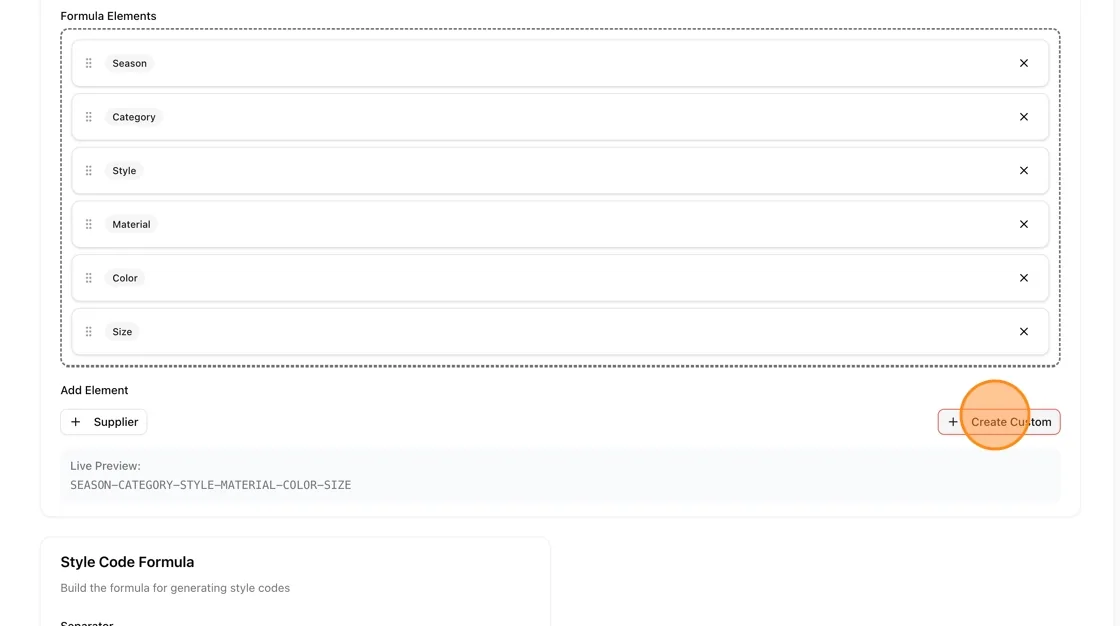
Choose the Custom type for the SKU formula:
- Text Enter fixed text that will appear exactly as input in the SKU code (e.g., brand name, category, or prefix).
- Number sequential Generate a sequence of numbers that automatically increments (e.g., 001, 002, 003).
- Letter sequential Generate a sequence of letters that automatically increments (e.g., A, B, C).
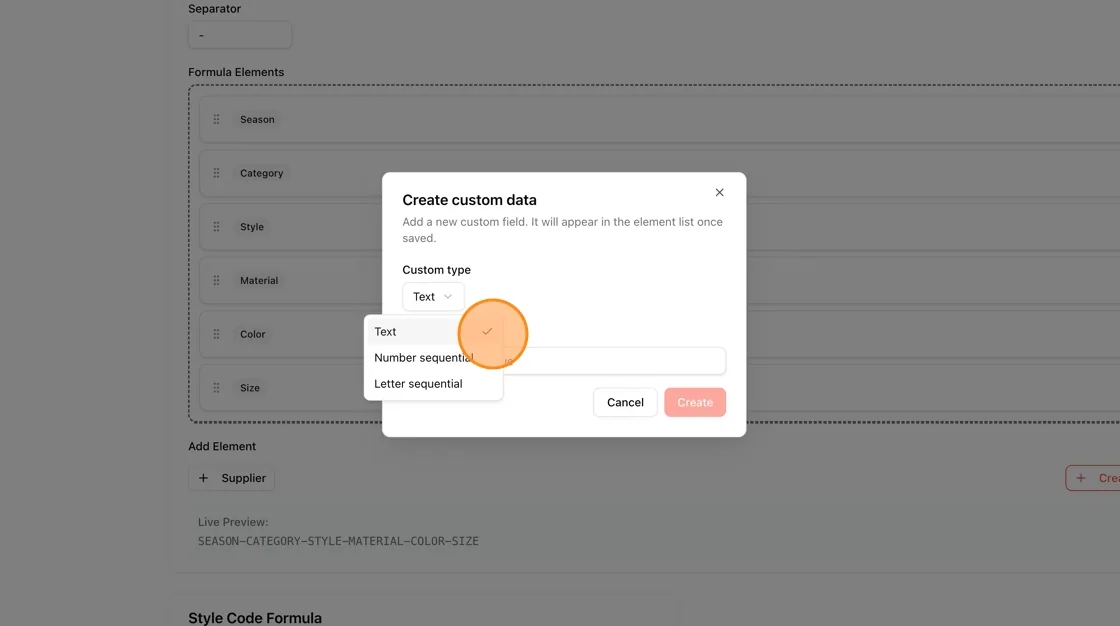
Input the desired custom value based on the selected type.
Click “Create” to apply and add it to the SKU formula.
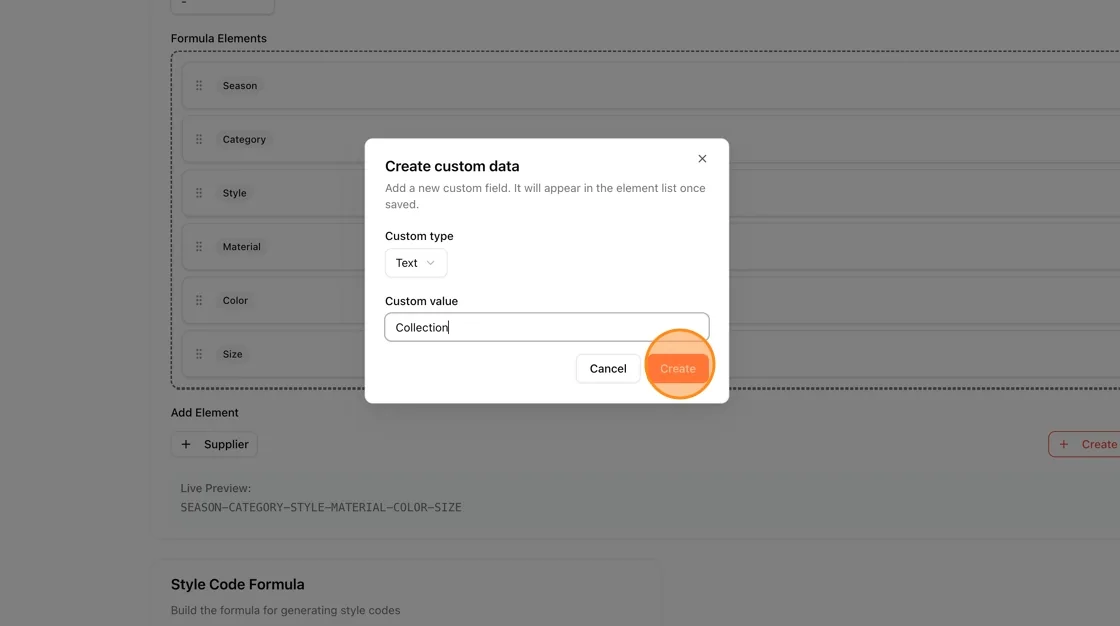
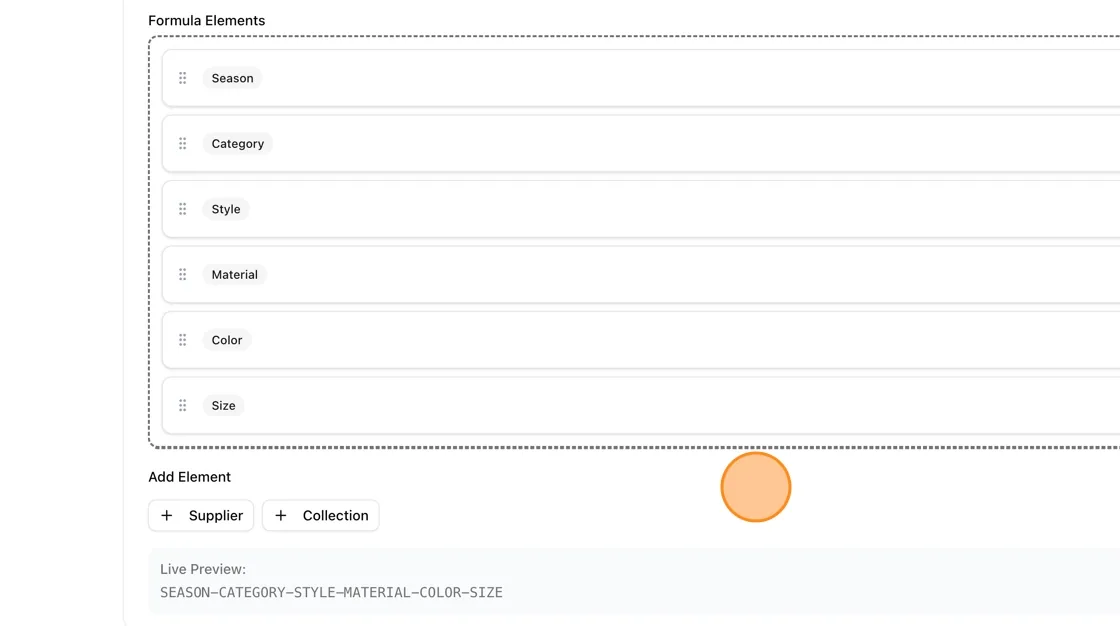
This format provides comprehensive product information in a logical sequence and helps to quickly identify products.
- "Season" to add a season to your formula
- "Category" to add product category
- "Style" to add the style number
- "Material" to add material type
- "Color" to add a color code
- "Size" to add size information
Suggested Formula: SEASON-CATEGORY-STYLE-MATERIAL-COLOR-SIZE.
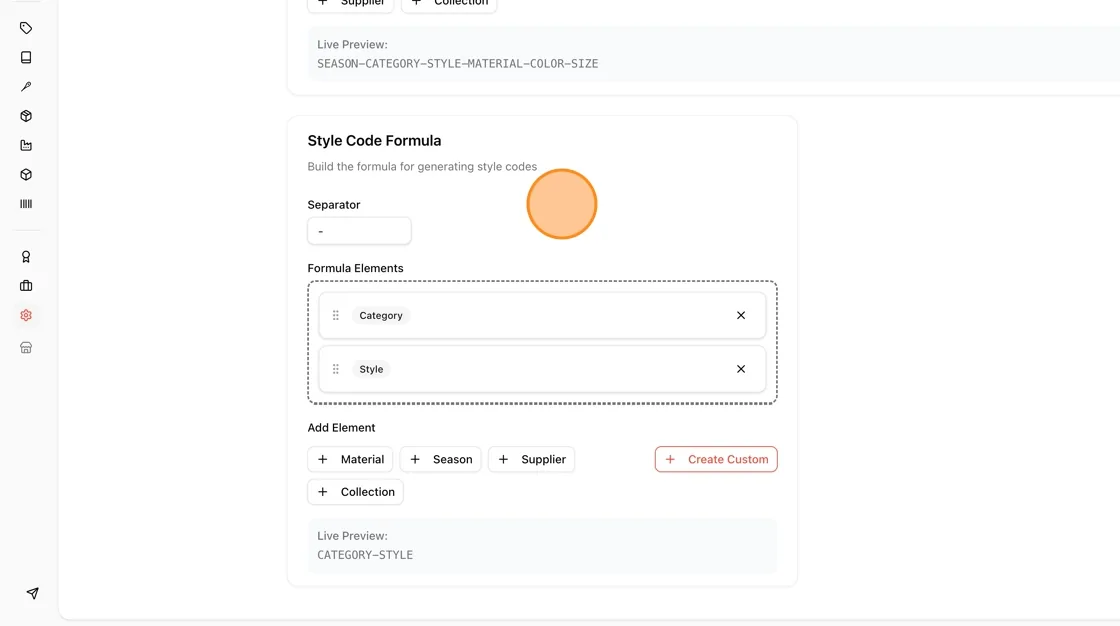
Ensure the style code aligns with the SKU format by selecting these elements:
- "Category" to add product category
- "Style" to add the style number
Suggested Formula: CATEGORY-STYLE
Go to "Settings"
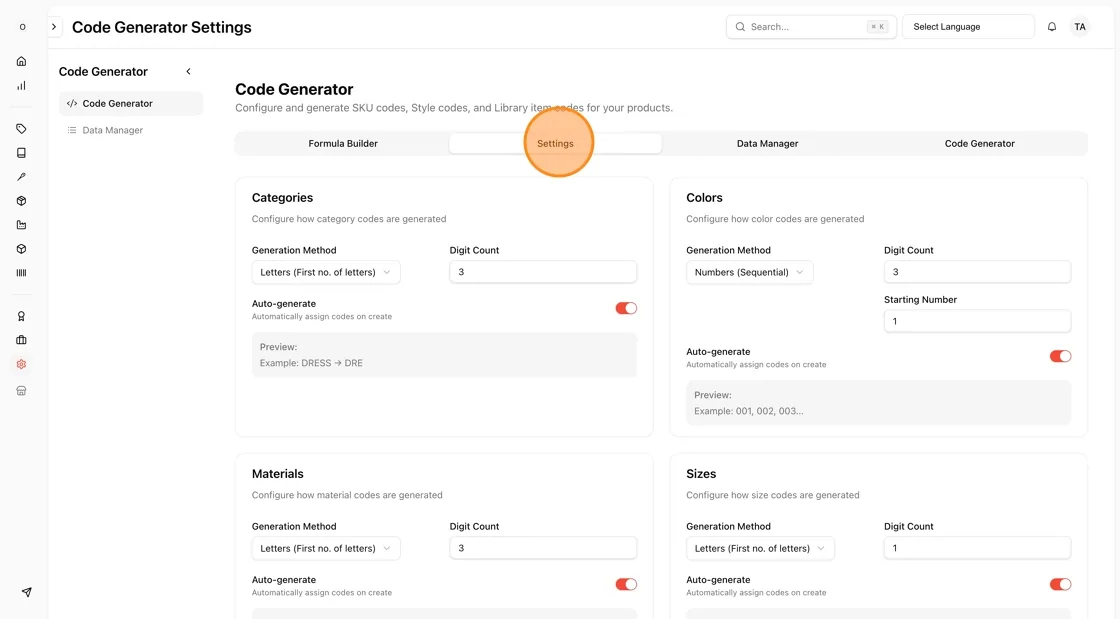
In the Setting Category Section, choose the generation method. There are three options:
- "Letters (First no. of letters)" - assigns the beginning letters of each name as the code (DRESS - DRE)
- "Letters (Sequential)" - assigns letters in order (A, B, C, etc.)
- "Numbers (Sequential)" - assigns numbers in order (001, 002, 003, etc.)
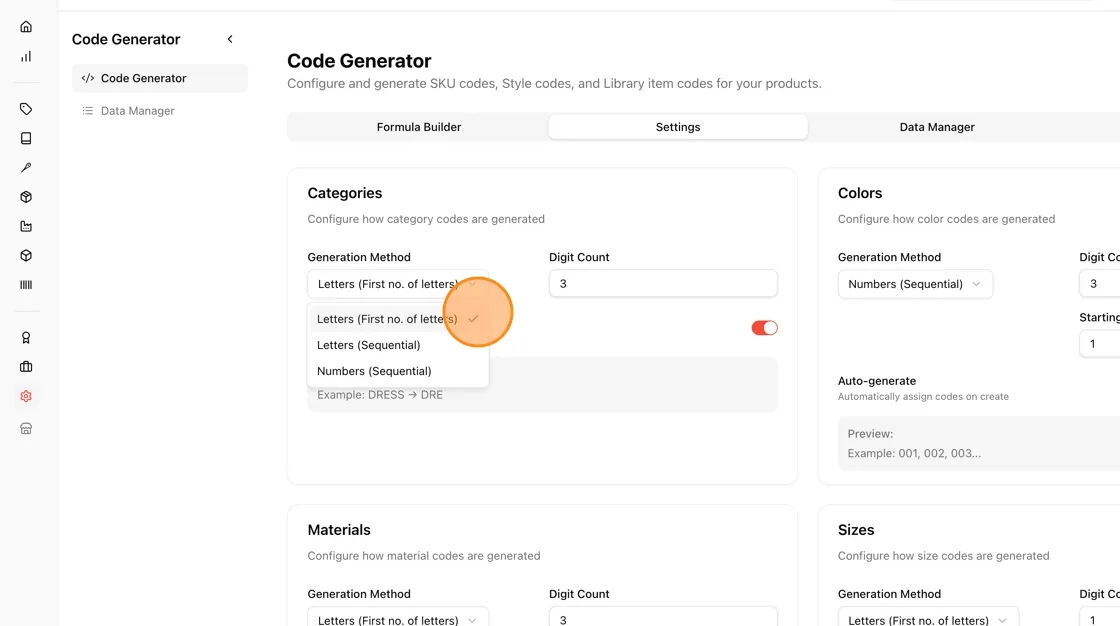
Choose "Letters (First no. of letters)" and enter the Digit count of the letters.
Note
For the most effective code structure, we recommend selecting "Letters (First no. of letters)" as the preferred generation method.
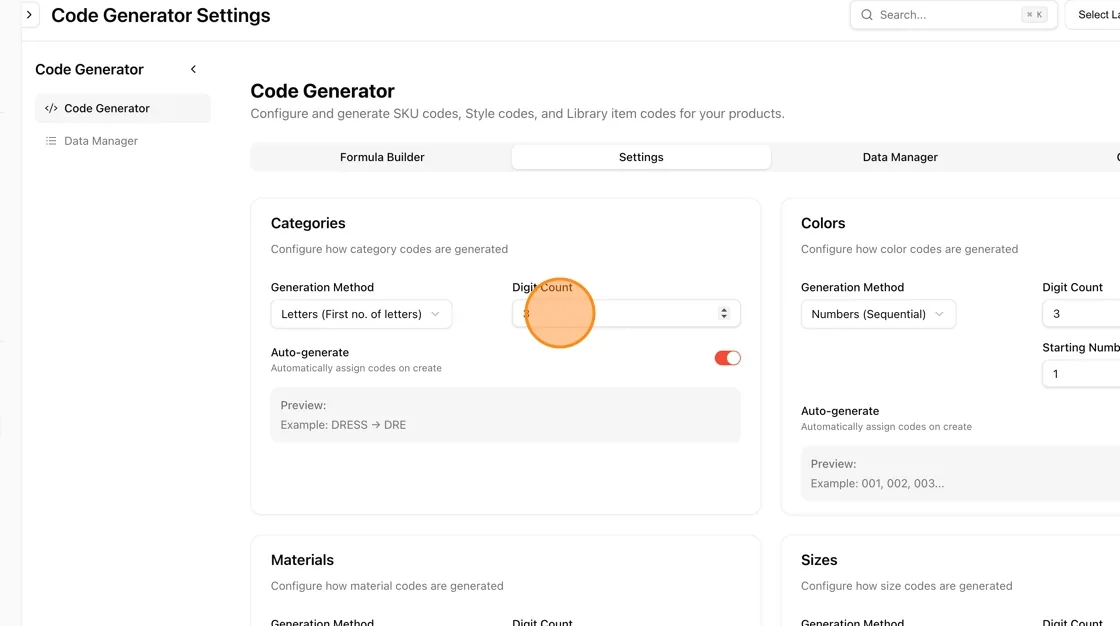
Use the Auto-generate toggle to turn automatic code assignment on or off.
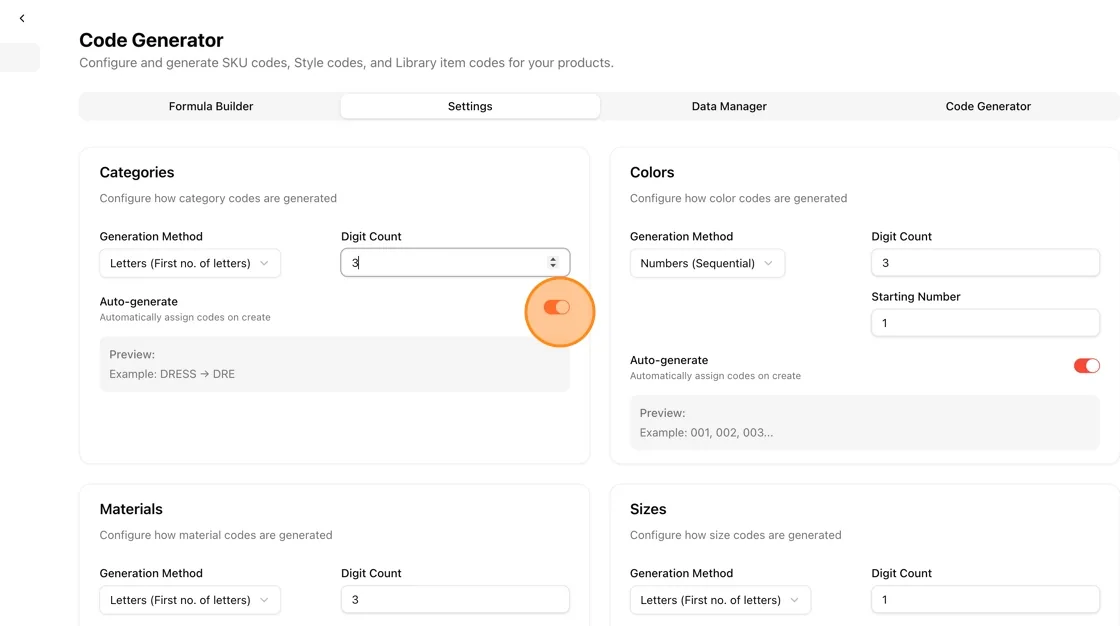
Example in action: If you choose 3 letters, "DRESS" becomes "DRE".
The preview of the SKU formula will be displayed below the field.
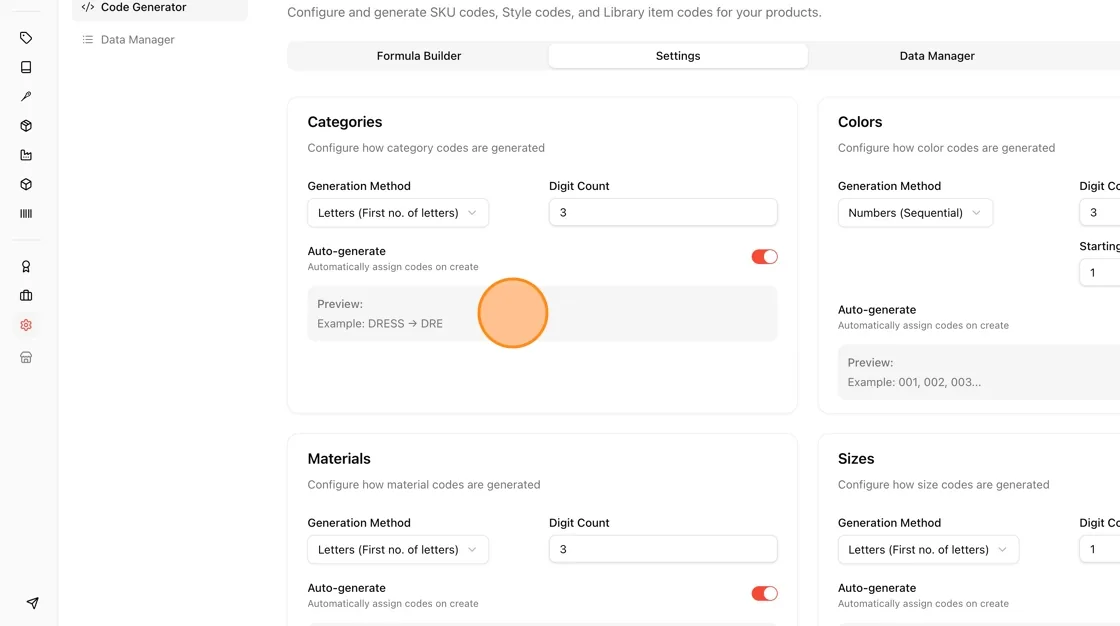
In the Setting Colors section, we recommend selecting "Numbers (Sequential)" as the preferred generation method. Enter the digit count and the starting number.
Note
to minimize the potential confusion that may arise from abbreviated color names. This approach maintains simplicity and organizational consistency.
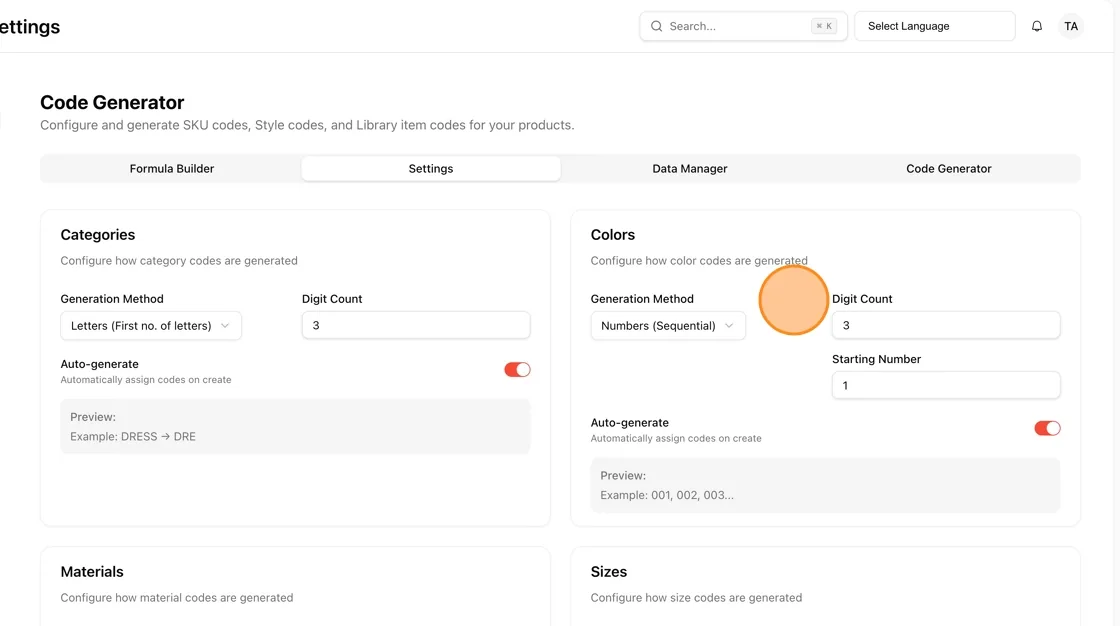
Example in action: Sequential numbering (001, 002, 003...)
In the Setting Material Section, we recommend selecting "Letters (First no. of letters)" as the preferred generation method for the most effective code structure. Enter the Digit count of the letters.
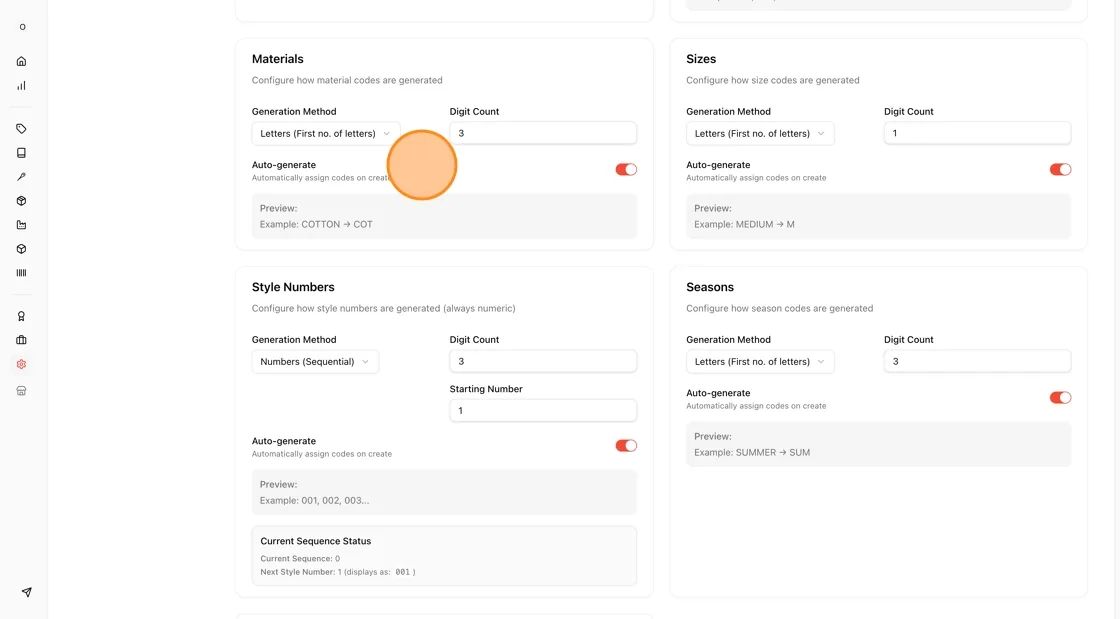
Example in action: If you choose 3 letters, "COTTON" becomes "COT".
In the Setting Size Section, for the most effective code structure, we recommend selecting "Letters (First no. of letters)". Enter the Digit count of the letters
Note
Users can set the size code manually (See step 17) as the preferred generation method.
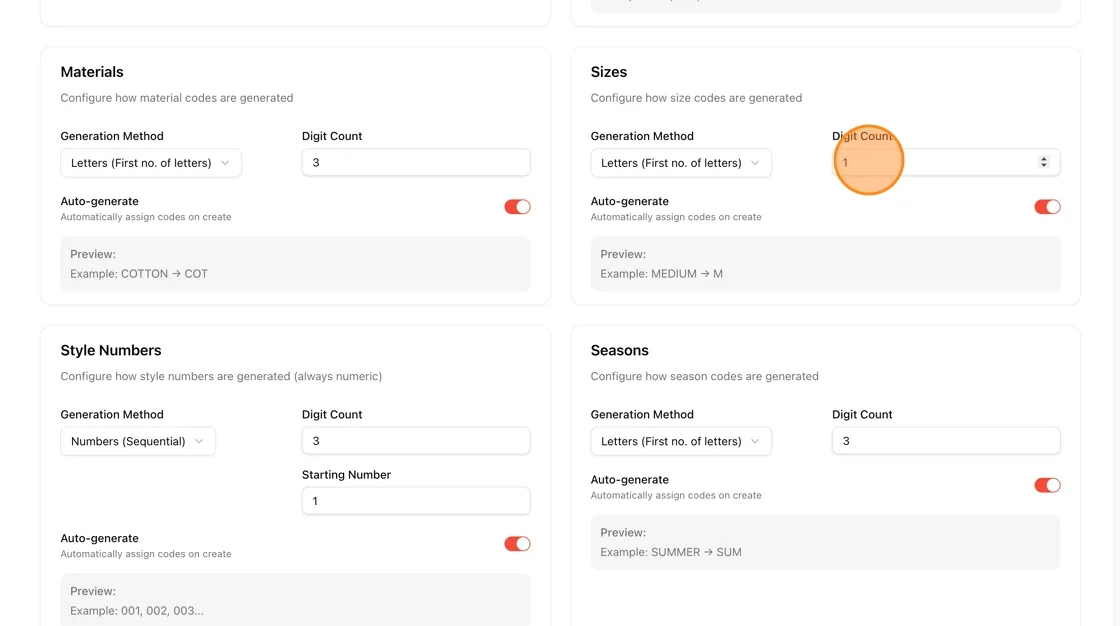
Example in action: If you choose 3 letters, "MEDIUM" becomes "MED".
In the Setting Style Number Section, we recommend selecting "Numbers (Sequential)" as the preferred generation method. Enter the Digit count and the starting number.
Note
to minimize the potential confusion that may arise from abbreviated names. This approach maintains simplicity and organizational consistency.
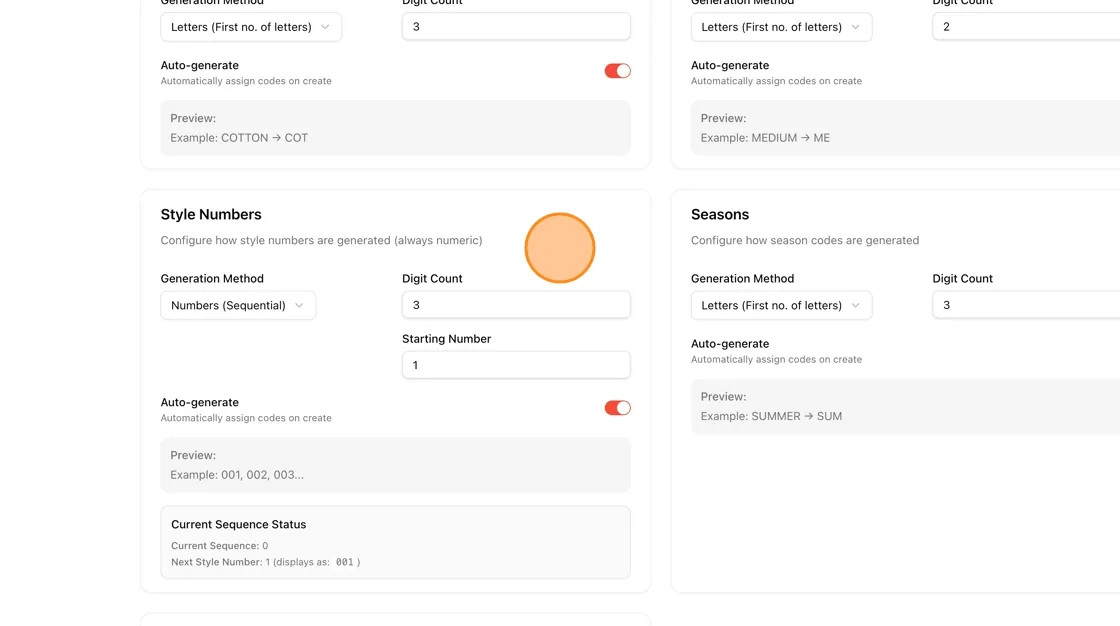
Example in action: Sequential numbering (001, 002, 003...)
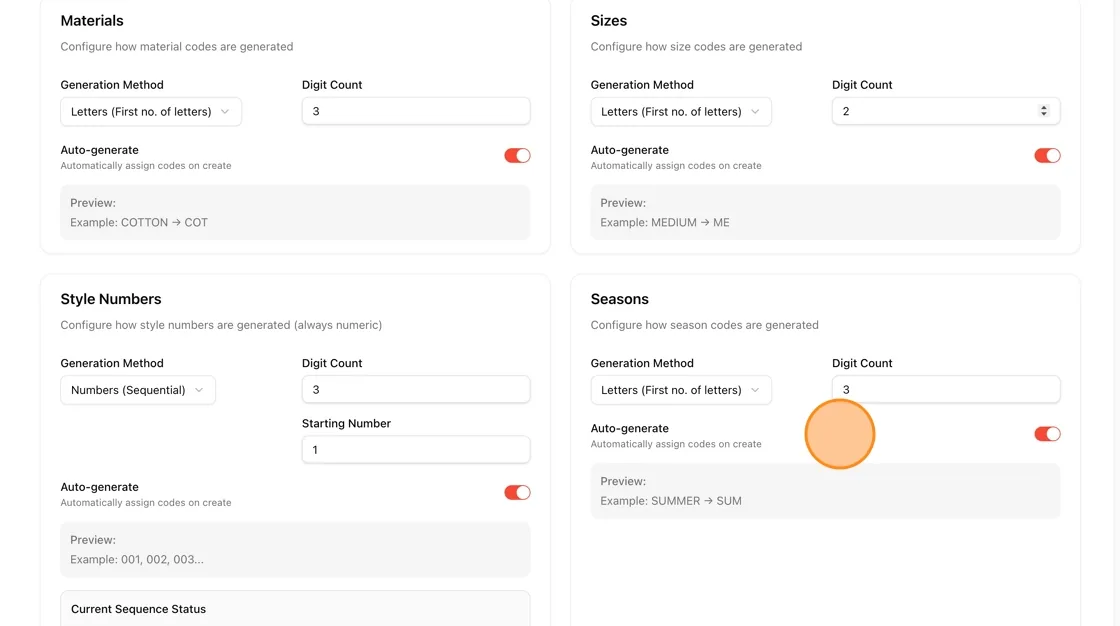
In the Setting Season Section, for the most effective code structure, we recommend selecting "Letters (First no. of letters)" as your preferred generation method. Enter the Digit count of the letters
Users can view, edit, or delete the custom codes they have created.
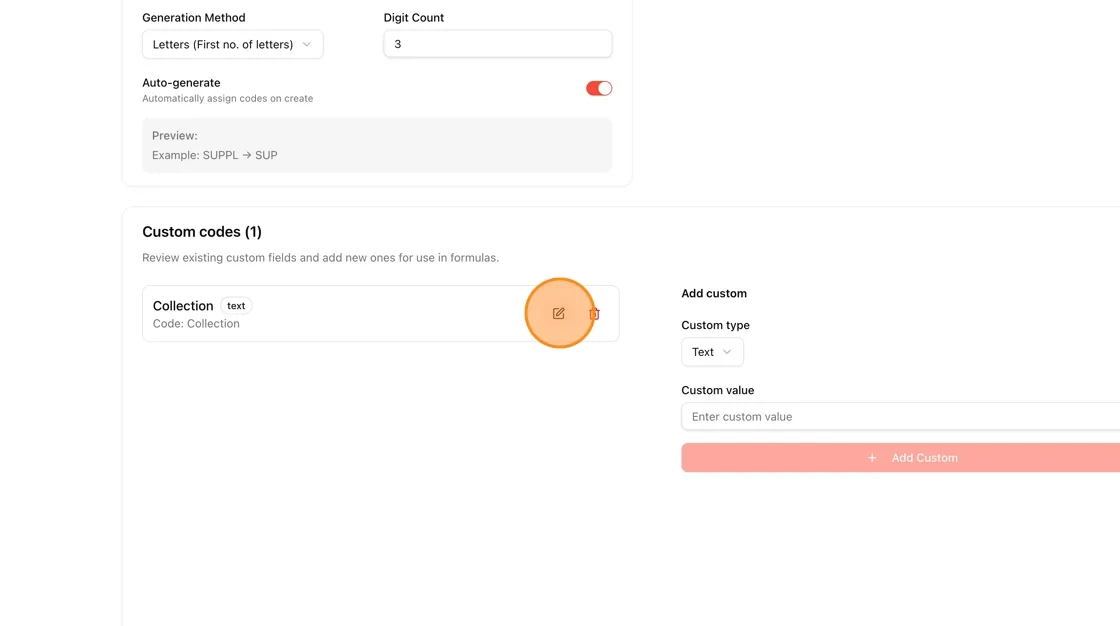
Users can create additional custom codes to further customize the SKU formula.
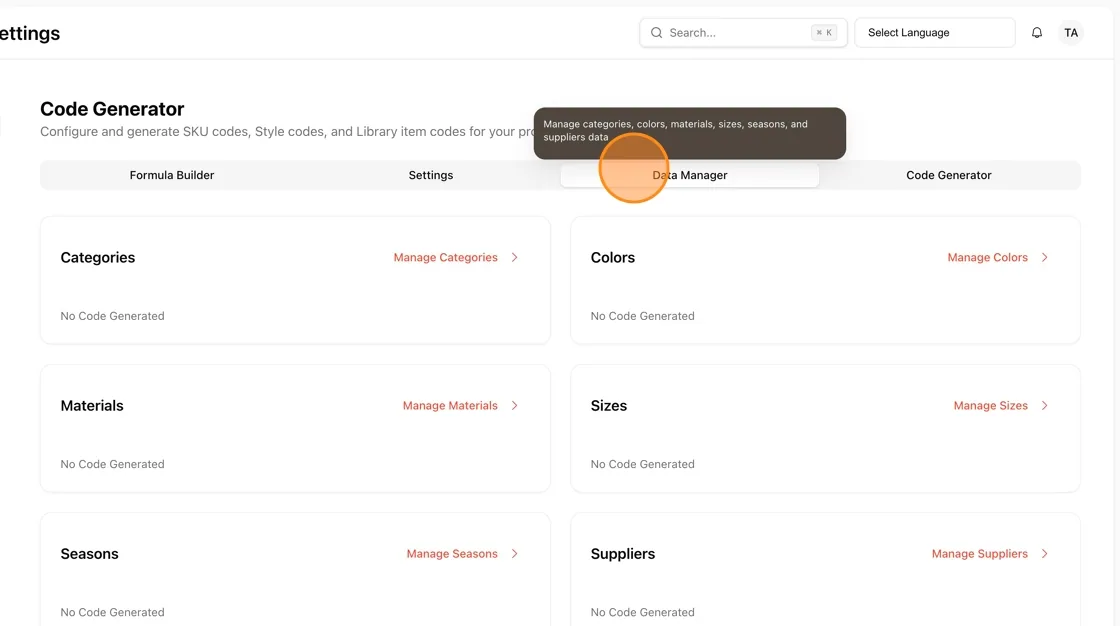
Data Manager functions as the master product library, enabling users to establish and maintain essential data elements including categories, sizes, and seasons. These components are essential to the proper operation of your code generation system.
Go to "Data Manager"
To set the code generator manually, select Manage the elements, For Example, "Manage Size."
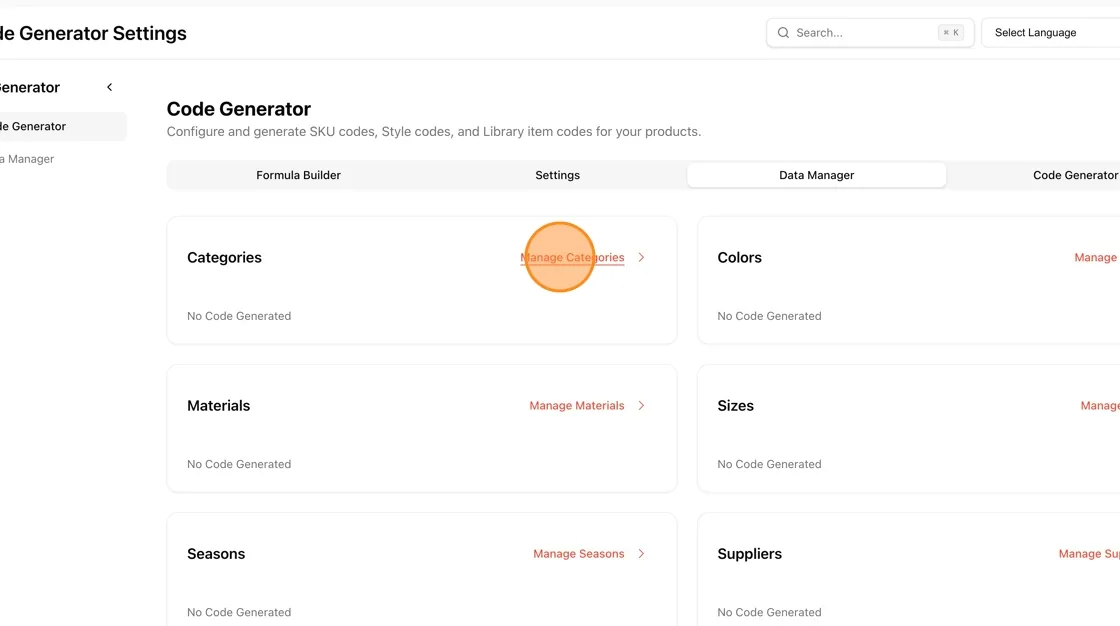
Existing data will be automatically updated when users create or modify codes for categories, colors, materials, sizes, and seasons for each style through the platform.
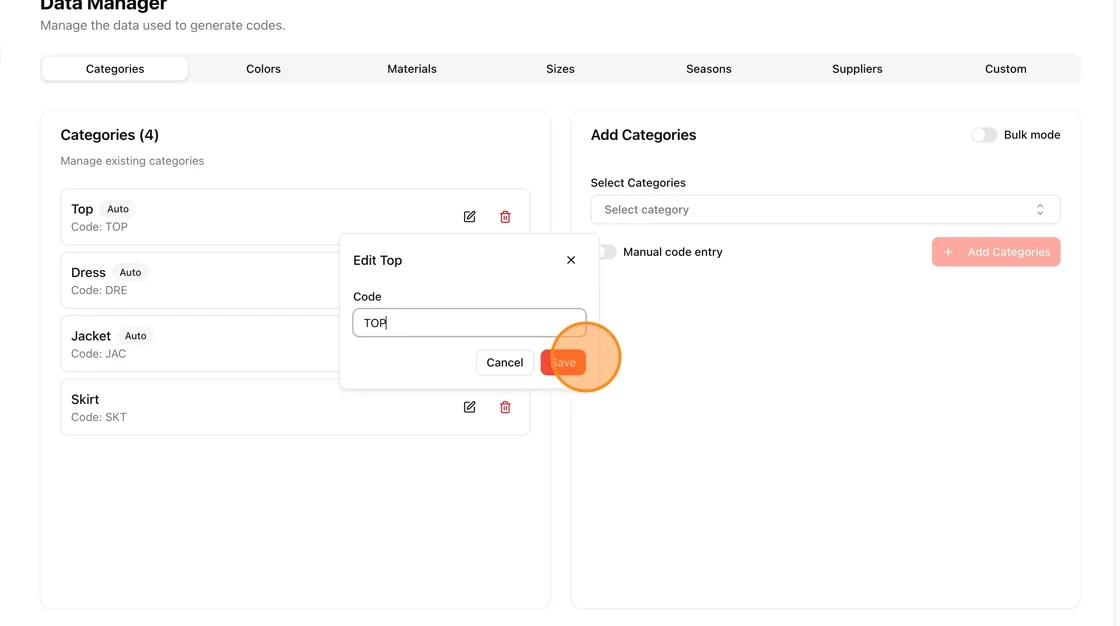
Click the edit icon for any existing size to modify the code.
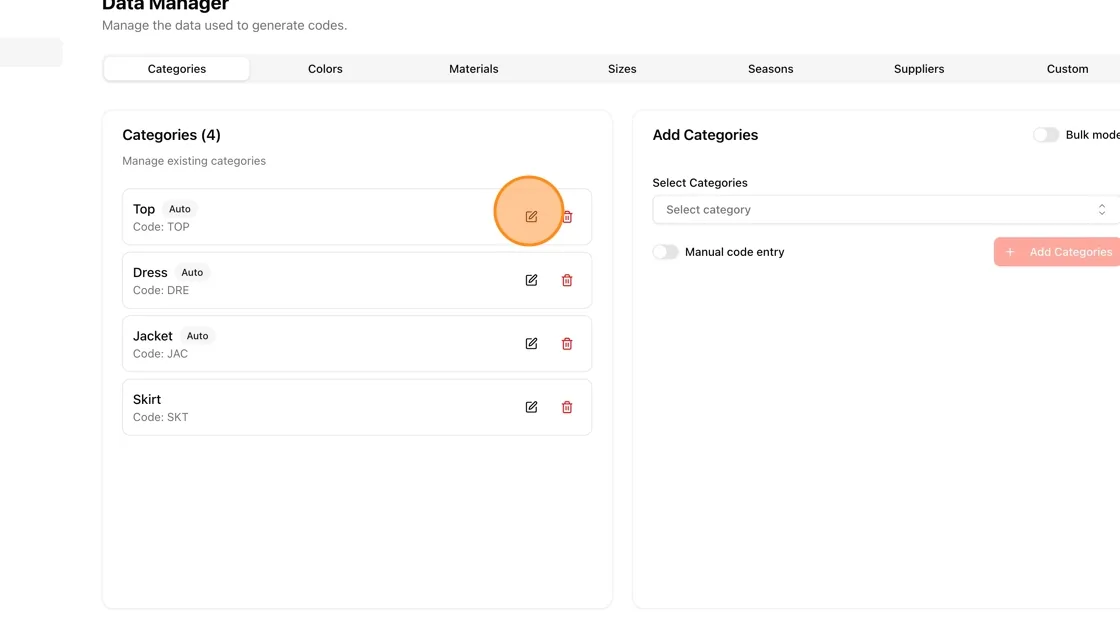
Enter the new code and click "Save" when done.
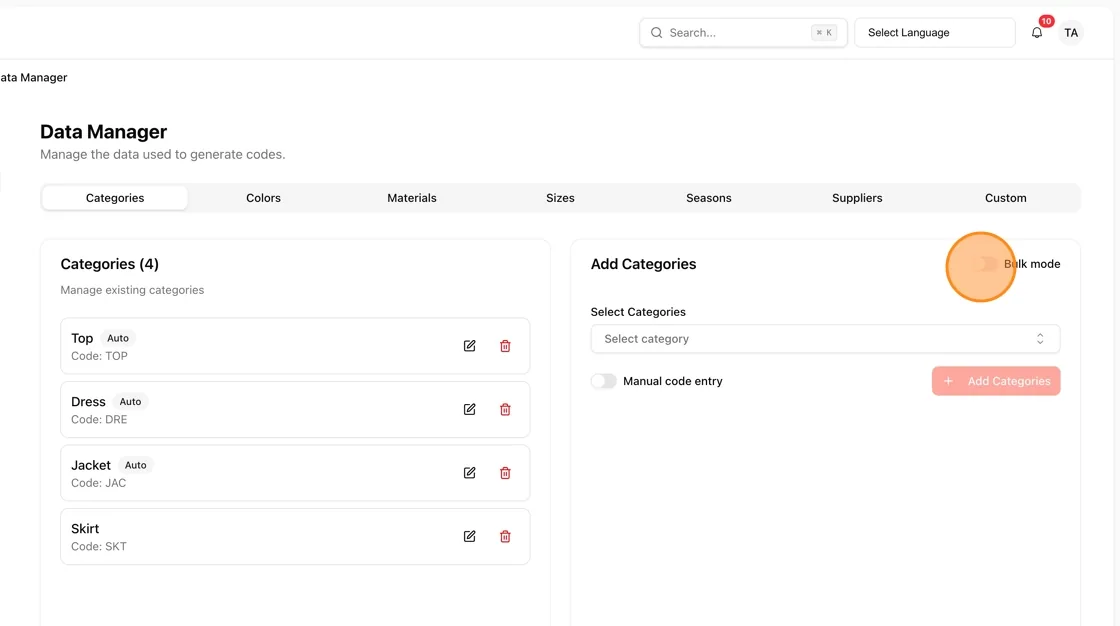
Users can add the created sizes in bulk mode to the data manager. Turn ON the bulk mode toggle.
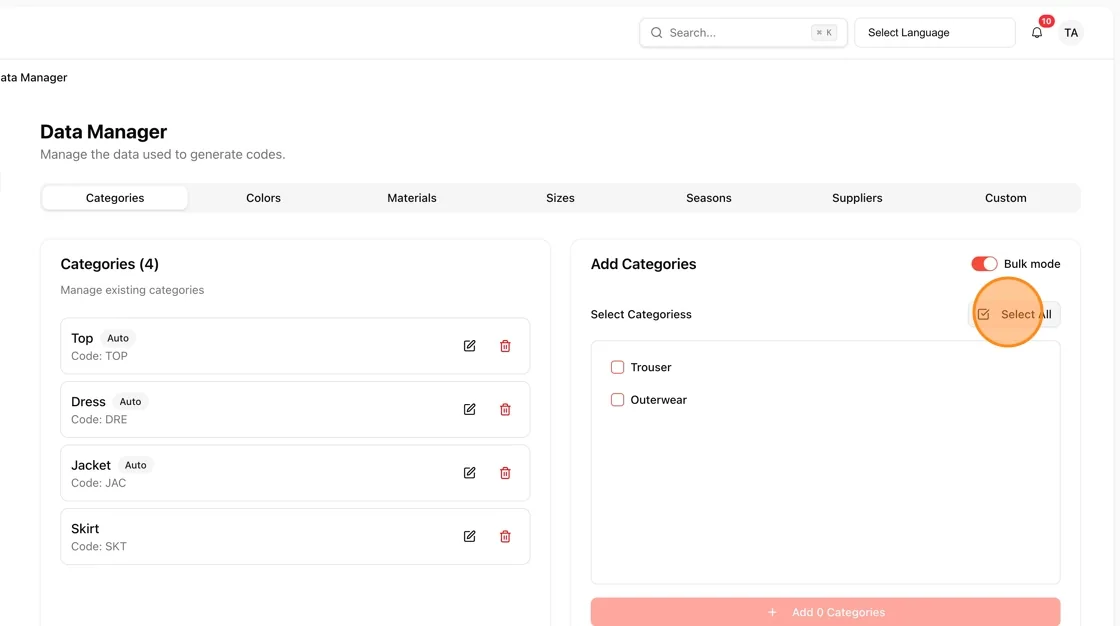
Click the "Select All" button to select all available sizes at once, or manually select individual sizes as needed.
Click "Add Sizes" (or however many users need)
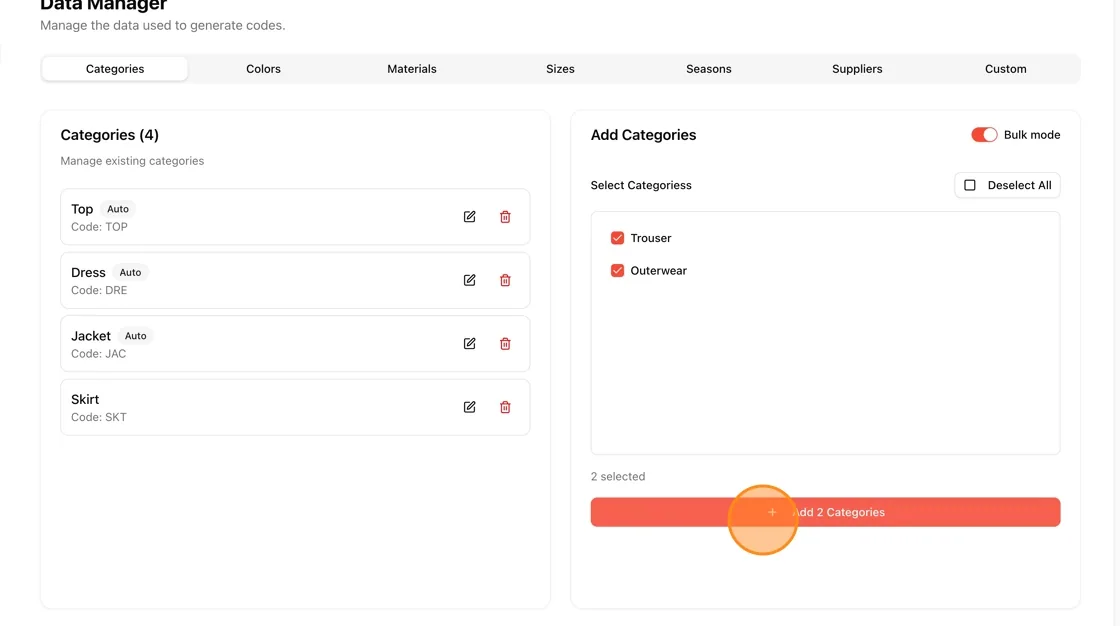
The sizes will automatically be added to the data manager.
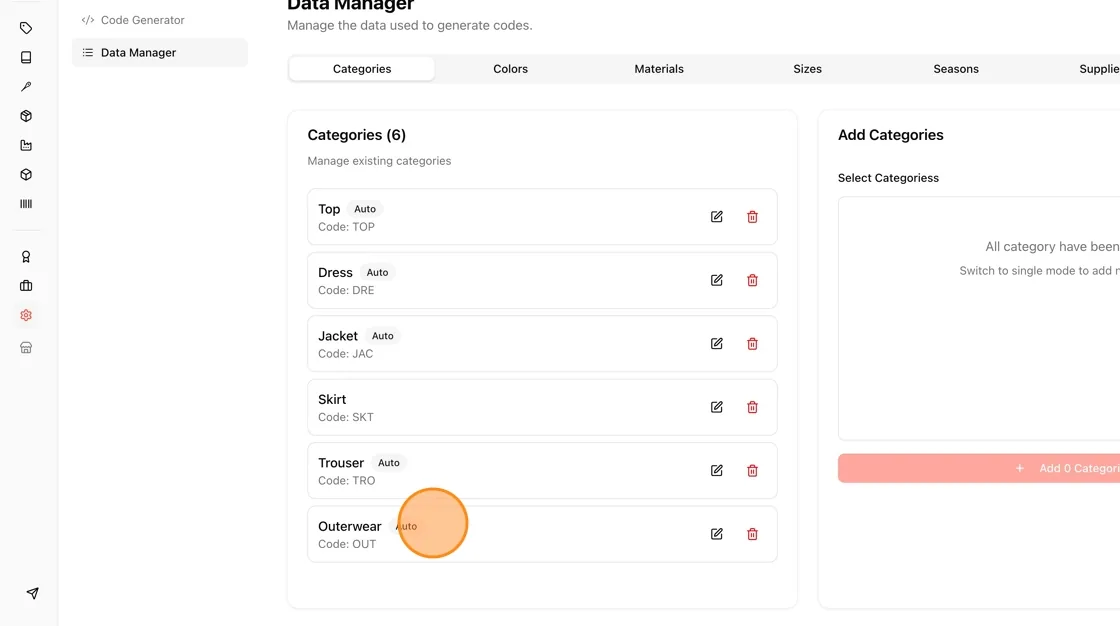
Note
The same steps apply when managing Categories, Colors, Materials, Sizes, and Seasons within the Code Generator.
Users can add the code manually. Turn ON the Manual code entry toggle field if you want a specific code.
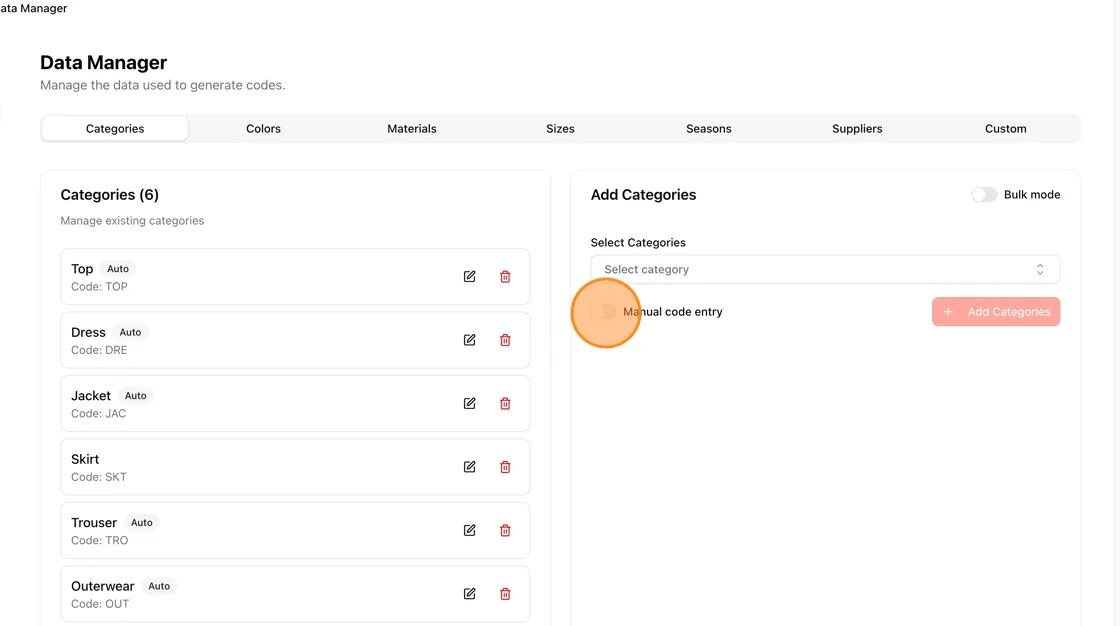
Enter the code to customize your own code generator
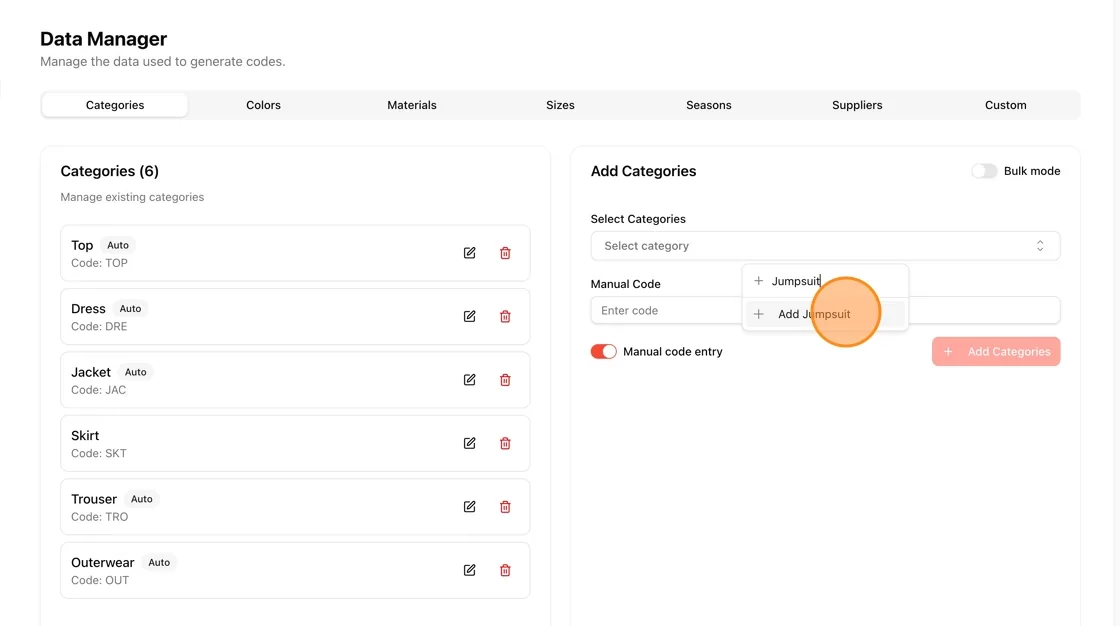
Enter the code manually, then click Add Categories
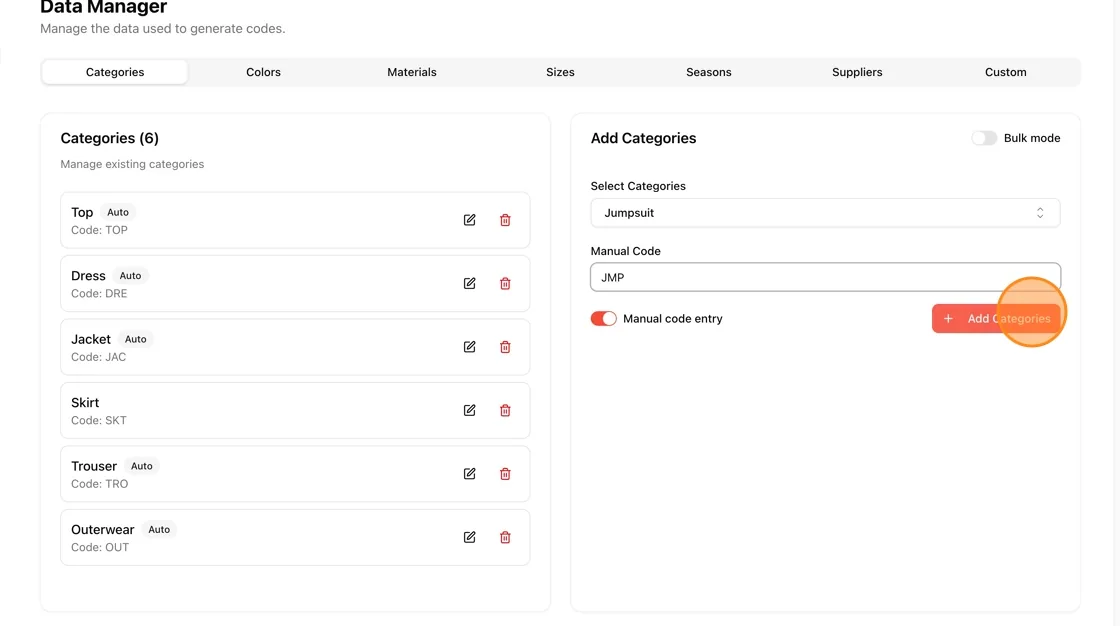
If users create new Categories, Colors, Materials, Sizes, and Seasons, they will be added automatically to the data manager and generate the codes.
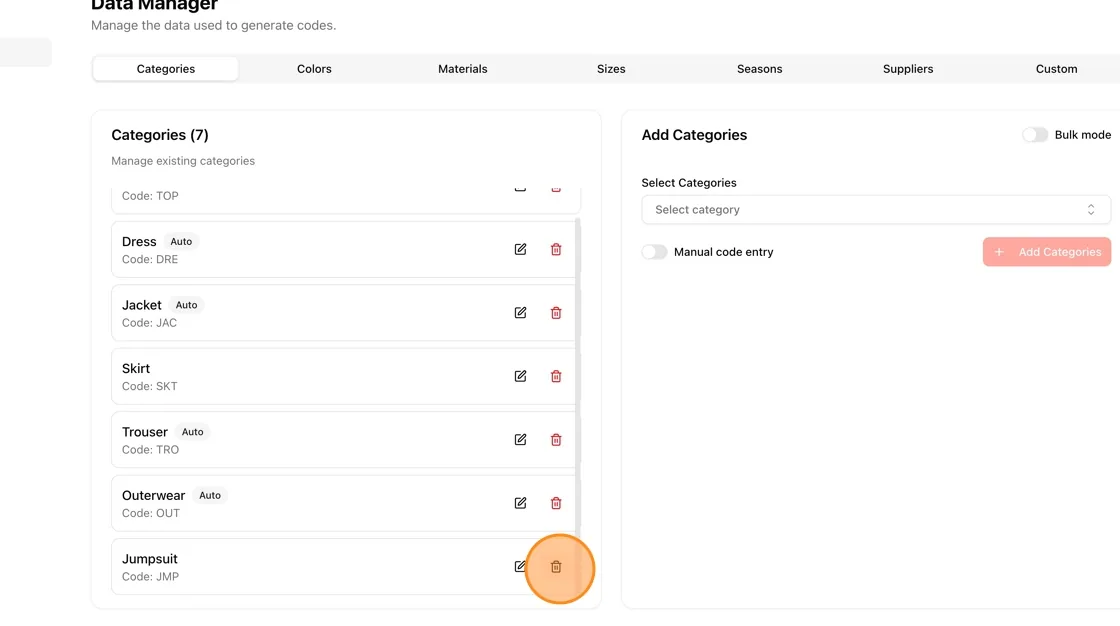
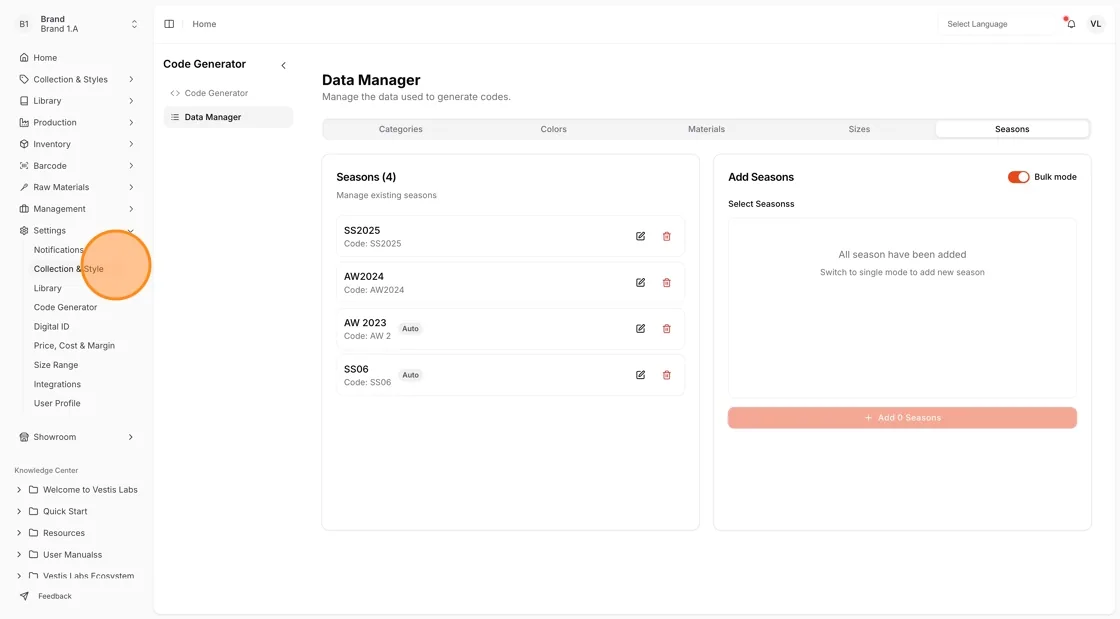
To automatically create and manage data formulas, navigate to the Library, Settings, and Management page.
For example to create a new Season:
Go to "Settings> Collection & Style."
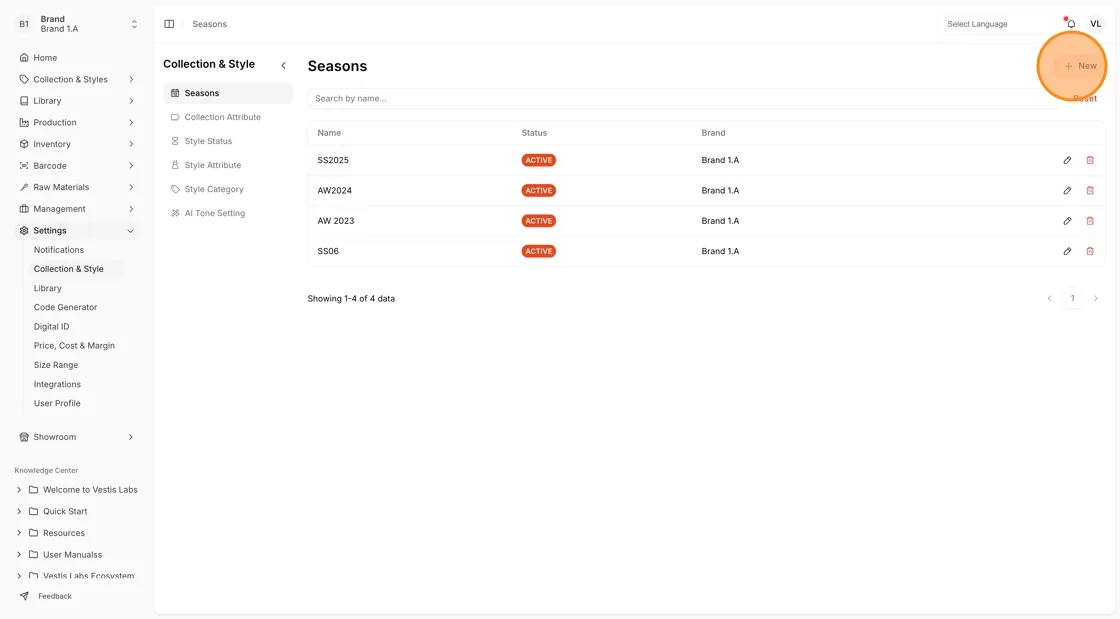
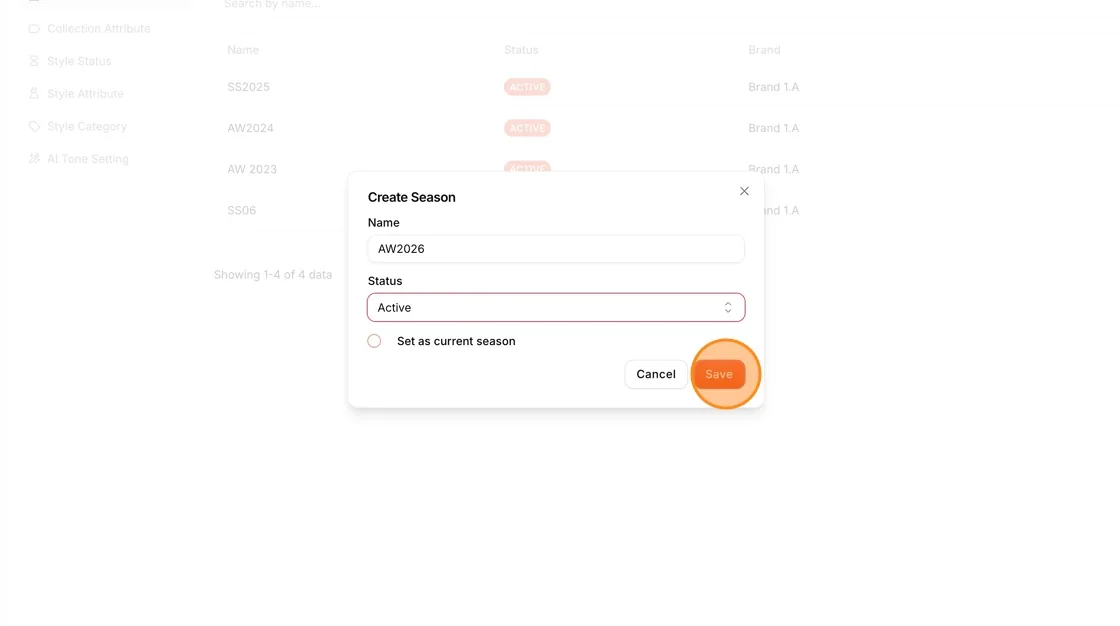
Select "+New" to create a new season
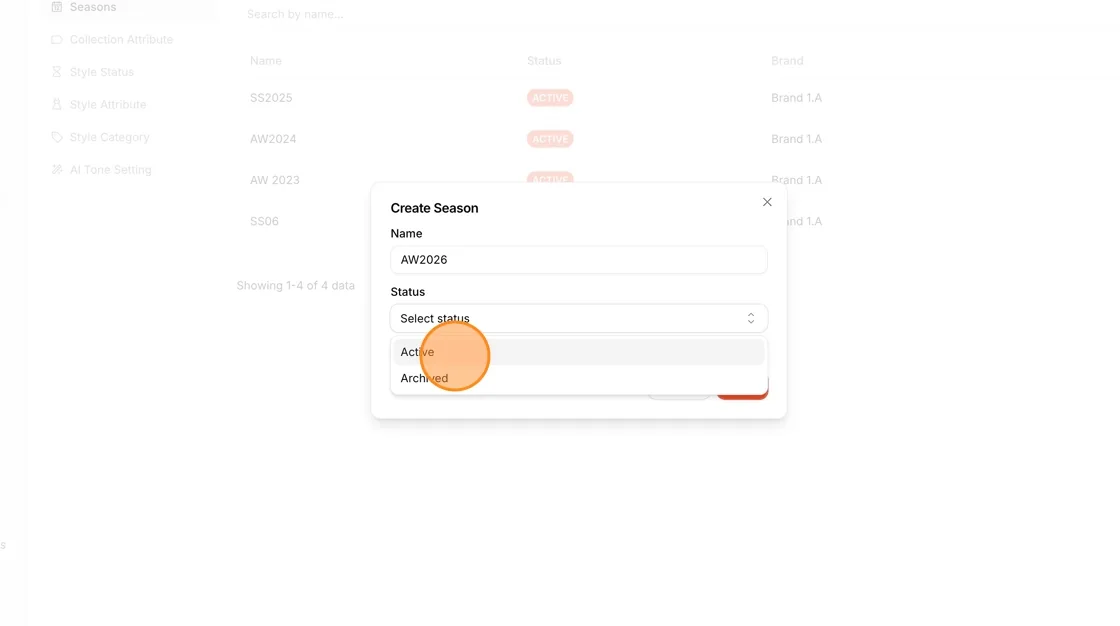
Enter the name of the season and select the status to be active.
Click "Save" to create the new season.
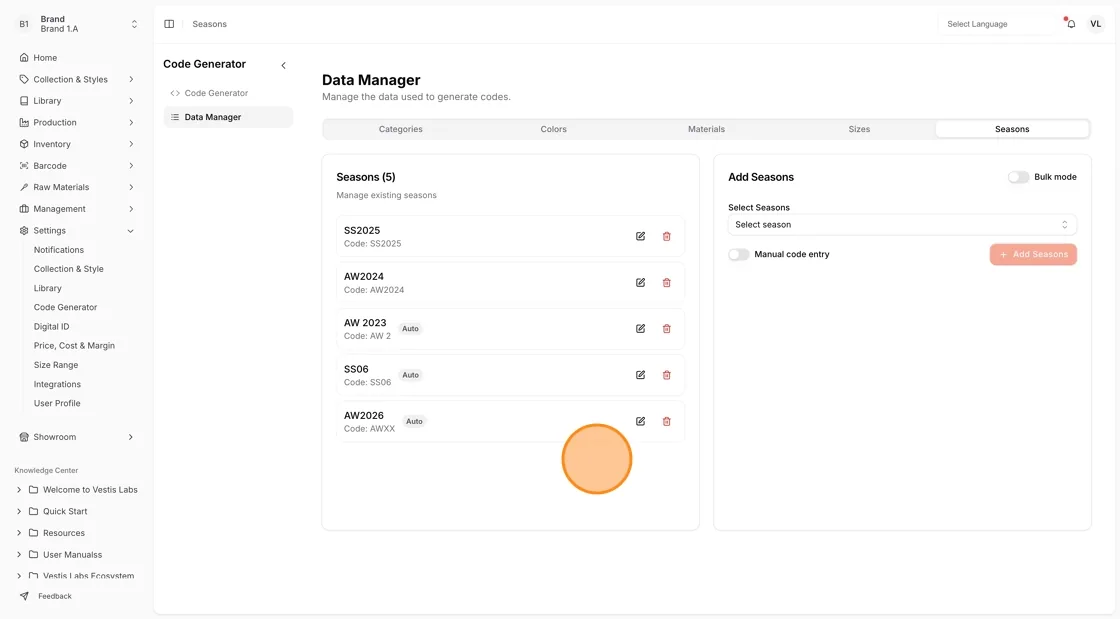
Go back to the "data manager > Seasons" from the left bar menu, and the newest season will be added to the data manager.
Note
The same steps apply when creating new Categories, Colors, Materials, Sizes, and Seasons.
GENERATING THE CODE FORMULA TO STYLE
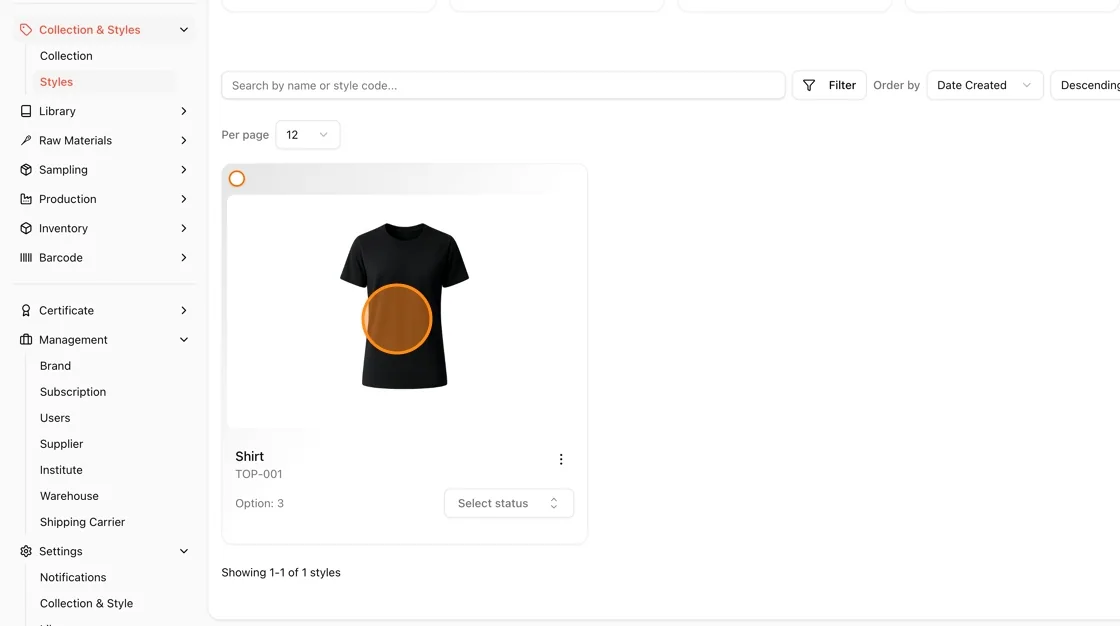
Go to "Collection & Style > Style" to generate the SKU code for the material
Important
Ensure all required fields are completed before generating SKU codes. All elements necessary for code creation must be filled out.
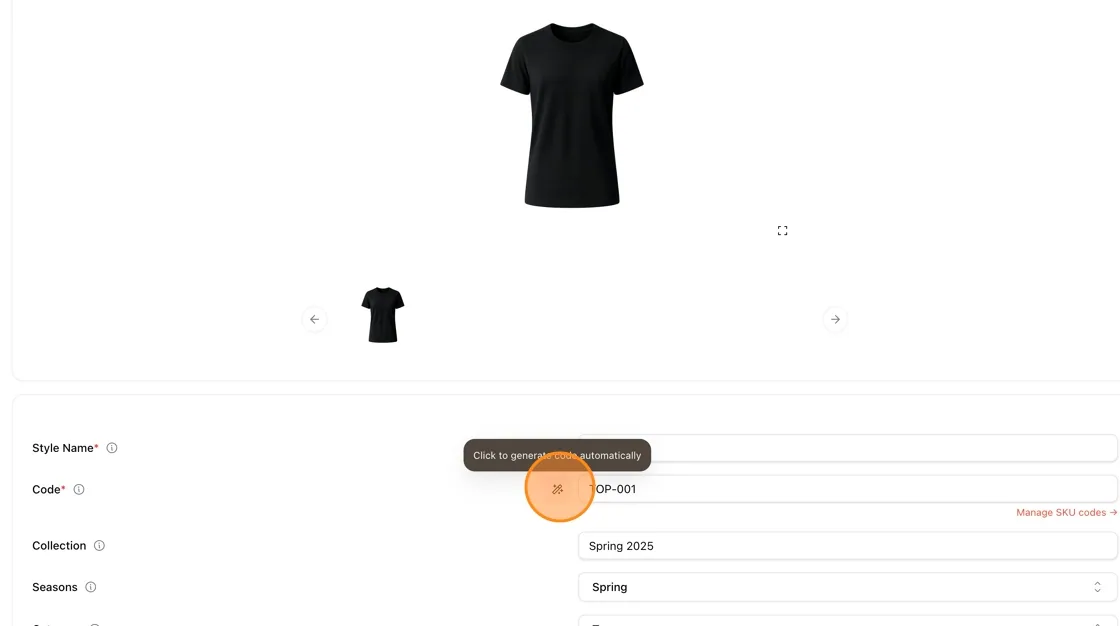
Click the generator icon to create a style code based on the Style Code Format configured in the previous step.
Note
The SKU numbers are generated in the order each style is created, and the sequence runs across all styles within your brand (not by category). This approach ensures that every SKU remains uniq ue and traceable, avoiding any duplicates that could cause issues when exporting or integrating data later.
The example of the SKU-generated number output can be accessed here
Click "Manage SKU codes"
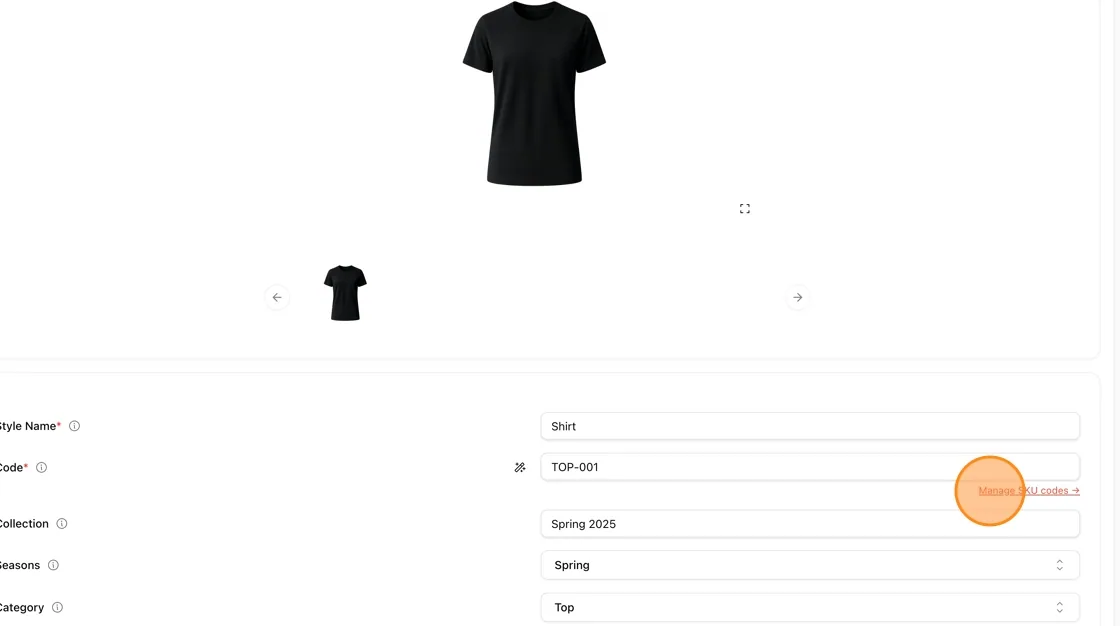
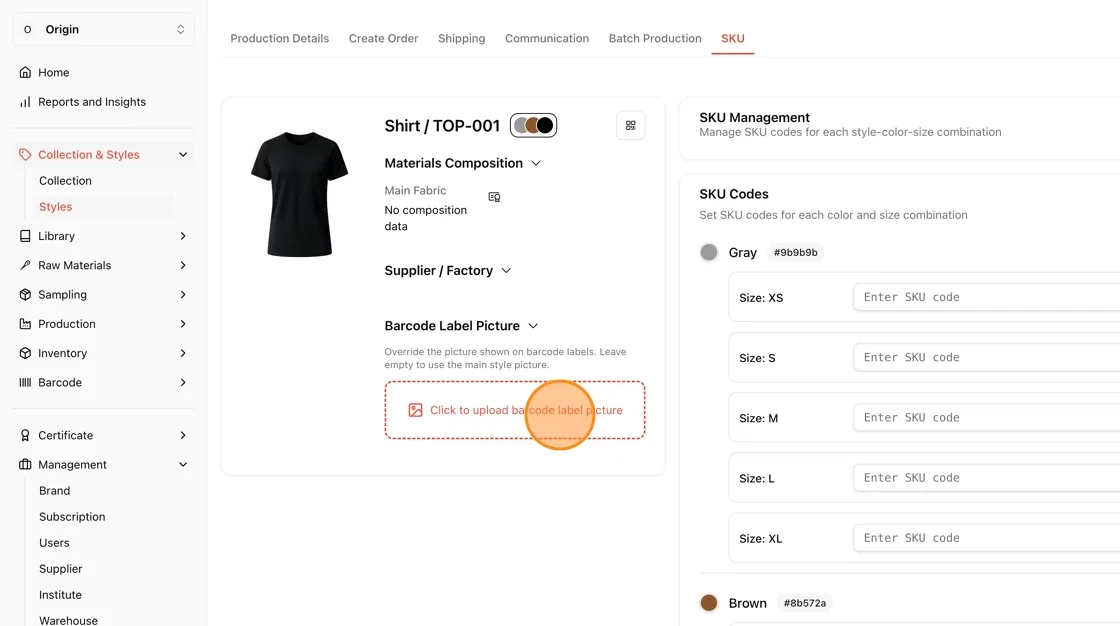
Users can upload an additional image to be displayed on the style barcode label.
Click to upload the picture.
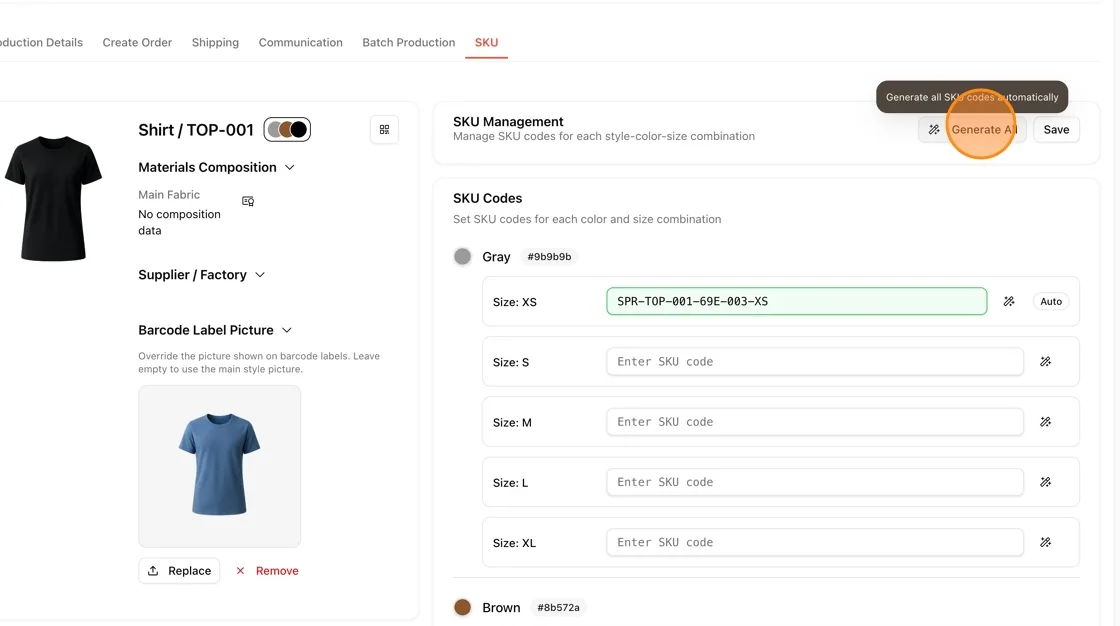
Click “Generate All” to generate all style categories, or manually select individual categories as needed.
Note
The system automatically creates distinct codes for all product variations using the formulas you established.
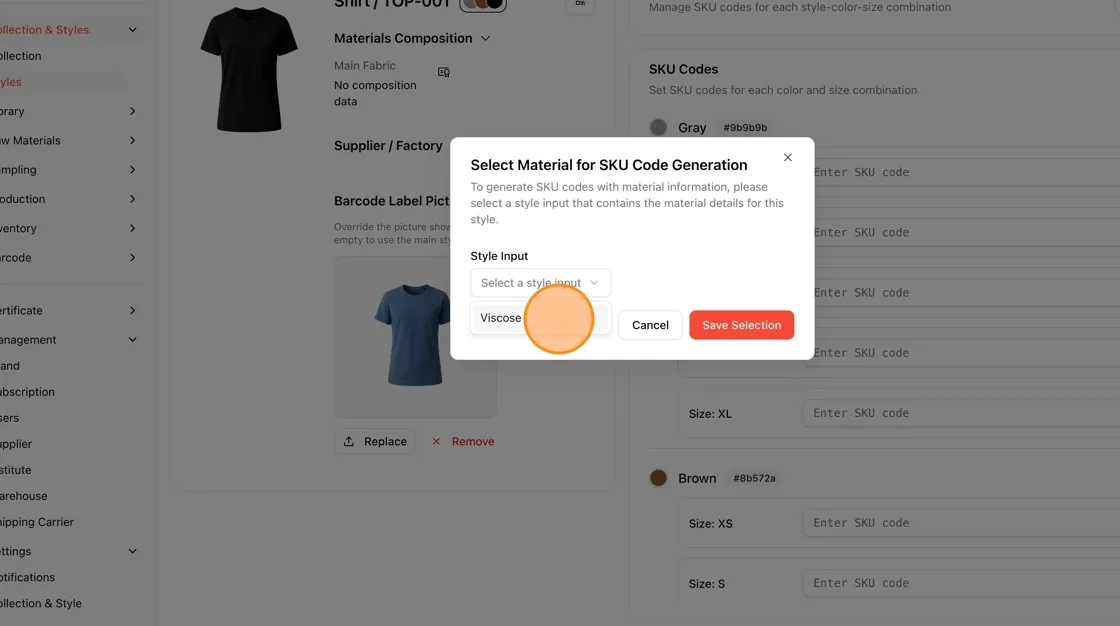
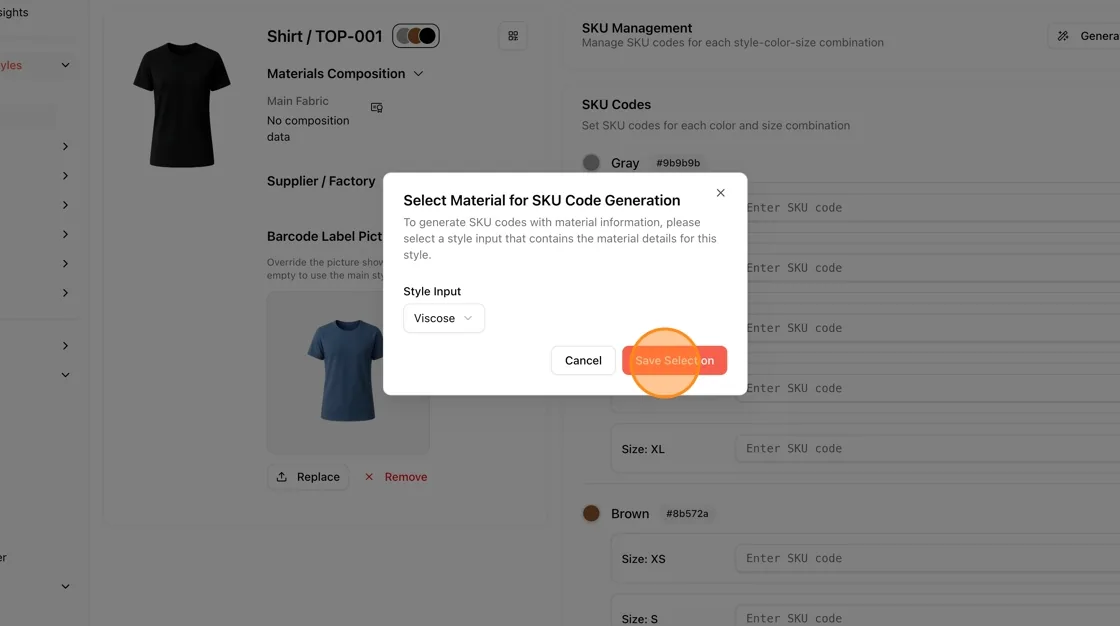
Click "Select a style input."
Note
To generate SKU codes with material information, select a style input that contains the material details for this style.
Click "Save Selection"
Click "Save" to confirm and store your SKU.