Step 8 of 12 in Connect Shopify
Updating synced data from Vestis Labs to Shopify
Open Integrations to compare with Shopify
Under review. This page is published while we check it against the live app, so some details may have changed.
Screenshots may be out of date.
- Back in Collection & Styles > Styles, note the previously selected/synced styles (Jolly Dress, Evergreen Casual Trousers, Simple Peach Dress) are still marked with checkmarks from the earlier bulk sync.
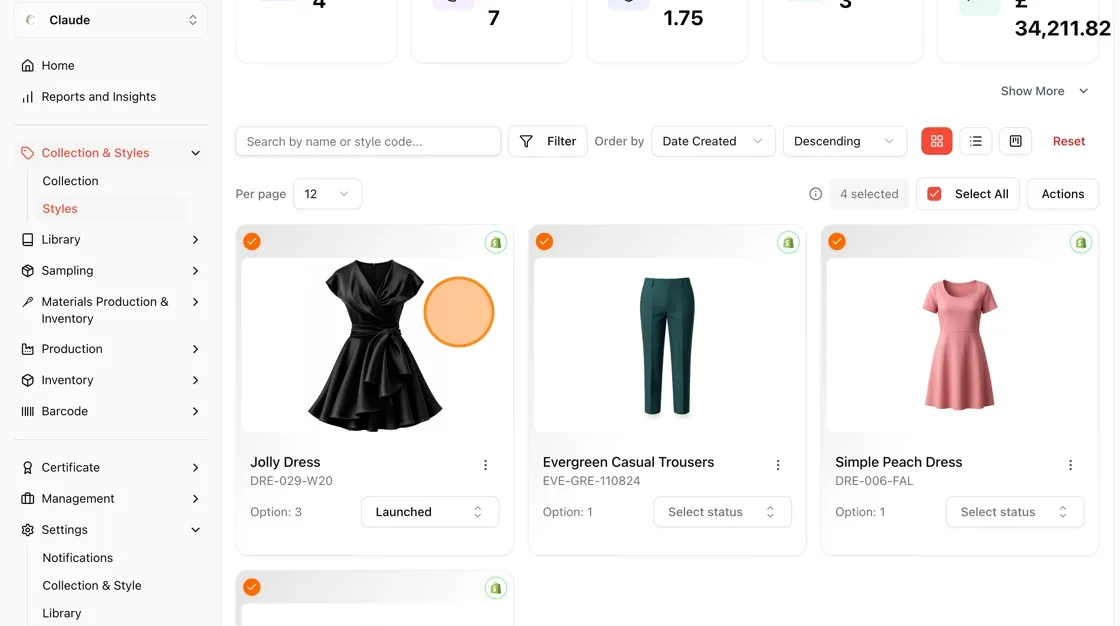
Open the Jolly Dress style details and update the information fields.
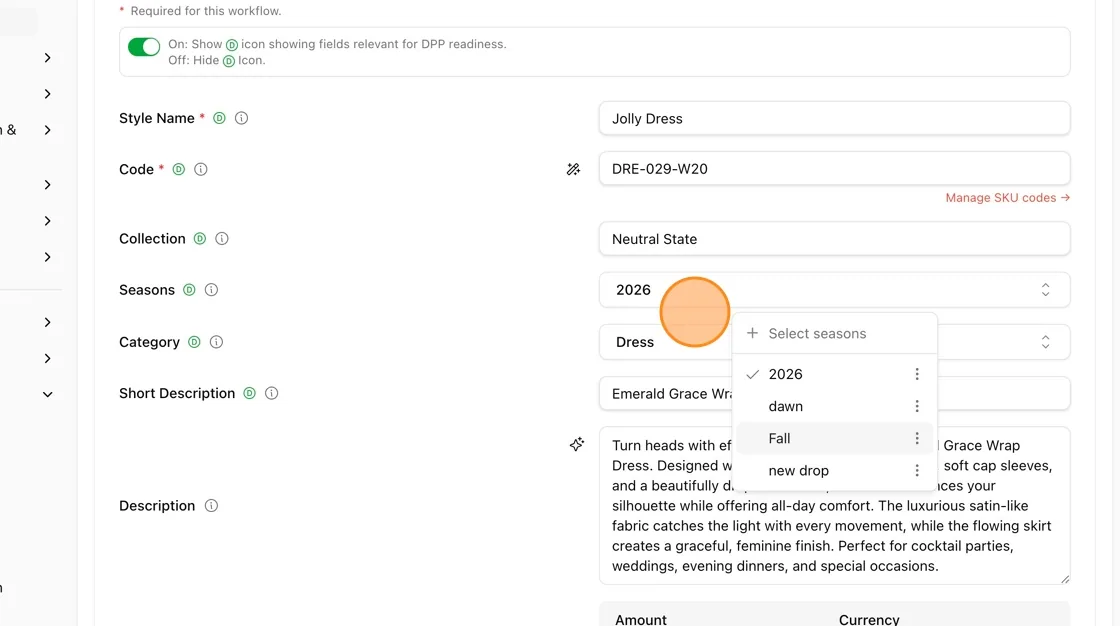
Example: locate the Seasons field.
Click the dropdown and change the season selection — in this case, switching from "2026" to Fall (or adding Fall alongside other season tags like "dawn" and "new drop").
Save the change
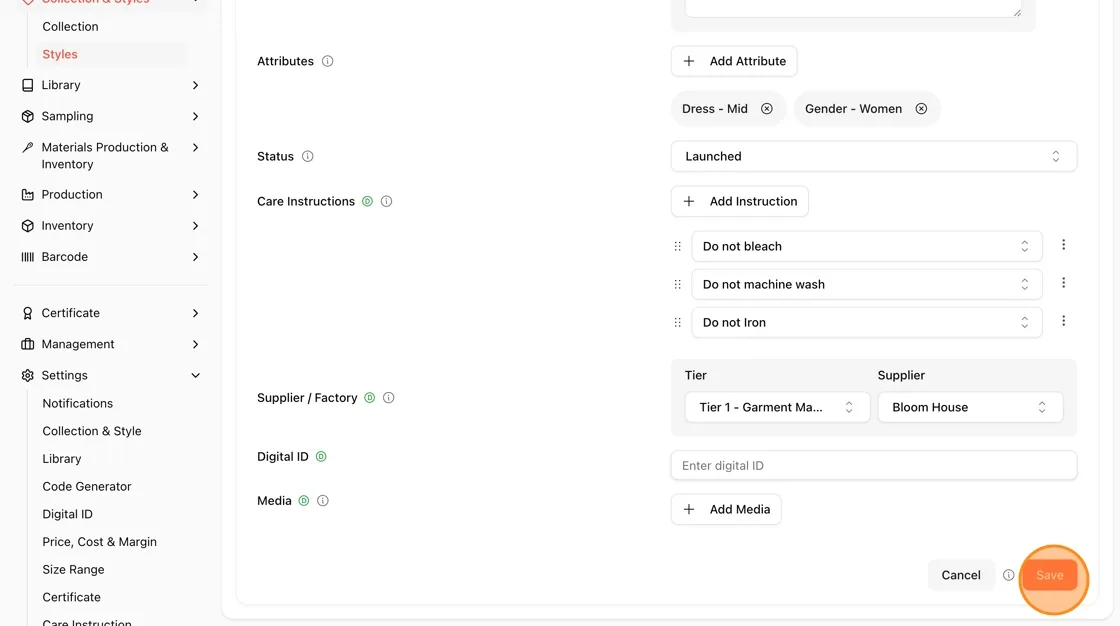
- After updating the field (and any other attributes), click Save at the bottom of the Details form to confirm the edit in Vestis Labs.
Open Integrations to compare with Shopify
- Navigate to the style's Integrations tab to view the sync comparison between Vestis Labs and Shopify.
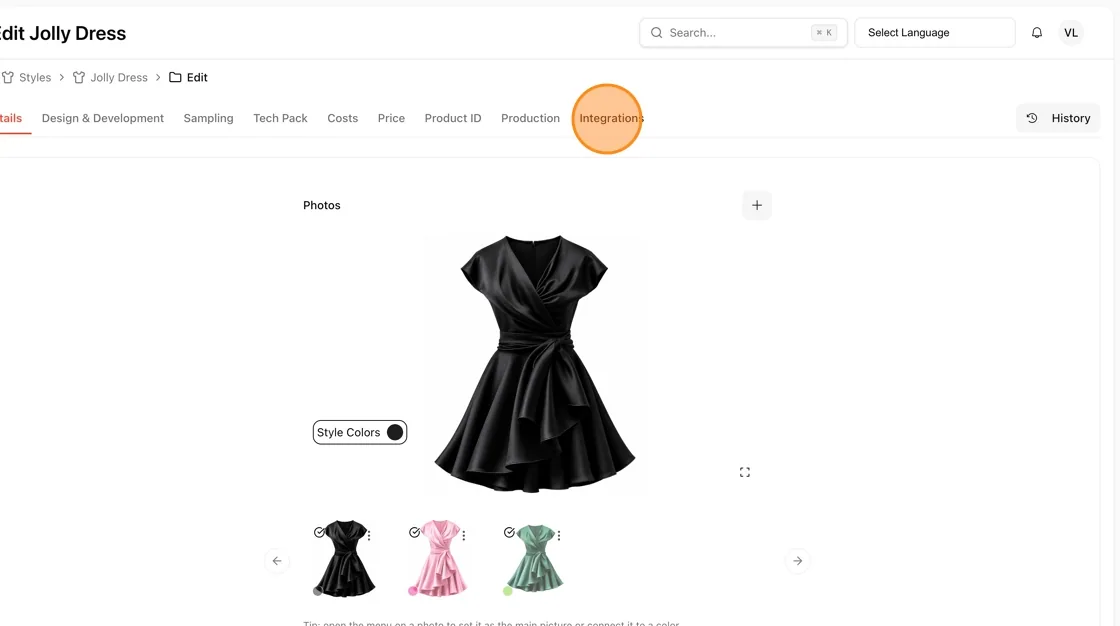
Review the Metafields comparison table
- Under Metafields, you'll see a side-by-side comparison of key fields between Vestis Labs and Shopify:
- Style Code, Category, Attributes, Fabrics, Care Instructions, and Colors all match.
- Seasons shows a mismatch — Vestis Labs now shows "2026" while Shopify still shows the old value "Fall" — highlighted in orange to flag the discrepancy.
How the comparison feature works:
- Two-column layout: Every synced field is displayed with its Vestis Labs value on the left and its current Shopify value on the right, so you can compare them at a glance.
- Fields tracked: Style Code, Category, Seasons, Attributes, Fabrics, Care Instructions, Colors, and SKU Codes (per size/color variant).
- Match detection: Rows where both values are identical (e.g., Style Code, Category, Attributes, Fabrics, Care Instructions, Colors) display normally with no action needed.
- Mismatch highlighting: If a field has drifted out of sync — like Seasons, where Vestis Labs shows "2026" but Shopify still shows "Fall" — the row is highlighted in orange/yellow to draw attention to the discrepancy.
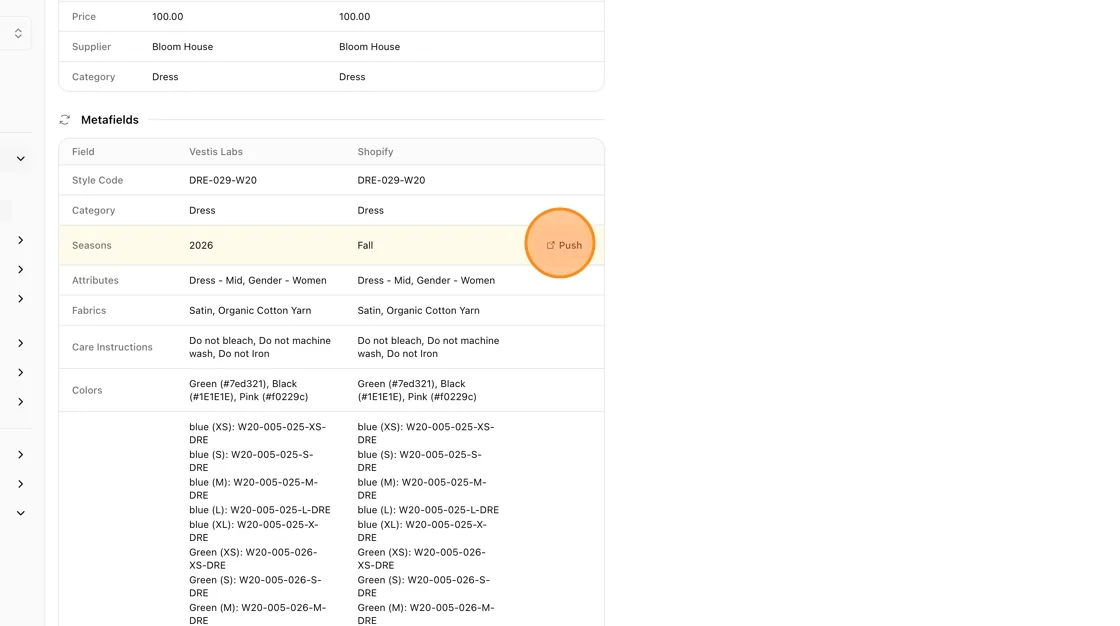
- One-click sync: A Push button appears next to any mismatched row, letting you send the updated Vestis Labs value to Shopify instantly, without needing to re-sync the entire product.
- Refresh control: The circular arrow icon (↻) next to "Metafields" lets you re-check/refresh the comparison to pull the latest values from both systems.
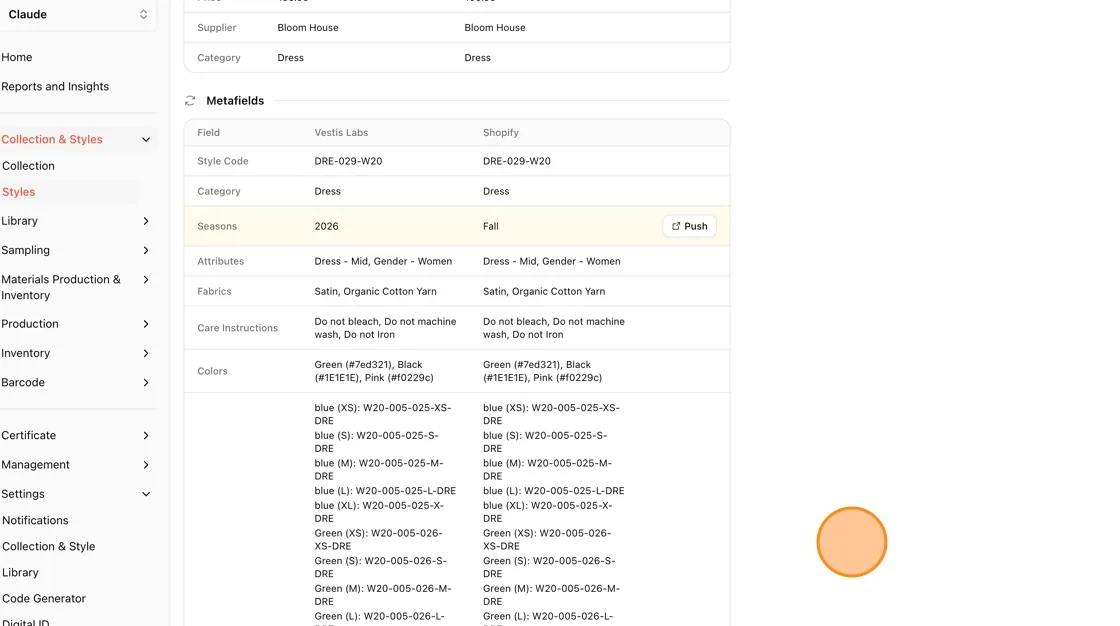
Push the updated field to Shopify
- Click the Push button next to the mismatched Seasons row to sync the updated value from Vestis Labs to Shopify.
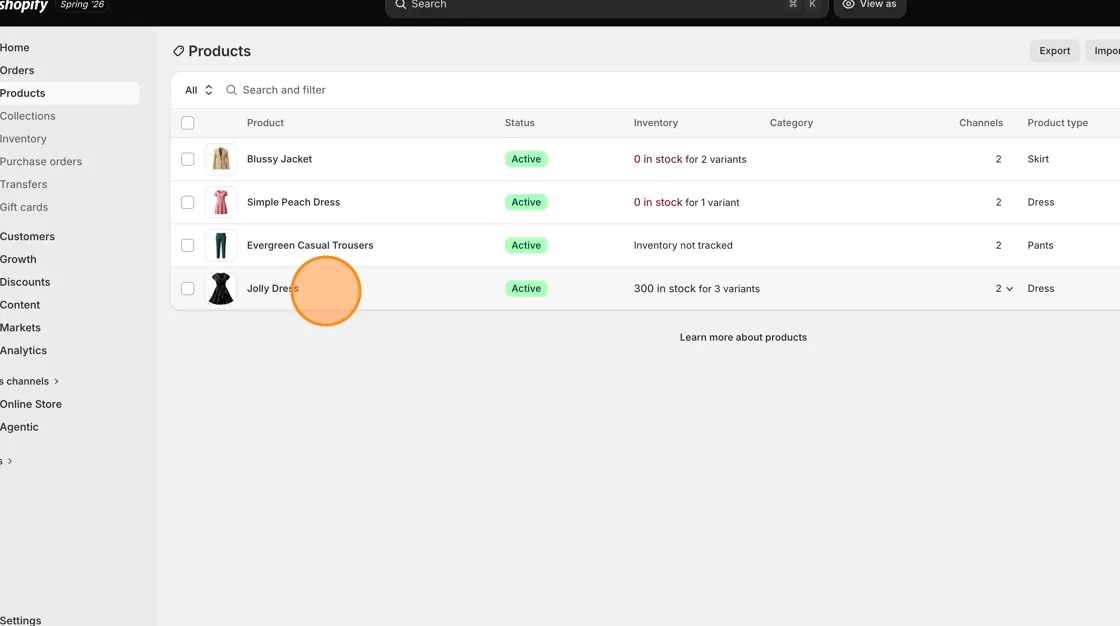
Verify in Shopify Products list
- Switch to your Shopify admin > Products to confirm the Jolly Dress product is still active with 300 in stock for 3 variants.
- Under Metafields, you'll see a side-by-side comparison of key fields between Vestis Labs and Shopify:
Confirm the metafield updated on the Shopify product page
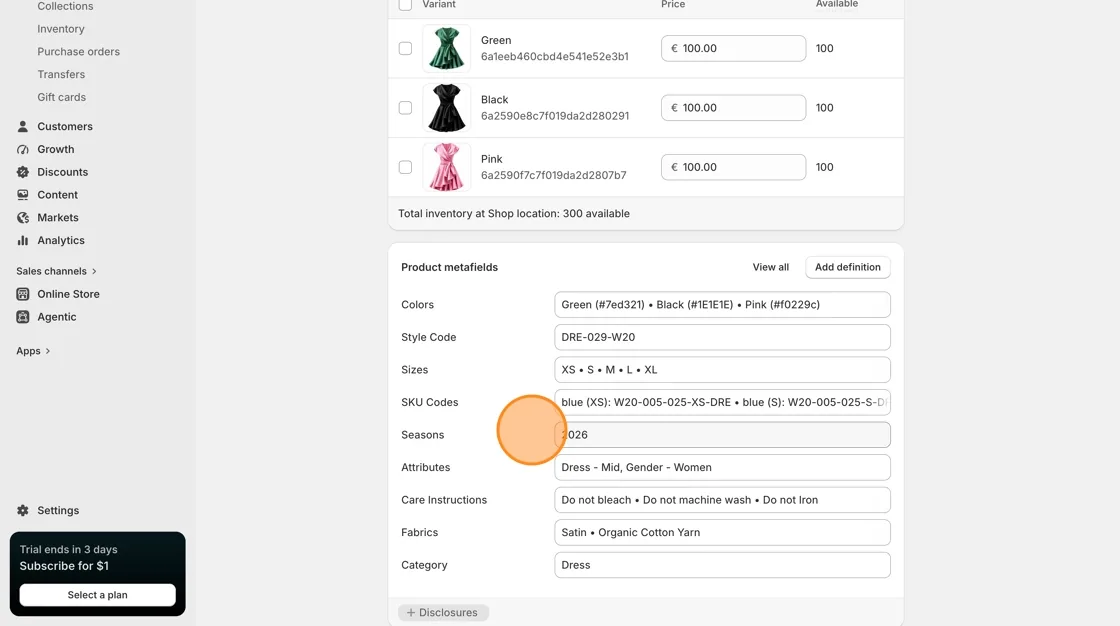
- Open the Jolly Dress product in Shopify and scroll to Product metafields.
- Confirm the Seasons field now reflects the pushed value ("2026"), along with other synced metafields: Colors, Style Code, Sizes, SKU Codes, Attributes, Care Instructions, Fabrics, and Category — all matching what's in Vestis Labs.
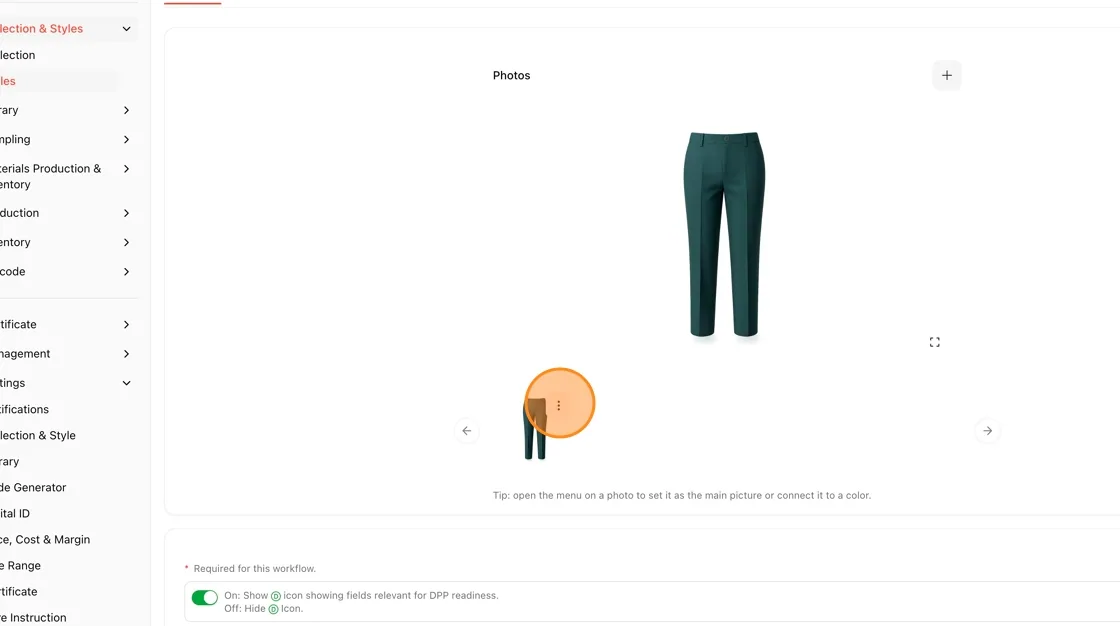
Connect your style color to Shopify
Open the photo menu
On the Styles page, go to the Photos section. Hover over the thumbnail image you want to use, and click the three-dot menu icon that appears on it.
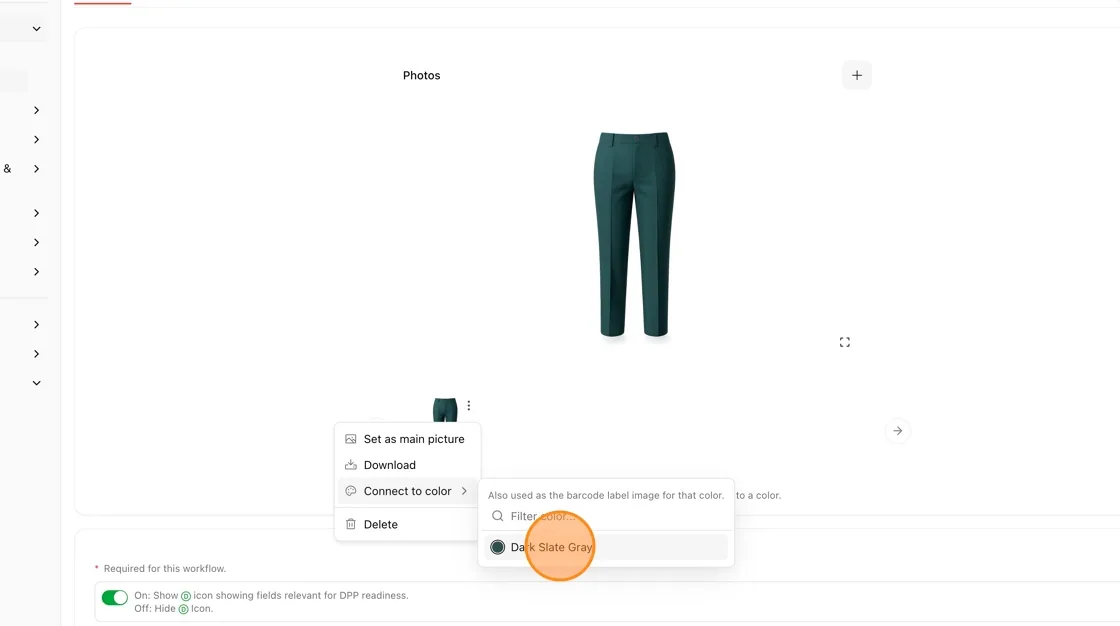
Connect the photo to a color
From the dropdown menu, you'll see options: Set as main picture, Download, Connect to color, and Delete. Click Connect to color.
Choose the correct color from the list.
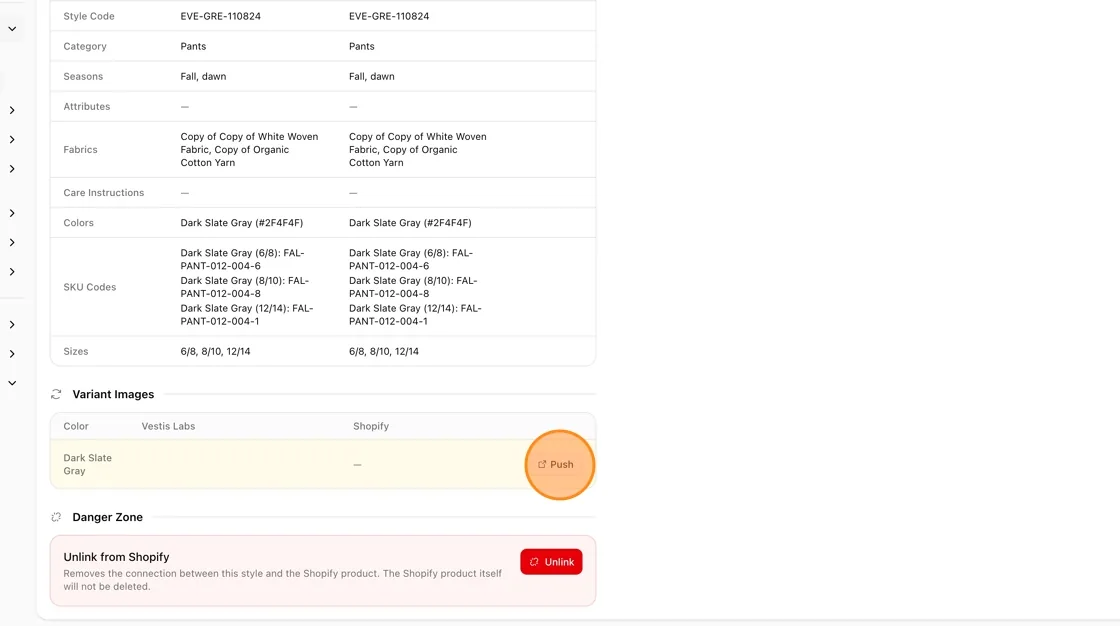
Push the variant image to Shopify
Scroll down to the Variant Images table, which compares images on Vestis Labs vs. Shopify for each color. Since the Shopify column shows "—" (no image yet) for Dark Slate Gray, click the Push button next to that row to send the image over.
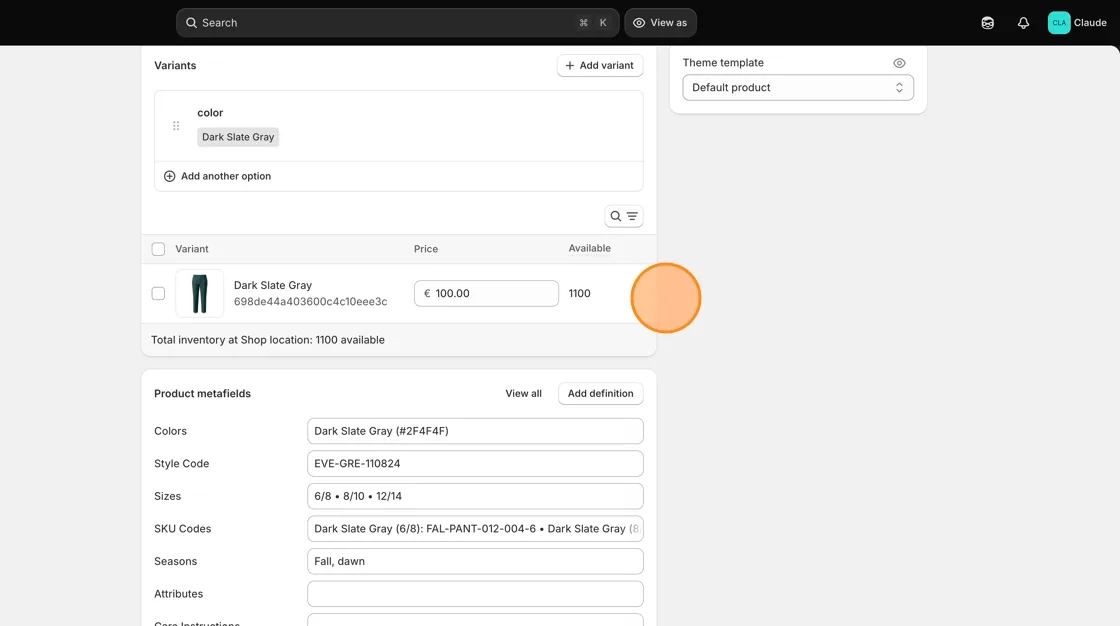
Go to the Shopify admin product page and check the colour section. Confirm the Dark Slate Gray variant now shows the correct thumbnail image alongside its price and inventory details.
Sync style colors in Shopify
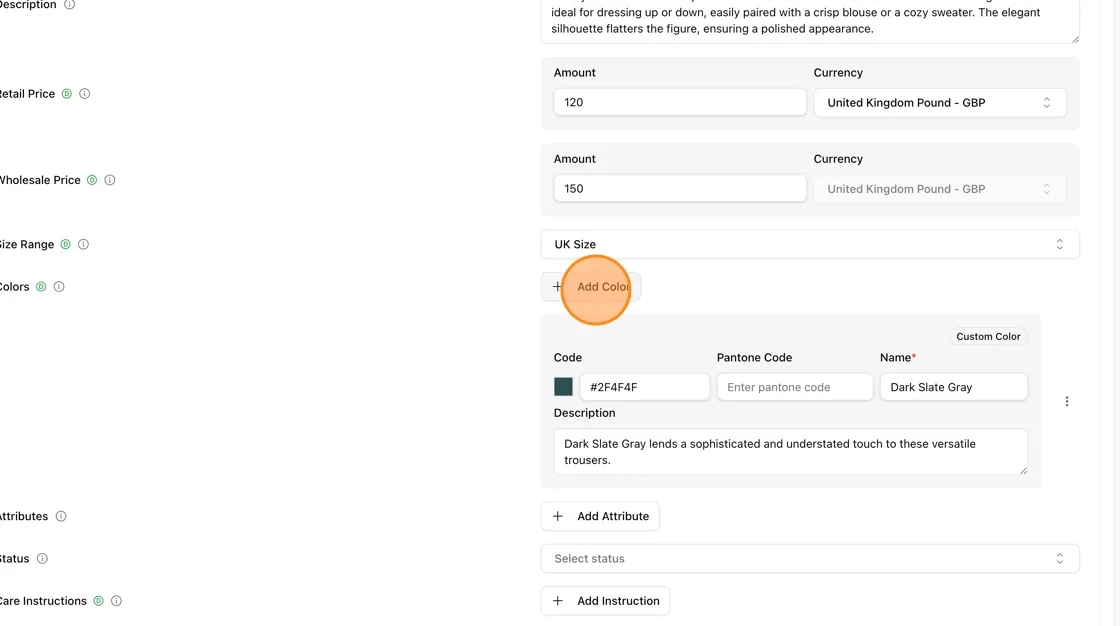
Click "Add Color"
On the style's Details page, next to the Colors field, click the + Add Color button.
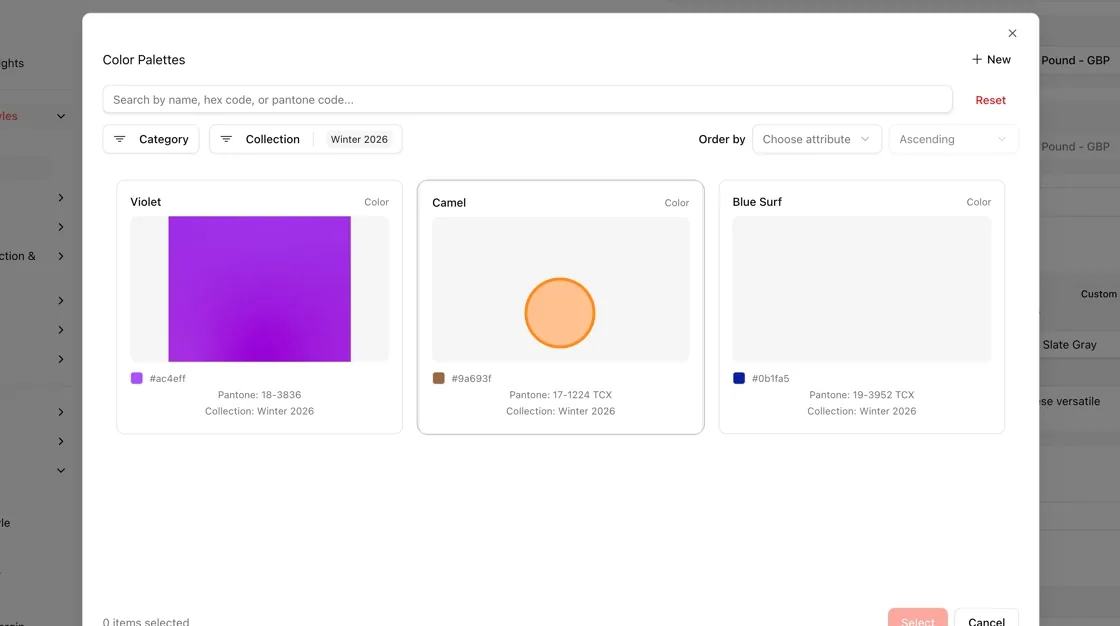
Choose a color source
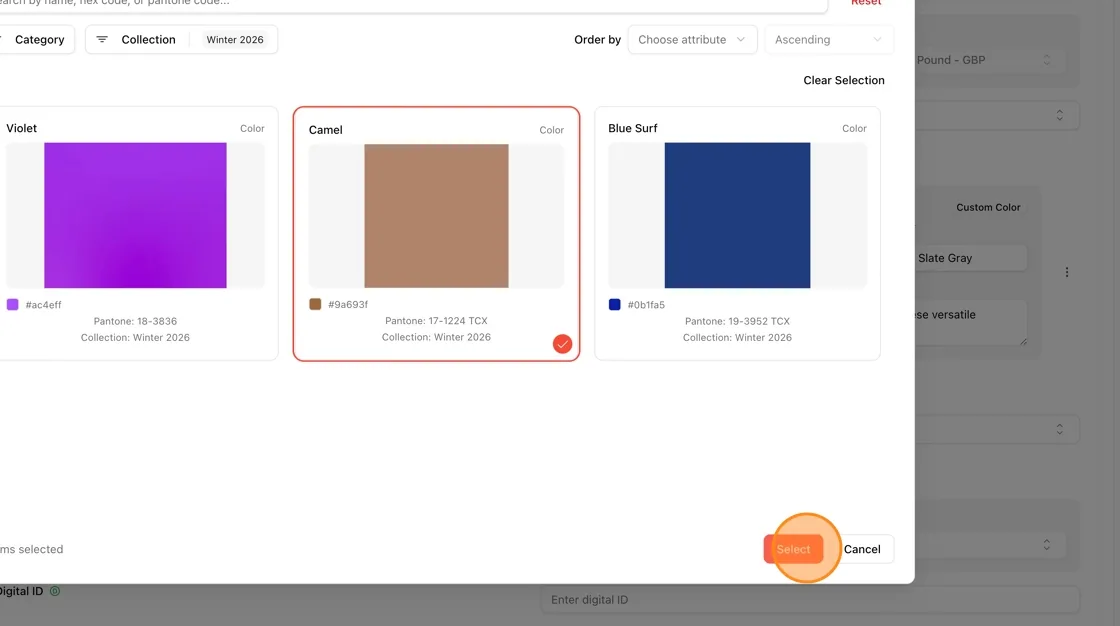
A dropdown appears with two options: From Library or Custom Color. Select From Library to pick a color from your existing color collection.
Save the style
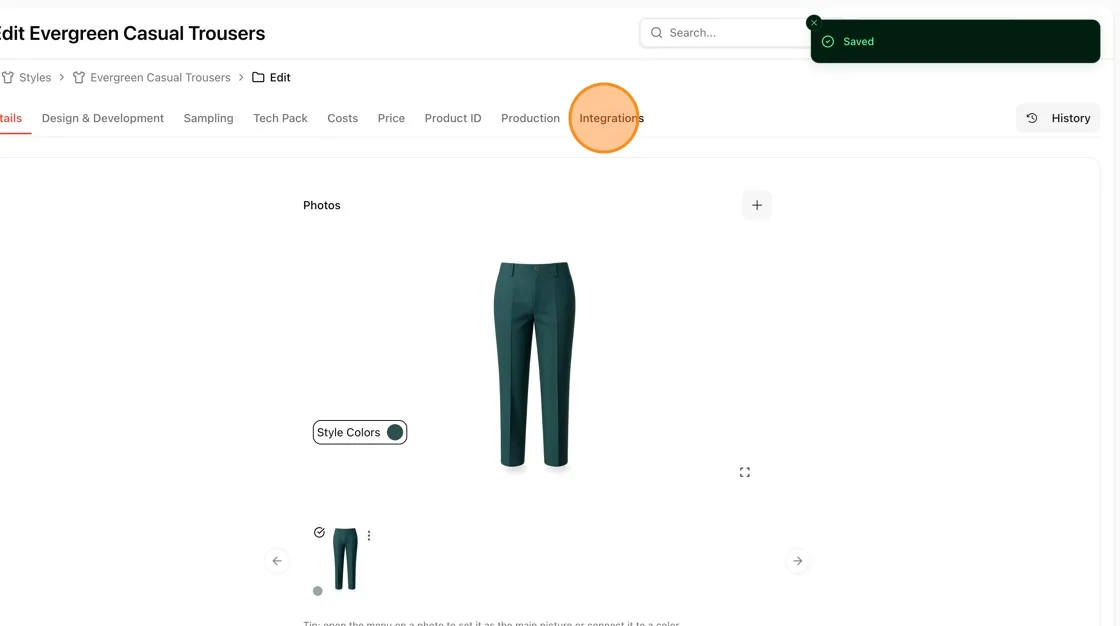
Back on the style's edit page, confirm the new color was added, then save your changes. A "Saved" confirmation toast appears in the top right.
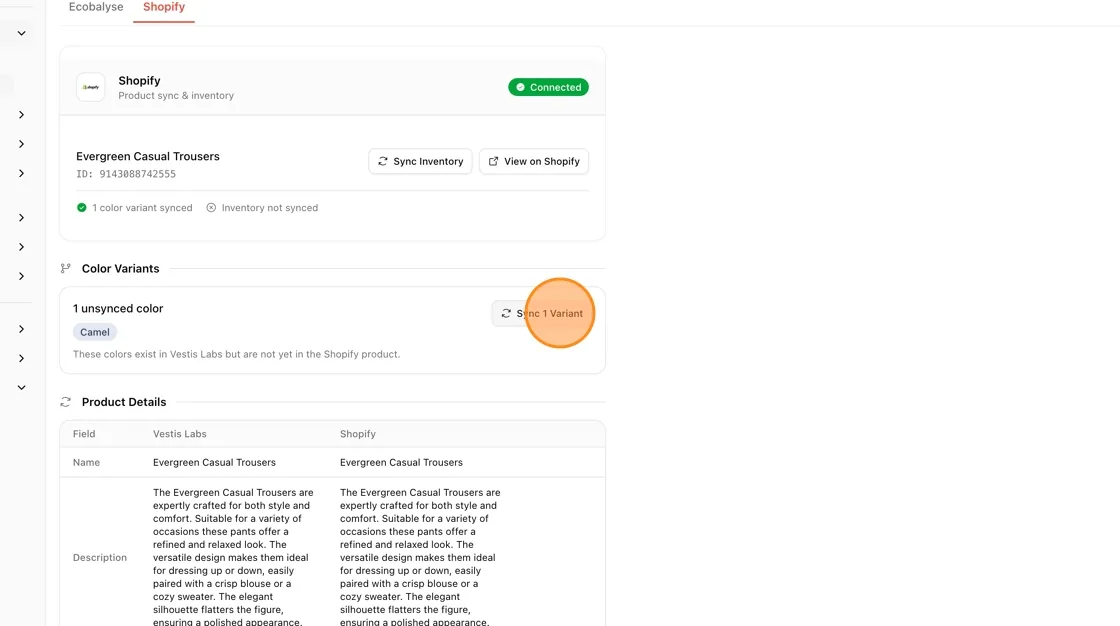
Navigate to the Integrations tab, then the Shopify sub-tab, to check the sync status with your connected Shopify product.
Identify the unsynced color
Under Color Variants, you'll see "1 unsynced color" with the Camel tag — indicating this color exists in VestisLabs but hasn't been pushed to Shopify yet. Click Sync 1 Variant.
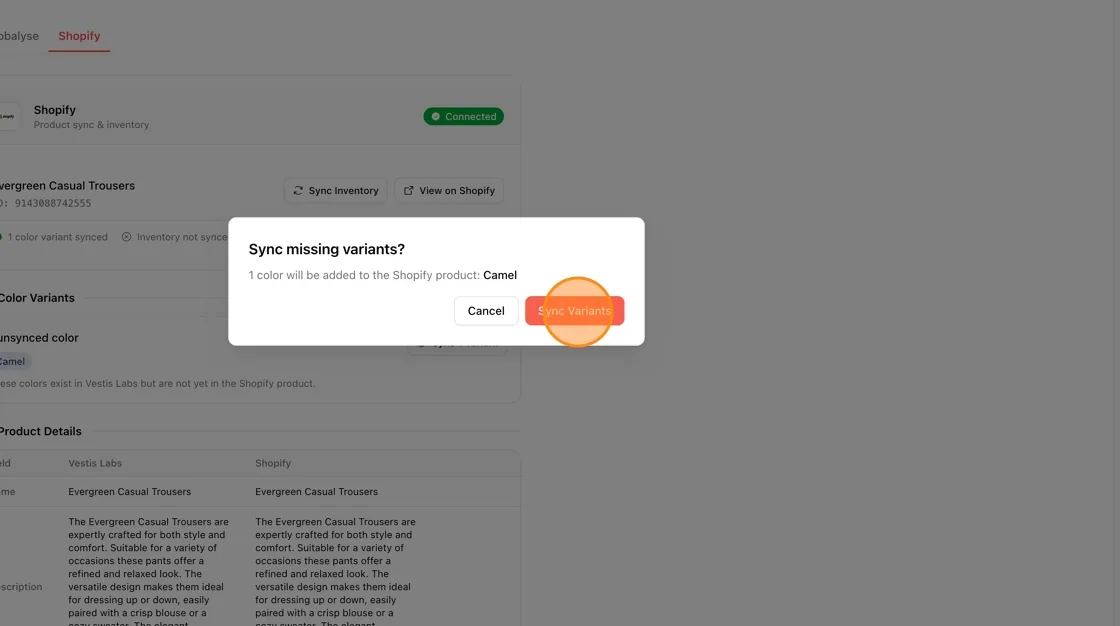
Confirm the sync
A confirmation dialog appears: "Sync missing variants? 1 color will be added to the Shopify product: Camel." Click Sync Variants to confirm and push the new color variant to Shopify.