
Style sampling
This page displays all product and component sampling items across the brand, allowing users to track the full sampling workflow from request to completion.
Under review. This page is published while we check it against the live app, so some details may have changed.
Screenshots may be out of date.
This page displays all product and component sampling items across the brand, allowing users to track the full sampling workflow from request to completion. Users can define and update sampling details for materials and measurements as development progresses, ensuring accurate and up-to-date information at every stage.
Each sampling item may use a different currency, which is reflected in the currency list. Users can request new material or product samples using New Sample, manage quantities, due dates, and costs, and update sample statuses with flexibility, including adding, editing, or removing status values. The page also supports collaboration between brands and suppliers through shared visibility and item-level memos or comments.
Note
Inside a style, the Sampling tab lists only the samples of that style. The full list across the brand is on the Sampling dashboard.
Permission: SAMPLING_VIEW, VIEW_STYLE
Collection & StylesStyles(your style)Sampling
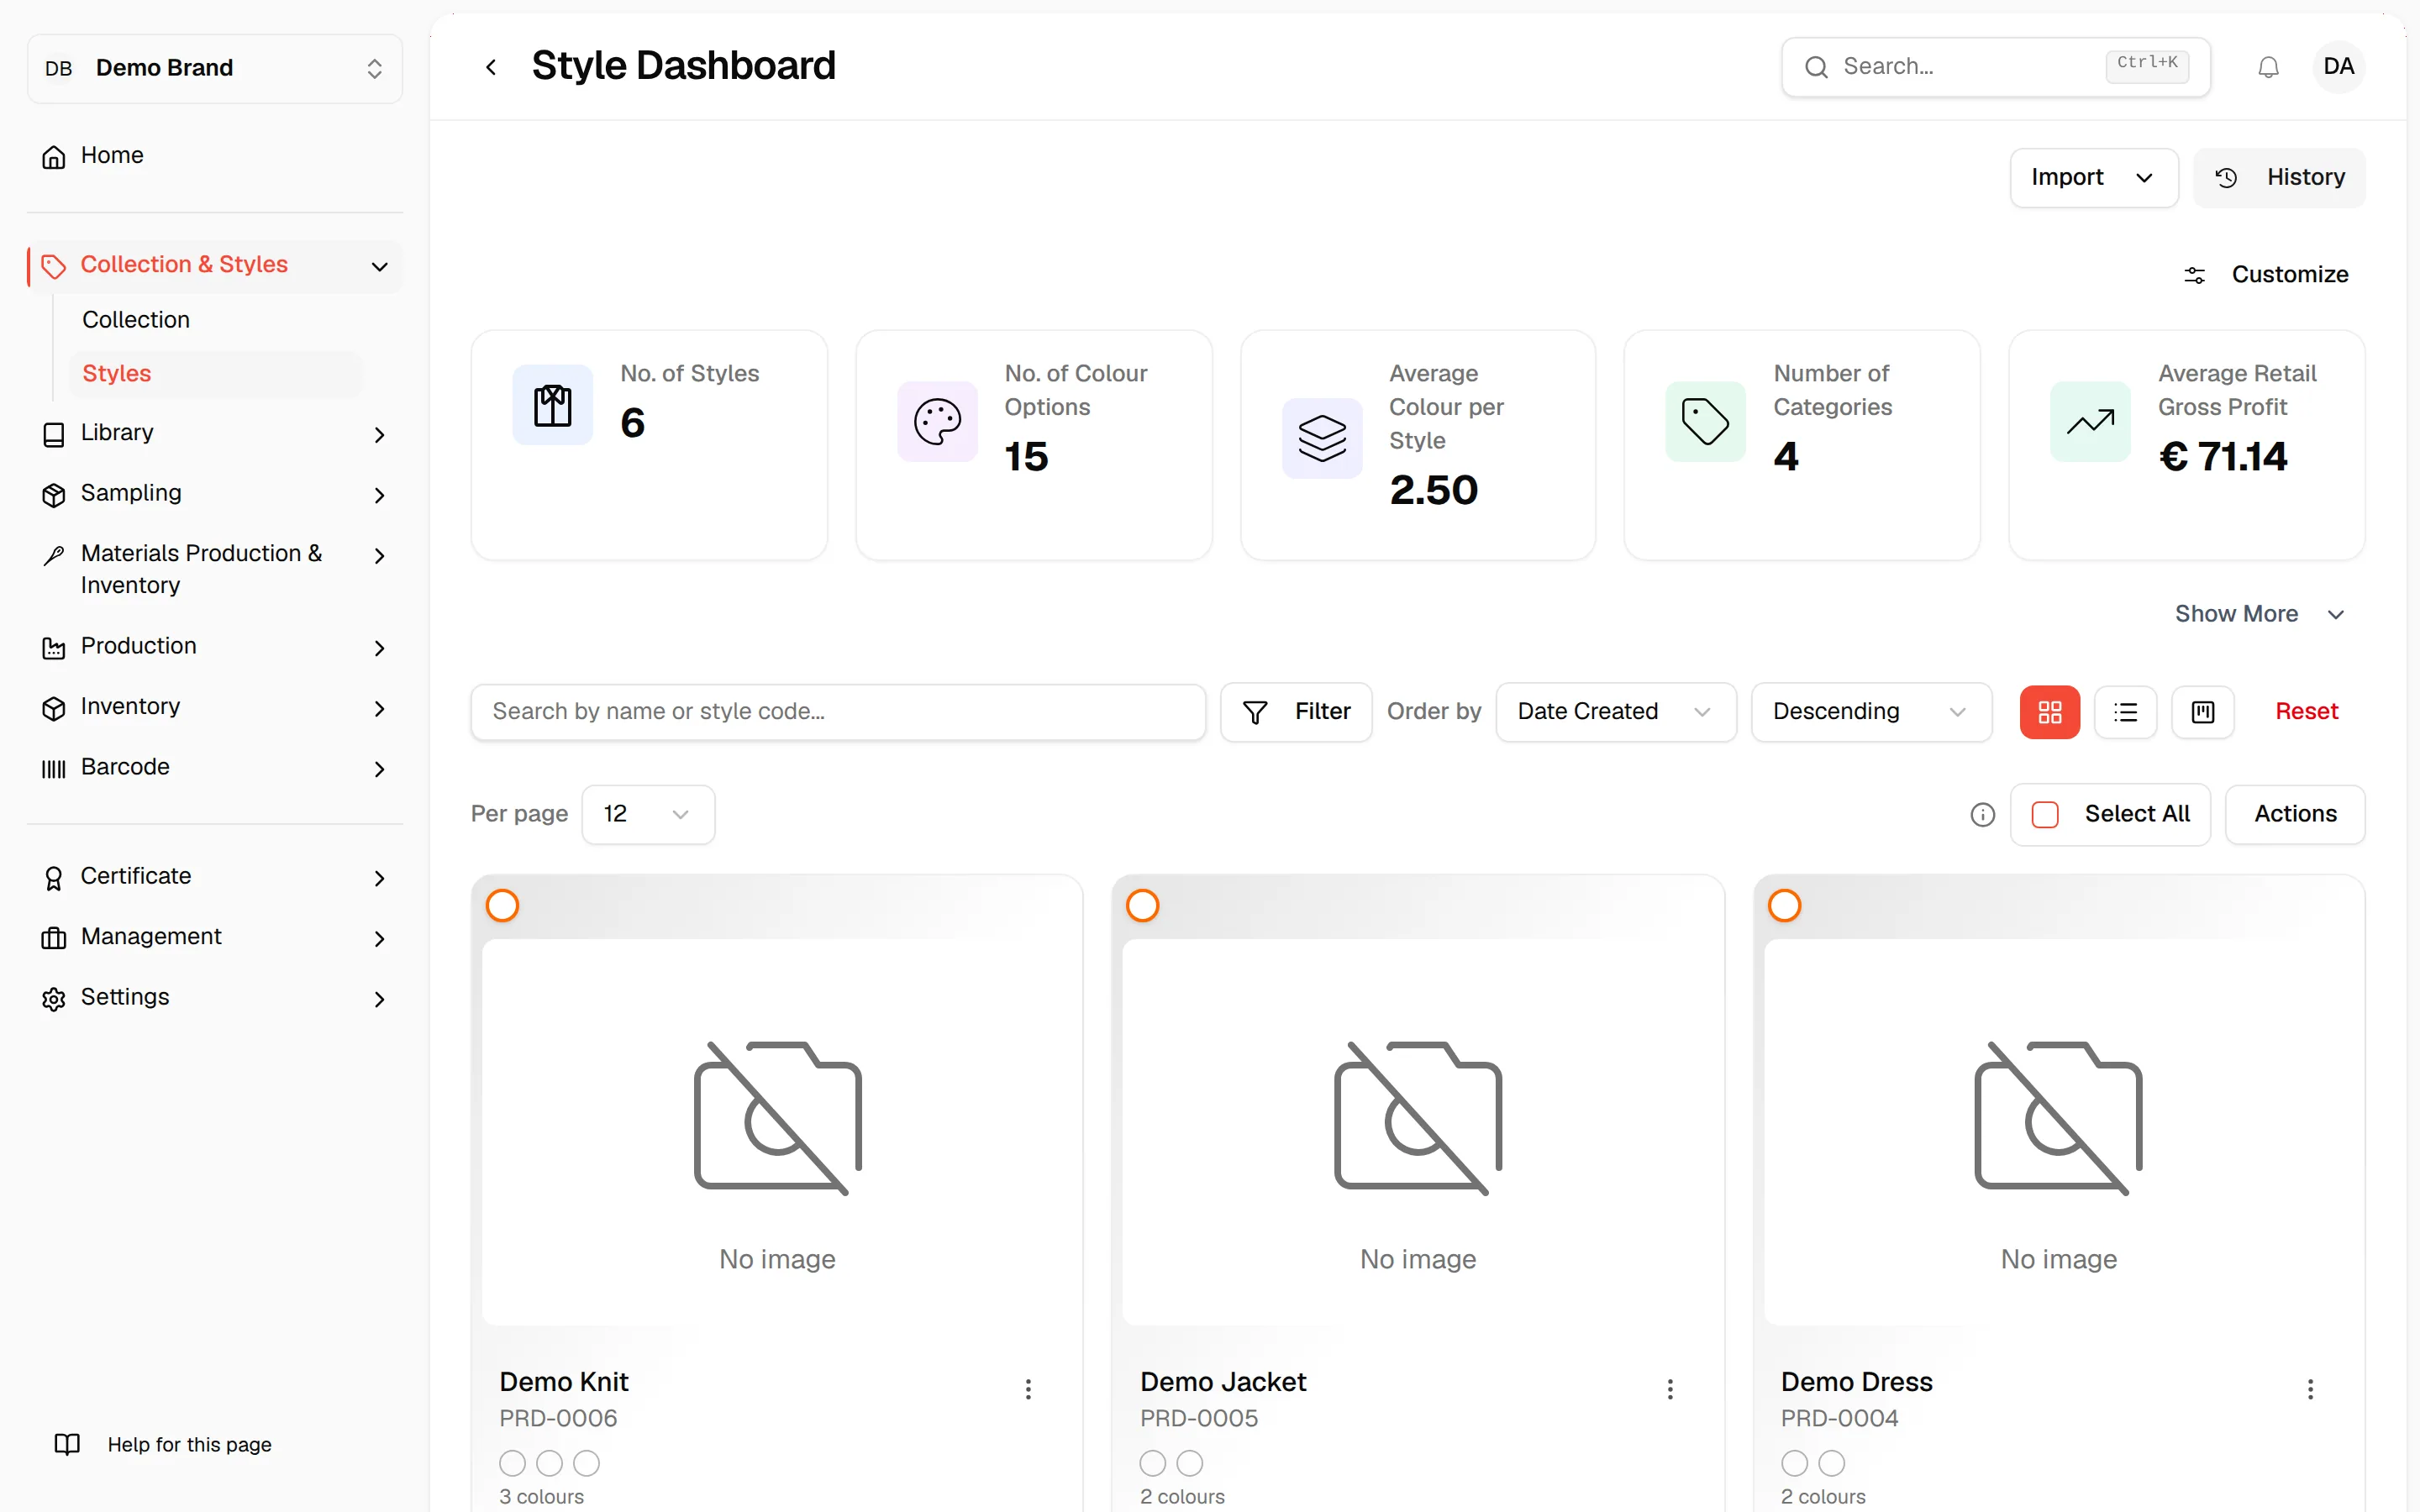
Navigate to Collection & Styles > Styles
Select the style you want to edit.
- Alternatively, click the three-dot (⋯) action menu and select "Edit".
Click the Sampling tab in the style's top menu. The tab only appears when the Sampling feature is turned on for your brand.
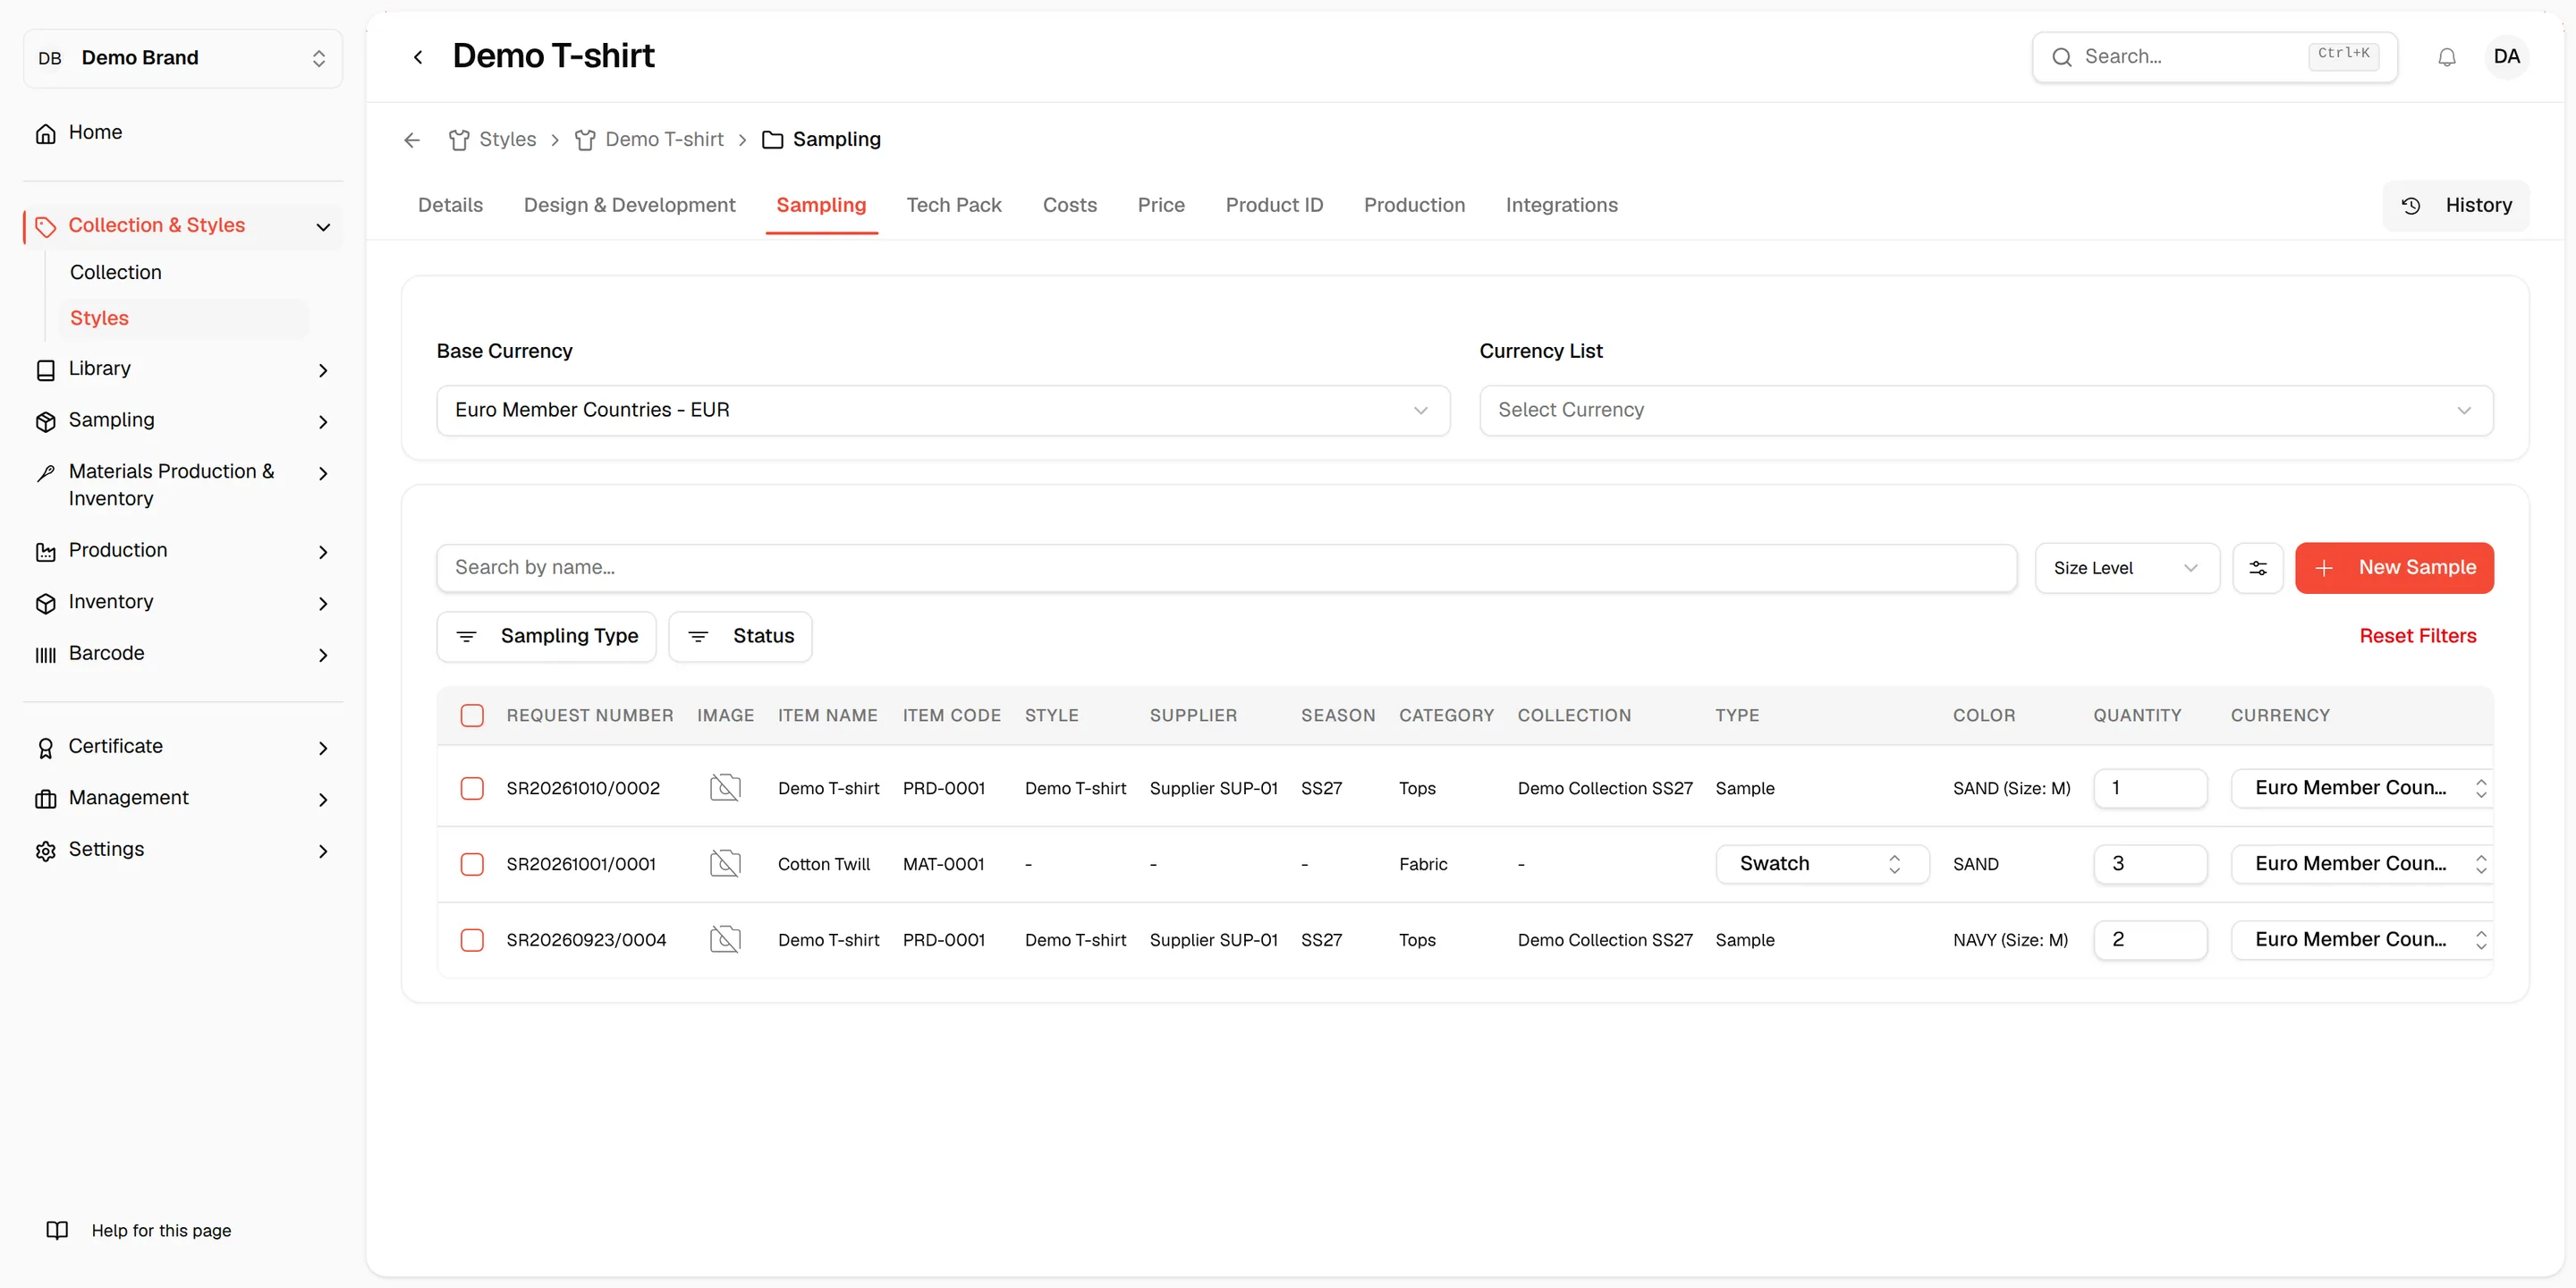
The base currency is defined in Settings and cannot be changed on this page.
Select a Currency List from the dropdown. If no currency list is available, follow the provided instructions to create a new currency list before continuing.

Sampling dashboard management
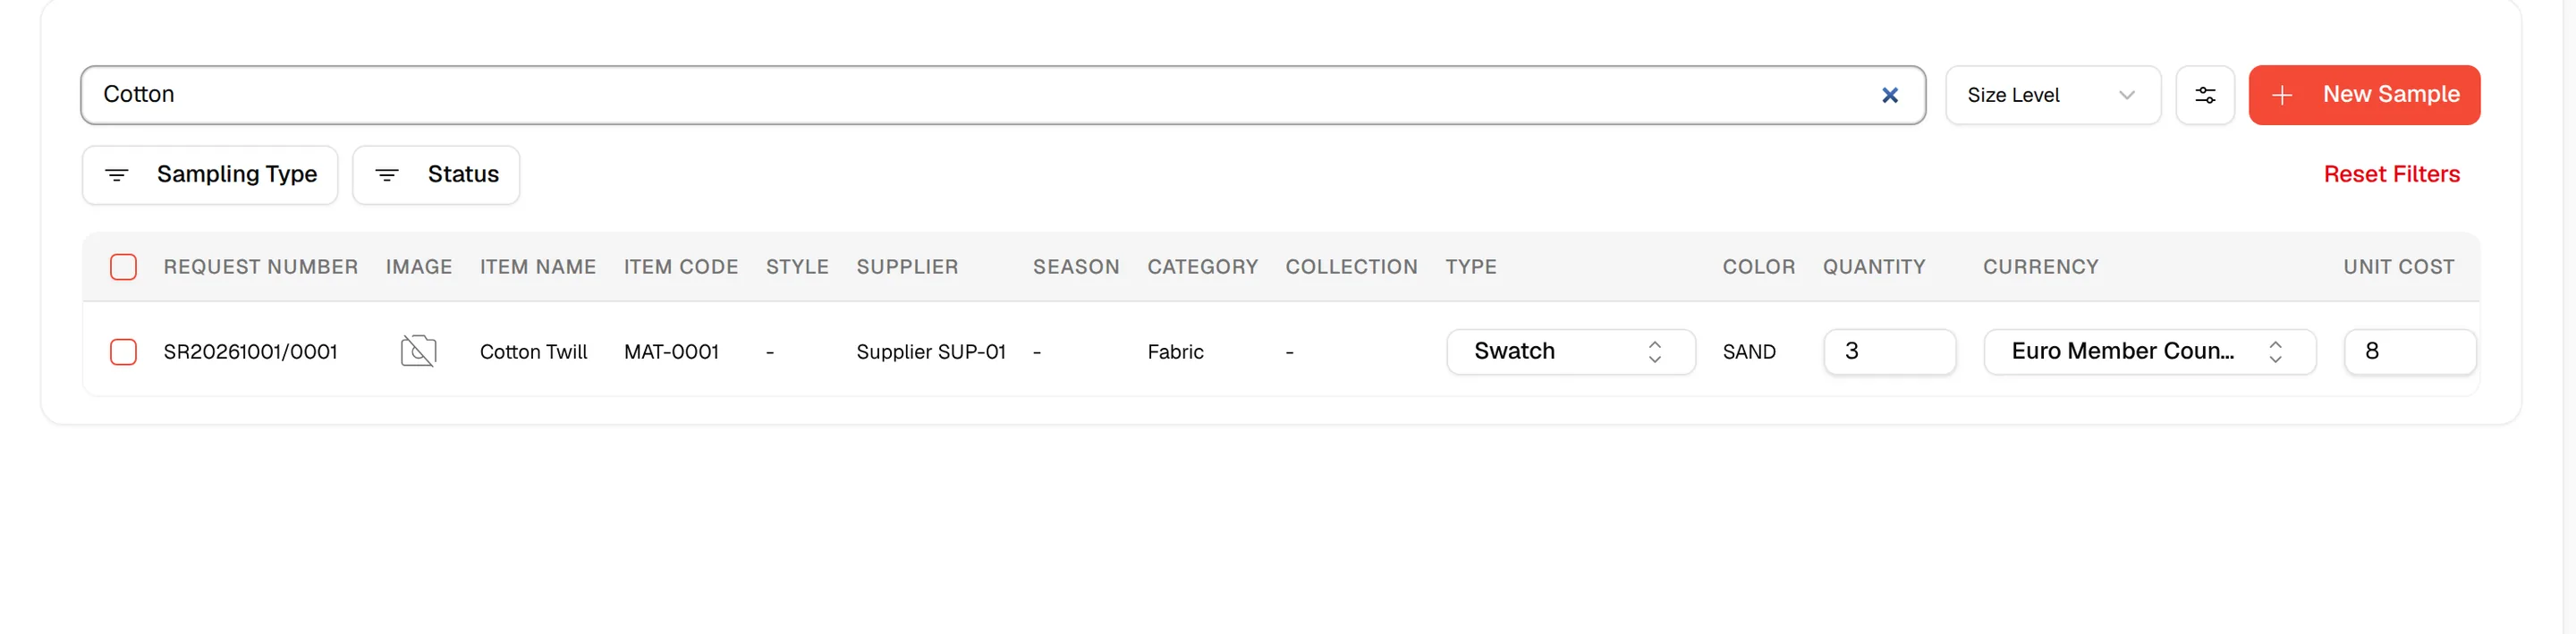
In the quick search, you can specify how the system searches for styles and items.
- Type the item names.
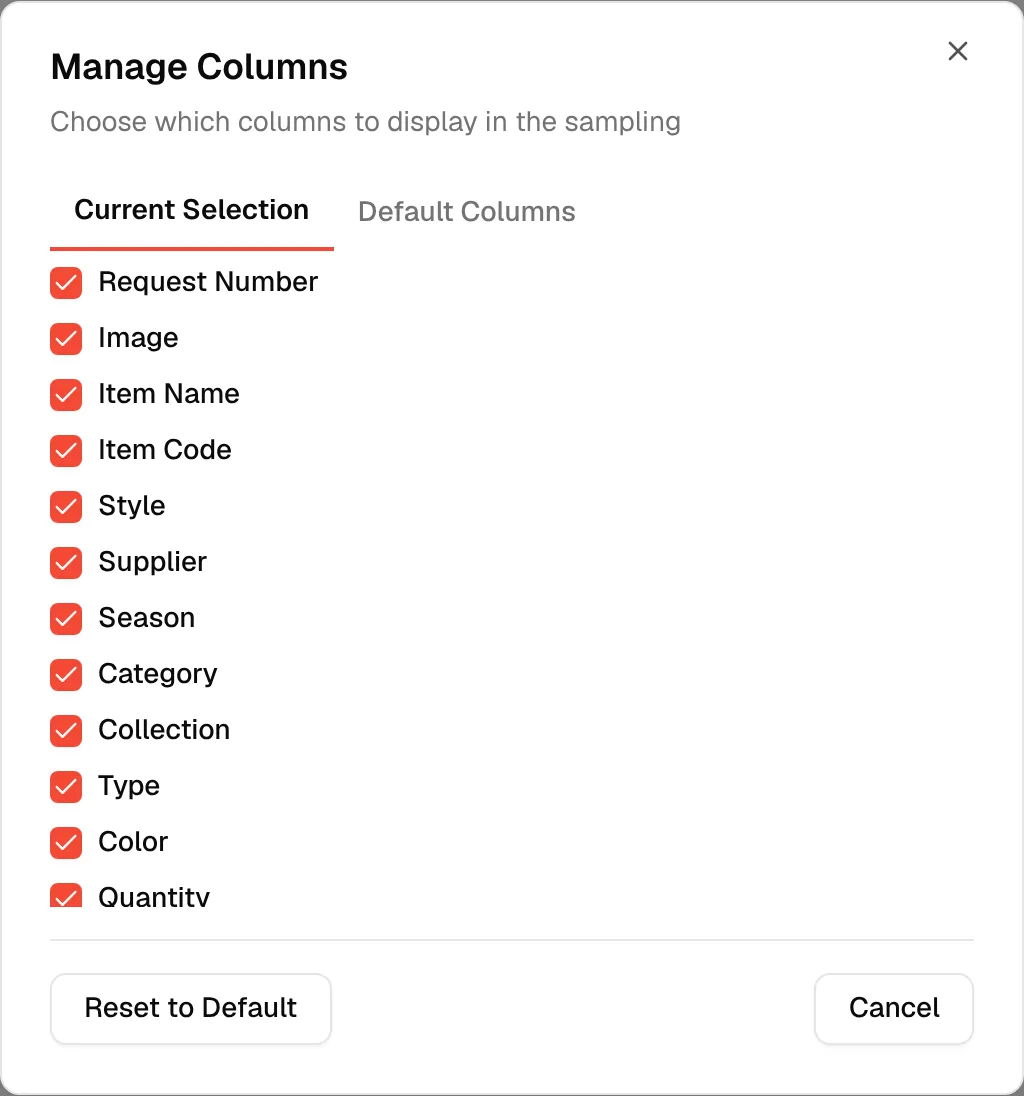
Click the column settings icon next to New Sample to open Manage Columns.
Select or Deselect Columns:
- Check the box next to each column name to show it in the table.
- Uncheck the box to hide it from the table view. Reset to Default restores the default columns.
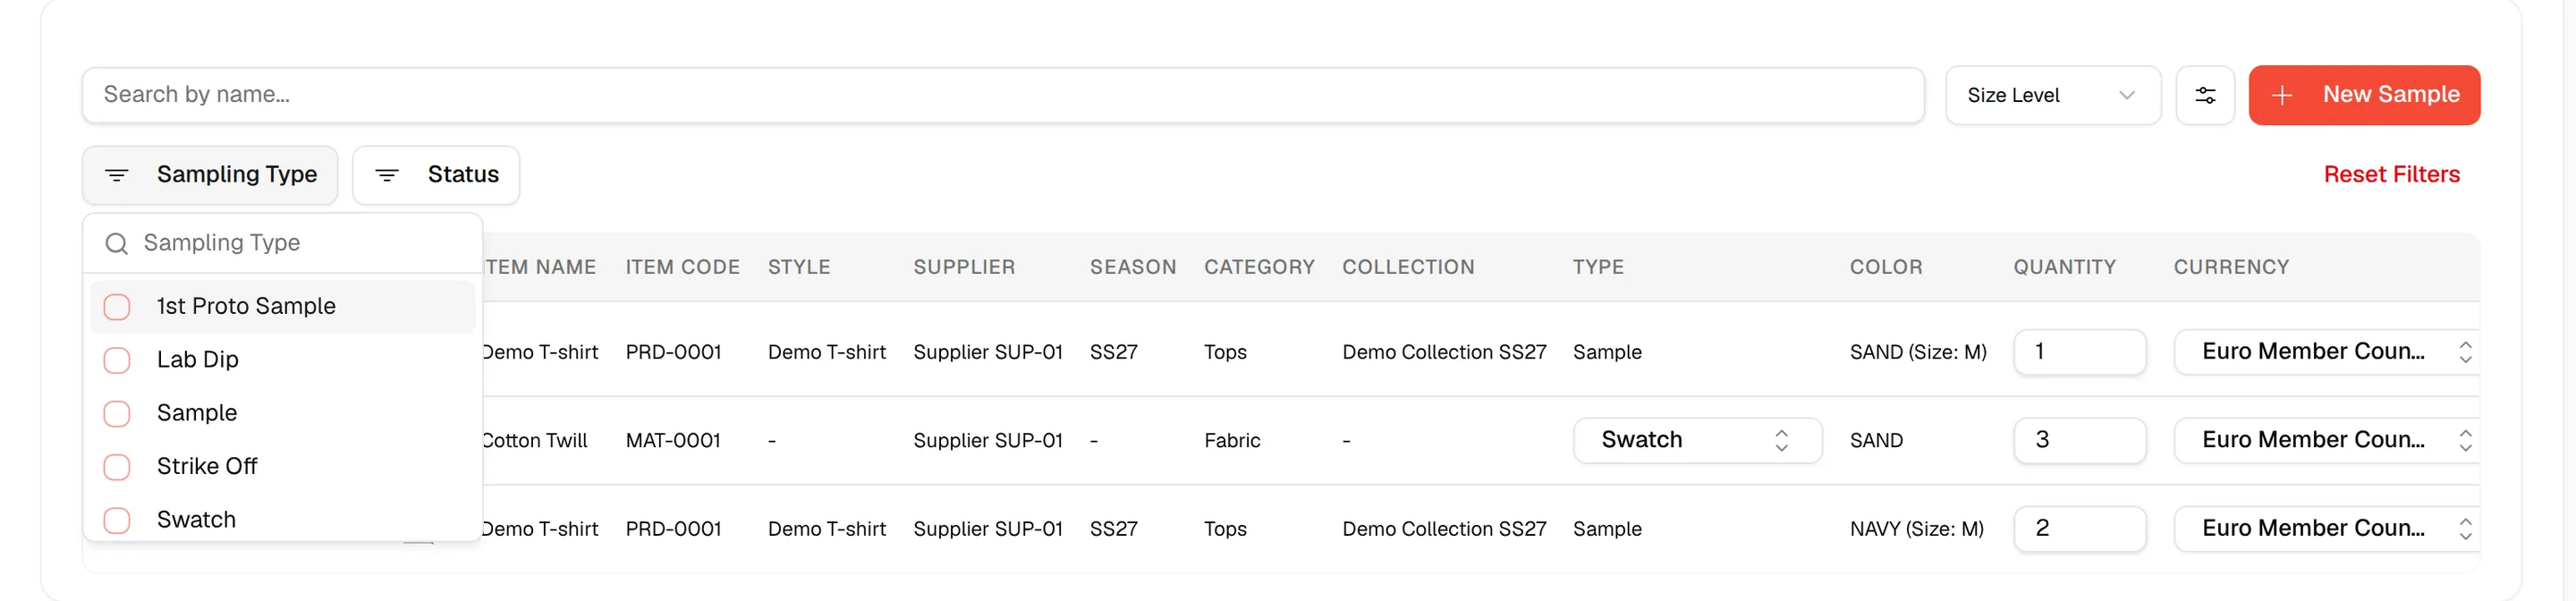
Use the filter view to sort sampling items by sample type or sample status.
Checkbox
- Use the checkbox to select one or multiple sampling items for bulk actions (Delete the selected created samples).
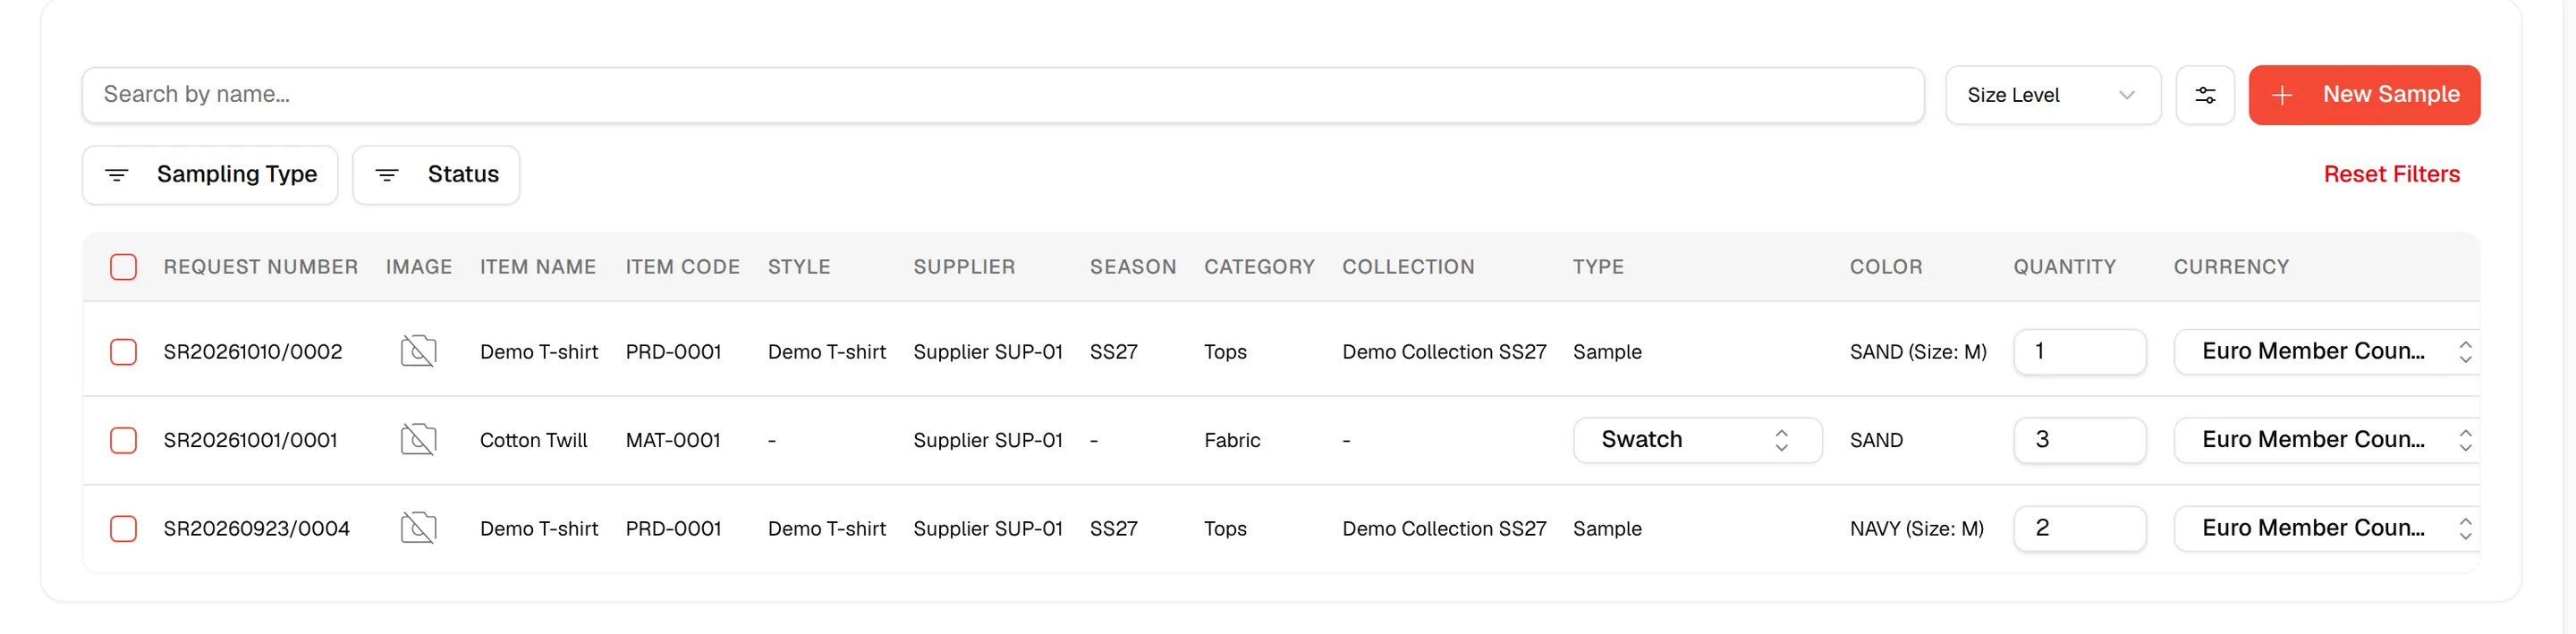
Thumbnail Image
The thumbnail image is generated automatically based on the source of the sampling item:
- If the item is created from a Library item, the main image from the Library is used.
- If the item is created directly from the Style, the main image from the Style Details page is used.
Item Name
- For Library-based samples, the Library item name is displayed.
- For Style-based samples, the Style name is displayed.
Item Code
- For Library-based samples, the Library item code is displayed.
- For Style-based samples, the Style code is displayed.
Supplier and Season
- The supplier responsible for the sample and season from the style details will be displayed.
Category
- For Library-based samples, the Library item category is displayed.
For Style-based samples, the Style category from the main Style page is displayed.
Type
- The sample type from the selected dropdown option when creating the sample.
Colour
- The colour associated with the sampling item.
Quantity
- Enter the number of samples required.
- This field must be completed by the user.
Currency (Original Currency)
- Select the currency in which the sampling cost is provided.
Unit Sampling Cost (Original Currency)
- Enter the cost per unit in the selected currency.
Total Sampling Cost (Original Currency)
- Automatically calculated as:
- Quantity × Unit Sampling Cost
Total Sampling Cost (Base Currency)
- Automatically calculated using the system exchange rate based on the selected currency list.
Due Date
- Select the required completion date using the calendar picker.
Last Status Update
- Displays the date of the most recent status change.
Status
- Select the current sample status from the dropdown.
- Status options are managed in the Status Settings page.
Memo
- Add comments or notes related to the sampling item.
- If comments exist, an indicator is displayed to highlight active memos.
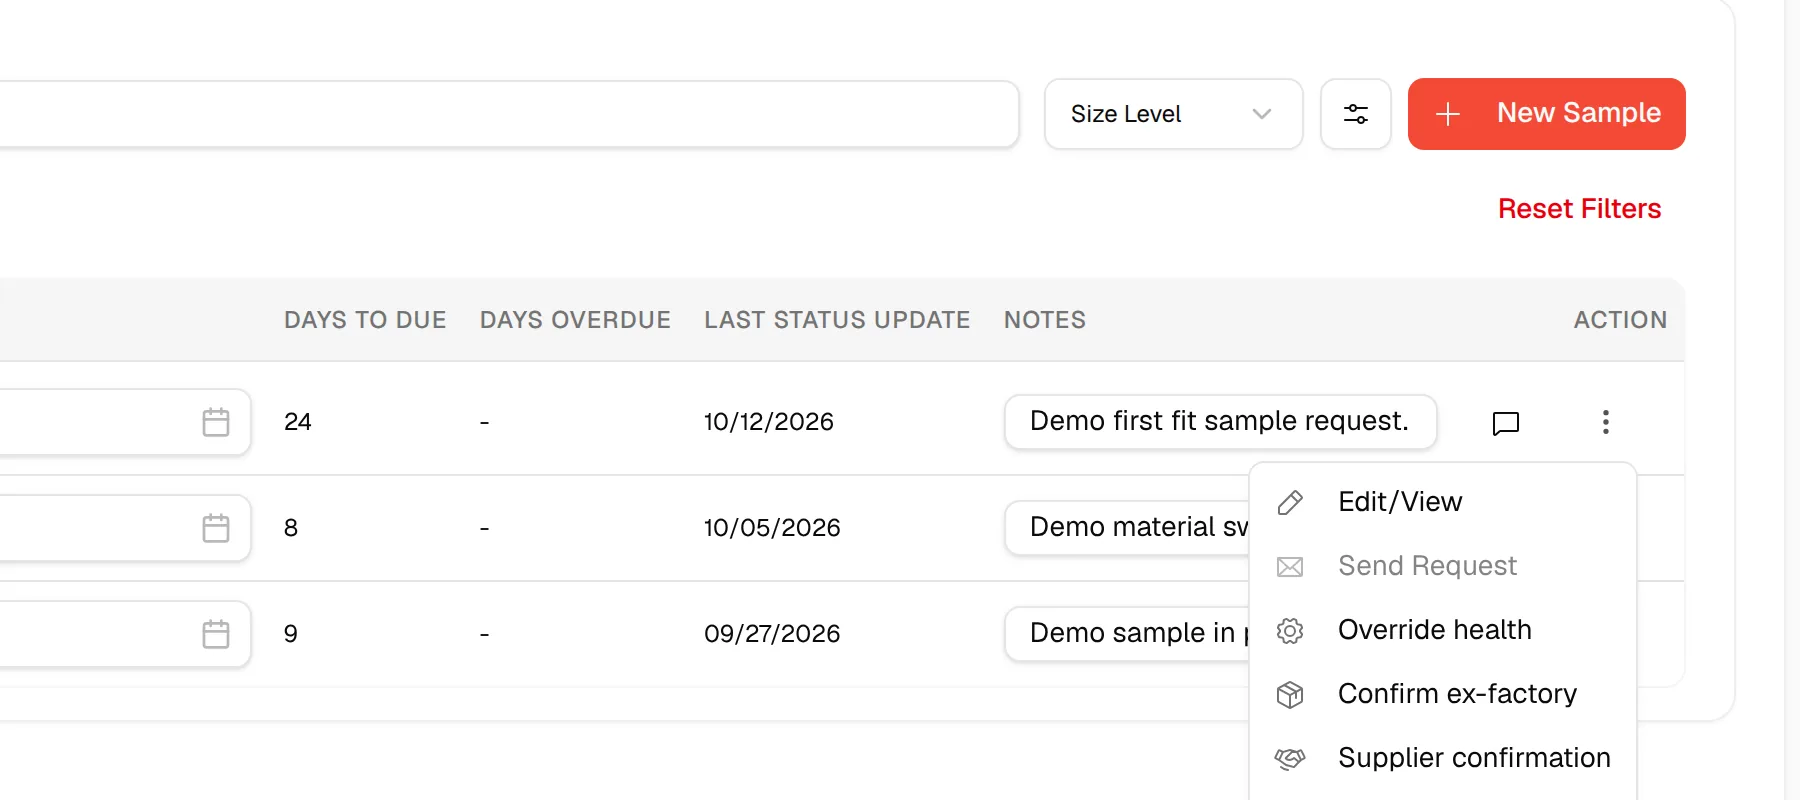
Actions Menu
- Access additional actions, such as edit or delete, for each sampling item.
Create new sampling
Click New Sample to create a new sampling item, then choose Material Sample or Product Sample.
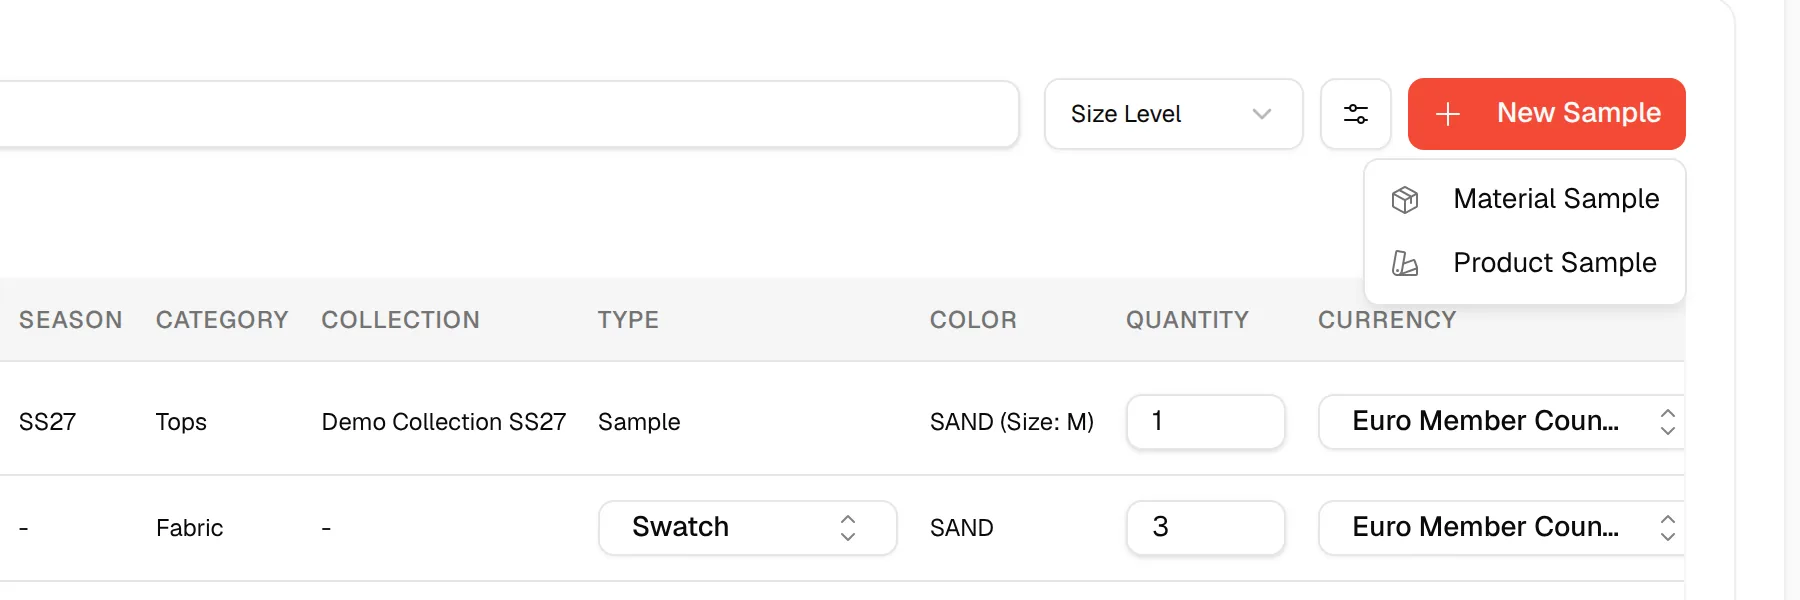
Users can choose whether the sample is for a Product Sample or the sample is for a Material Sample. When you choose a material that is not linked to this style, Product Not Linked to Style asks whether to Proceed or Cancel. If the style has no samples yet, the tab shows No Samples Available with the same New Sample button.
Sampling through your style design and development page
Users are able to view the status of a sample that has been requested for a style directly within the Style Design and Development page. This provides visibility into whether a sample request is currently pending, in progress, or completed for the selected style.
From the left-hand navigation menu, select Collection & Styles, then click Styles to open the Style Dashboard.
On the Style Dashboard, locate the desired style card and click on it to open the style.
Within the style page, select the Design & Development tab.
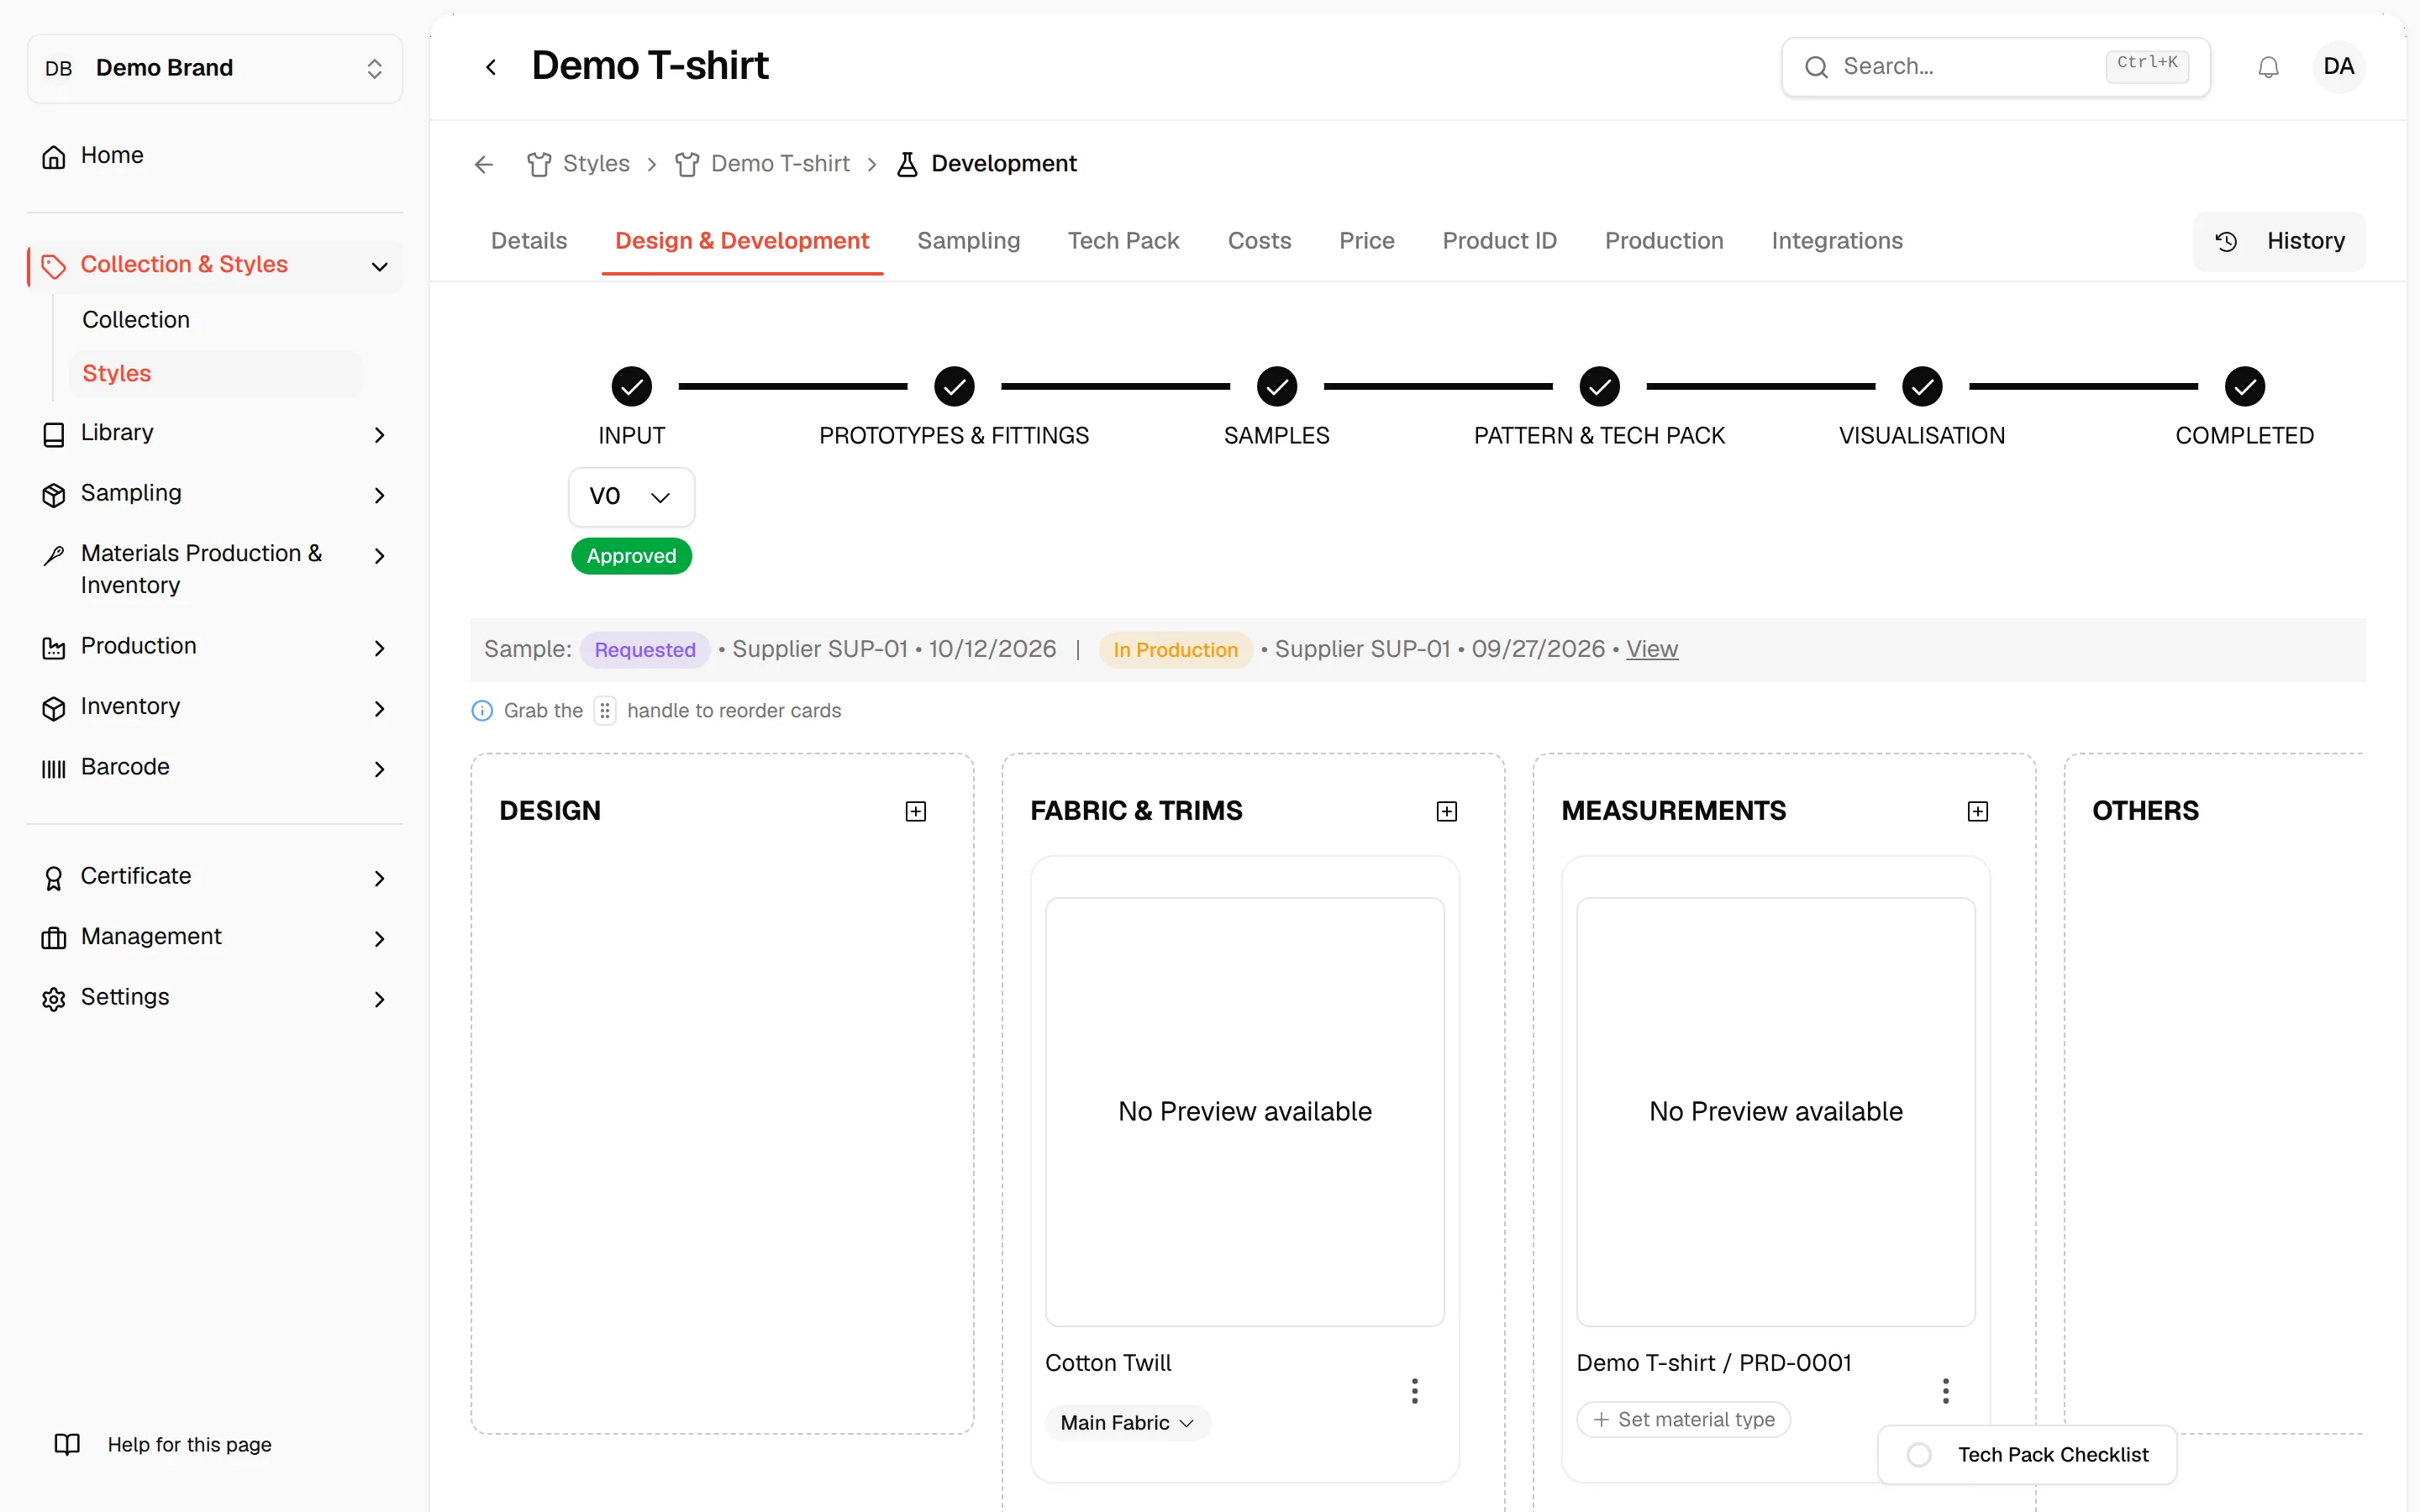
Review the development stage tracker (Input, Prototypes & Fittings, Samples, Pattern & Tech Pack, Visualisation, Completed) to confirm the current status. Note the message indicating the total number of existing sampling requests for the style.
To view full details of all sample requests, including request number, item name, item code, supplier, season, category, and status, navigate to the Sampling tab from the style's top menu bar.
Note
Sample requests are not initiated from this page. To request a sample, users must continue to follow the standard process via the Tech Pack and Measurement sections.
Under the relevant card section (e.g., Fabric & Trims, Measurements, etc.), click the three-dot menu (⋮) on the specific item card for which a sample is needed (Material and product).
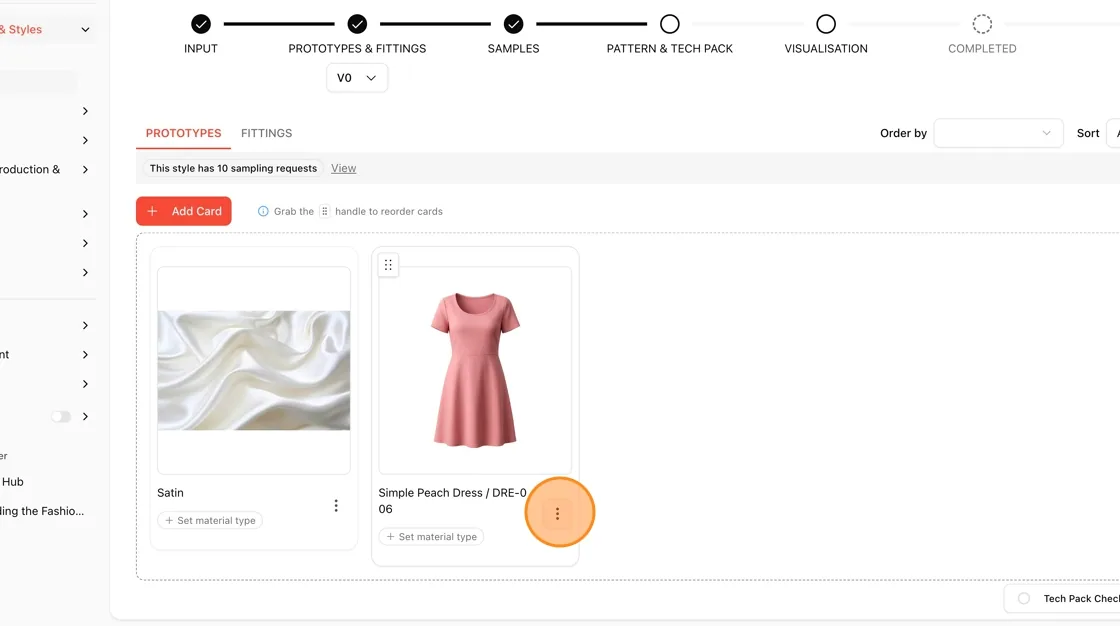
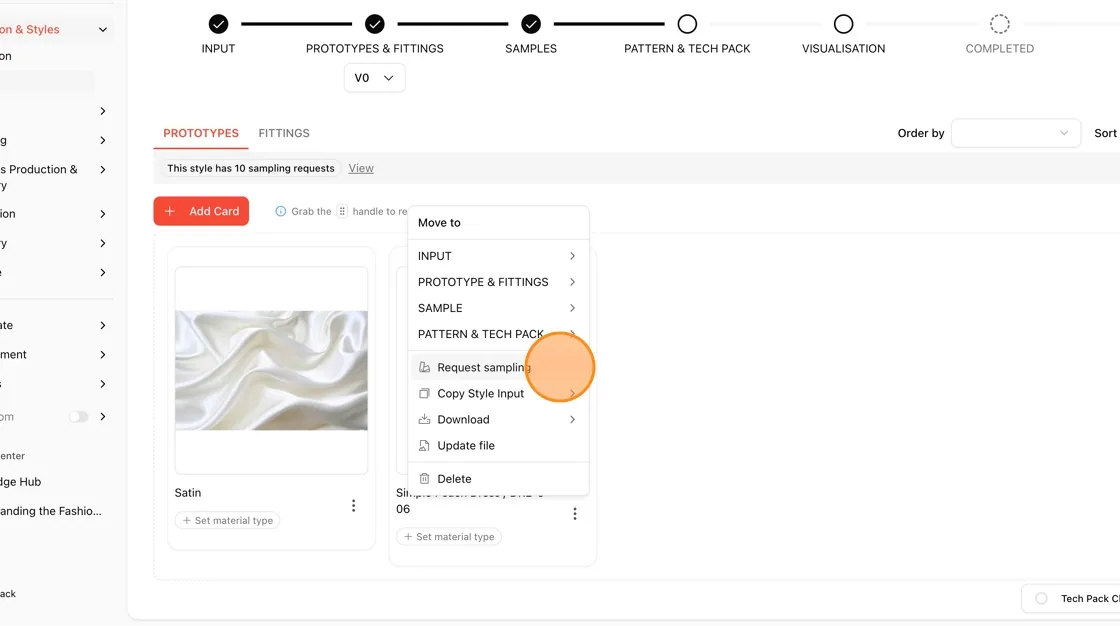
From the dropdown menu, hover over or select Request sampling.
Confirm the request. Once submitted, the sampling request counter at the top of the page will update automatically.
Sampling request from tech pack
Click the "Tech Pack" Tab
Inside the style's edit page, use the top tab bar (Details, Design & Development, Sampling, Tech Pack, Costs, Price, Product ID, Production, Integrations) and click Tech Pack.

Review the Overview Tab
The Tech Pack section opens on the Overview sub-tab by default, showing the Style Name/Code, Collection, Status, Category, and the style's Attributes. Additional sub-tabs — Bill of Material and Measurements — are available alongside Overview.

Open the Tech Pack's Options Menu
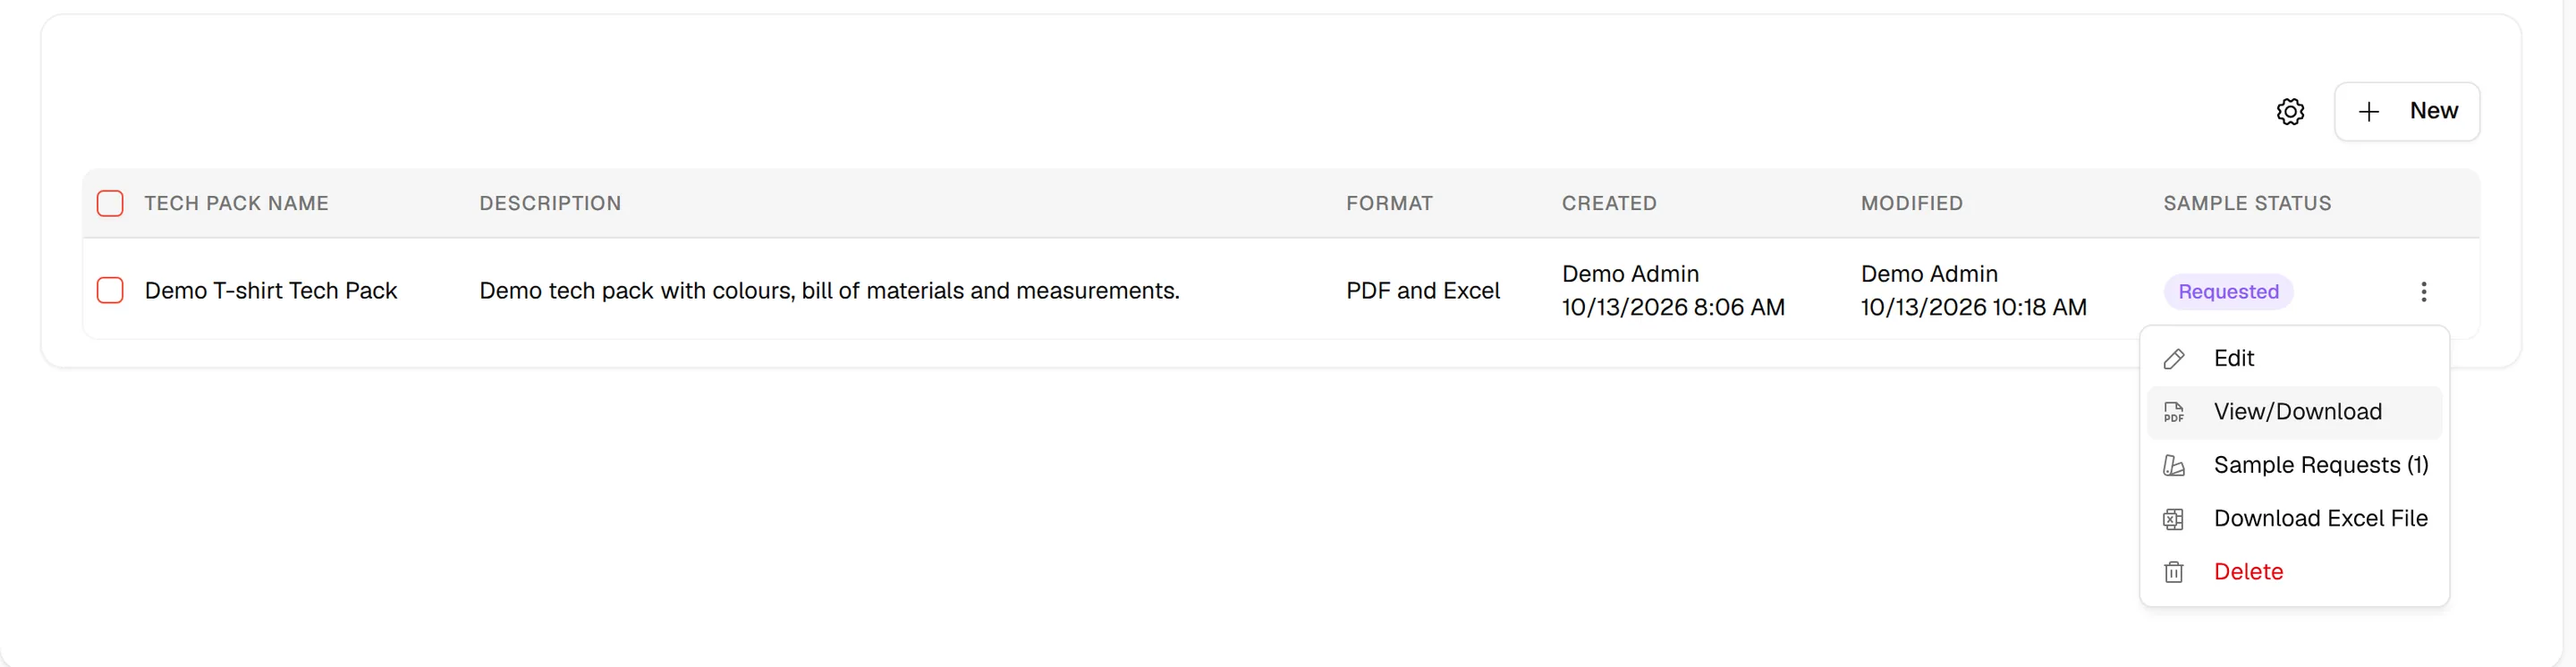
Scroll down to the tech pack table at the bottom of the Overview tab. Find the relevant tech pack row (for example, "batch 1") and click the three-dot (⋮) icon on the right side of that row.
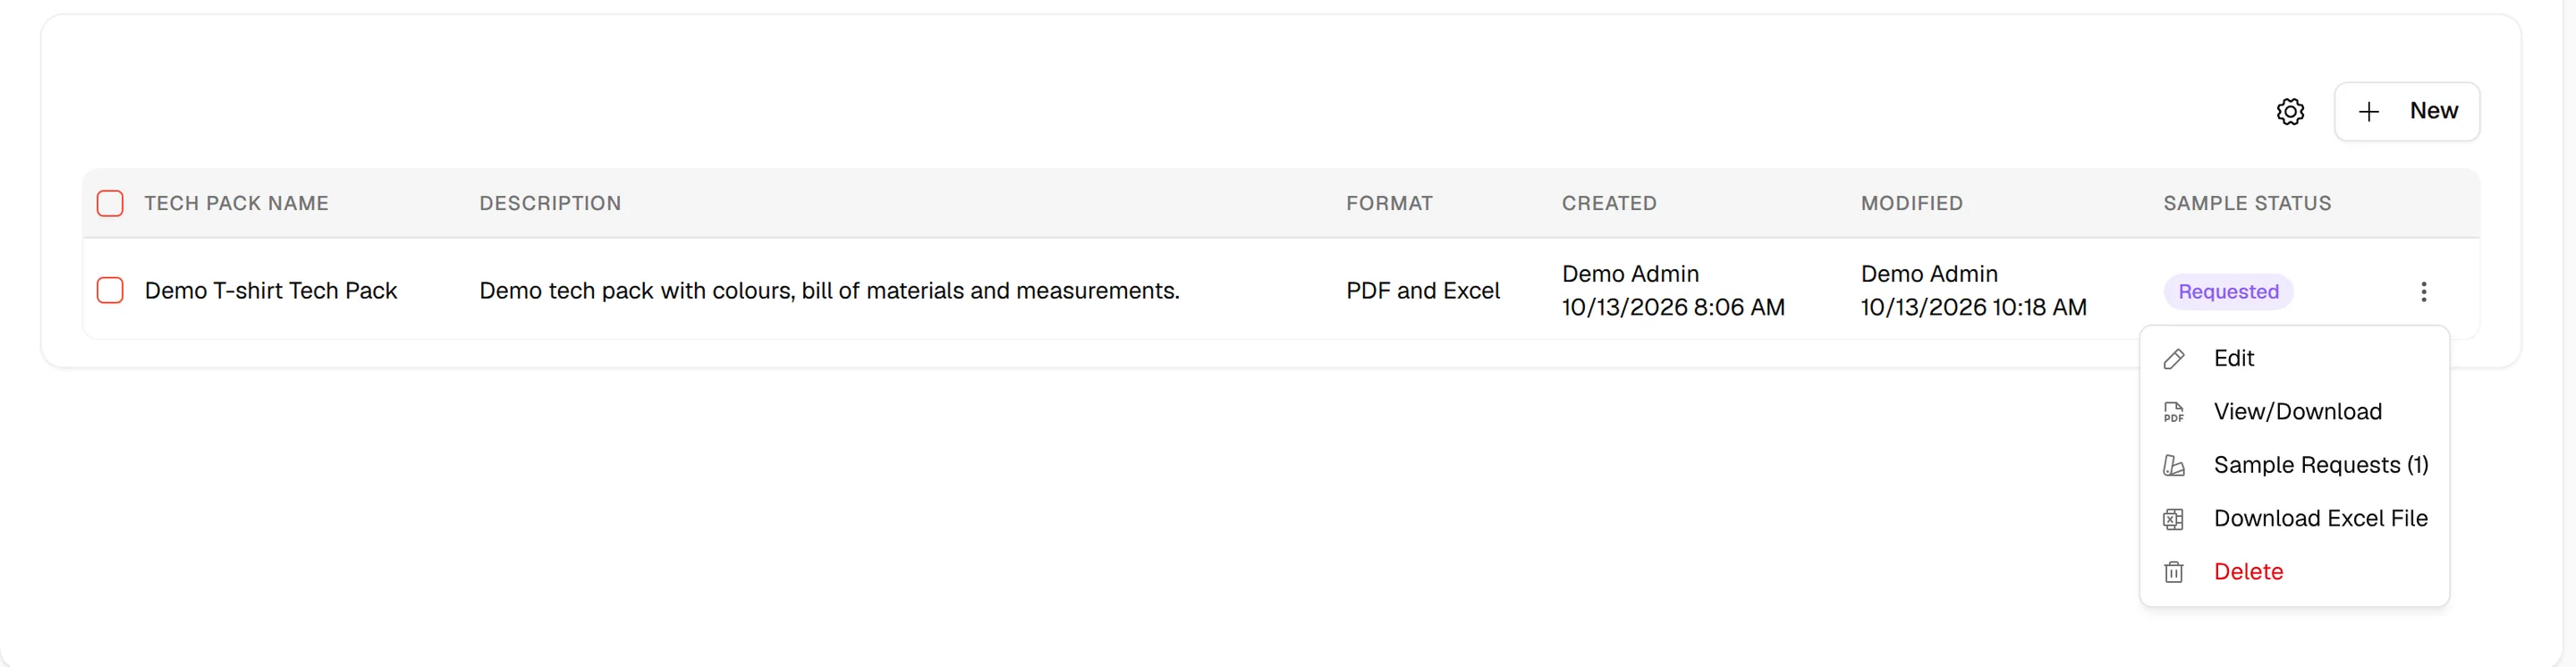
Select "Sample Requests"
From the dropdown menu (Edit, View/Download, Sample Requests, Download Excel File, Delete), click Sample Requests to view or create sample requests linked to this tech pack.
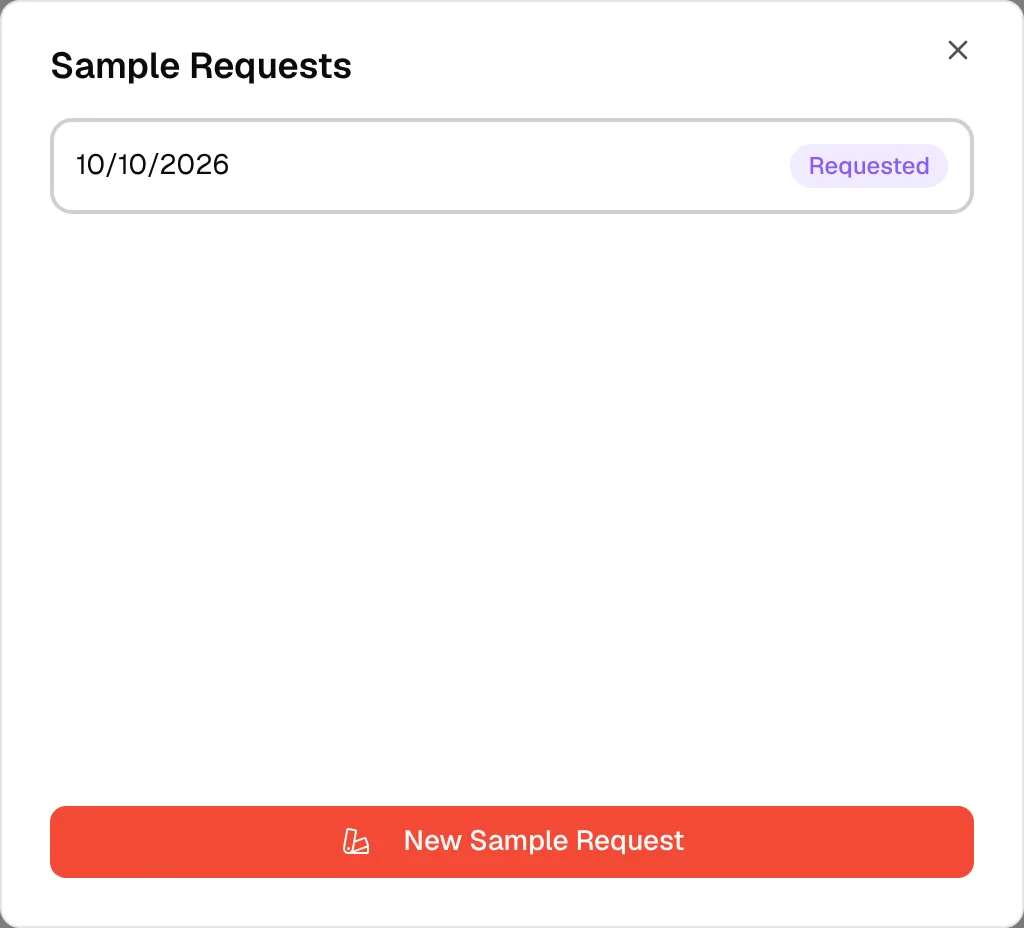
Start a New Sample Request
The Sample Requests dialog opens. If no requests exist yet, it will show "No sample requests yet for this tech pack." Click New Sample Request to begin creating one.
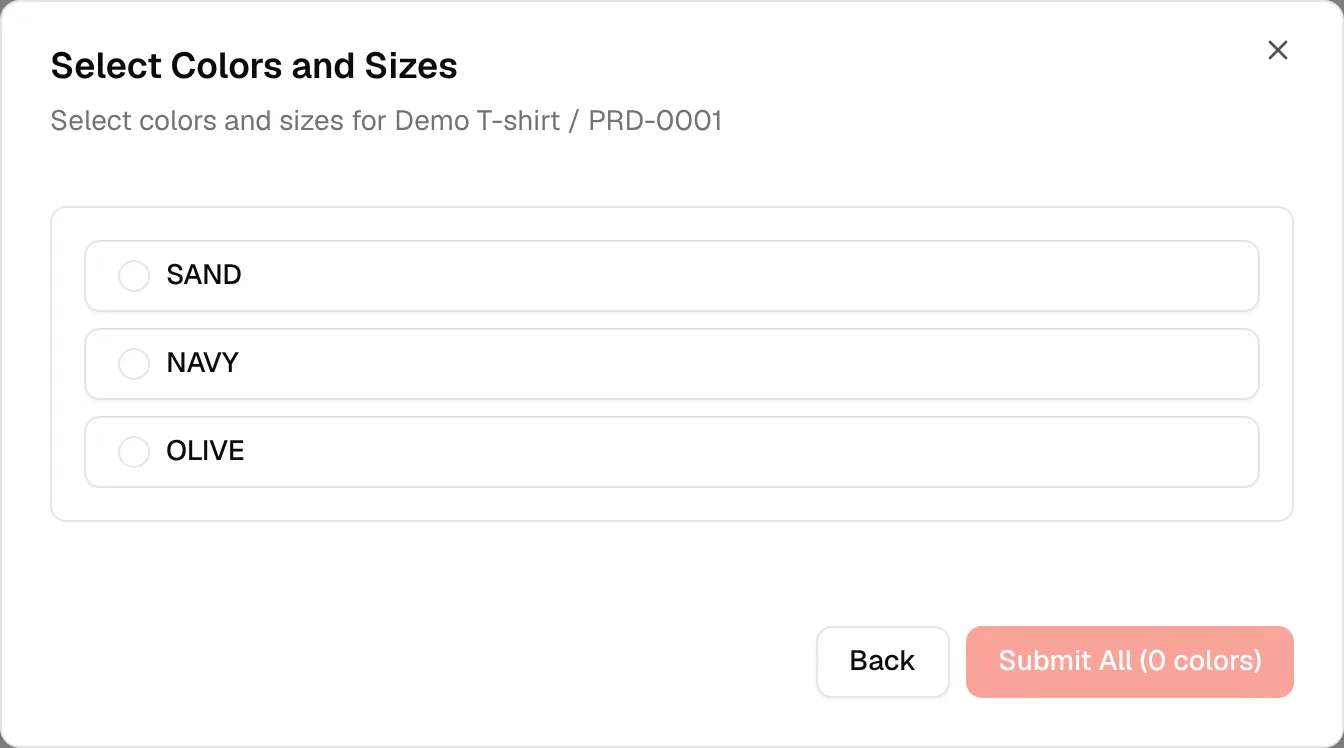
Choose a Color
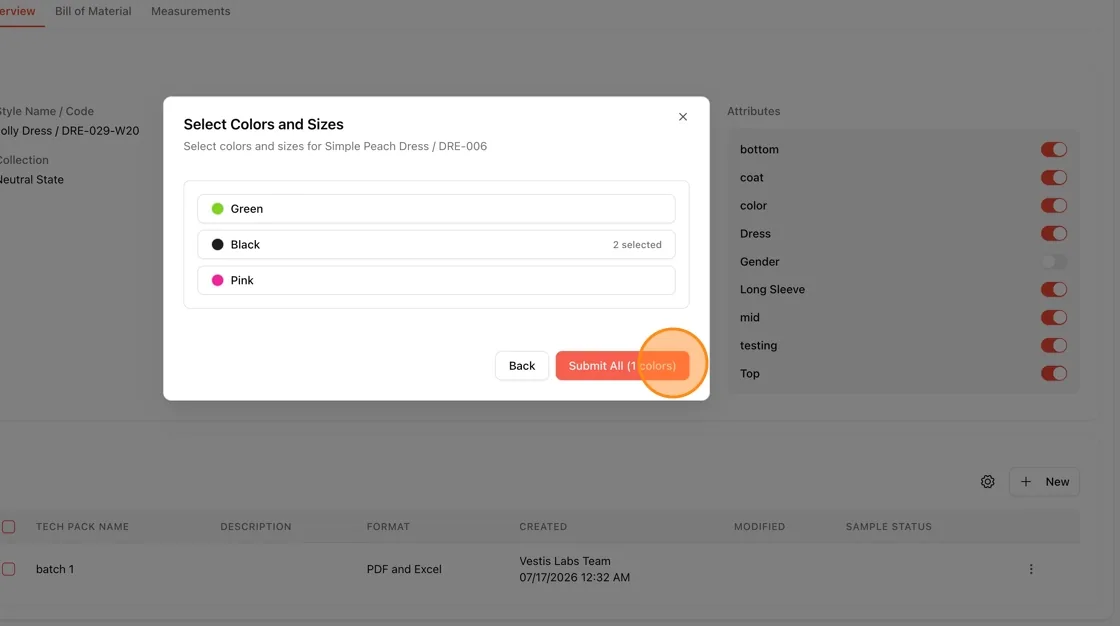
The "Select Colors and Sizes" dialog lists all available colors for the style (for example, Green, Black, Pink). Click on a color, such as Black, to expand its size options.
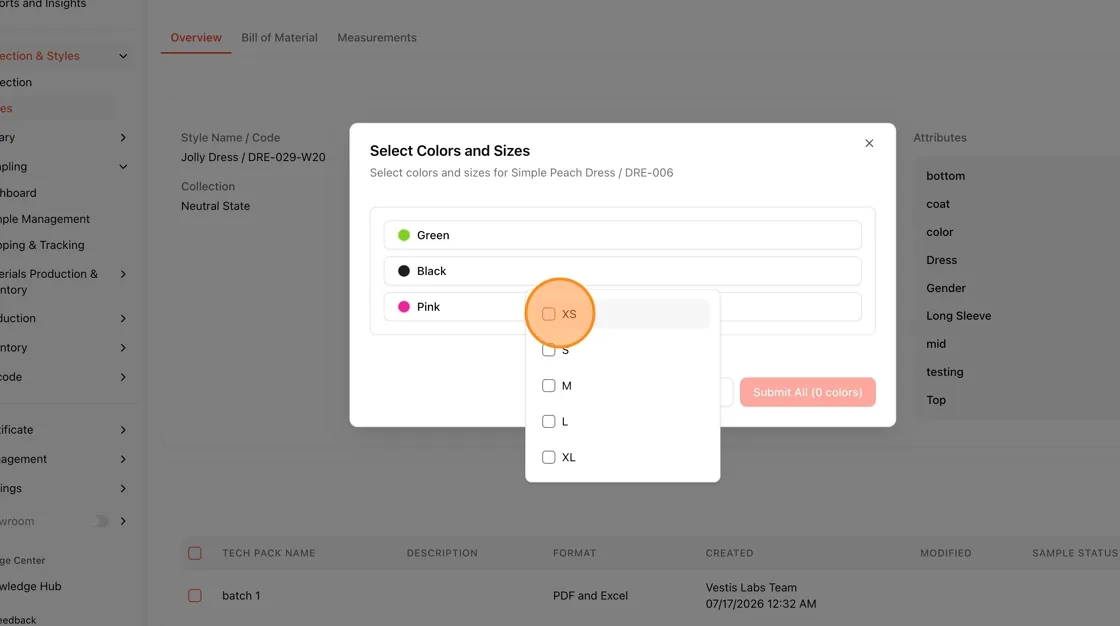
Choose the Size(s)
A list of available sizes (XS, S, M, L, XL) appears under the selected color. Check the box next to each size you want to include in the sample request.
Submit the Selection
Once your sizes are selected, the color row updates to show how many sizes were selected (for example, "2 selected"). Click Submit All to confirm and create the sample request(s) for the chosen color and size combinations.
Review the Sample Details
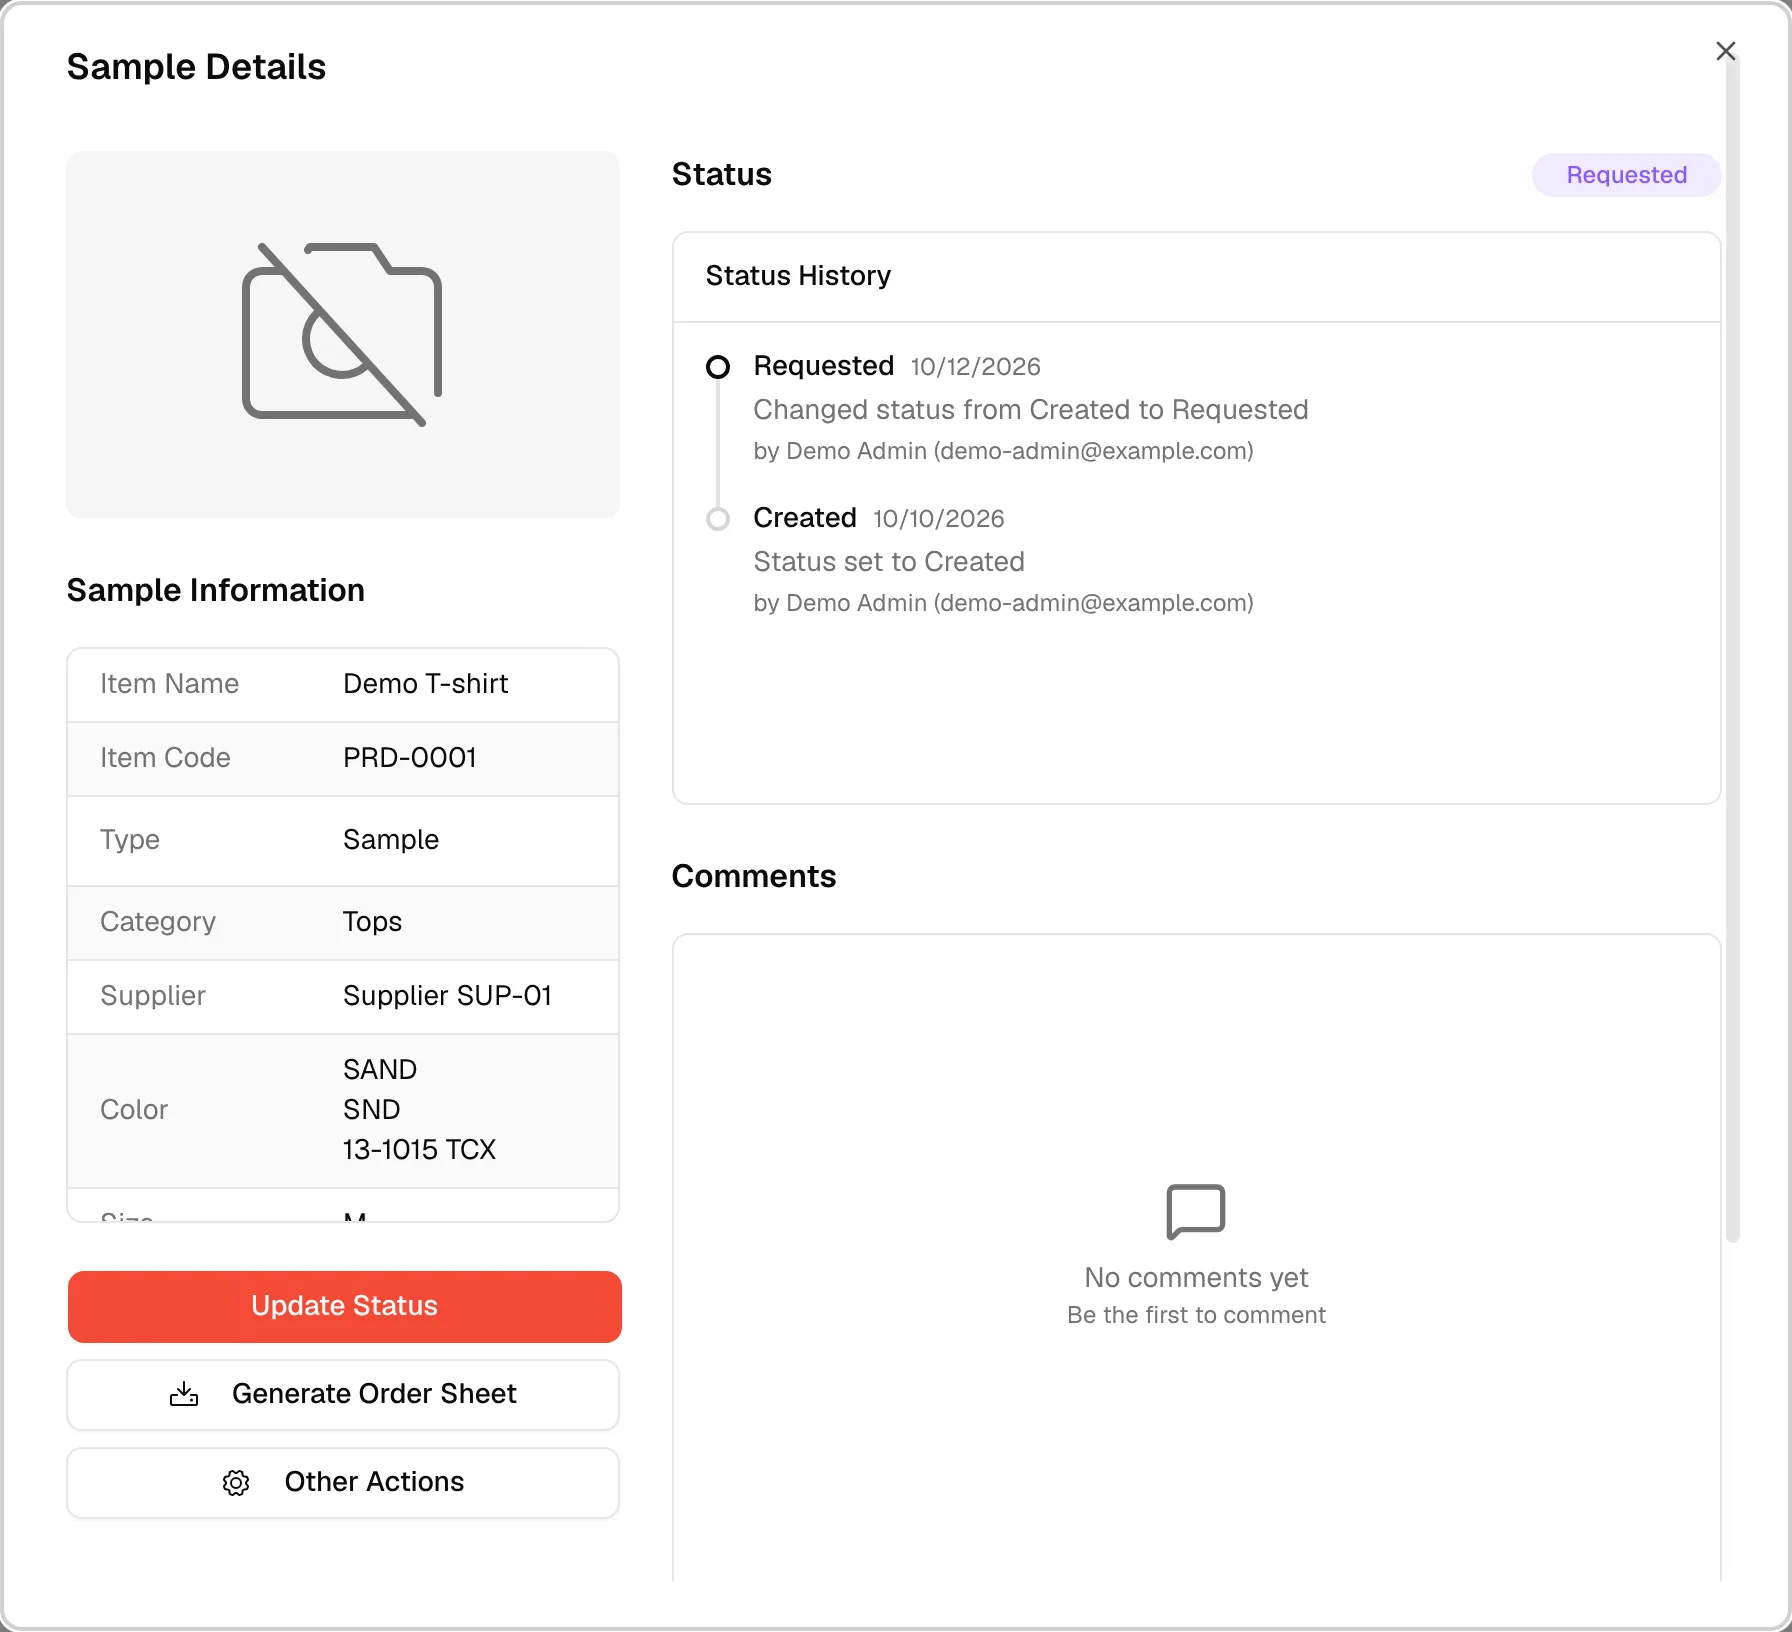
A Sample Details panel opens automatically, confirming that the sample has been created. It displays the Sample Information (Item Name, Item Code, Type, Category, Supplier, Color, Size) along with its Status History and a Comments section.
Verify on the Overview Tab
Back on the Tech Pack Overview tab, the tech pack row now shows an updated Sample Status badge (for example, "2 Samples"), confirming that the sample request(s) have been successfully linked to this tech pack.