Tech pack settings
This article provides an overview of all the functionalities available under Tech Pack Settings, which will be automatically applied to the tech pack based on all categories and collections…
Under review. This page is published while we check it against the live app, so some details may have changed.
Screenshots may be out of date.
This article provides an overview of all the functionalities available under Tech Pack Settings, which will be automatically applied to the tech pack based on all categories and collections when creating a tech pack.
Introduction & best practice
In Vestis Labs, Tech Pack Settings enable you to configure default options that control how tech packs for BOM (Bill of Materials) items are displayed across categories and collections. From here, you can define which item from the library material information appears in the BOM page, as well as manage default items that are automatically applied based on the created library material, or you can create new items. Created items that appear in BOMs based on rules. Each rule can target collections, categories or sizes.
SettingsCollection & StyleTech Pack Settings
Permission: VIEW_BILL_OF_MATERIAL,VIEW_STYLE
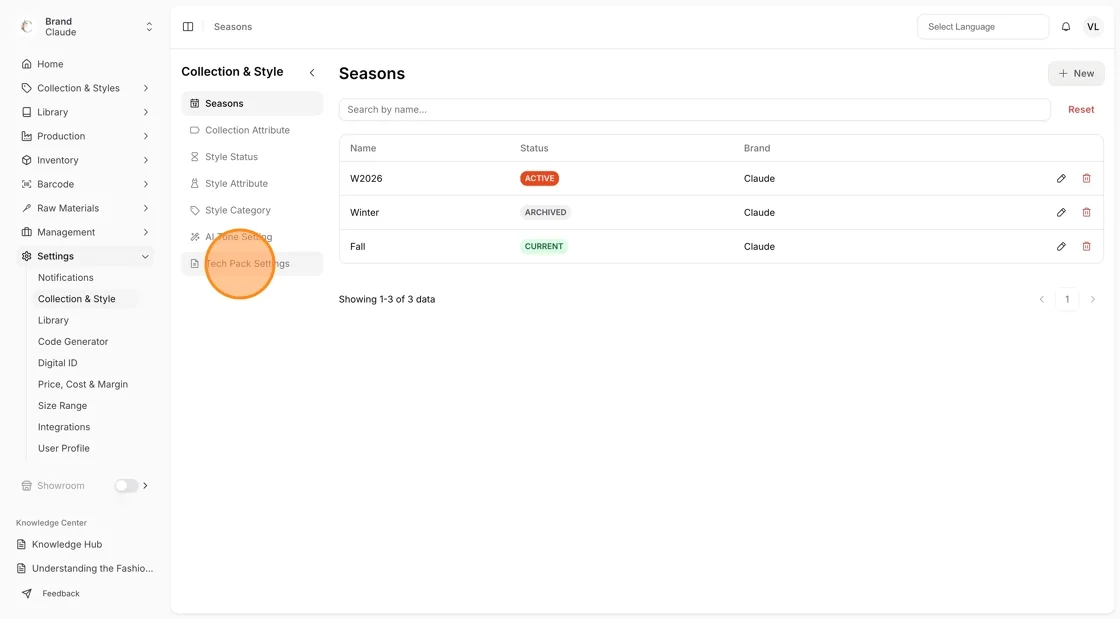
Navigate to Settings > Collection & Style, go to Tech Pack Settings section. The page has three tabs: Annotation & Comment Settings, BOM Category Sequence and Default BOM Items.
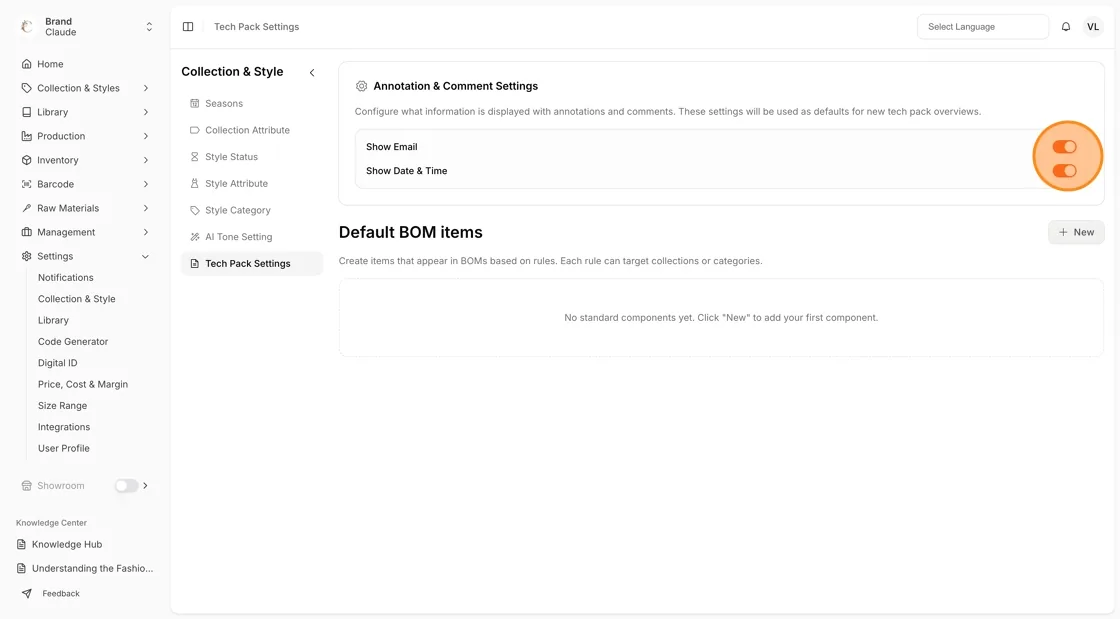
Annotation & Comment Settings
Use the toggle to activate or deactivate the information that is displayed with annotations and comments in the tech pack. These settings will be used as defaults for new tech pack overviews.
- Show Email – The user’s email address will be displayed when annotations and comments are created.
- Show Date & Time – The date and time will be displayed when users create annotations and comments.
- Show Comments & Annotations – When off, the design image fills the page.
Each toggle saves as soon as you change it and shows Settings saved successfully.
BOM Category Sequence
Open the BOM Category Sequence tab to set the default order of material categories in the Bill of Materials table. Drag a category by its handle to reorder; the new order is saved automatically (Category sequence saved). The order applies to all styles unless manually overridden. Changing the order needs the permission to update the bill of materials.
Default BOM items
Default BOM items allow you to automatically include predefined components in tech packs based on rules.
- Create BOM items that appear by default in tech packs
- Apply rules based on collections, categories or sizes
- Set items as Active or inactive depending on current needs
Each default BOM item can include:
- Product information (category, code, color, dimension, position)
- Component details (name, composition, supplier)
- Quantity and unit
- Images, notes, and additional references
Step by step guide
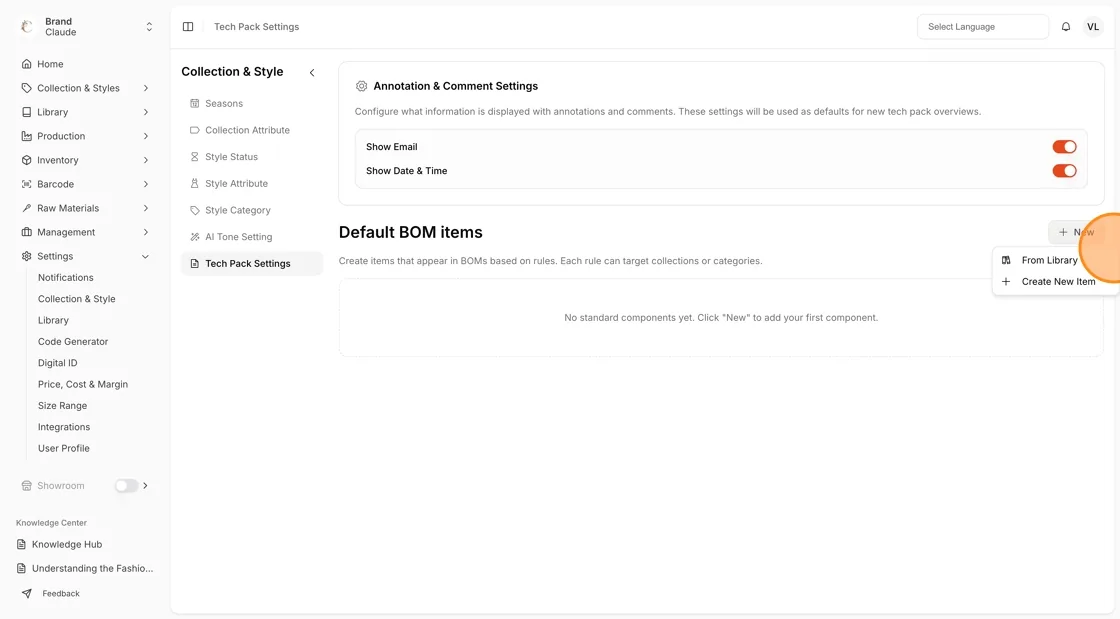
Open the Default BOM Items tab and click New to add the BOM Item. There are two options:
- From Library - to view existing item entries.
- Create New Item - to create a new item.
Select from library
In the Library view, select the existing item
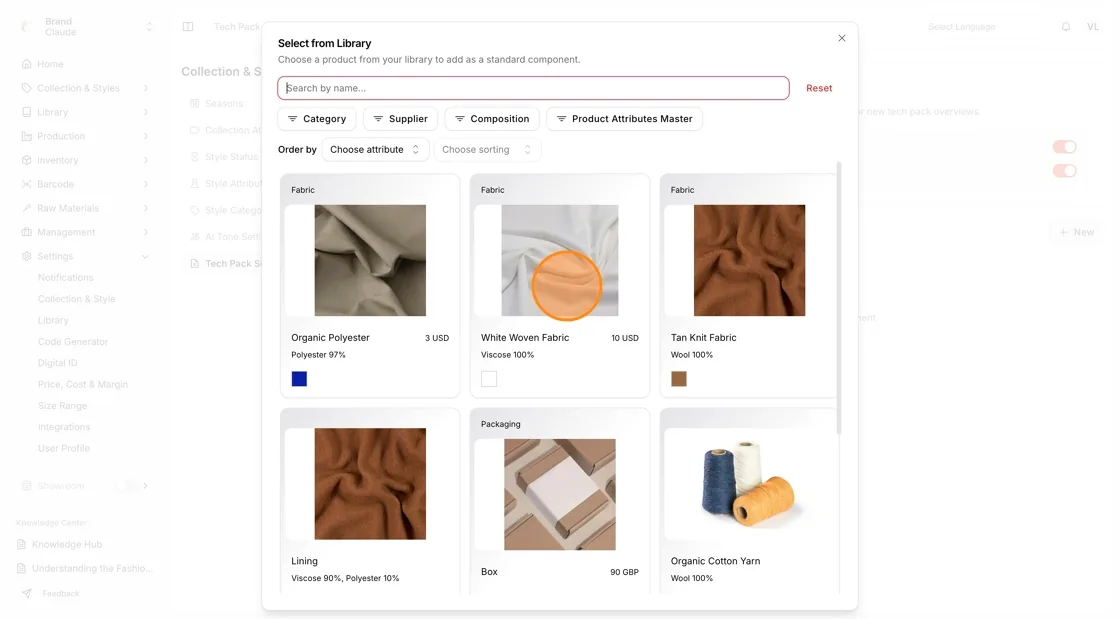
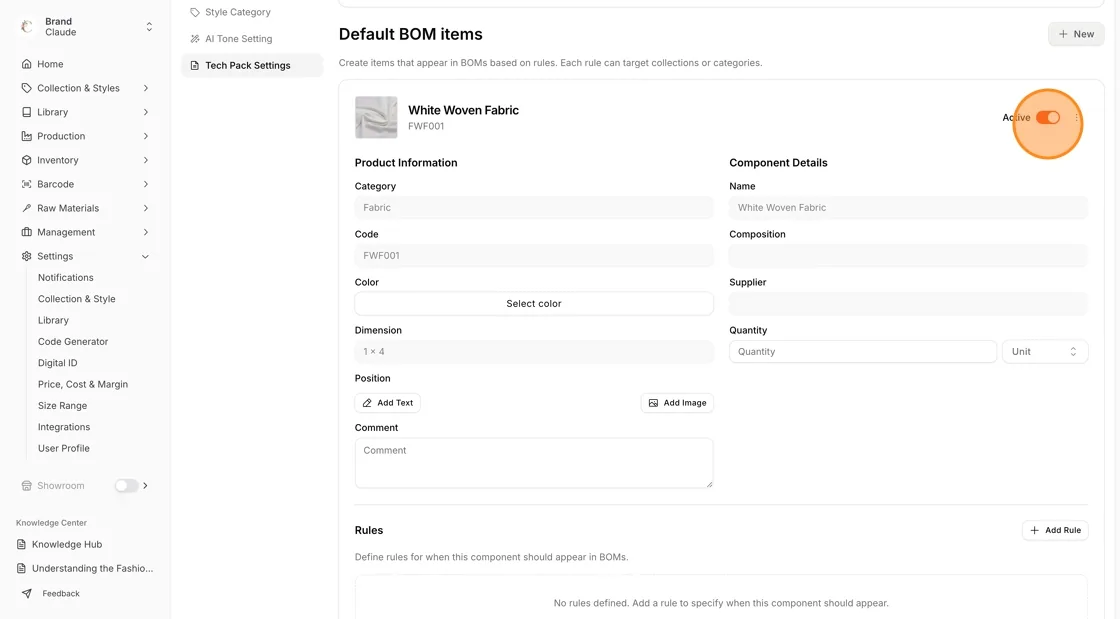
Use the Active toggle to activate or deactivate the automated BOM item displayed in the tech pack. The toggle saves as soon as you change it. If your plan includes Digital ID, a Product Journey toggle also appears to show the item in the product journey.
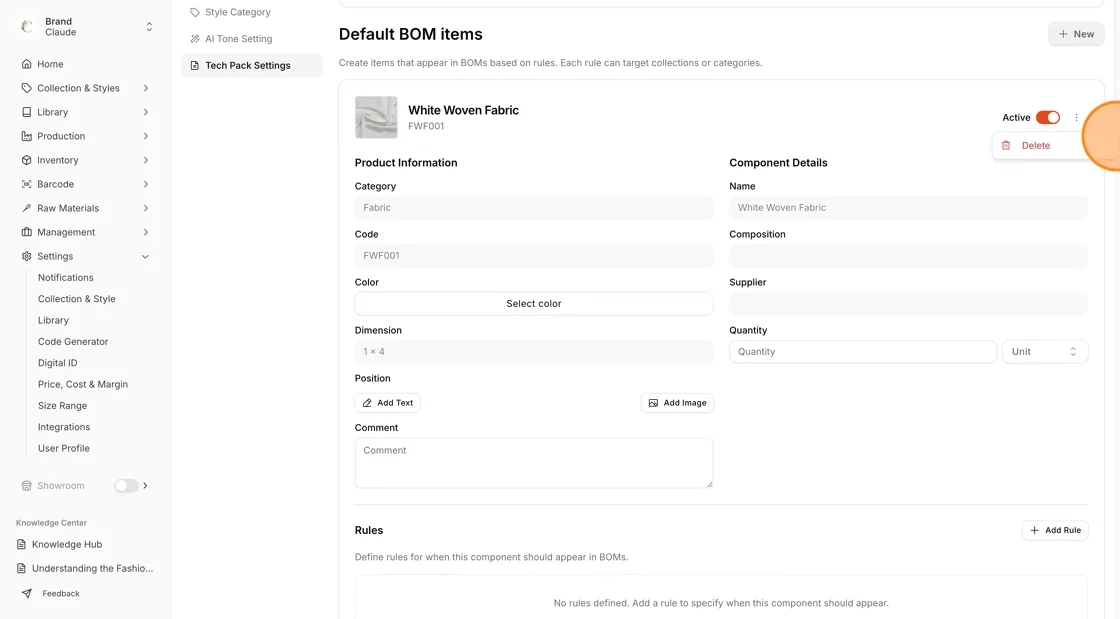
Use the three-dot action button to delete the selected BOM item. You are asked to confirm before it is deleted.
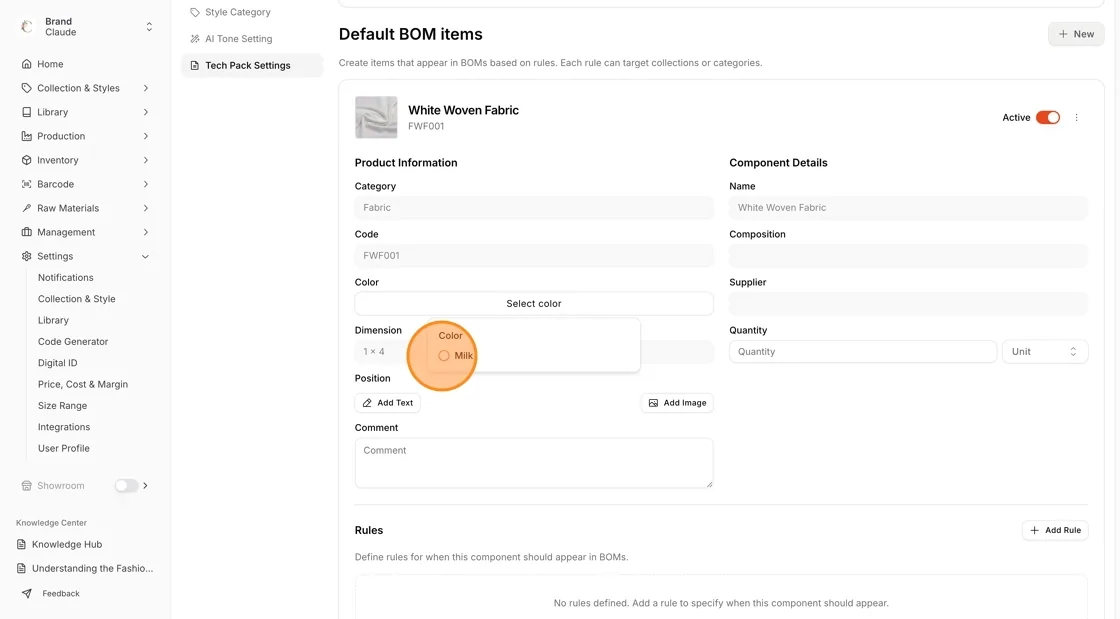
Enter the required BOM Item details, such as:
- Select the color from the dropdown option
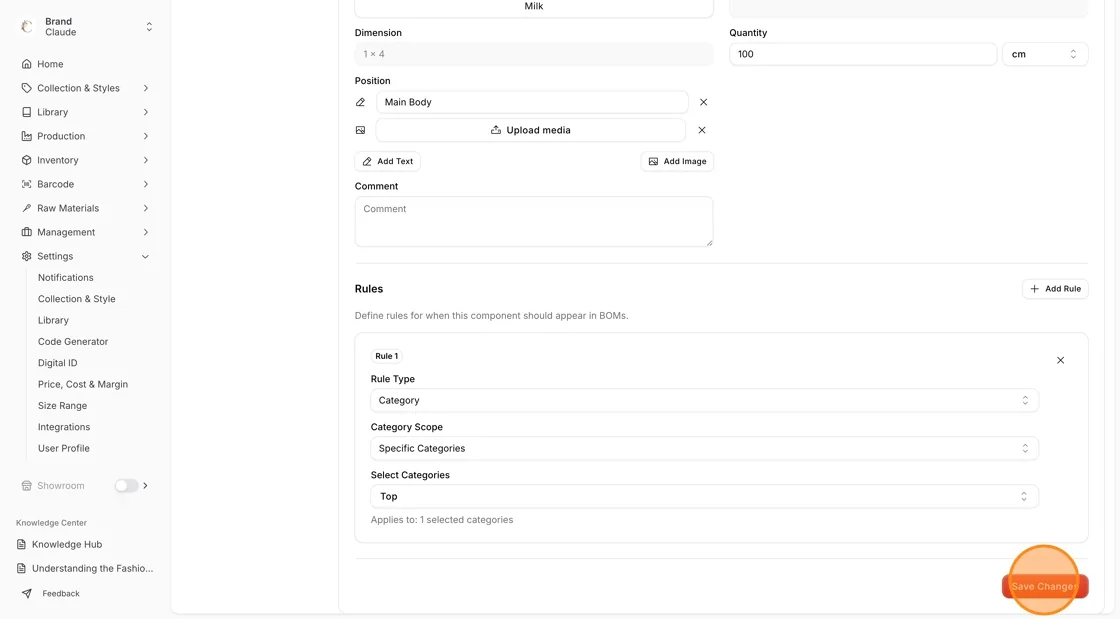
- Enter the Quantity (for example, enter 100) and Unit (select from the dropdown, such as cm)
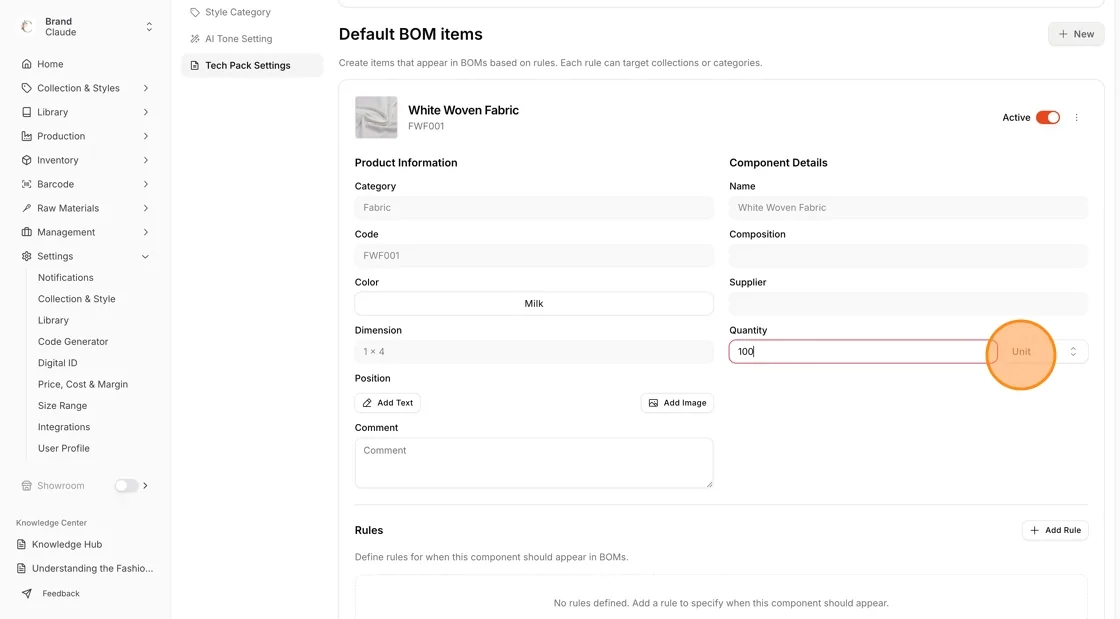
Add additional information:
- Click Add Text to include notes such as component descriptions (e.g. Body).
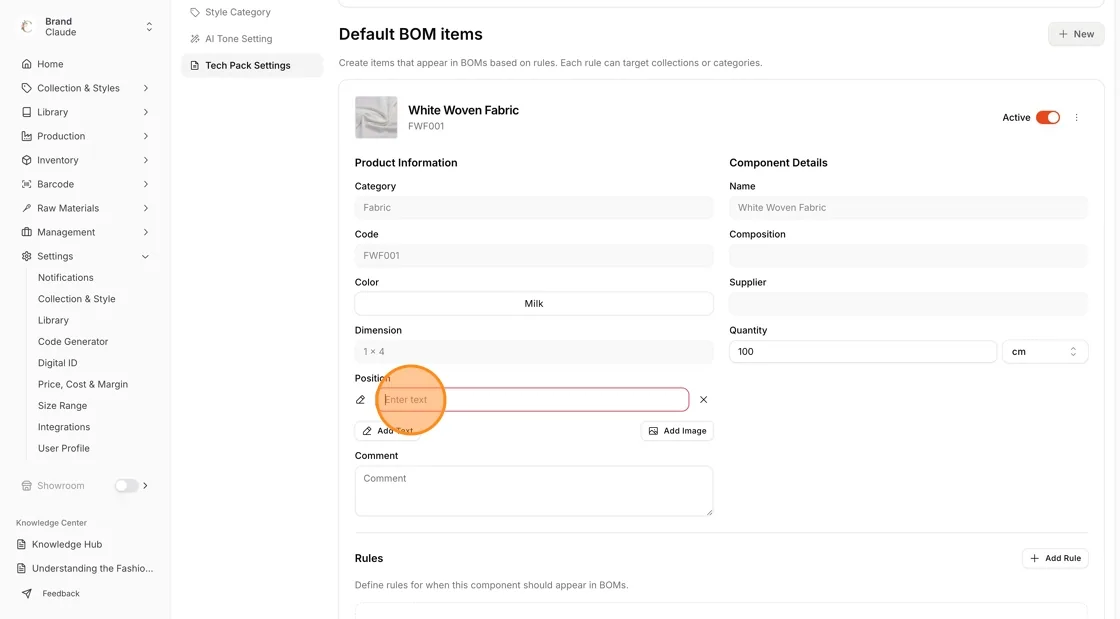
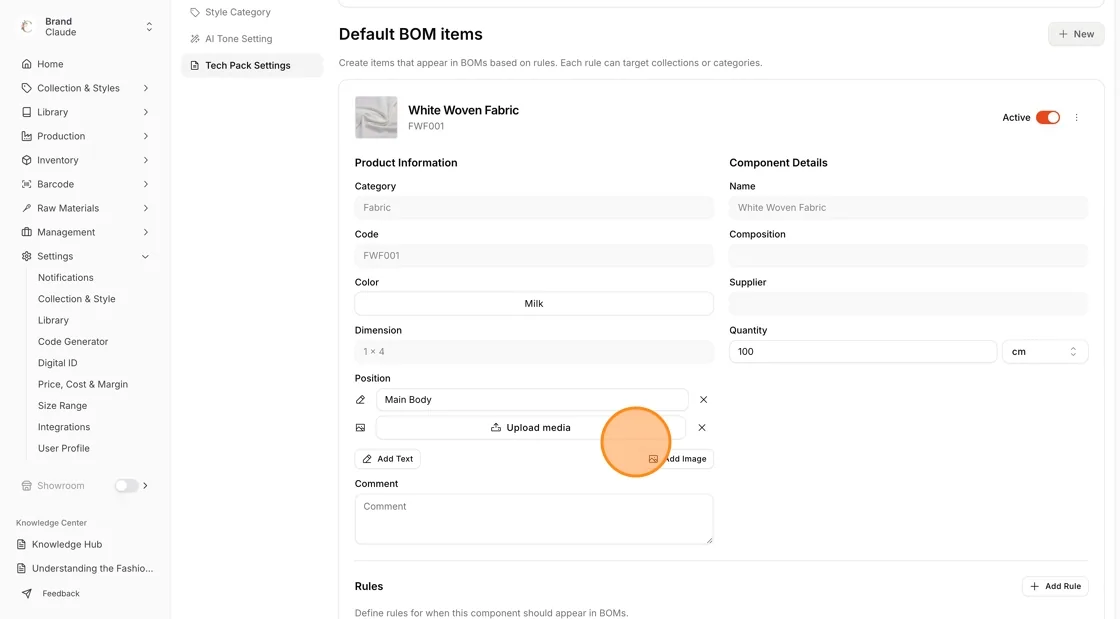
- Click Add Image, then Upload media, to attach reference images in the Position field.
- Add comments in the Comment field if needed.
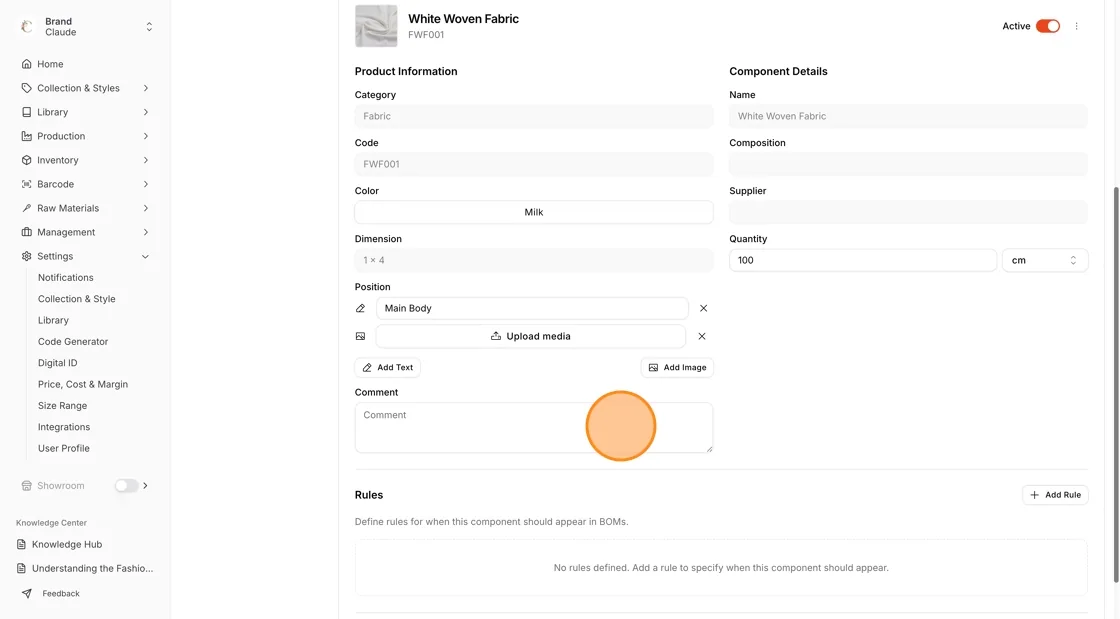
Default BOM items allow you to automatically include predefined components in tech packs based on rules.
- Click Add Rule to define where the Item applies in the BOM.
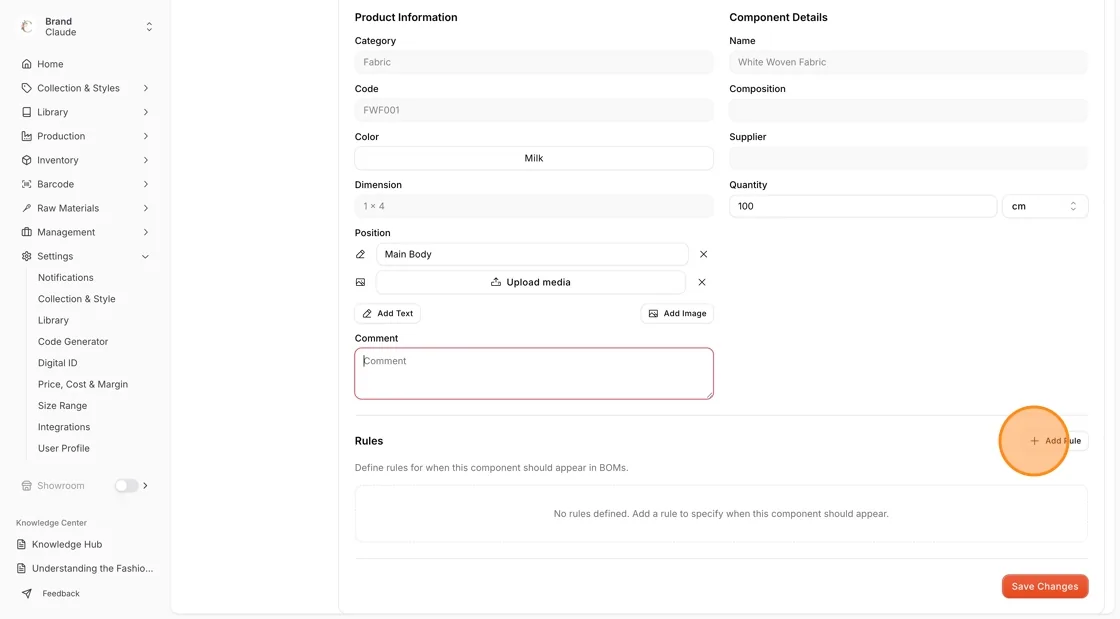
Choose the Rule Type: Collection, Category or Size.
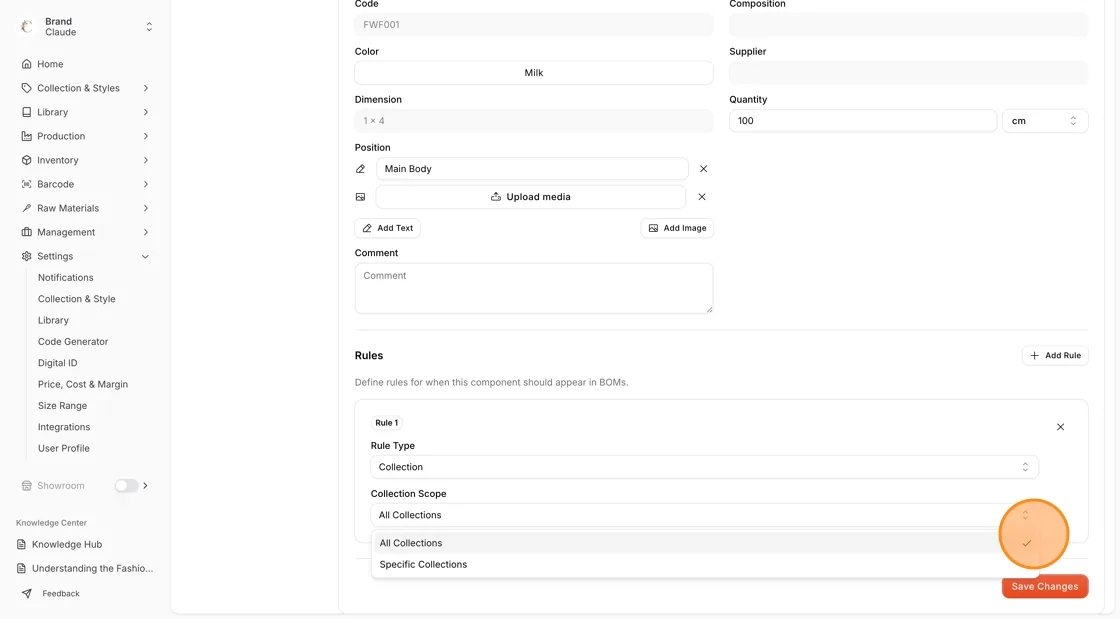
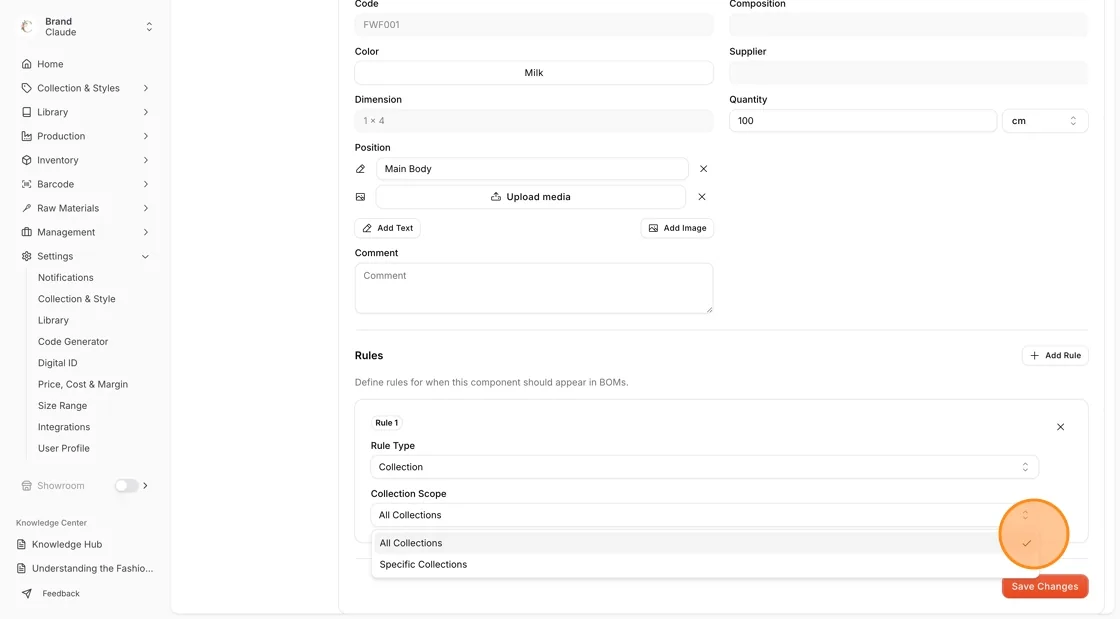
Select the scope for the chosen rule type (for example Collection Scope):
- All (for example All Collections) – applies the item to all collections, categories or sizes
- Specific (for example Specific Collections) – applies the item only to the selected ones
If Specific is selected, choose the required collections, categories or sizes from the dropdown list.
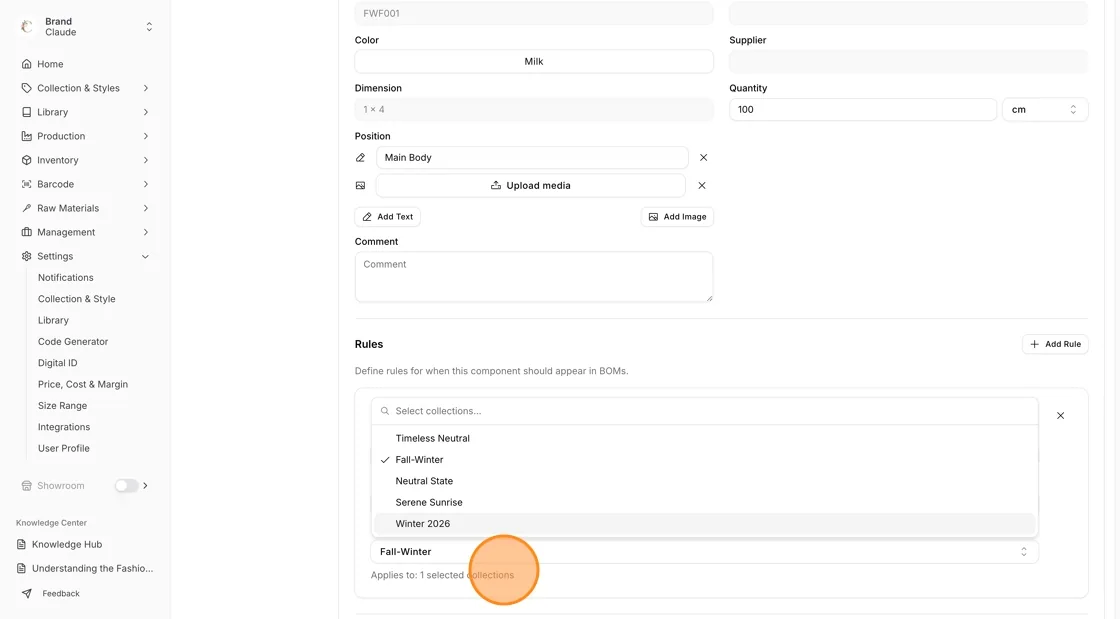
Review all entered information, then click Save Changes.
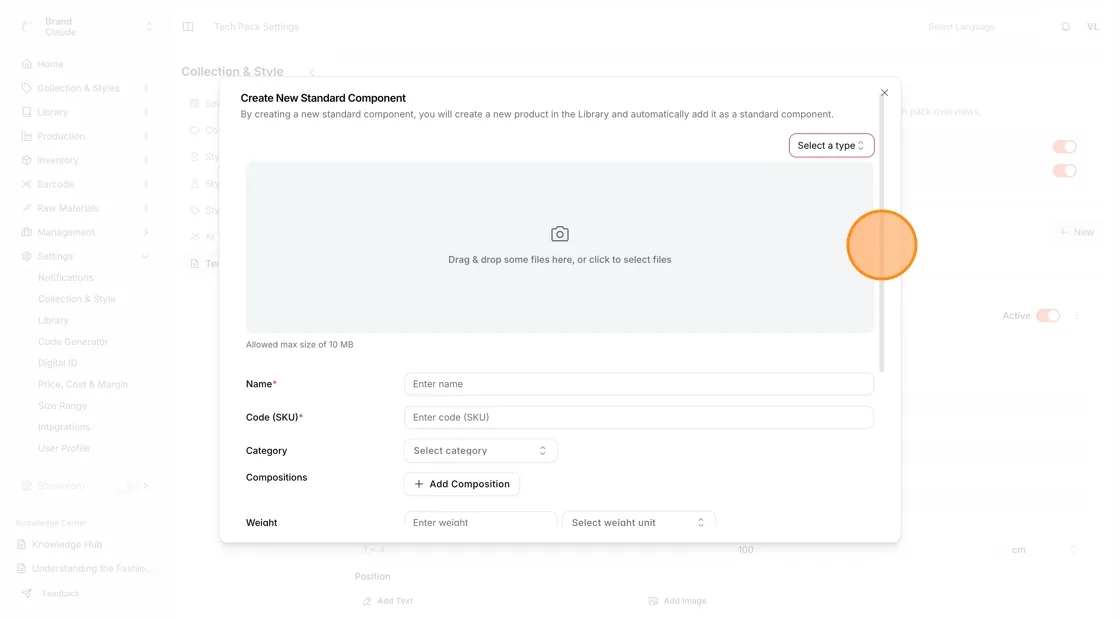
Create a new item
Click New, then Create New Item.
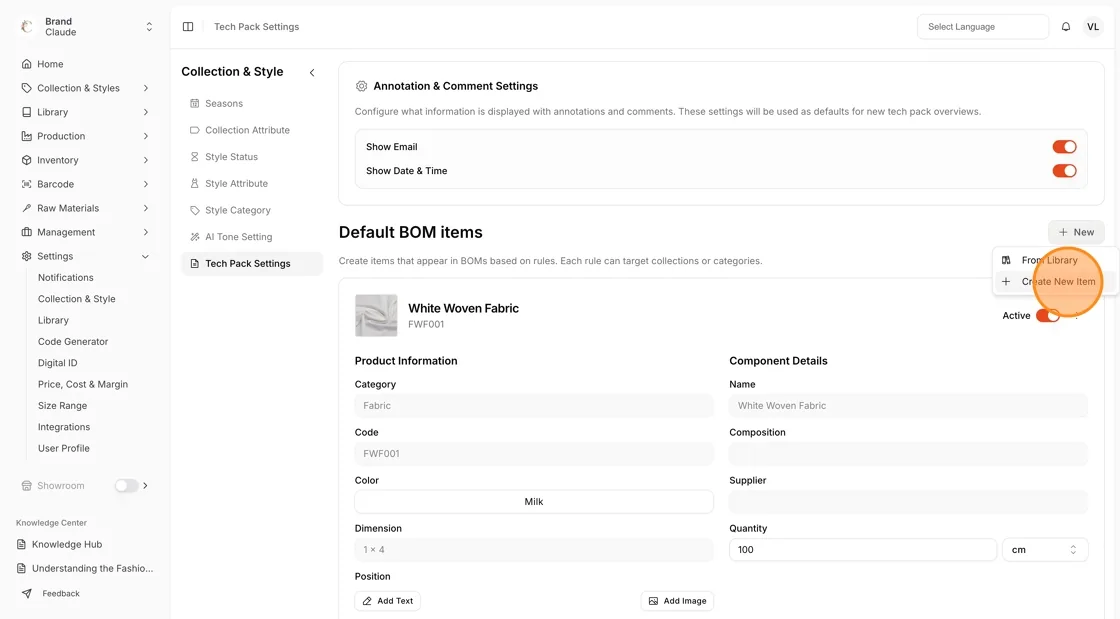
A Create New Standard Component window opens. The new item is created in the Library and automatically added as a default BOM item.