
Step 11 of 12 in Stock materials and finished goods
Inventory stock level rules
Create, edit, switch on and test stock level rules that change a product's stock status when its quantity crosses a threshold.
Under review. This page is published while we check it against the live app, so some details may have changed.
Stock Level Rules are rules that trigger based on inventory quantities. Each rule says when a stock quantity counts as low, out of stock, in stock or overstock, and can send a notification. You can set rules for individual SKUs or for whole styles.
InventoryRules & AutomationStock Level Rules
Permission: UPDATE_STYLE_INVENTORY
Choose SKU level or style level
At the top of the page, select a tab:
- SKU Level Rules: the Select Product list contains each size and colour of a style, for example one entry per SKU.
- Style Level Rules: the Select Product list contains styles, with quantities added up across their variants.
Each tab has its own rules. The steps below are the same for both.
Create a rule
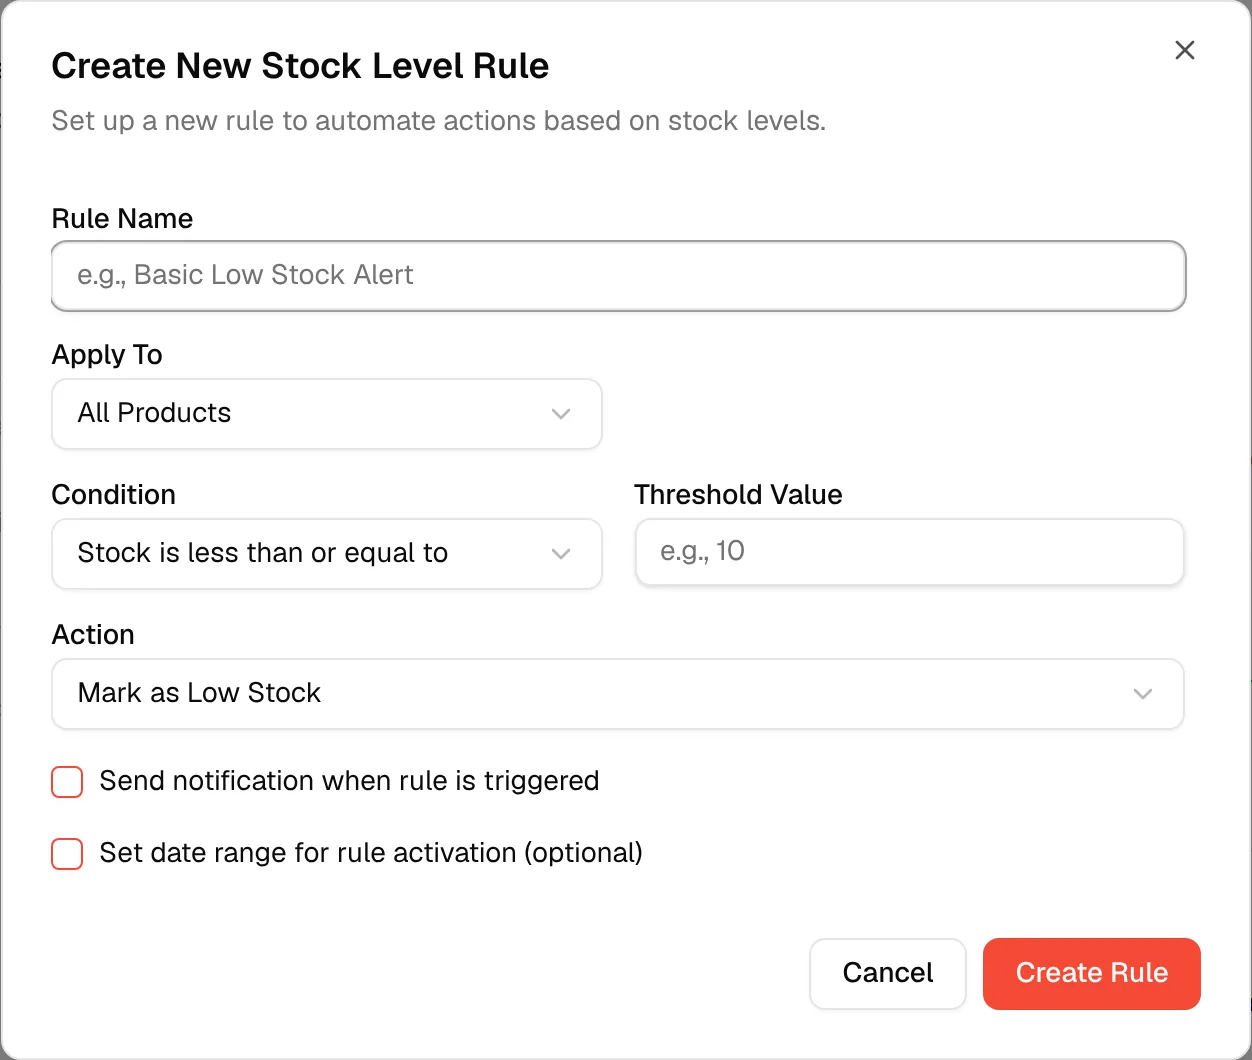
Click "Create New Rule"
Click Create New Rule at the top of the Stock Level Rules card. If you have no rules yet, you can click Create Your First Stock Level Rule instead.
Enter the rule name
In Rule Name, type a name, for example Basic Low Stock Alert. This field is required.
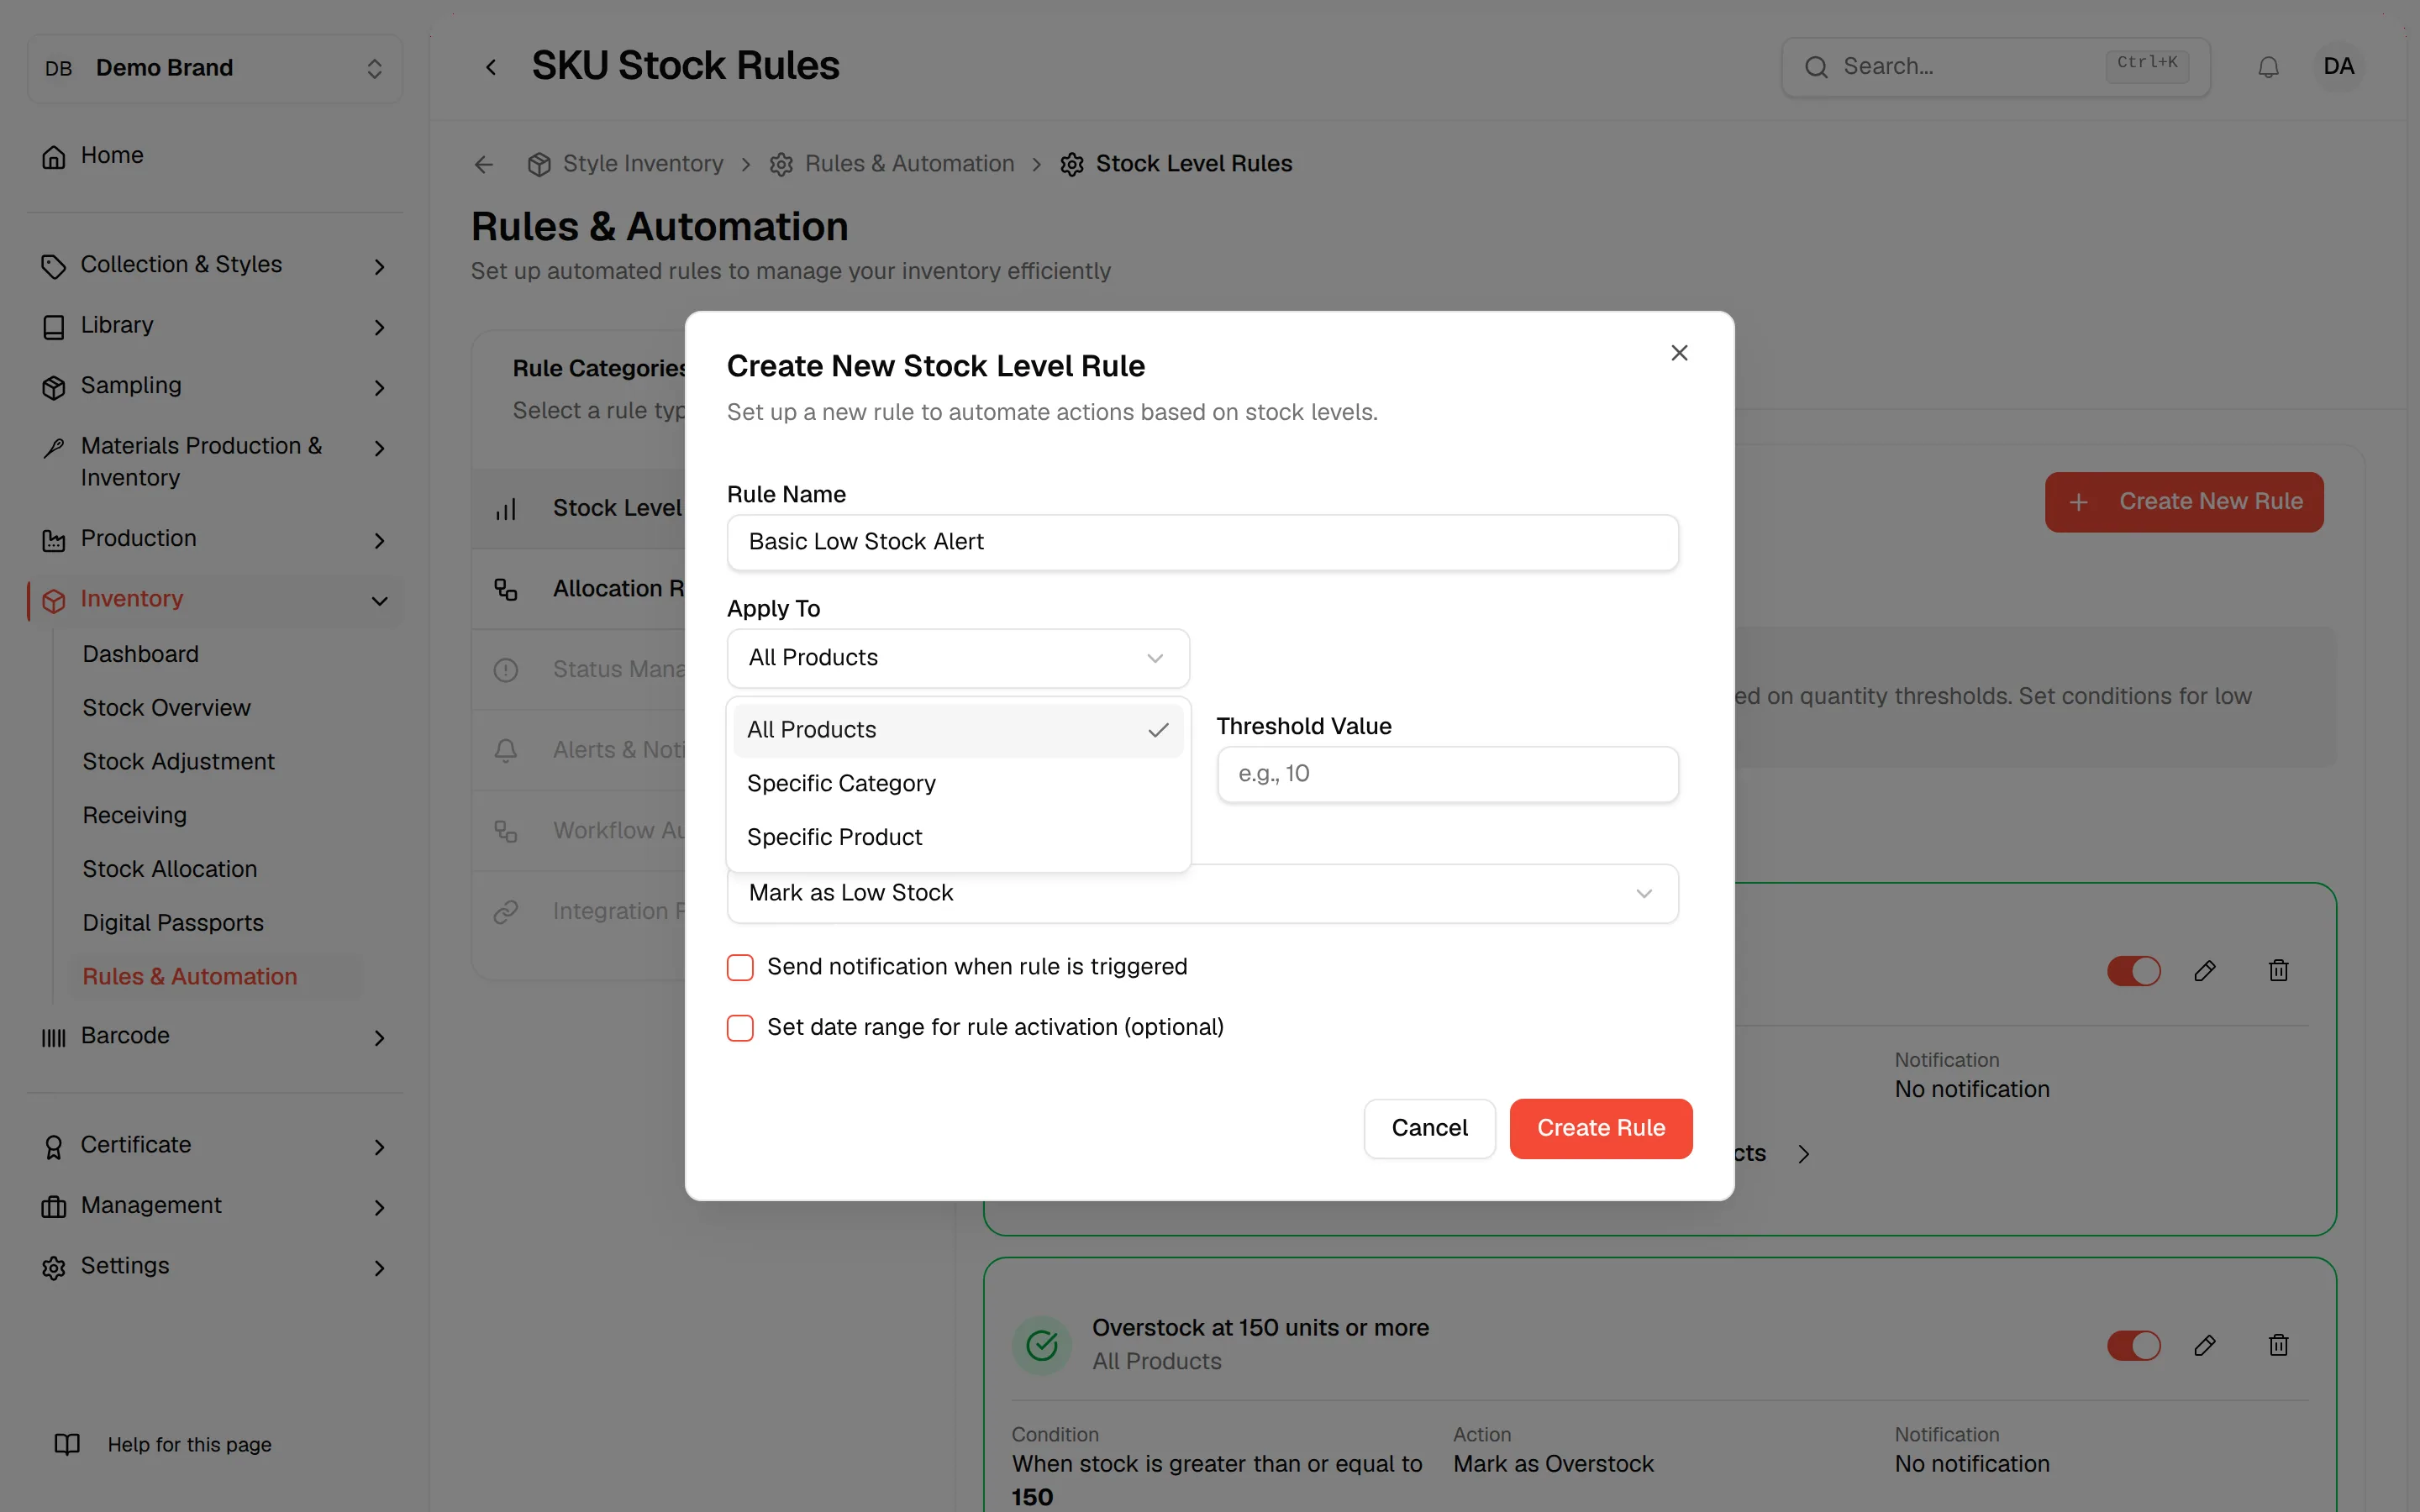
Choose what the rule applies to
In Apply To, select All Products, Specific Category or Specific Product. For a category or product, also pick it in Select Category or Select Product.
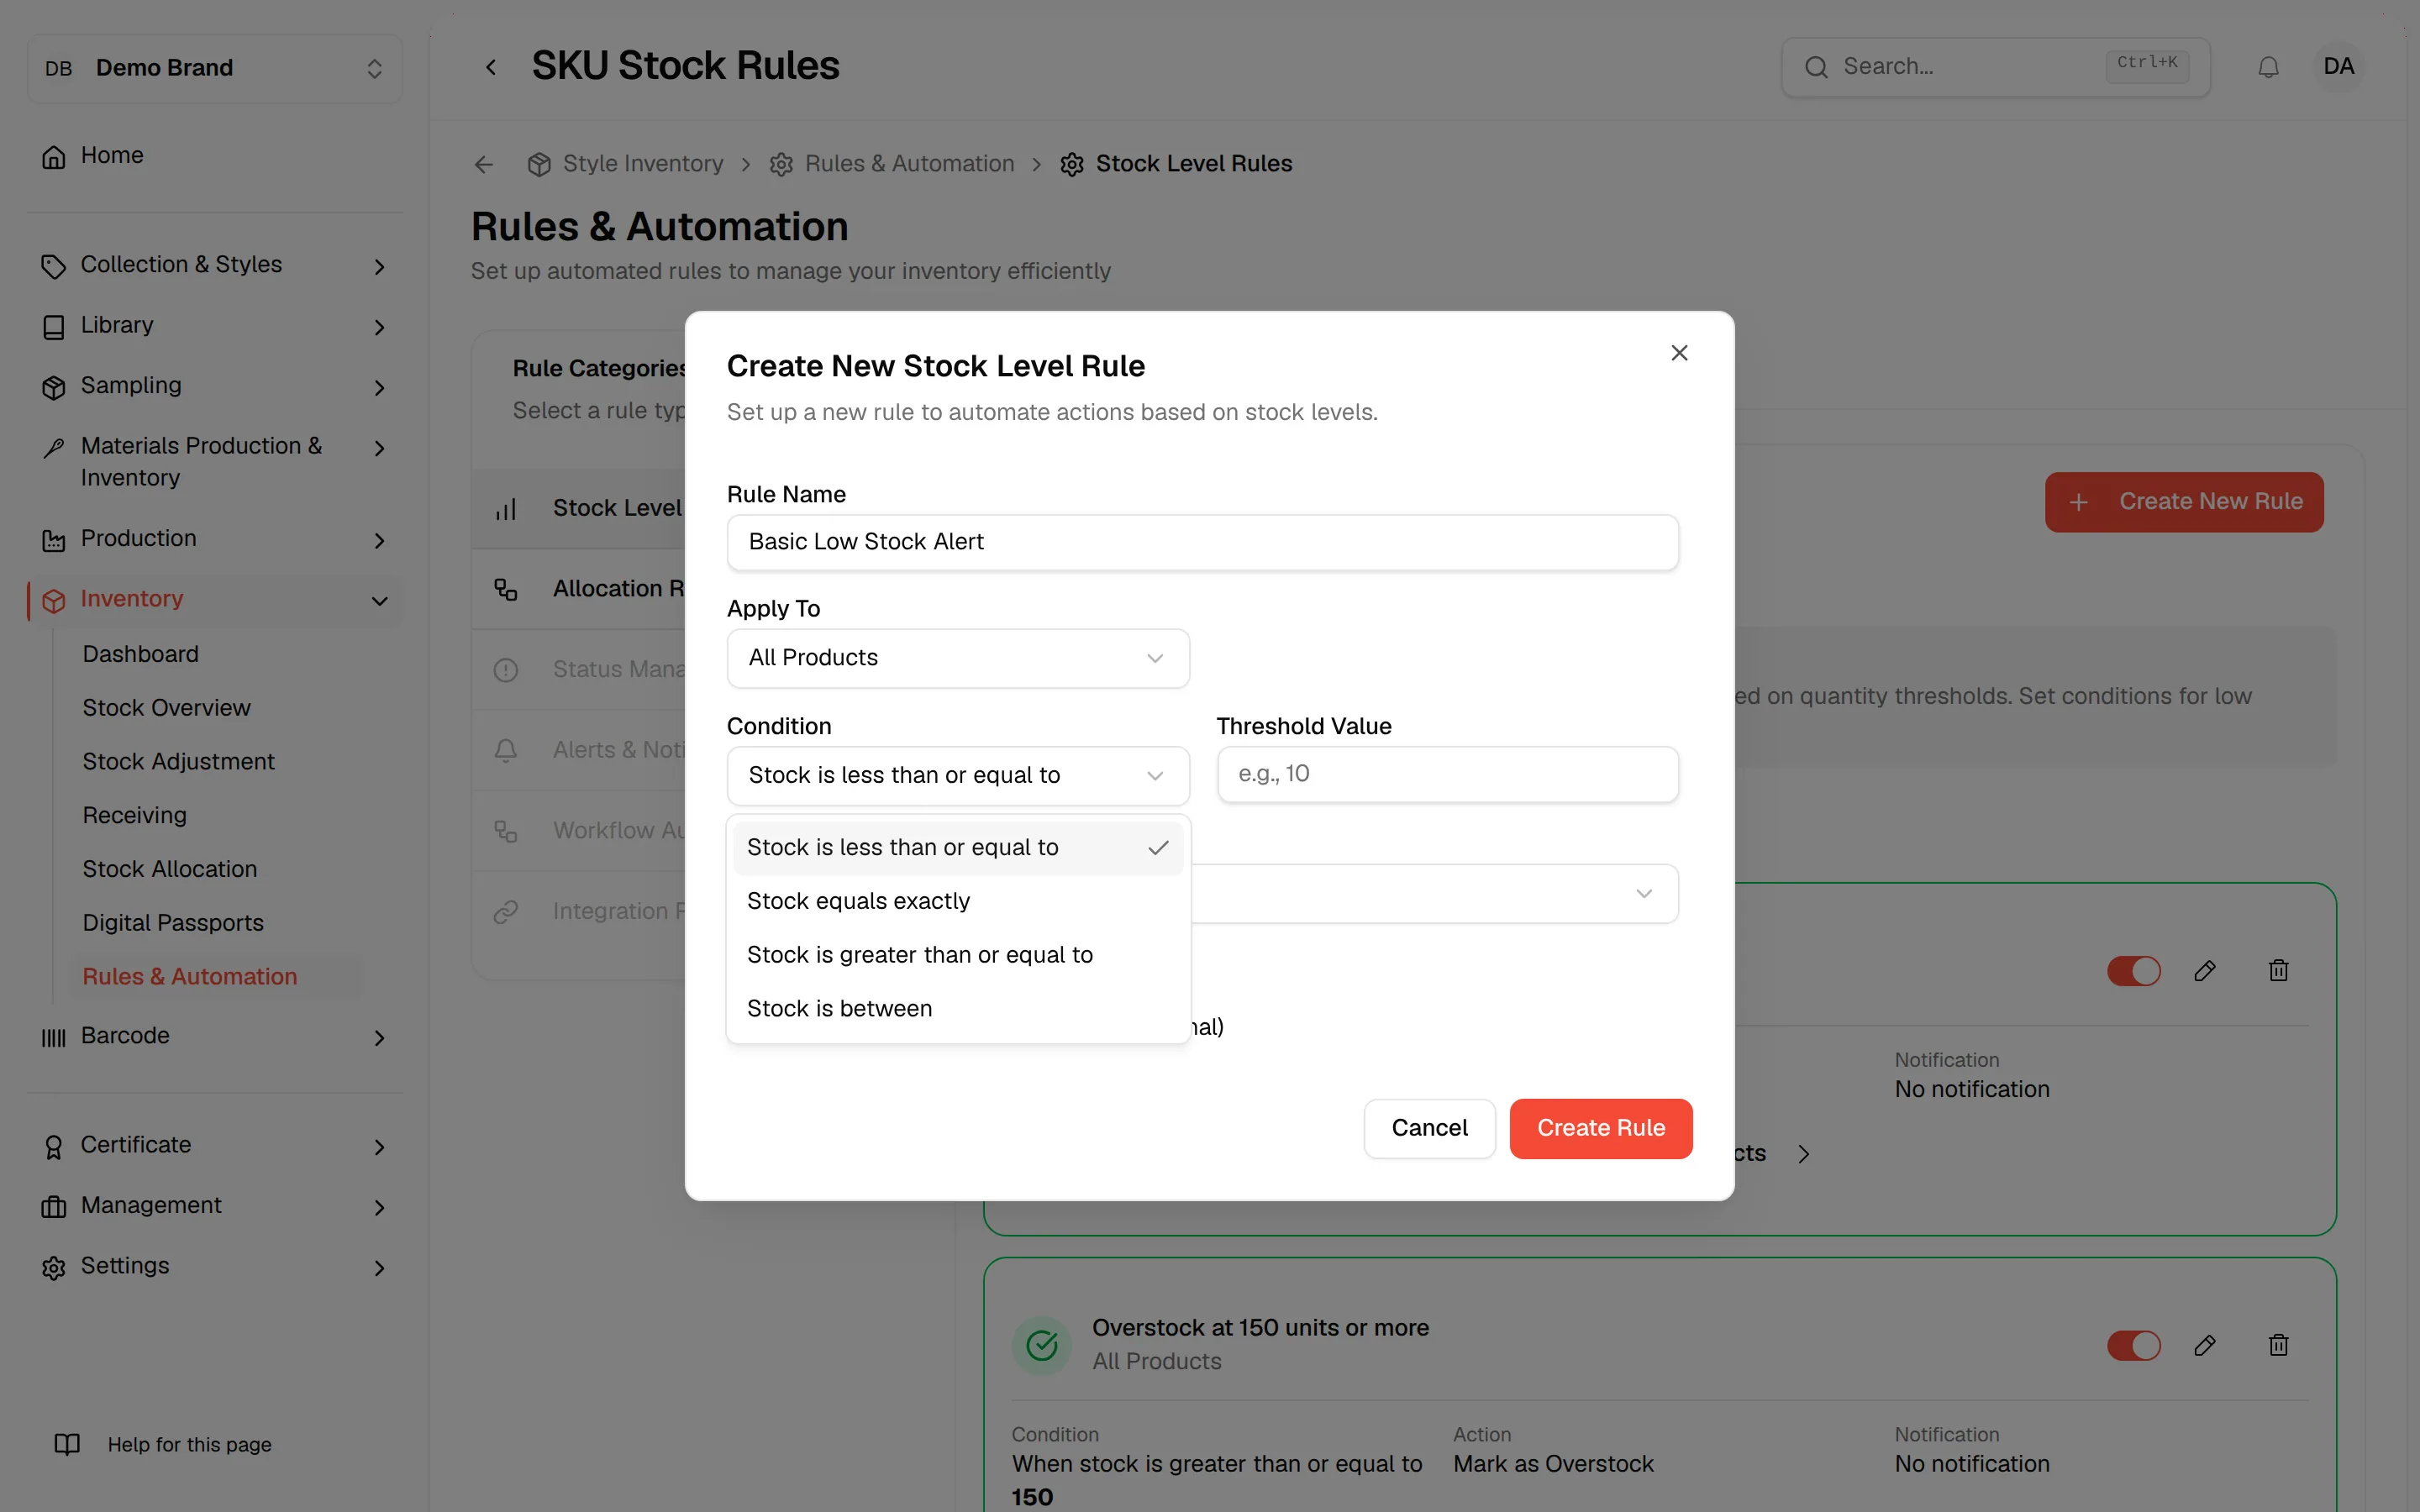
Set the condition
In Condition, select Stock is less than or equal to, Stock equals exactly, Stock is greater than or equal to or Stock is between.
Enter the value
Type the Threshold Value. For Stock is between, type a Minimum Value and a Maximum Value instead. The values must be positive numbers, and the maximum must be greater than the minimum.
Choose the action
In Action, select Mark as Low Stock, Mark as Out of Stock, Mark as In Stock or Mark as Overstock.
Turn on notifications (optional)
Check Send notification when rule is triggered.
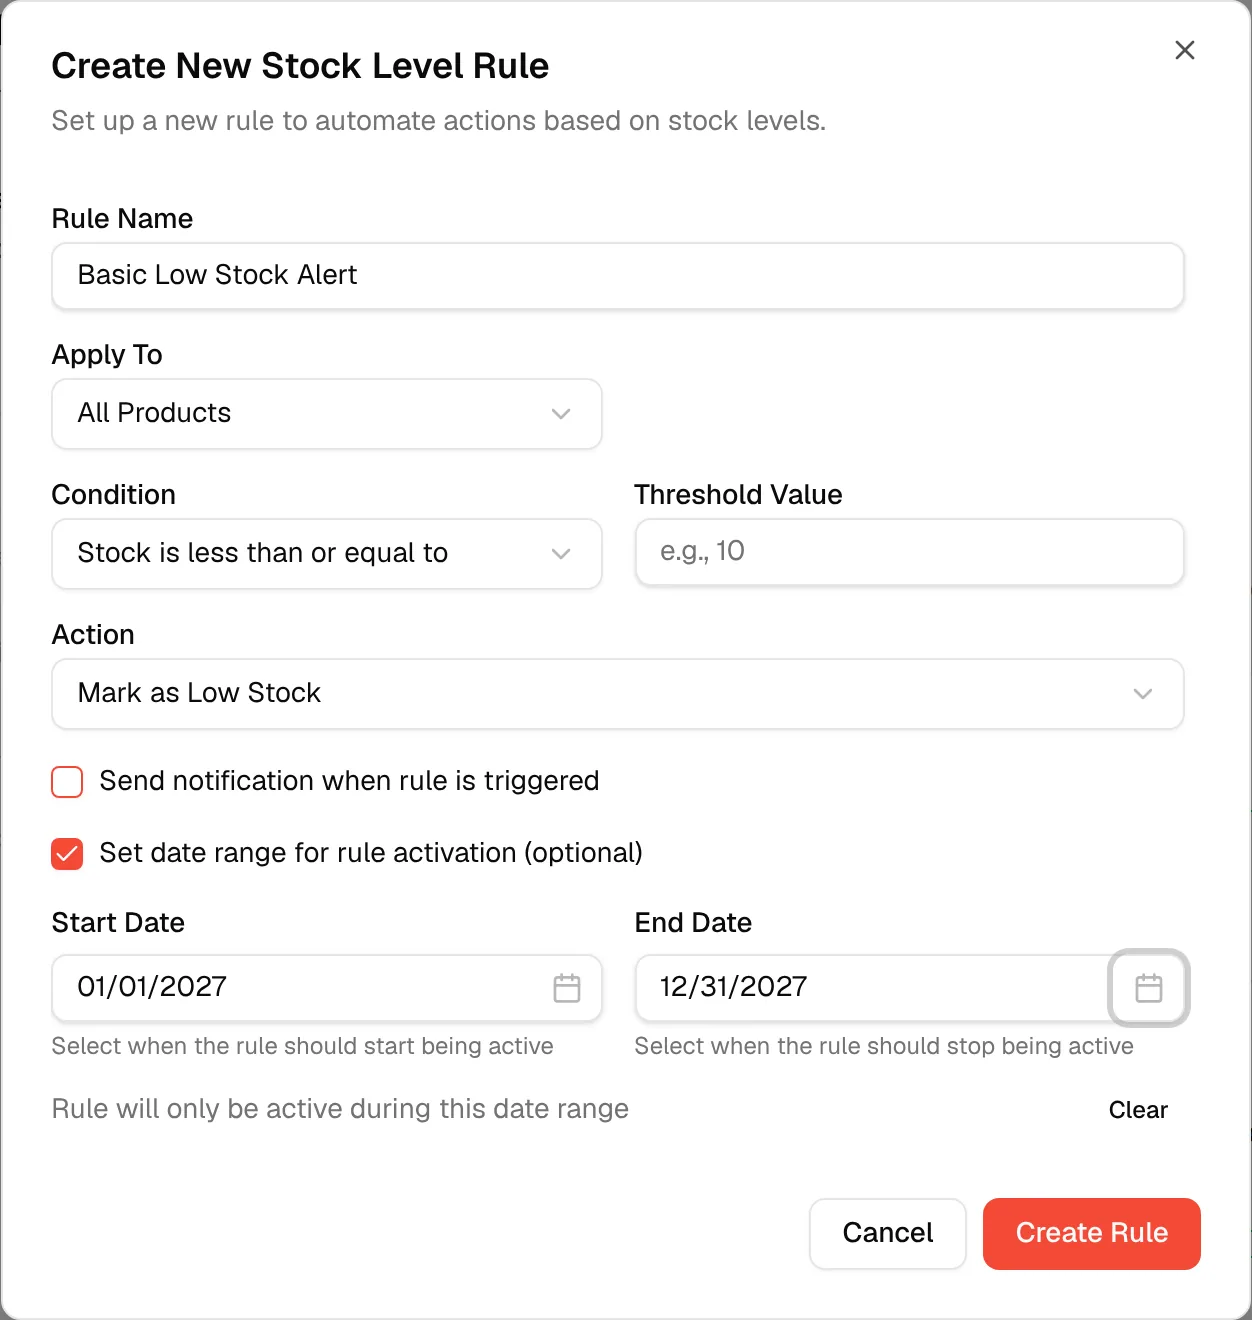
Limit the rule to a date range (optional)
Check Set date range for rule activation (optional), then choose a Start Date and an End Date. The rule is only active between those dates. Click Clear to remove a date.
Click "Create Rule"
Click Create Rule. Click Cancel to close without saving.
The rule appears under Your Stock Level Rules.
Manage your rules
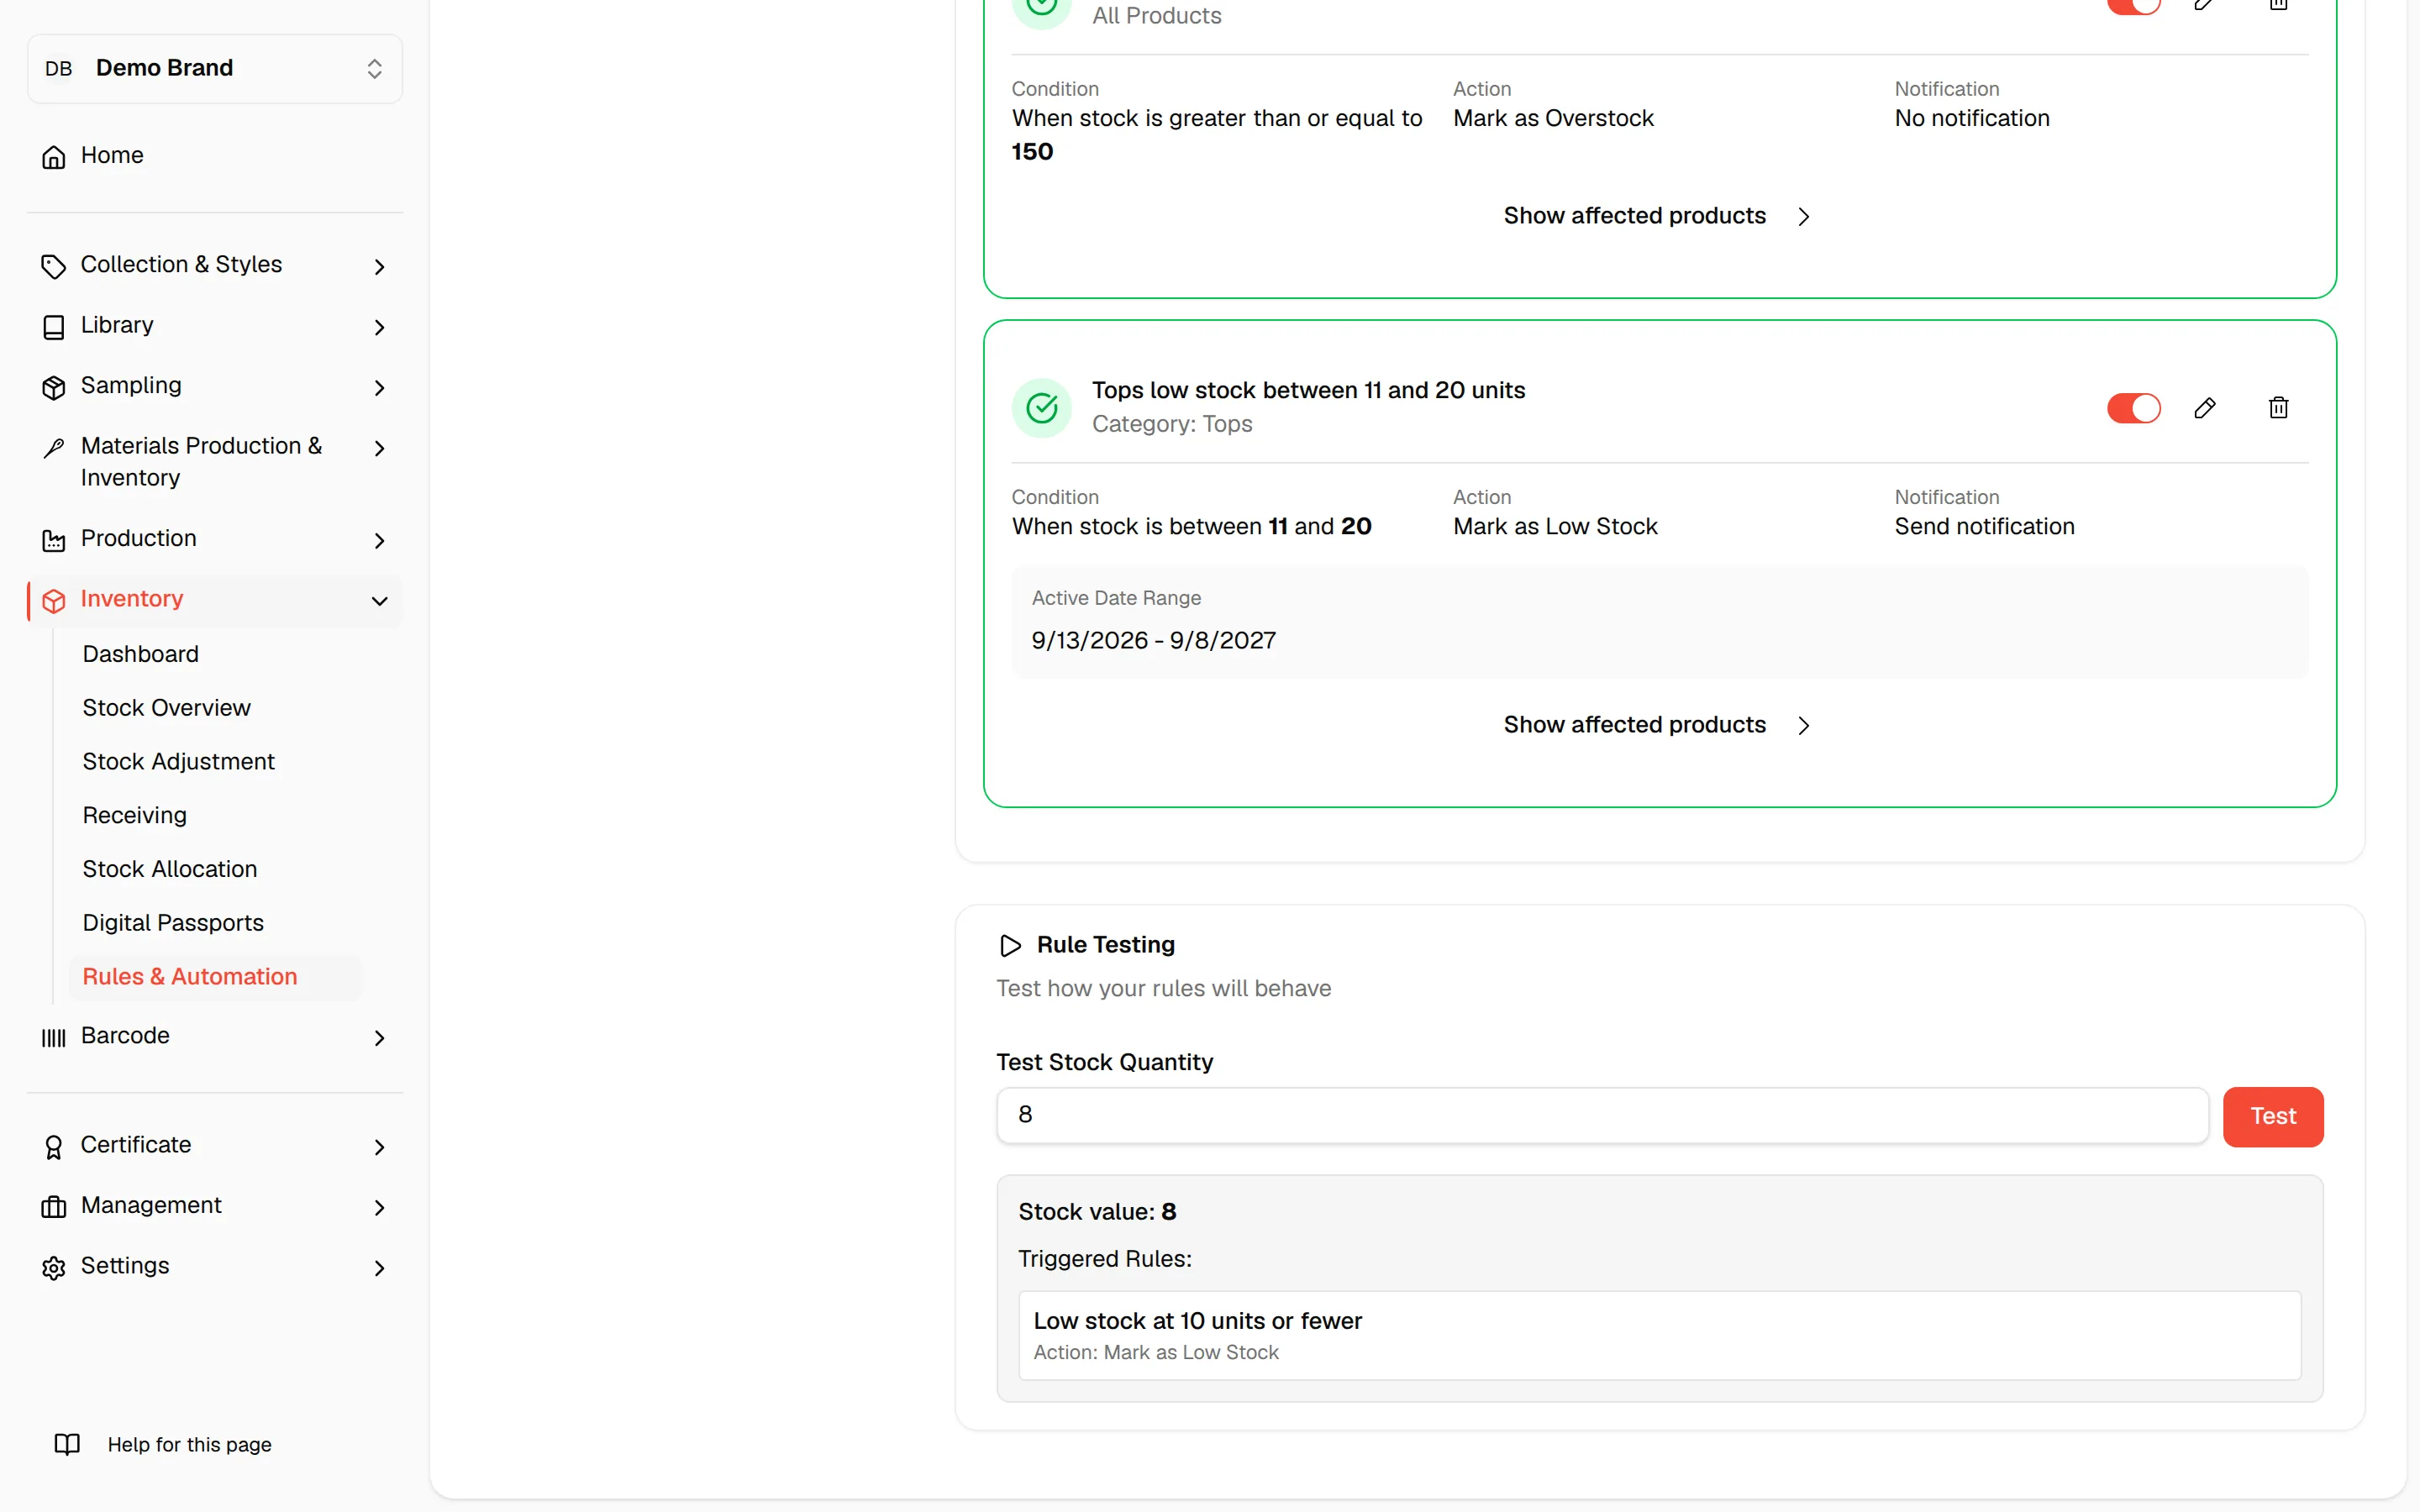
Each rule card shows its name, what it applies to, its Condition, Action, Notification (Send notification or No notification) and, if set, its Active Date Range. A green border and tick mean the rule is on and currently valid.
- Use the switch on the card to turn the rule on or off.
- Click the pencil icon to open Edit Rule (Update the details of your existing rule.), then click Save Changes.
- Click the bin icon to delete the rule. Delete Rule asks you to confirm, and the rule is removed when you click Delete.
- Click Show affected products to see each product's Current Stock and Status, with Rule Triggered or Not Triggered.
Test your rules
Rule Testing (Test how your rules will behave) lets you check your rules before relying on them.
Enter a quantity
In Test Stock Quantity, type a stock quantity, for example 8.
Click "Test"
Click Test. The result lists each rule that would be triggered and its action, or shows No rules triggered.
Note
The test only compares the quantity you type with your rules. It does not change any stock.