
Step 1 of 13 in From idea to a production-ready tech pack
Create a new collection
This guide explains how to create collections in Vestis Labs and leverage AI to automatically generate collections based on your product assortment and business objectives.
Under review. This page is published while we check it against the live app, so some details may have changed.
Screenshots may be out of date.
Collection - admin setup
This guide explains how to create collections in Vestis Labs and leverage AI to automatically generate collections based on your product assortment and business objectives.
Collection & StylesCollectionNew
Permission: CREATE_COLLECTION
Introduction & best practice
To organize your product catalogue effectively in Vestis Labs, you first need to set up your collections. We recommend beginning by creating collections either manually or using AI assistance. Collections allow you to group products by season, category, theme, or any criteria that aligns with your merchandising strategy. Using AI to create collections can significantly speed up this process by analyzing your products and suggesting intelligent groupings. This allows you to structure your assortment efficiently, prepare your seasonal launches, and ensure all products are properly categorized before sharing with buyers or suppliers.
Step by step guide
Create new collection
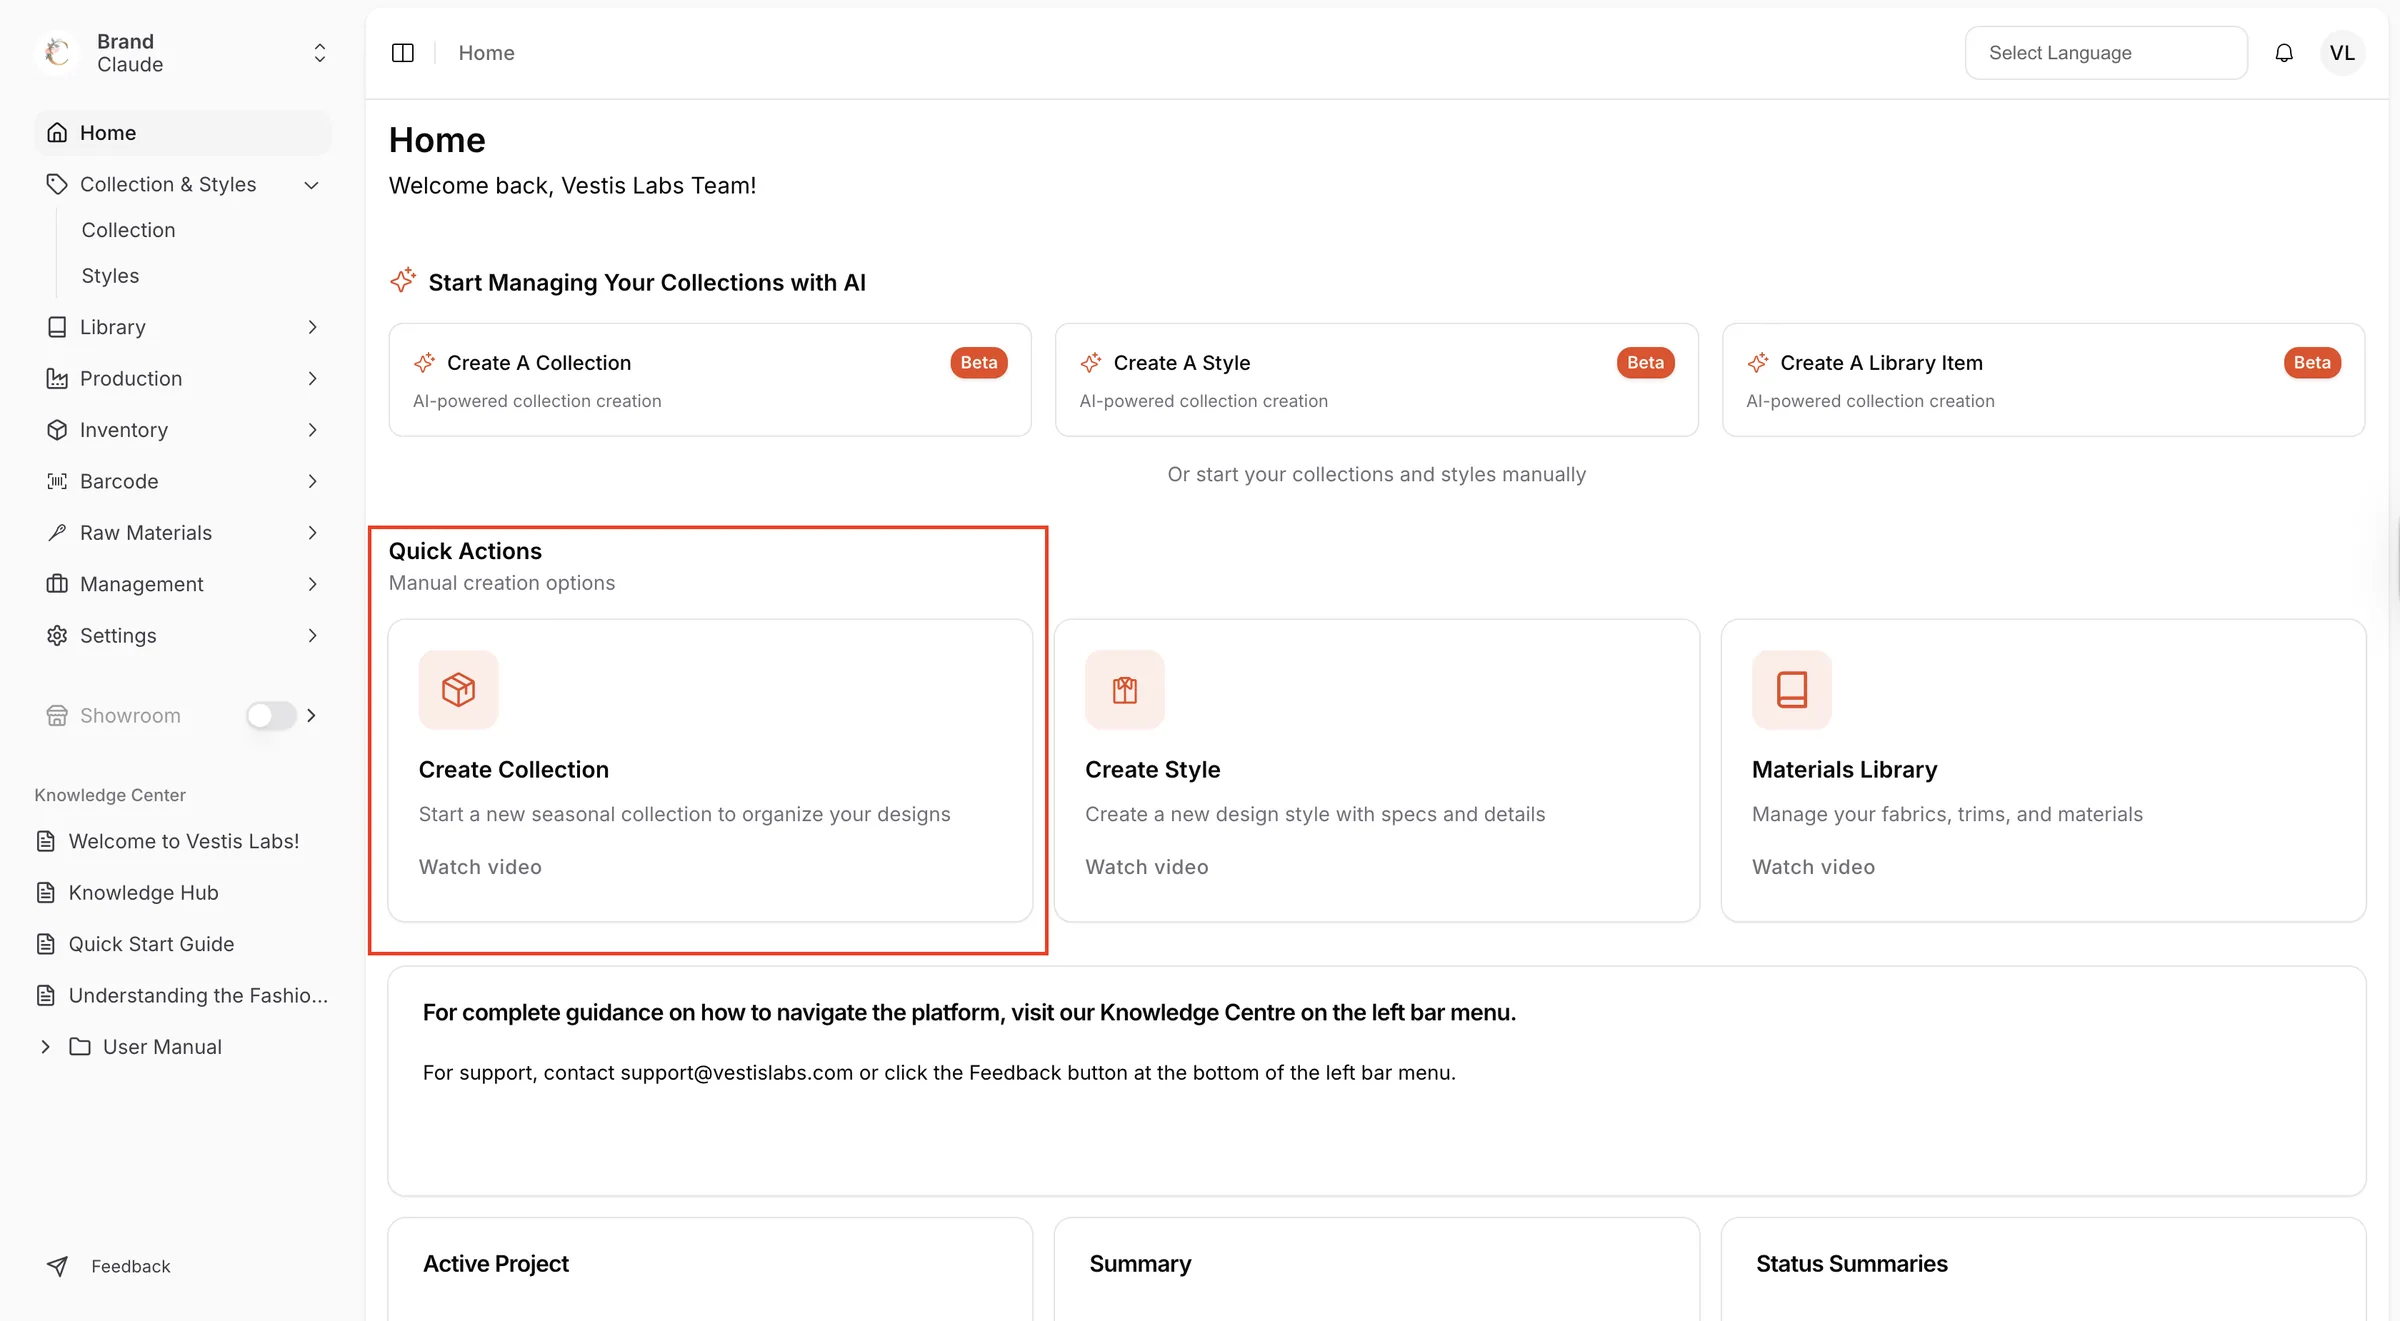
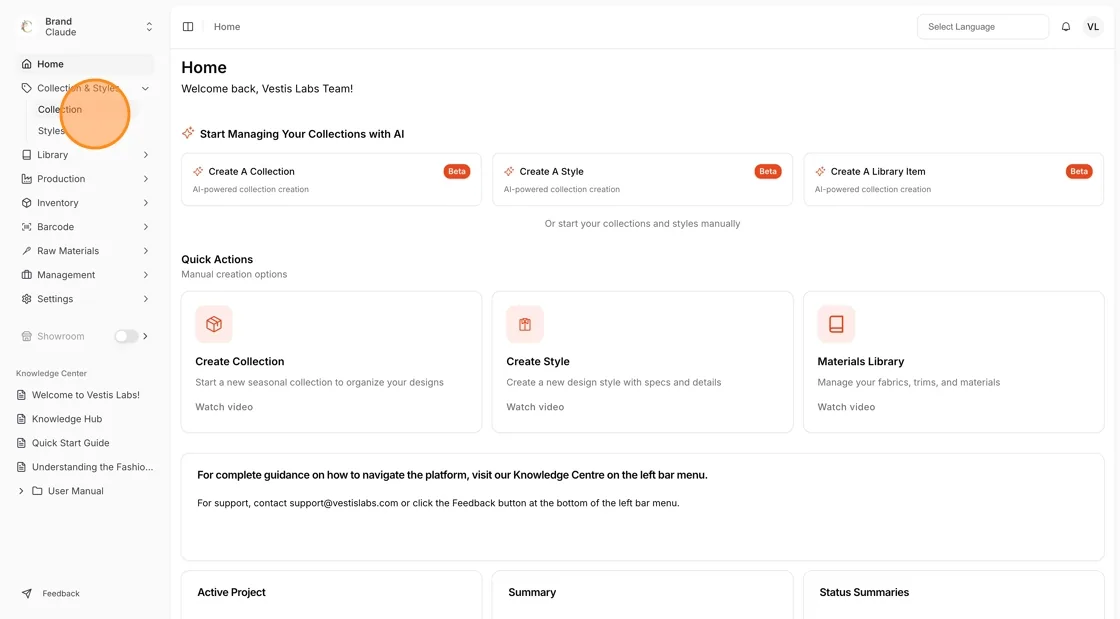
To access the Collection Page use the Quick Action option in the Home Page to Create New Collection or navigate to the Collection & Style > Collection from the left bar menu to view the full collection or create a new collection.
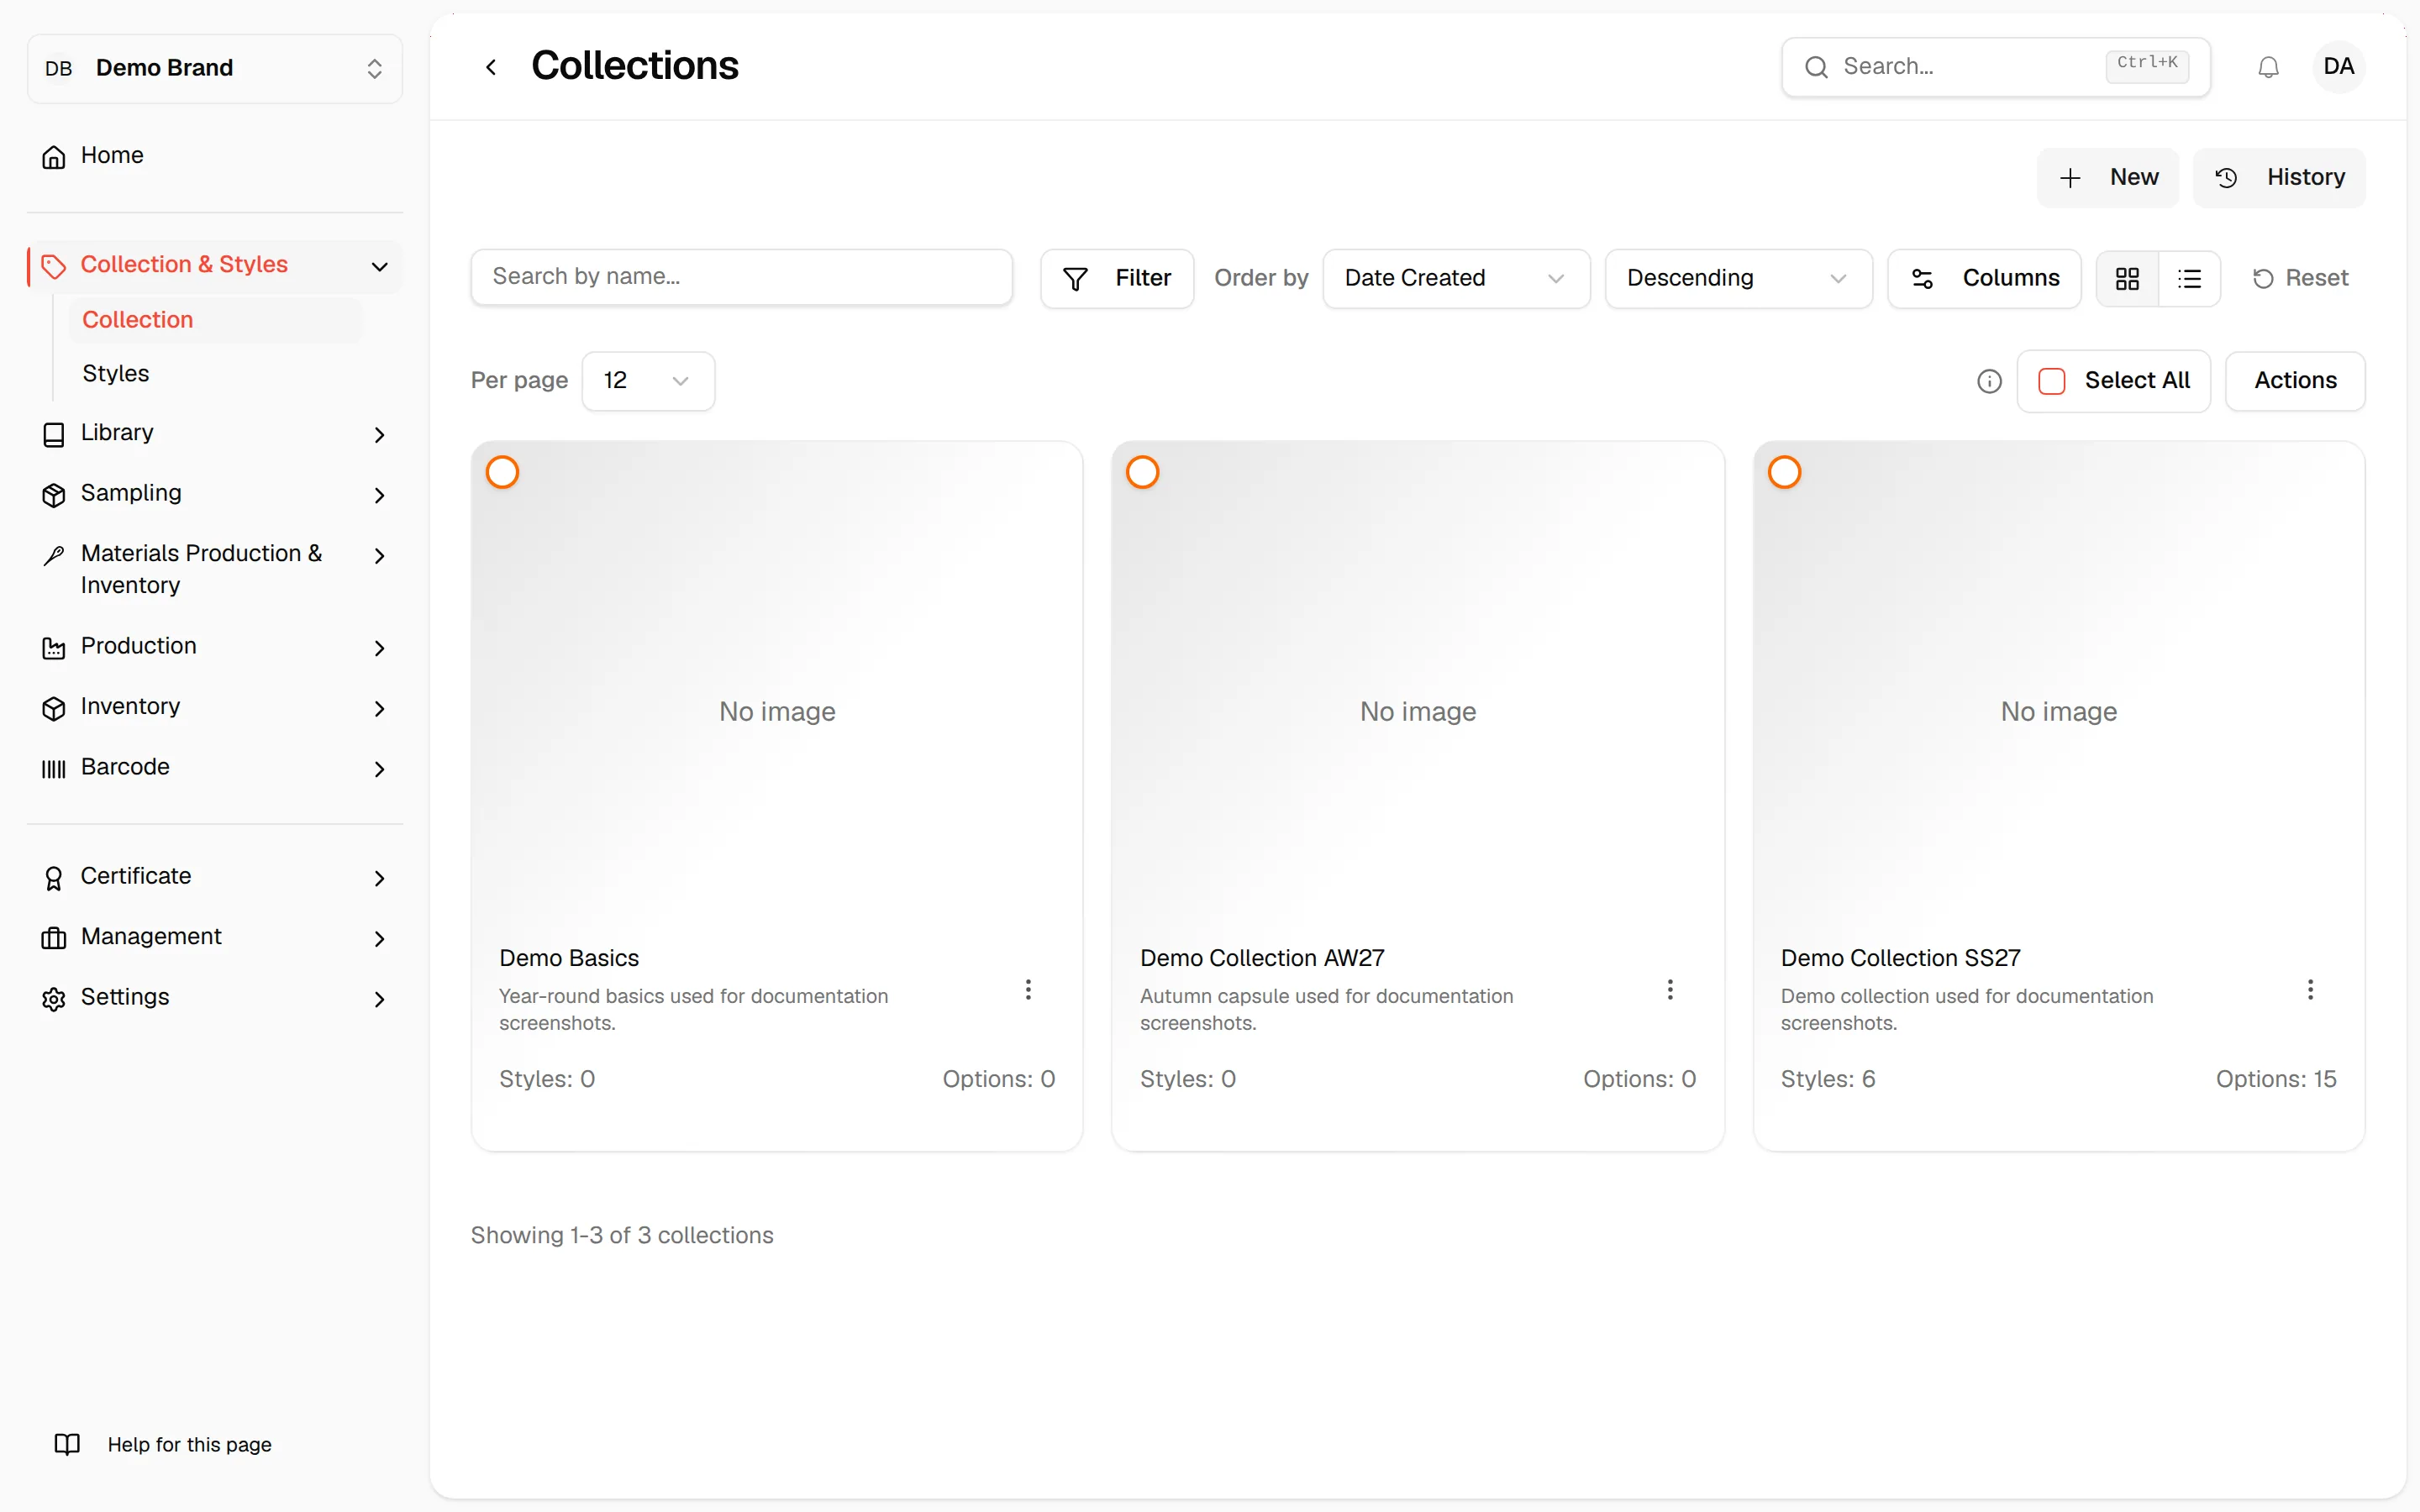
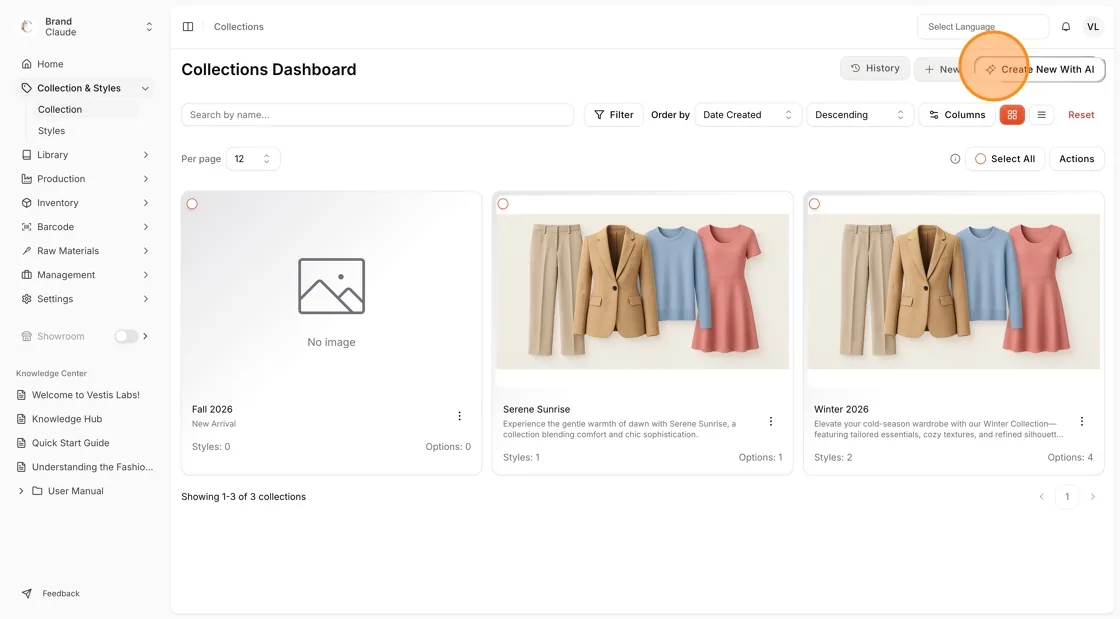
Select +New in the center of the page or at the upper-right corner to create a new collection.

In the Create Collection page, you need to fill out all the required fields. Required fields are marked with red asterisk symbol (*).
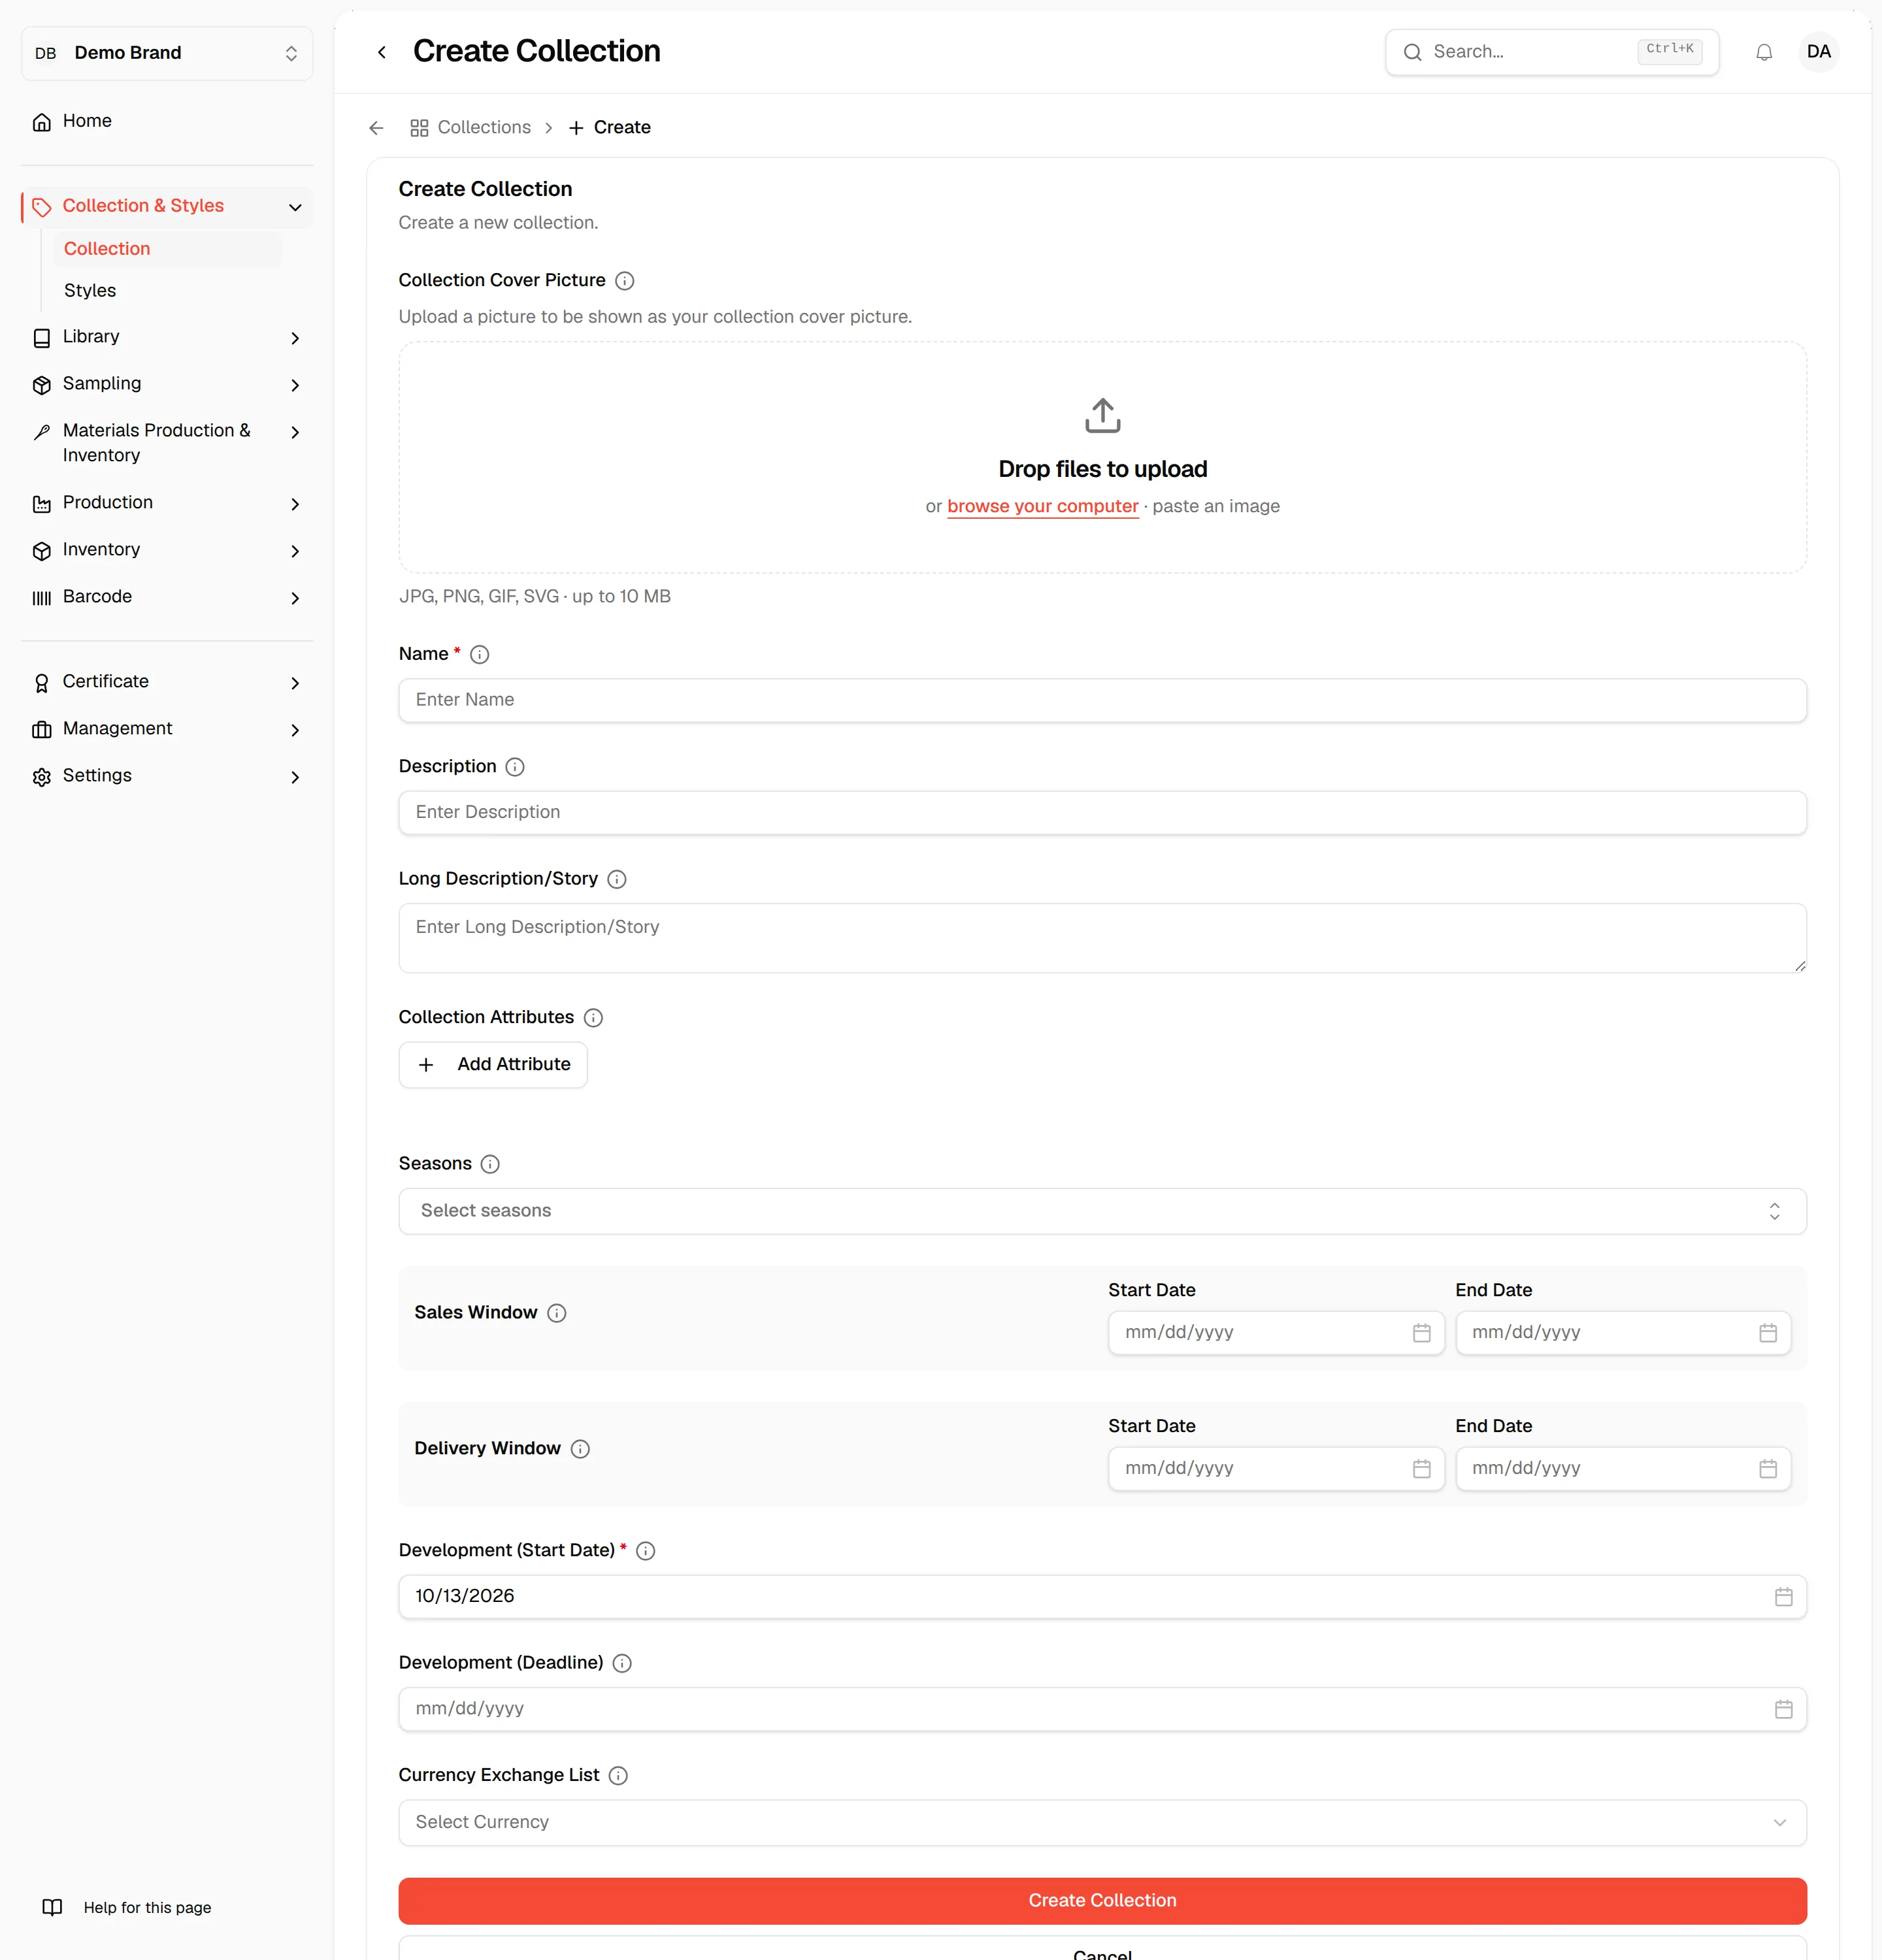
Collection Cover Picture: Users can upload a picture to represent the collection.
Name: Enter the collection name (required field).
Description: Enter the description to represent the collection.
Long Description/Story fields: Enter the Collection Story fields to represent the collection.
Attributes: Users can add or create attributes to the collection.
Currency Exchange List: Select the currency list from the Created Currency Exchange Page. The currency list on the collection will apply automatically to the Costs section of all the styles within this collection. Users don’t have to choose a currency list for each style.
Sales Window: to define the period when a sale or promotion is active. It allows users to select a date.
Delivery Window: This specifies the timeframe during which a shipment is expected to arrive and includes a start date/time and an end date/time. It allows users to select a date.
Development (Start Date): The date is filled in automatically when the collection is created. It also allows users to select the starting date manually (required field).
Development (Deadline Date): allows users to select a deadline date of the created collection.
Image Spesification:
- The files that are allowed are JPG, PNG, GIF and SVG.
- The maximum size is 10 MB.
To fill out the Start Date and Deadline Date, you can pick the date using the dropdown date option. The calendar appears on the page, and users can mark up on the calendar.
Set a "Sale Start Date" and "Sale End Date" to display real-time transactions, helping monitor activity and price changes for the active sale or promotion.
To fill out the date, you can pick the date using the dropdown date option. The calendar appears on the page, and users can mark up on the calendar.
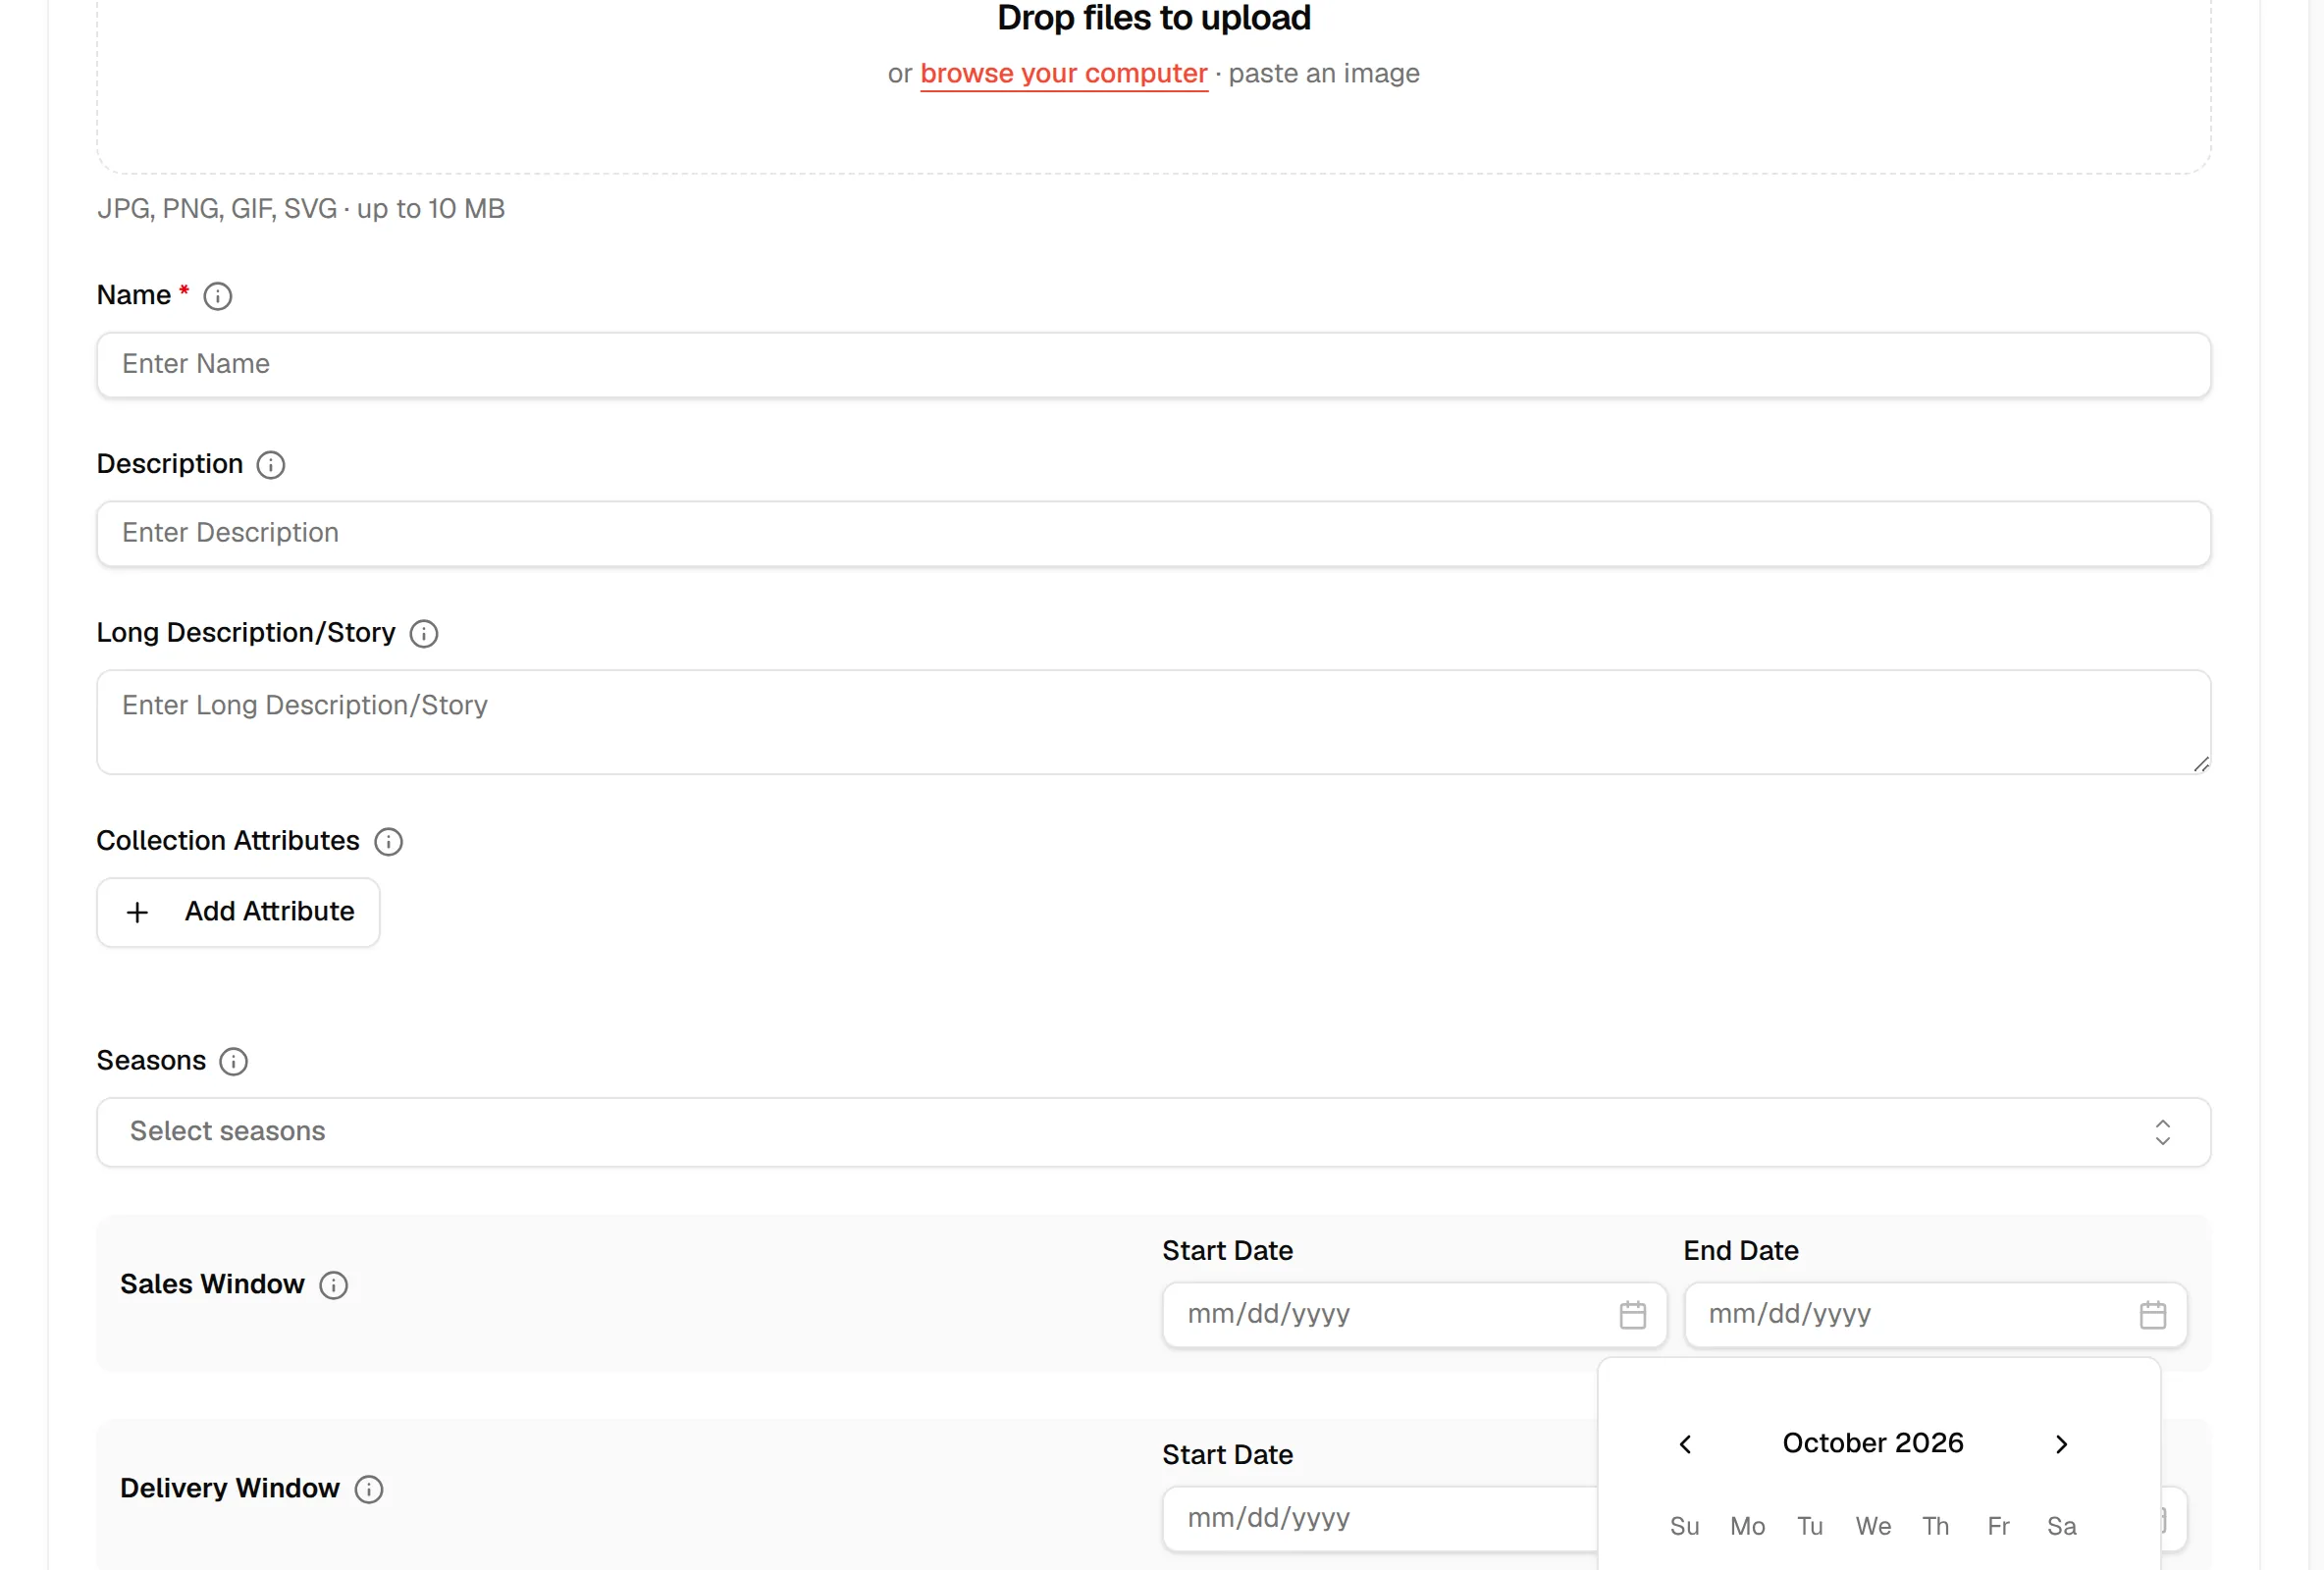
Set a "Delivery Start Date" and "Delivery End Date" to display real-time delivery arrival. It ensures that shipments are delivered on time, reduces inefficiencies in scheduling, and minimizes the risk of missed or late deliveries
To fill out the date, you can pick the date using the dropdown date option. The calendar appears on the page, and users can mark up on the calendar.
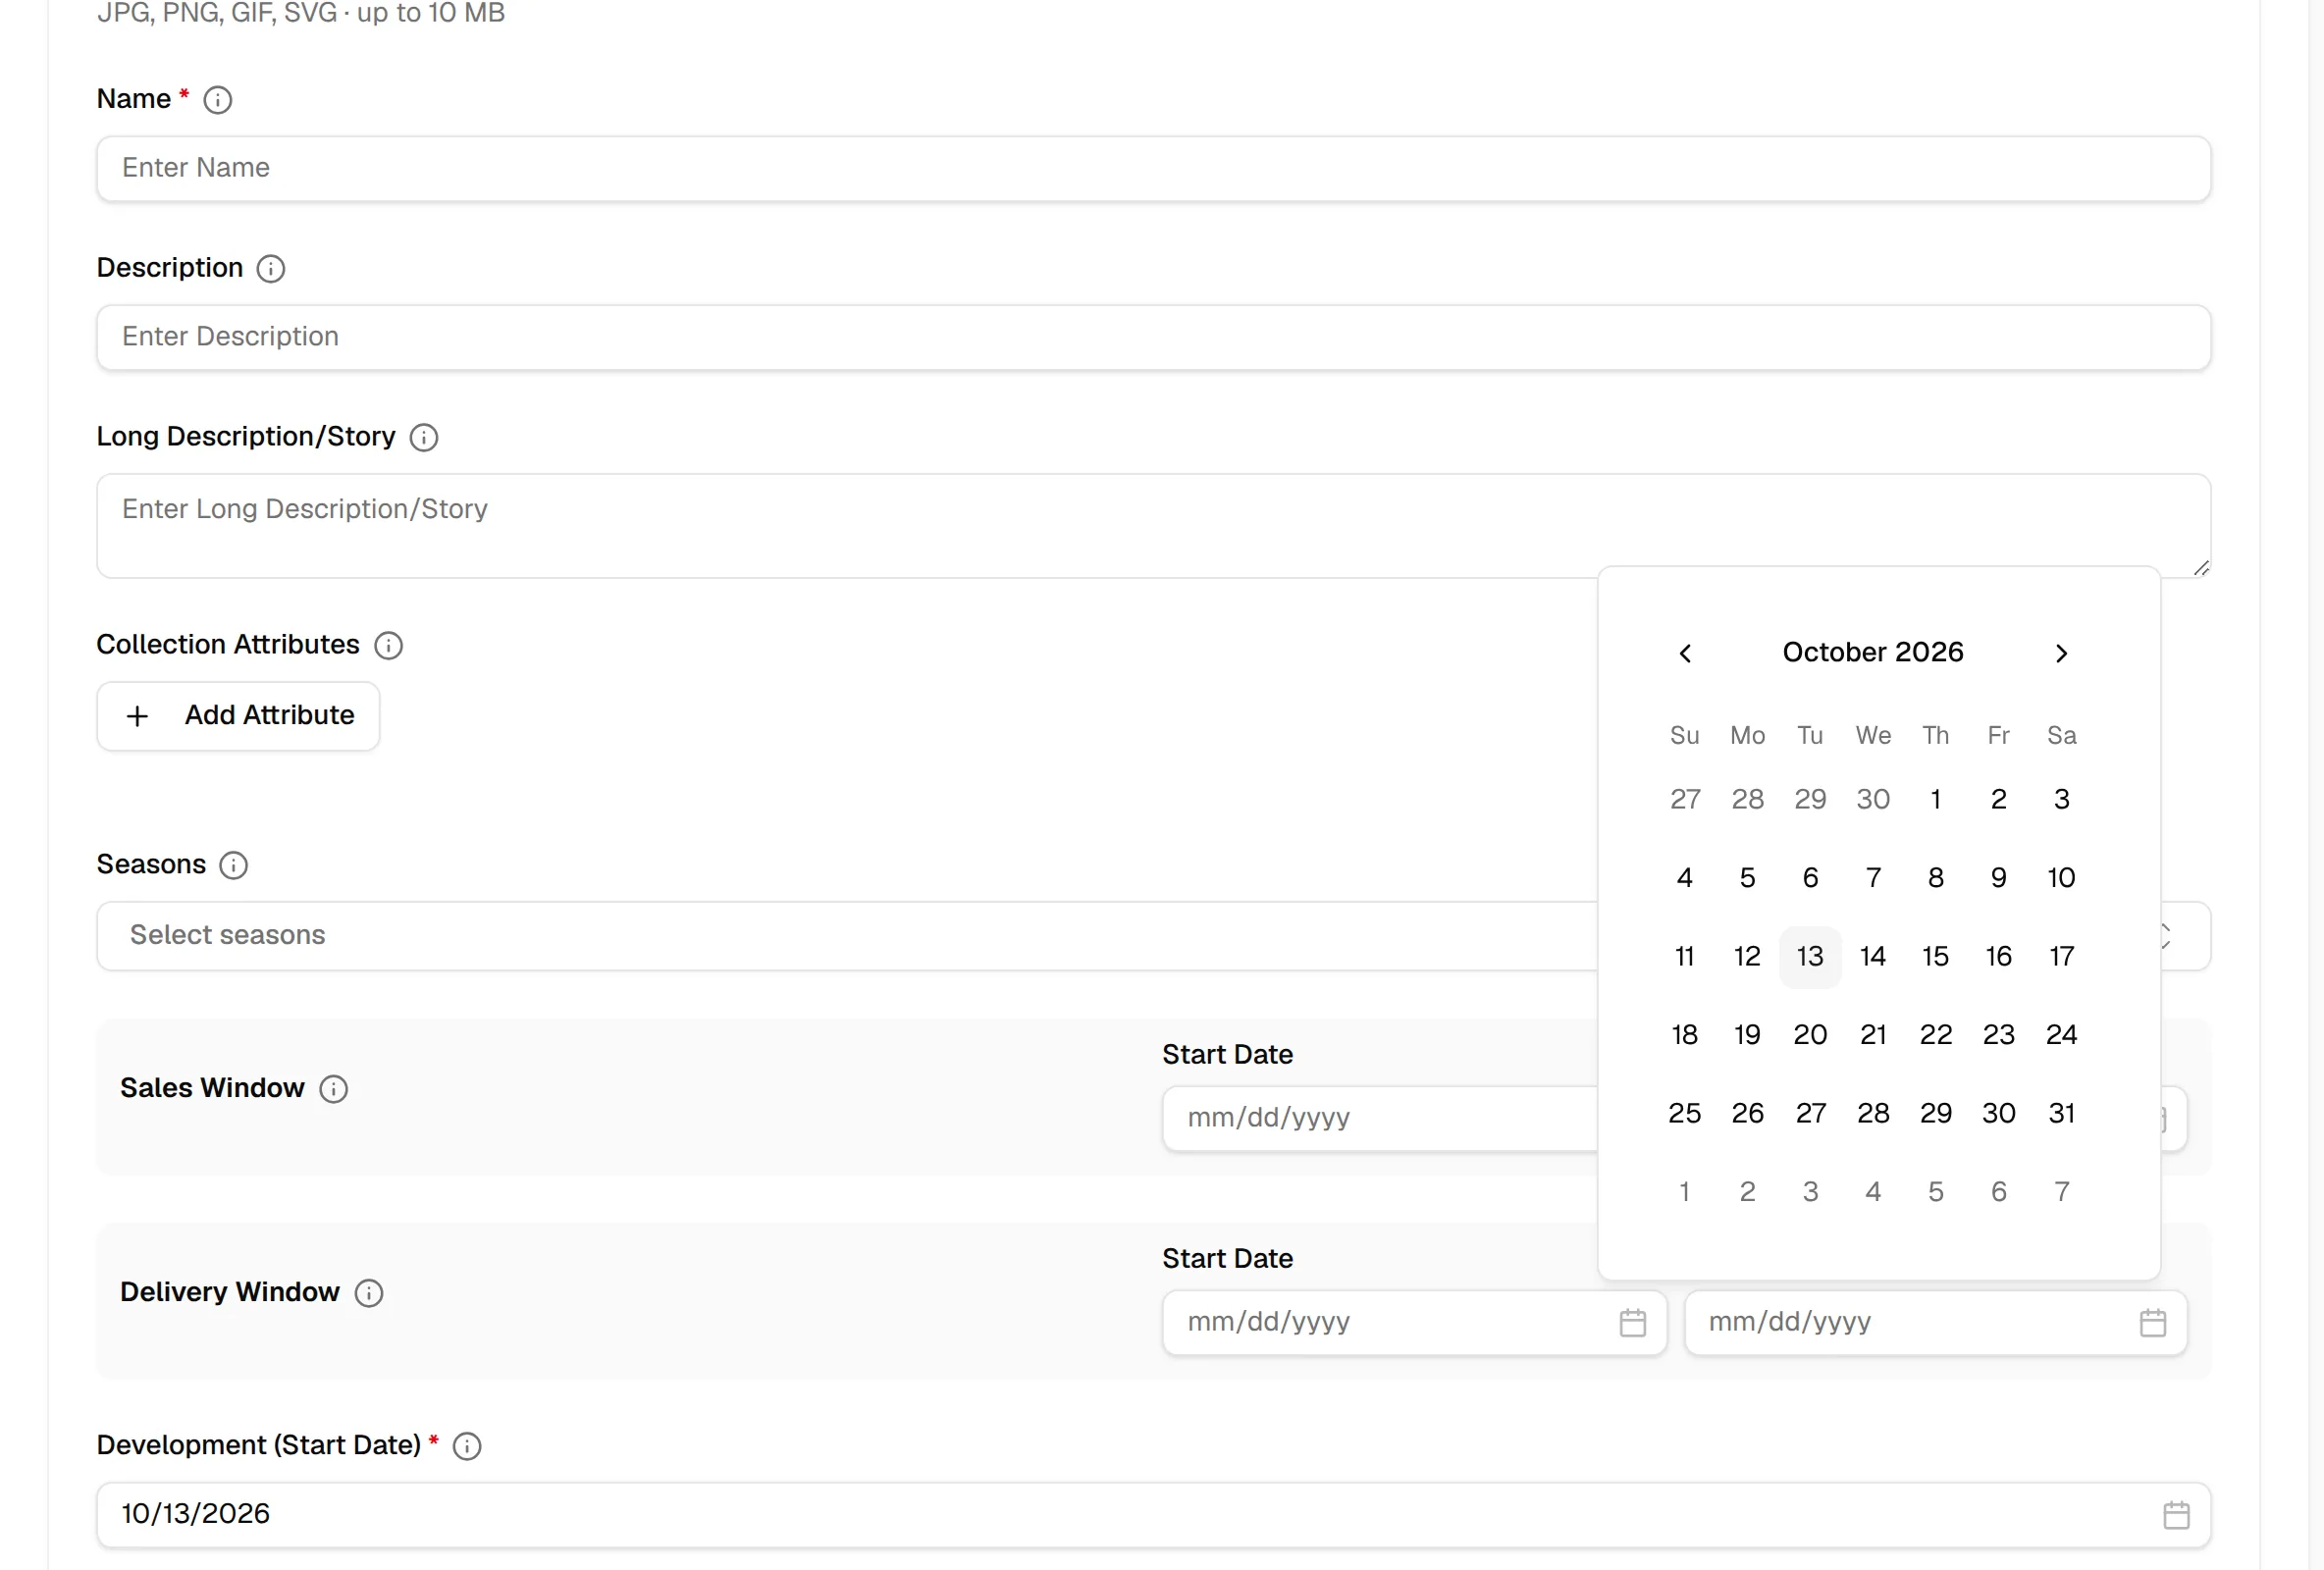
Select Create Collection in the lower part of the form. Select Cancel to leave without saving.
When the collection is successfully created, the page will directly go to the Main Collection Page.
Note
If you started from the Guided Tour on the Home page, creating the collection marks the Create your first collection step as completed and takes you back to Home so you can continue with the next step.
Create collection using AI generator
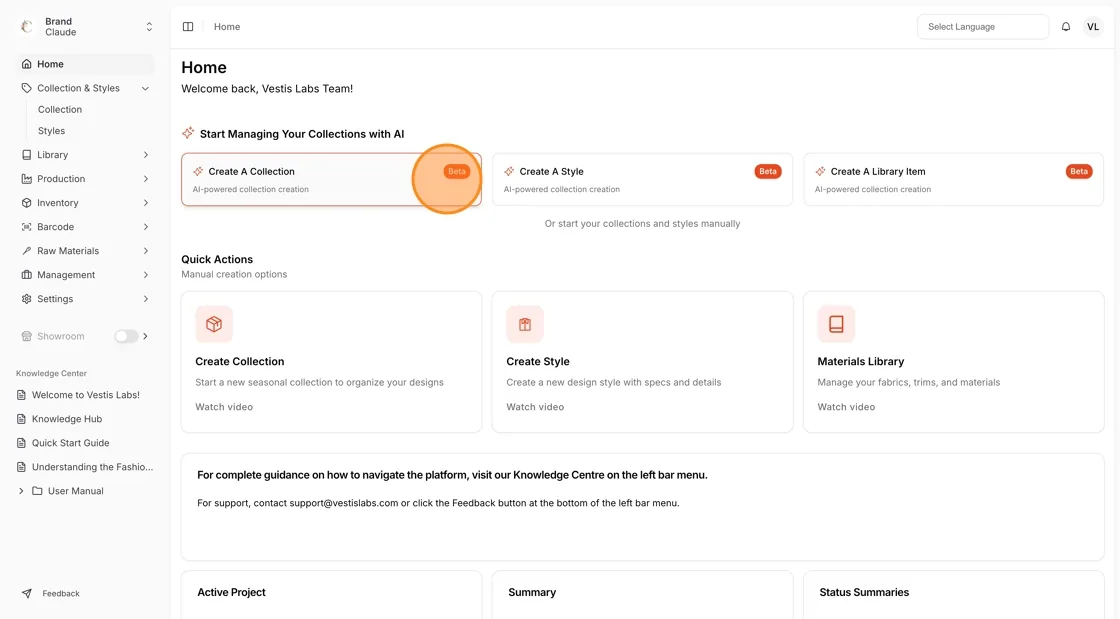
Navigate to the Home Page or
Navigate to Collection & Style > Collection
Select Create New With AI next to New at the top of the Collection Page. This button only appears for brands that have the AI collection feature turned on and for users who can create collections.
In the Create Collection With AI window, set up the collection basics
- Whats your collection name? – Enter the collection name, or check Leave it empty, let AI generate for you so AI proposes a name
- Upload an image that represents your collection (the Create button stays disabled until an image is added; JPG, PNG, GIF or SVG up to 10 MB)
- Do you want to add a description for your collection? – Check it to let AI write the description
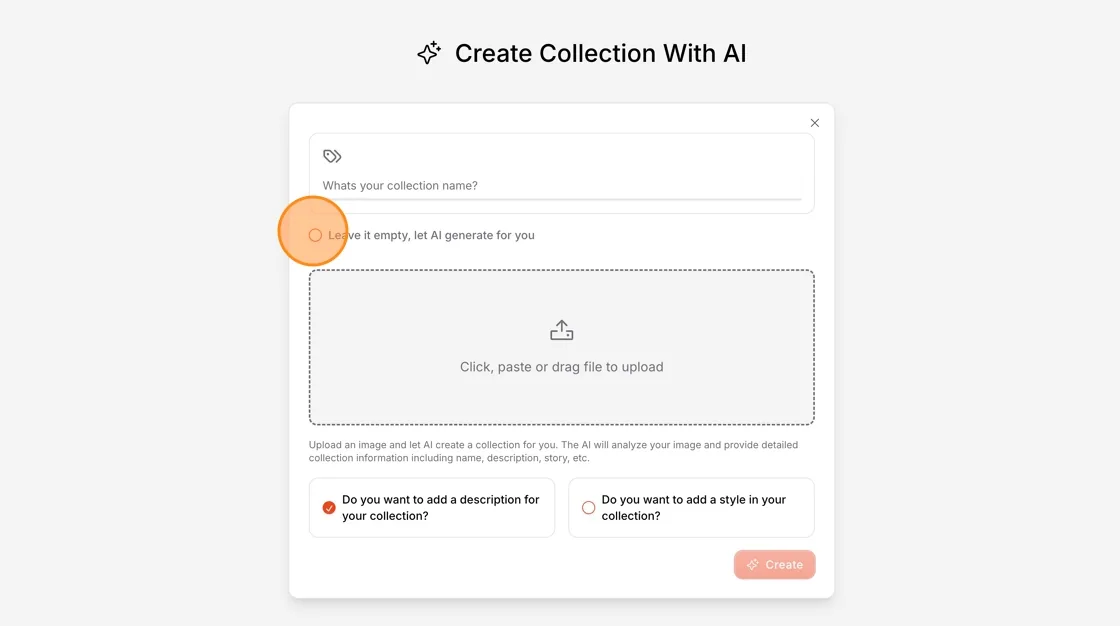
Choose your workflow
- Check Do you want to add a style in your collection? to continue with the AI style window right after the collection is created, or
- leave it unchecked to open the new collection on its edit page.
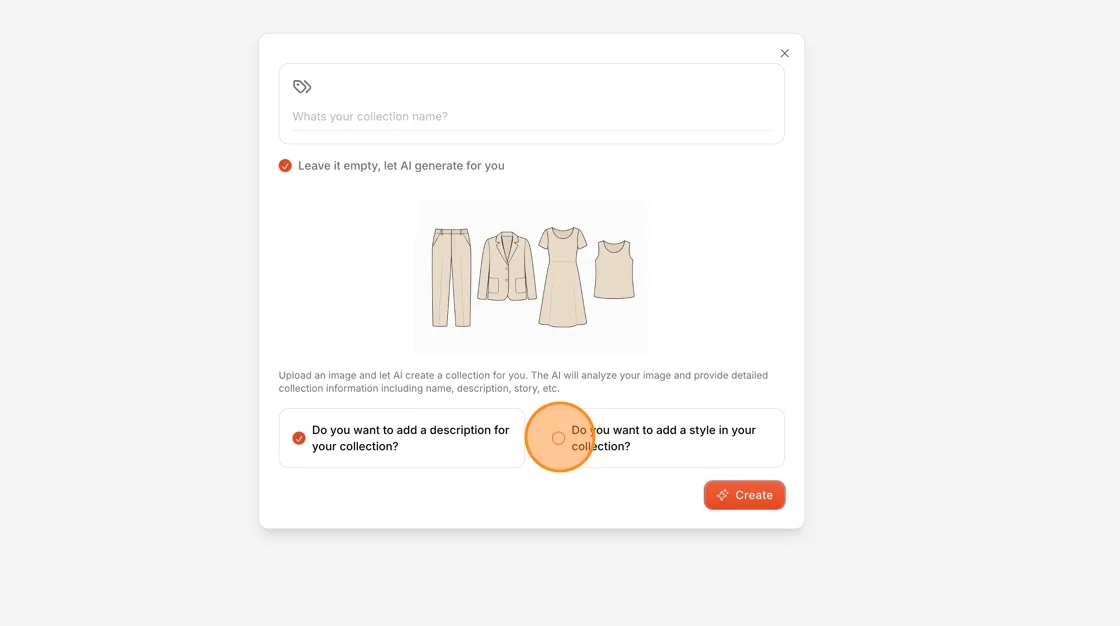
Click Create to proceed
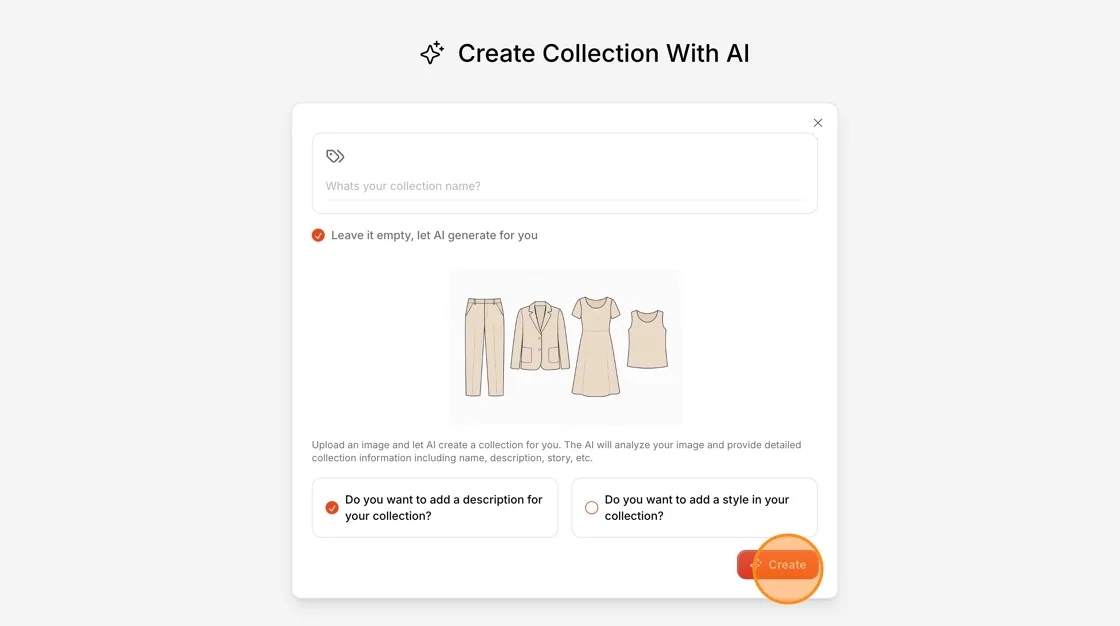
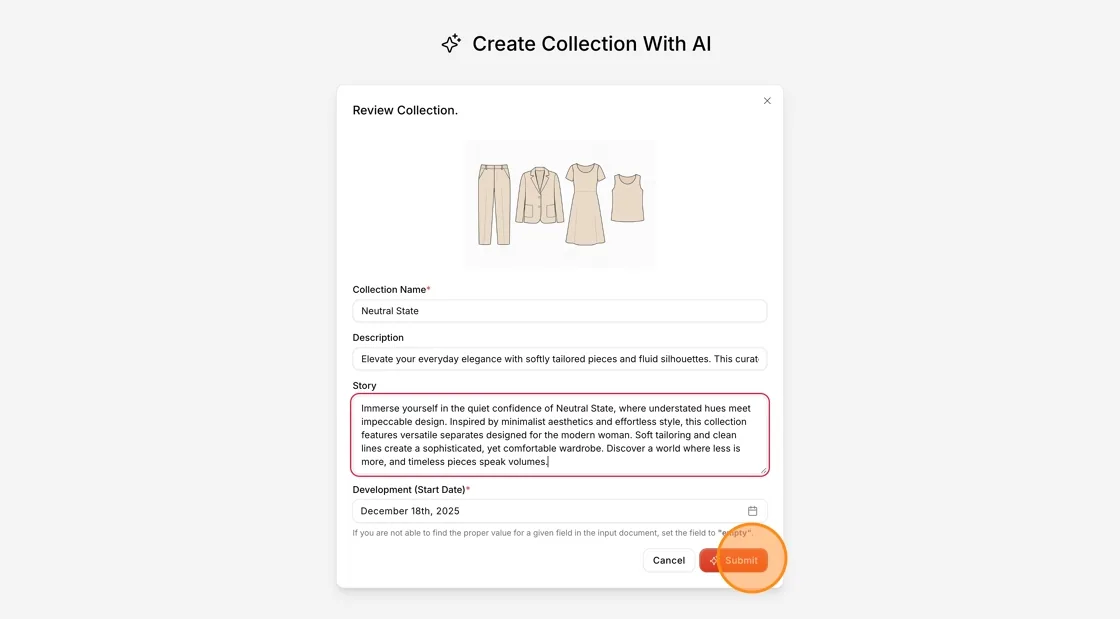
The window now shows Review Collection. AI has filled in the Collection Name, Description and Story
- Make any necessary adjustments to the name, description, story, or image
- Verify that the AI suggestions align with your vision
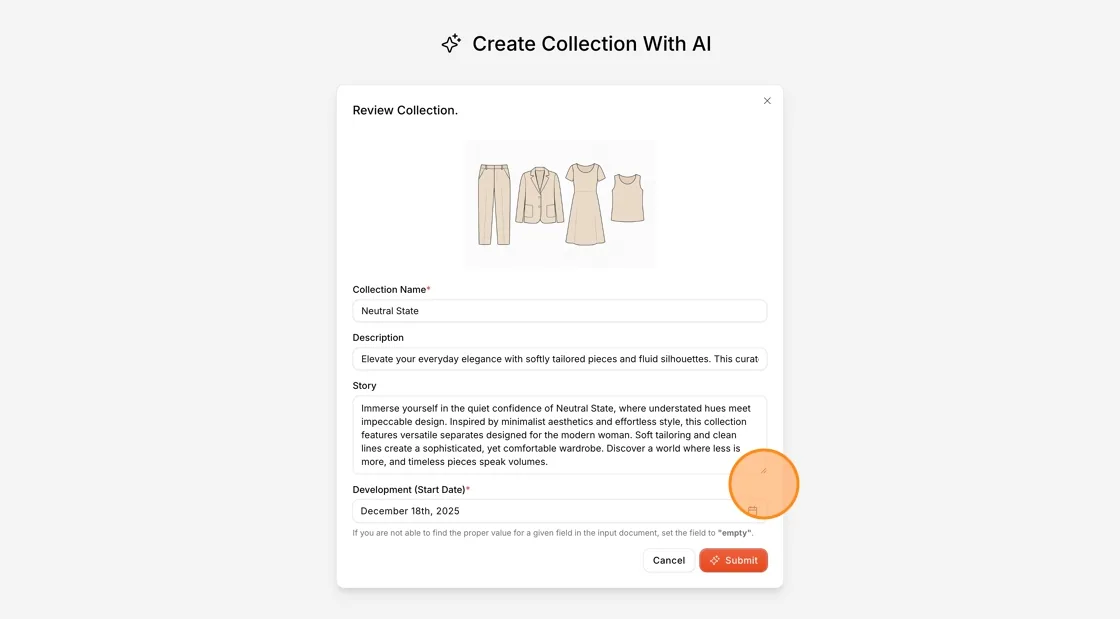
- Select the Development (Start Date) for your collection. This helps track your product development schedule
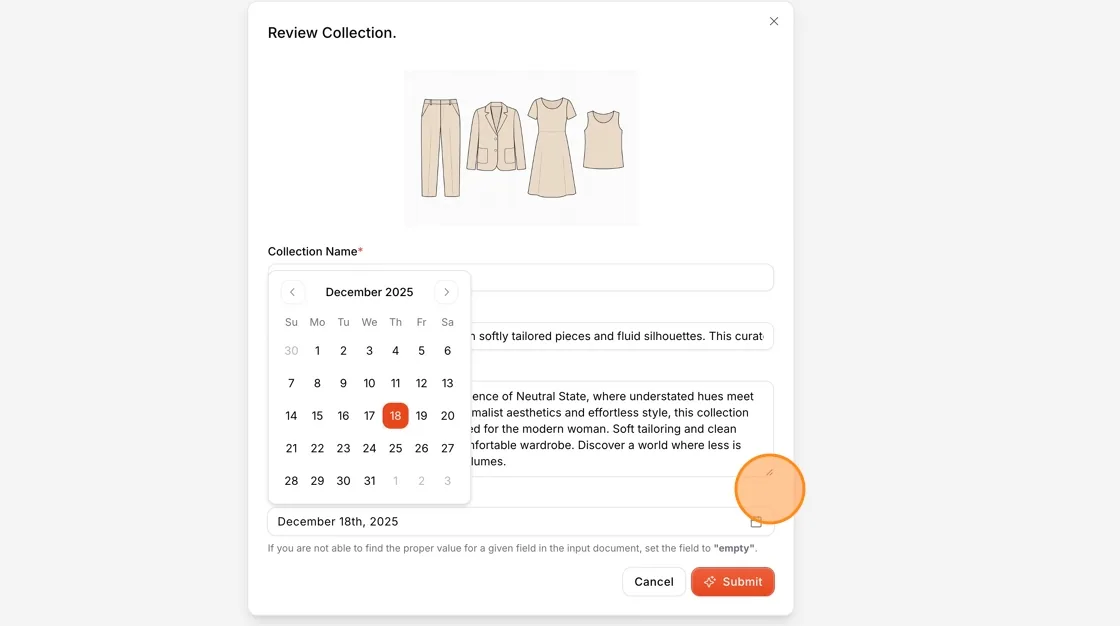
- Click Submit to create the collection
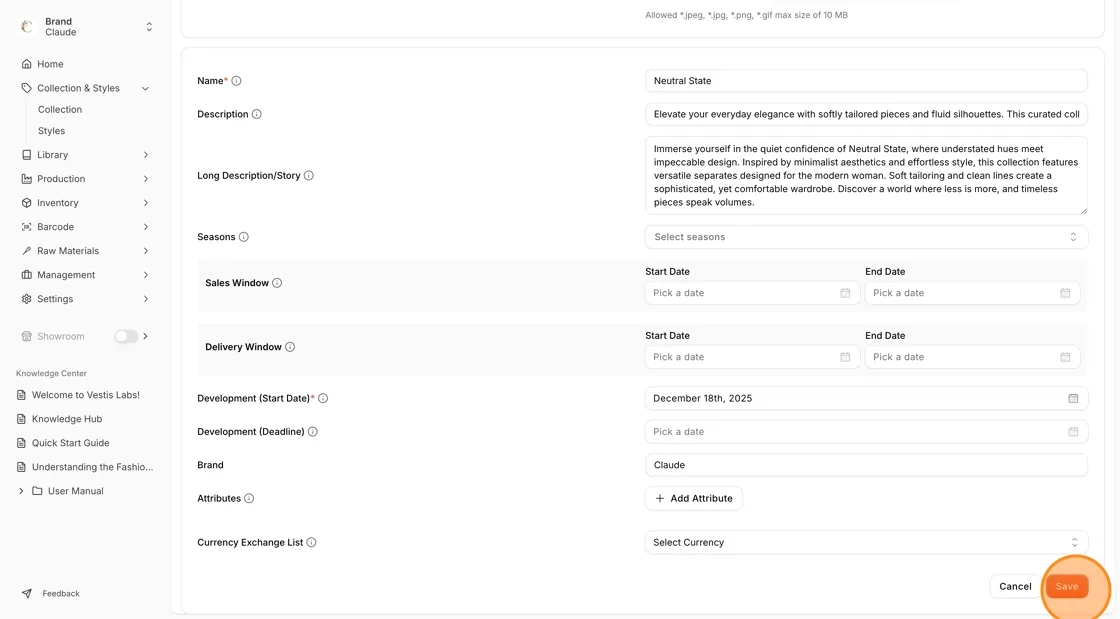
- Without the style option, Vestis opens the Edit Collection page of the new collection
- Review the remaining fields, such as seasons, sales and delivery windows and the currency list
- Click Update Collection to save your changes
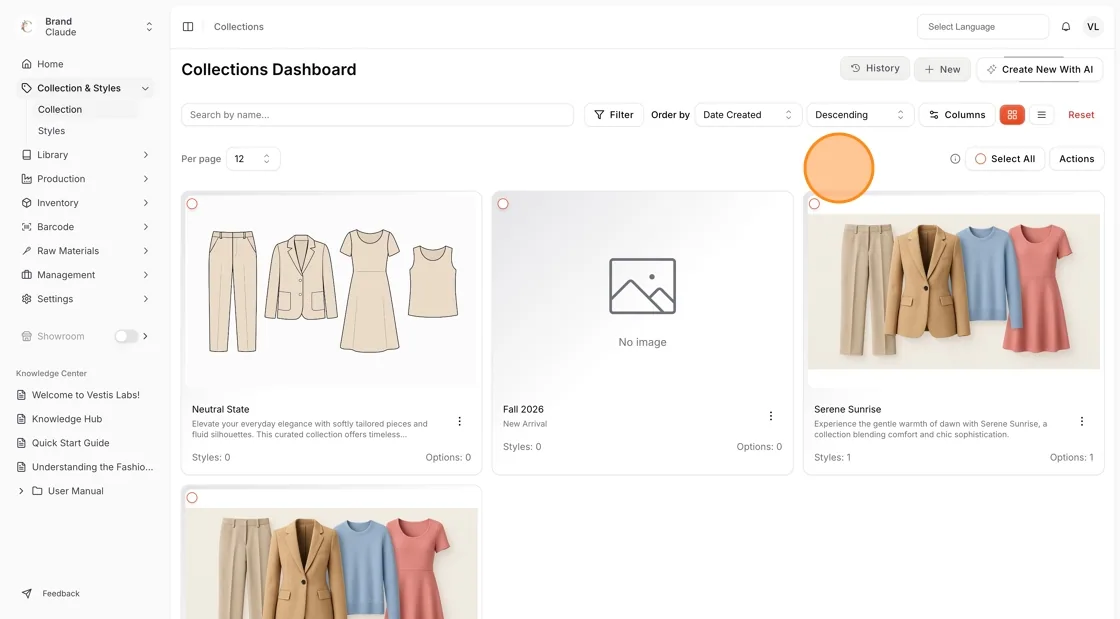
Your AI-generated collection is now created and ready to be populated with products or styles.
Edit a collection
Permission: UPDATE_COLLECTION
Open the action menu
On the Collection Page, click the three-dot button on the collection you want to change.
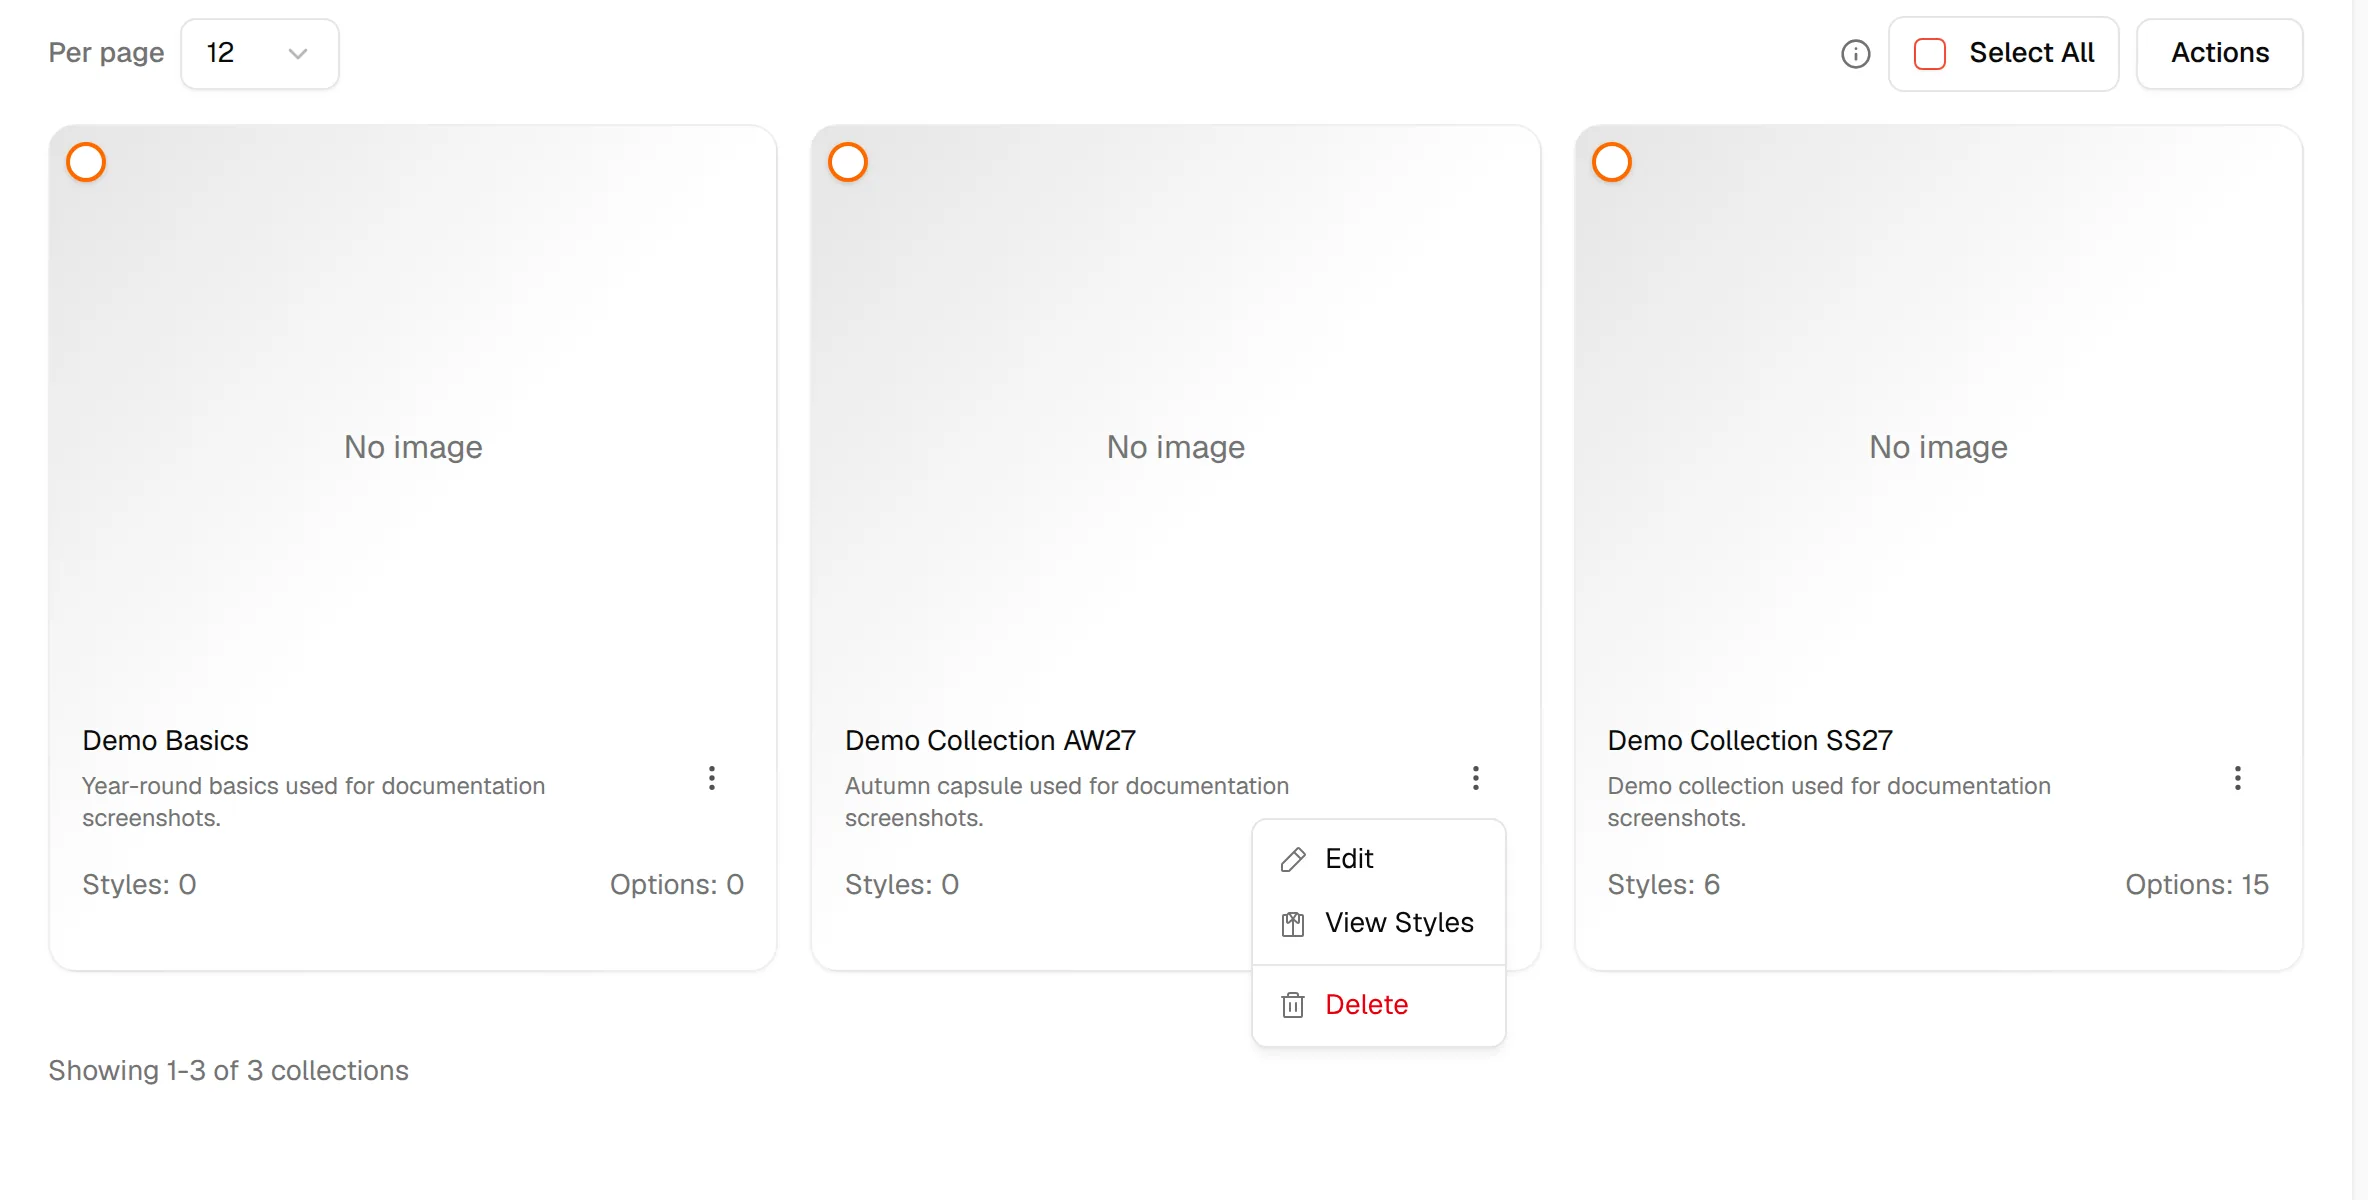
Click "Edit"
Select Edit. The Edit Collection page opens with the same fields as when you created the collection.
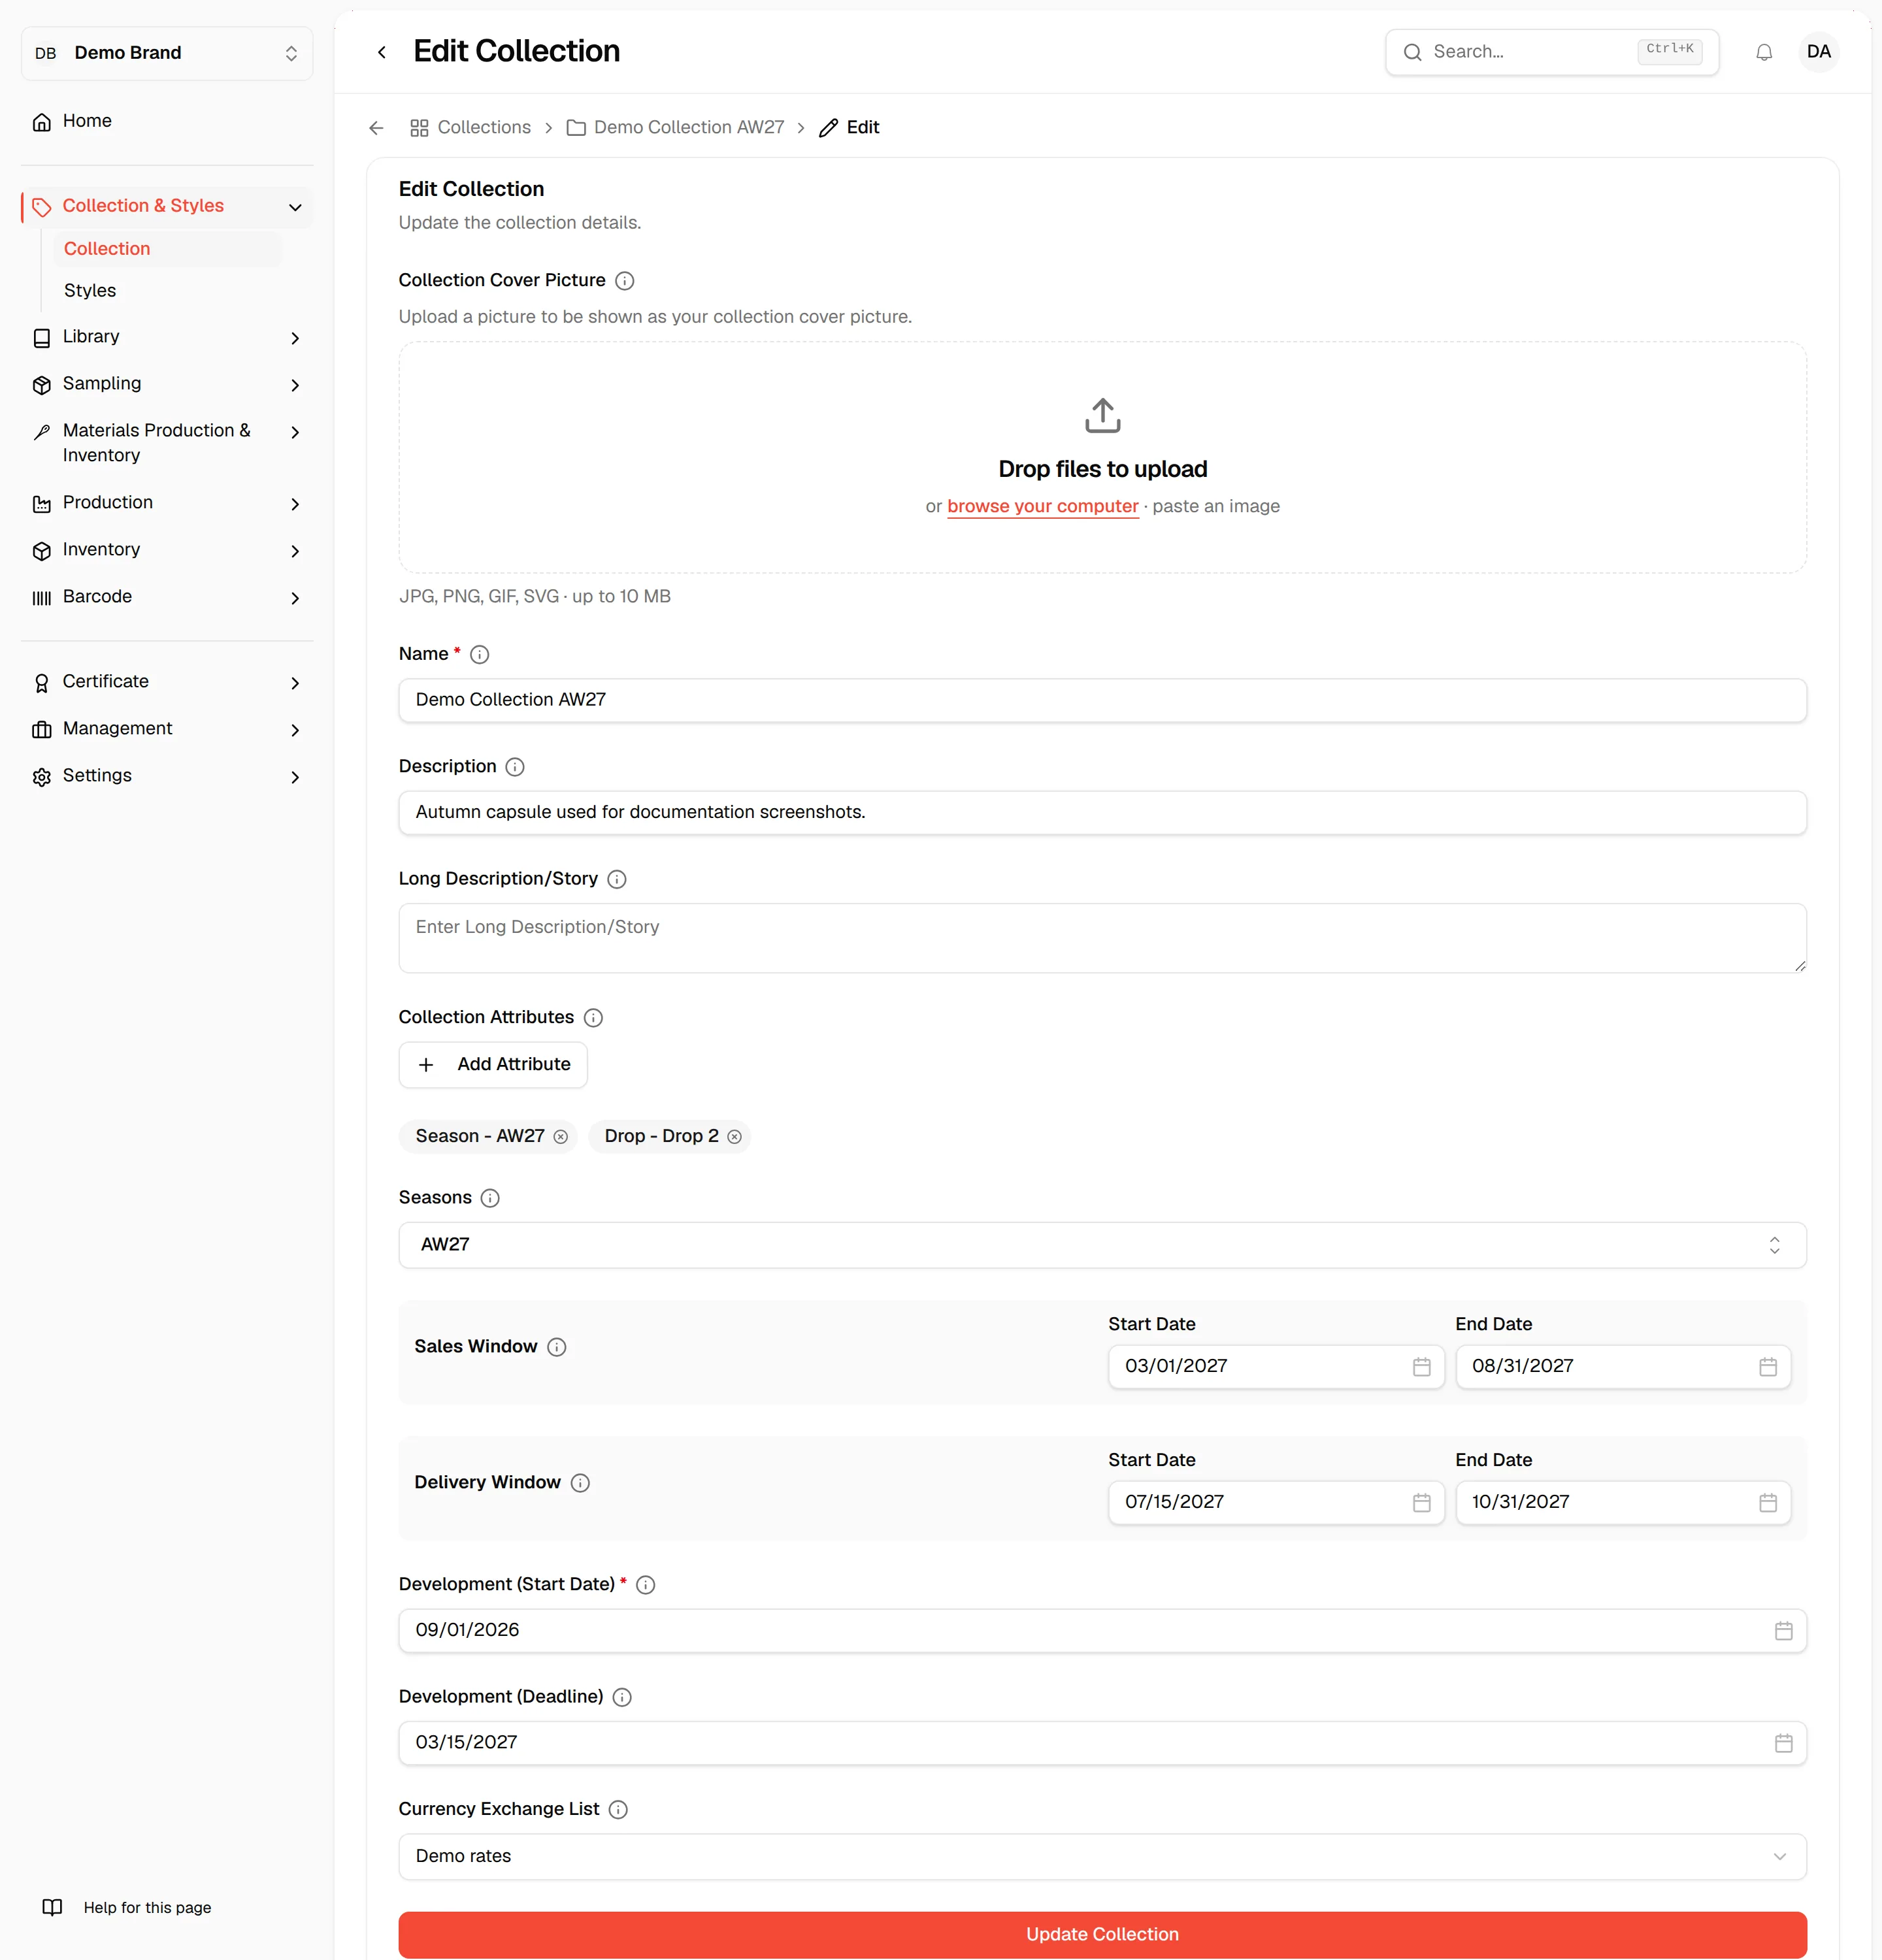
Change the details
Update any field, for example the Collection Cover Picture, the Seasons or the Development (Deadline).
Click "Update Collection"
Click Update Collection. The page shows Collection updated successfully and returns you to the Collection Page.

Add attributes and seasons from the form
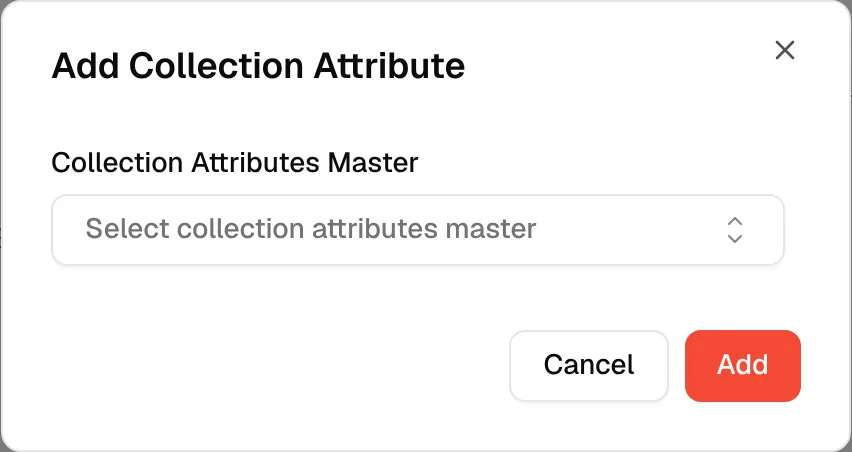
Next to Collection Attributes, click Add Attribute. In the Add Collection Attribute window pick a Collection Attributes Master, then pick one or more values under Collection Attribute, and click Add. If no master or value exists yet, use Create Collection Attributes Master or Create Collection Attribute to make one on the spot. Selected values appear as tags that you can remove with the small cross.
In Seasons, select one or more seasons. Type a new name to create a season. Use the three-dot menu on a season to Edit it or Delete it (a season that is already selected cannot be deleted from here).
The Currency Exchange List is chosen from the currency lists created in your settings, and the Sales Window and Delivery Window each have a Start Date and an End Date.