
Data manager code settings
This article outlines best practices for setting up and managing the Data Manager in Vestis Labs to support accurate, consistent data used in the Code Generator across your product…
Under review. This page is published while we check it against the live app, so some details may have changed.
Screenshots may be out of date.
Data manager – admin setup
This article outlines best practices for setting up and managing the Data Manager in Vestis Labs to support accurate, consistent data used in the Code Generator across your product development process.
Introduction & best practice
The Data Manager in Vestis Labs allows you to manage the reference data used to generate product codes, including categories, colours, materials, sizes, seasons, suppliers and custom fields. By maintaining well-defined and standardised data values, you ensure that all generated SKU and Style codes remain consistent and aligned with your internal naming conventions.
Using the Data Manager, Admin users can add, edit, and remove data values that directly feed into the Code Generator formulas. This centralised control reduces inconsistencies, prevents duplicate or incorrect codes, and improves overall data quality across the system.
SettingsCode GeneratorData Manager
From the left sidebar, click Settings, then Code Generator, then Data Manager.
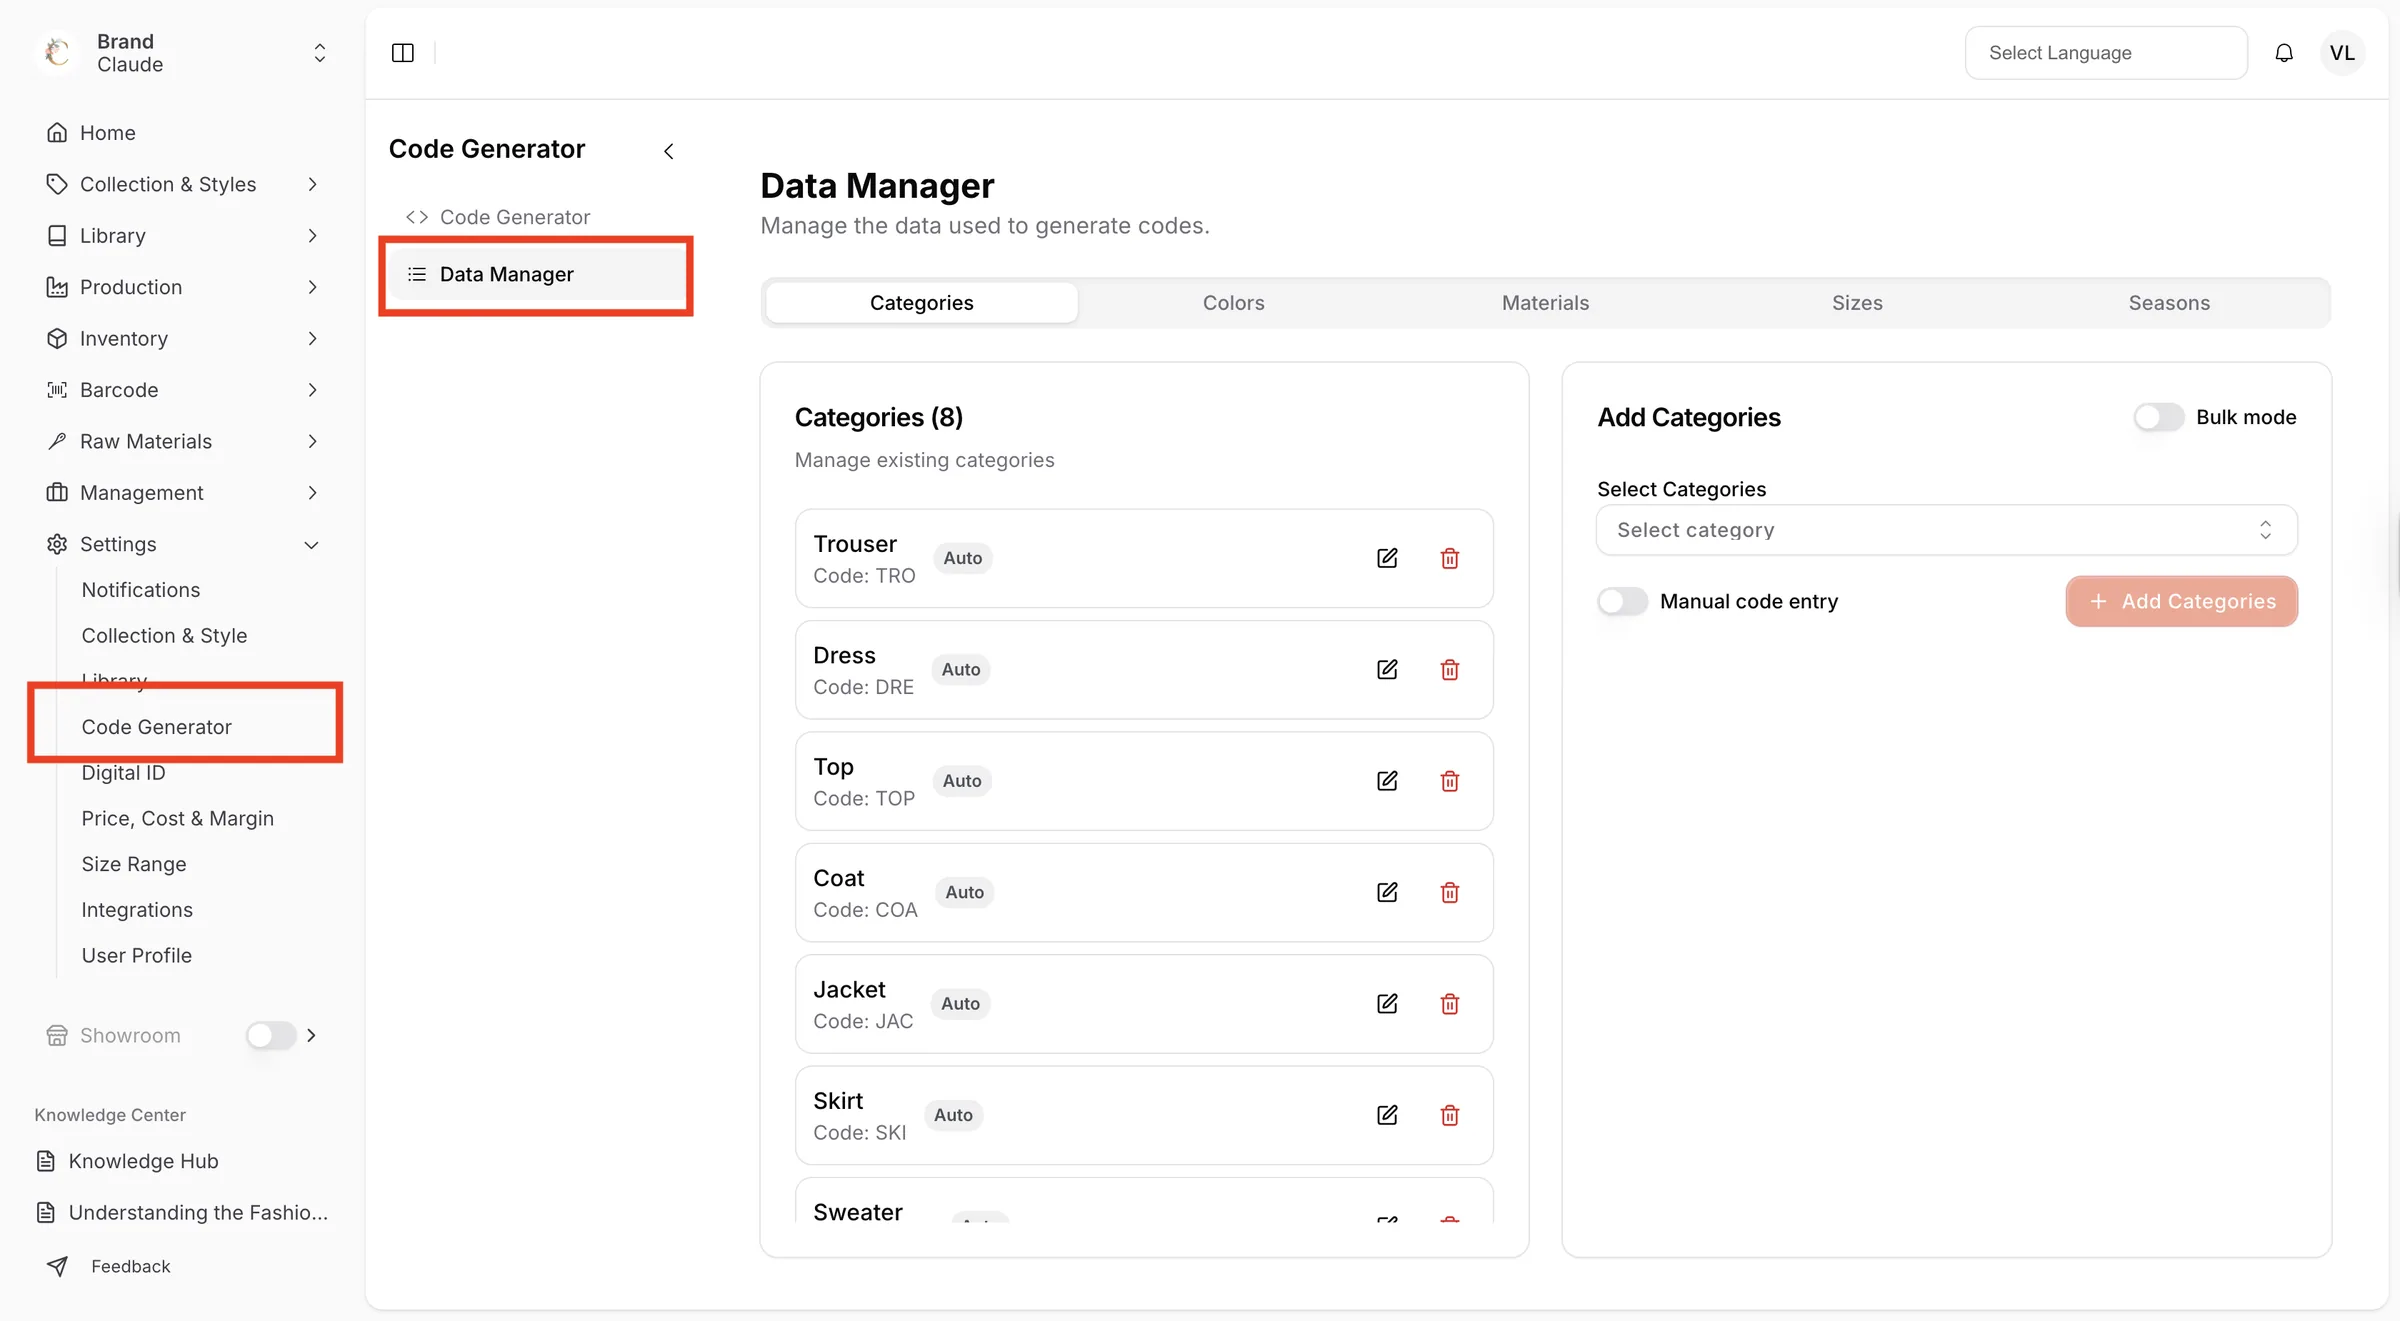
The Data Manager allows you to manage all reference data that feeds into the Code Generator. Each data type is organised into tabs for easy access and maintenance.
Each tab (Categories, Colors, Materials, Sizes, Seasons, Suppliers, Custom) shows the existing values on the left and an Add card on the right.
- The left list shows each value with its Code, for example "Dresses" with code
DRE. Values created automatically carry an Auto badge. - Click the edit (pencil) icon to change the Code and click Save. Only the code can be changed here, not the name.
- Click the delete (trash) icon and confirm in the Delete window to remove a value. This cannot be undone.
- If two values share a code, a Duplicate Codes Detected warning lists the repeated codes. Edit or remove the duplicates so every code is unique.
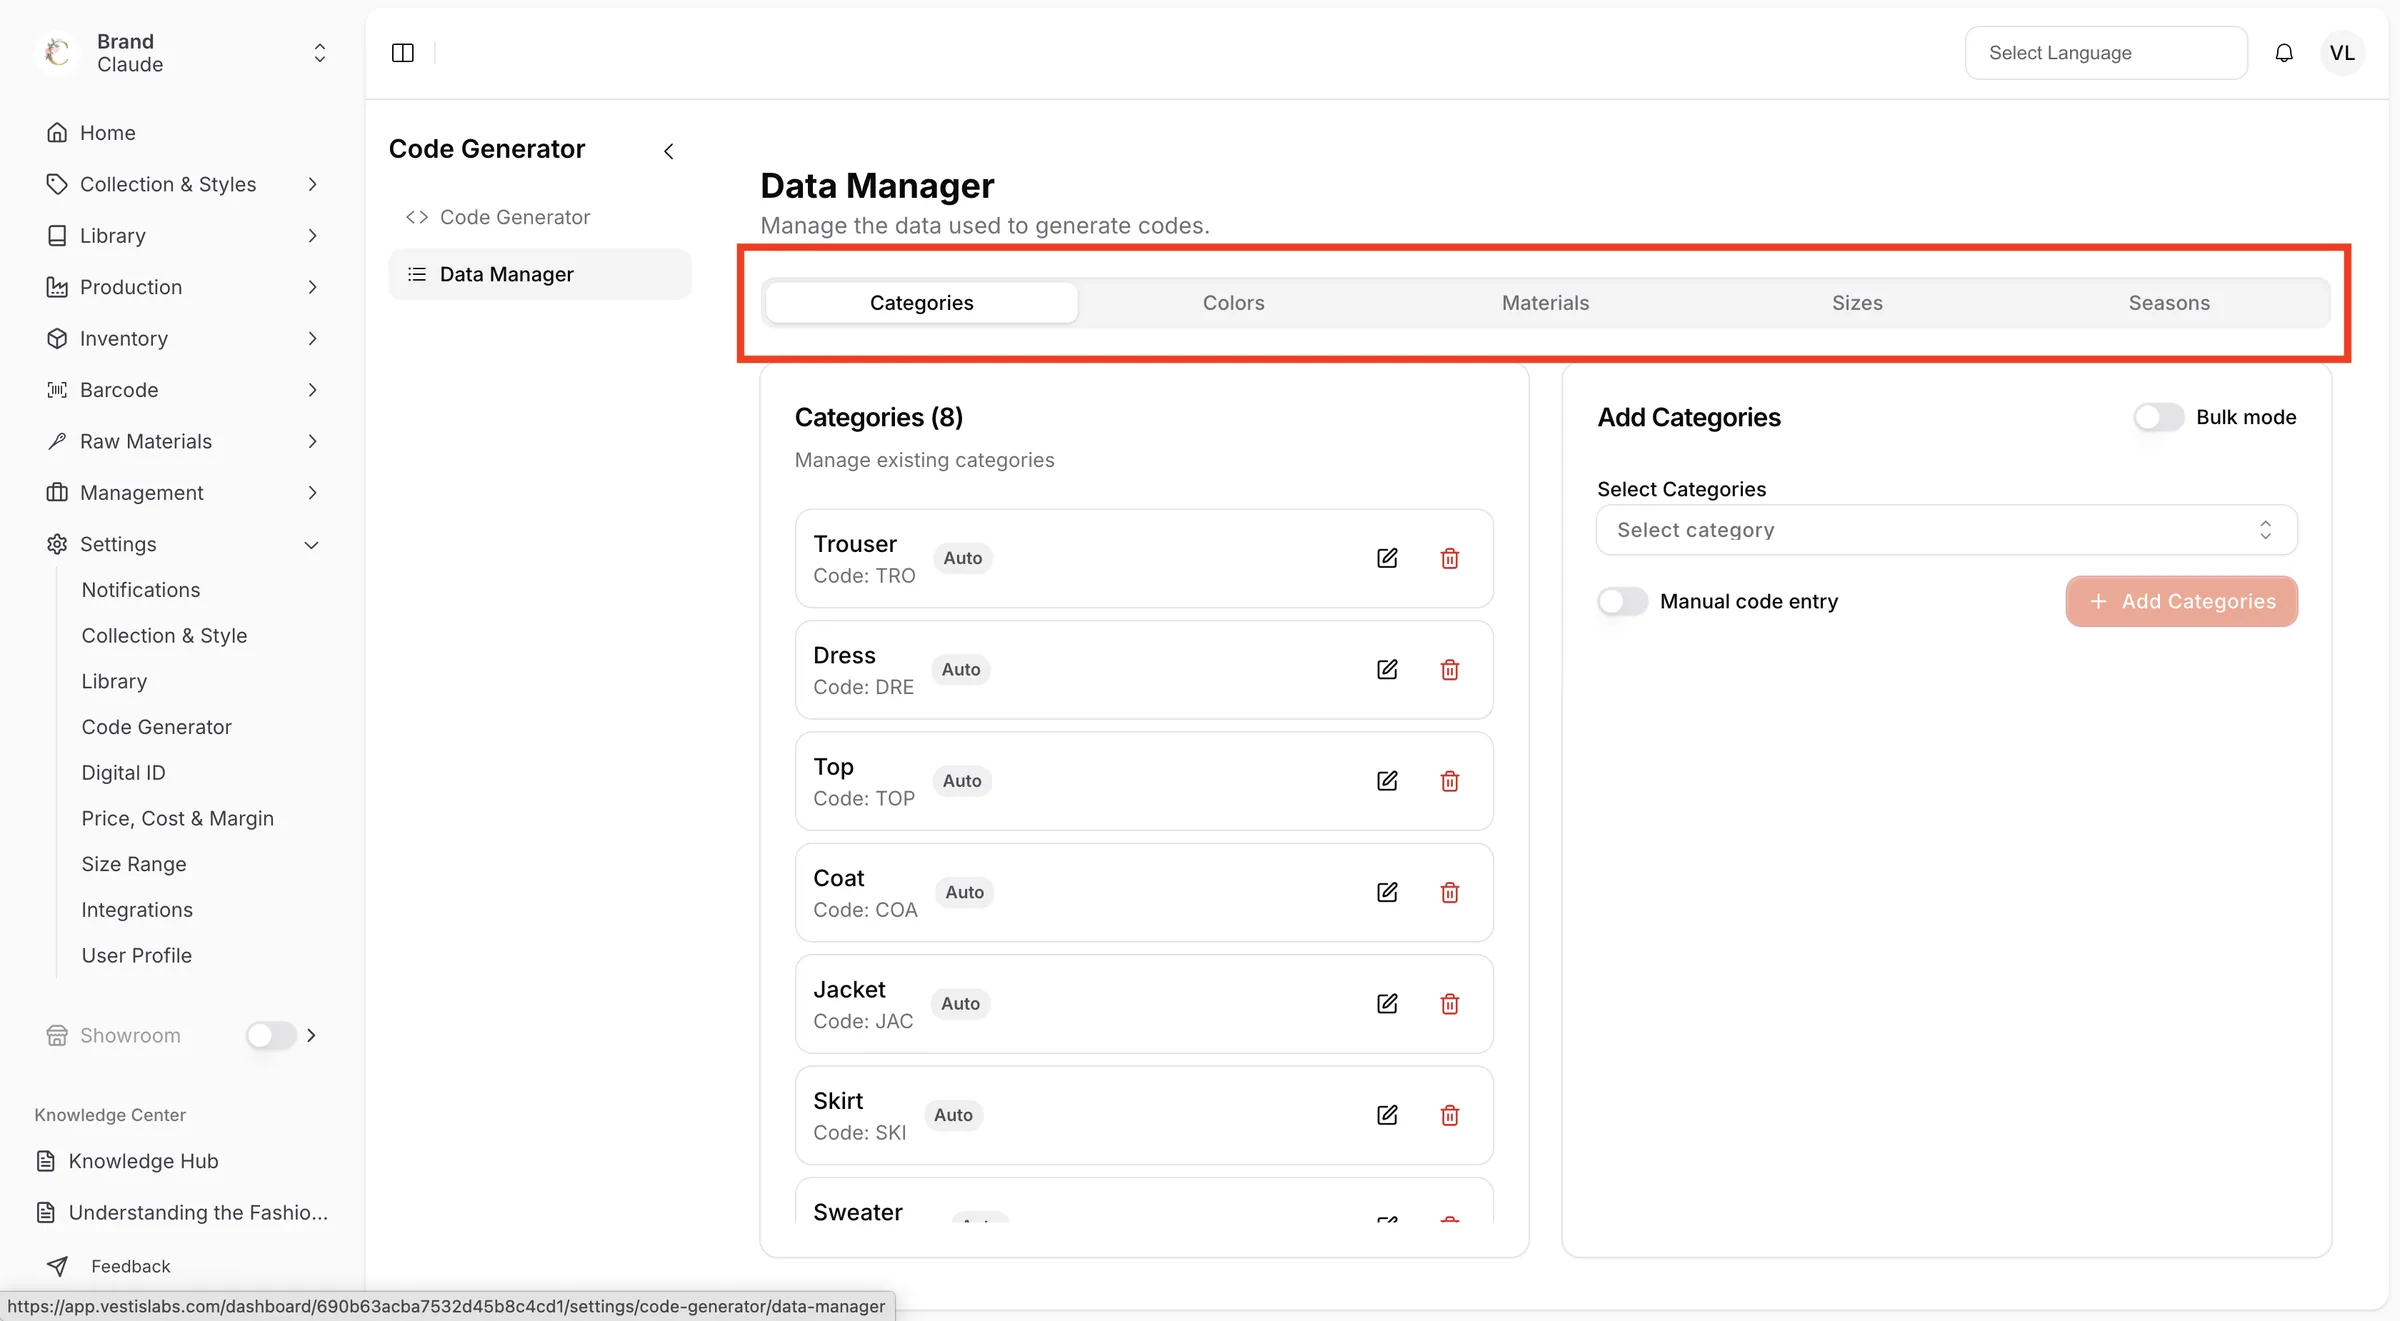
Add a value
Select the value
In the add card, open the Select dropdown (for example Select Sizes) and choose an existing value. Values already in the list are not offered again.
Set a manual code (optional)
Turn on Manual code entry, then type the code in Manual Code. Codes are converted to capitals.
Click the add button
Click the button at the bottom right of the card, for example Add Sizes.
Tip
Turn on Bulk mode to select several values with checkboxes (or Select All) and add them with one click, for example Add 3 Sizes.
In the Categories tab you can also type a new name in the dropdown to create a new style category on the spot. Use the Custom tab to create and manage custom fields: pick a Custom type, enter the value or label and click Add Custom. Sequential customs show their Start Value and Current sequence, with a Reset button.