Style sync configuration
Make sure before you connect your shopify, filled out the required fields that will be sync to shopify.
Under review. This page is published while we check it against the live app, so some details may have changed.
Screenshots may be out of date.
Return to Styles
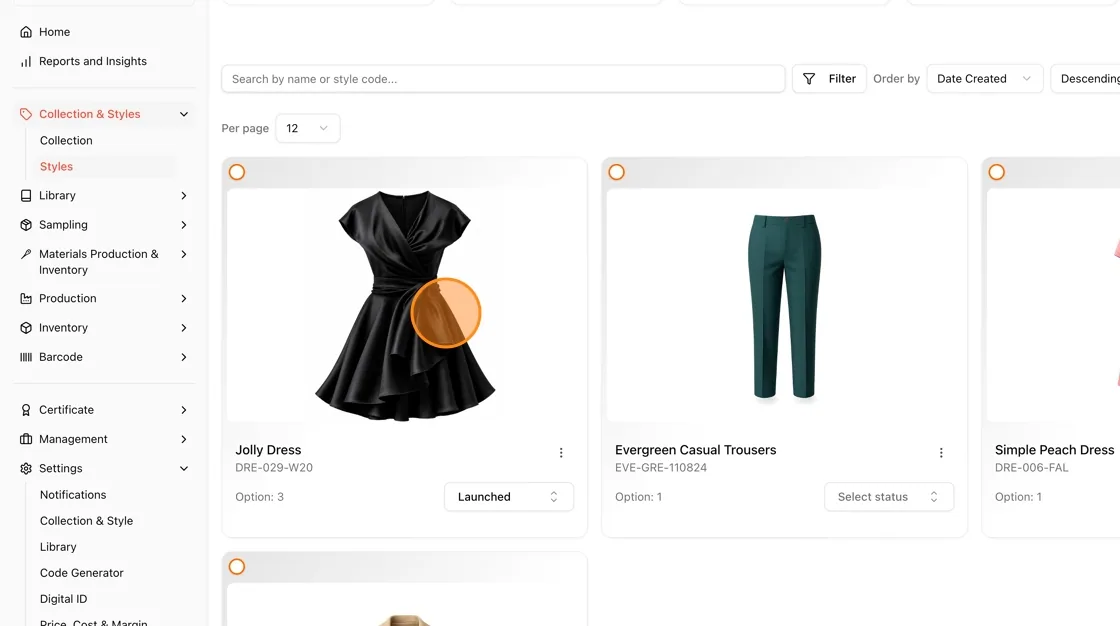
- In the left sidebar, navigate back to Collection & Styles > Styles to select a product to sync/manage.
- From the Styles grid, click into the Jolly Dress card to open its details
Make sure before you connect your shopify, filled out the required fields that will be sync to shopify.
Edit style details — Style Name & Code
- On the Details tab, review the Photos section with color variants (black, pink, green).
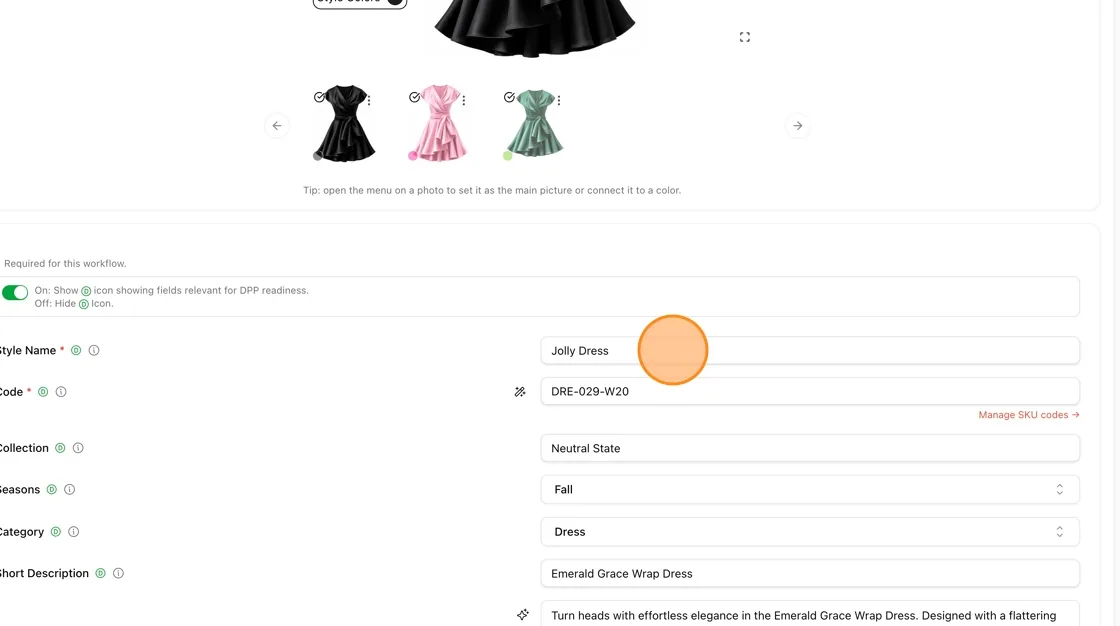
- Enter/confirm the Style Name ("Jolly Dress") and Code ("DRE-029-W20") fields.
Fill in collection, category, and description
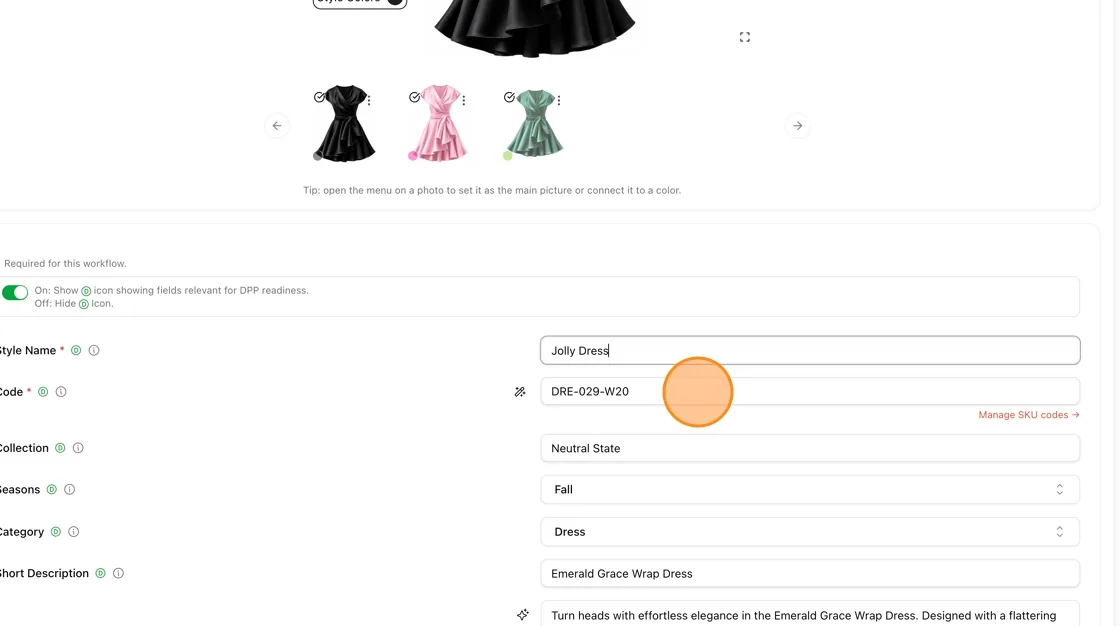
- Enter the Collection name (e.g., "Neutral State"), Season ("Fall"), and Category ("Dress").
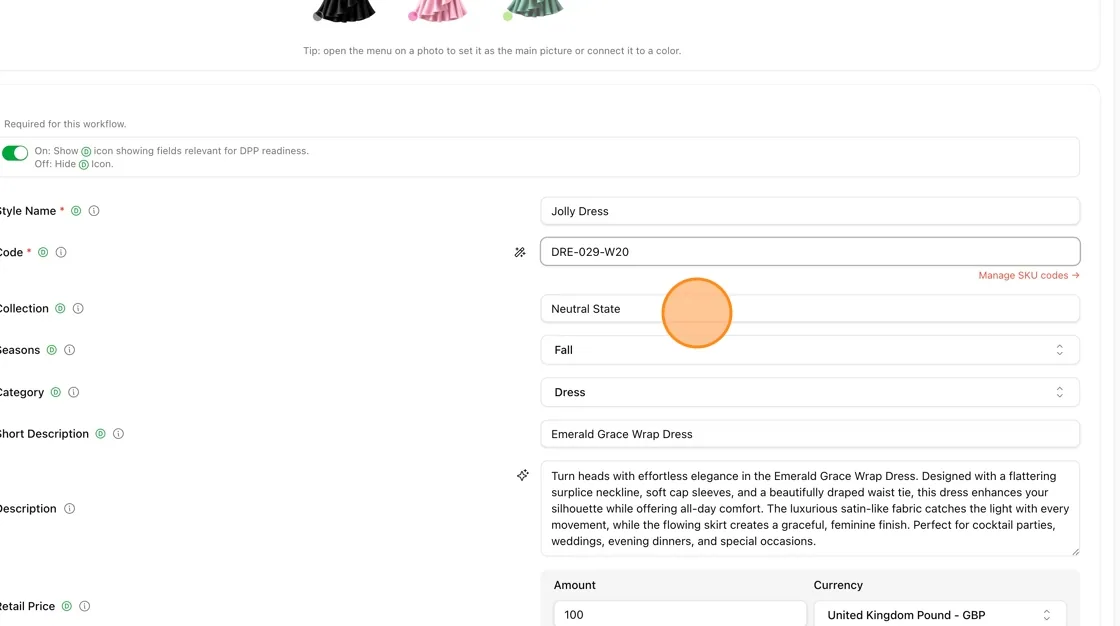
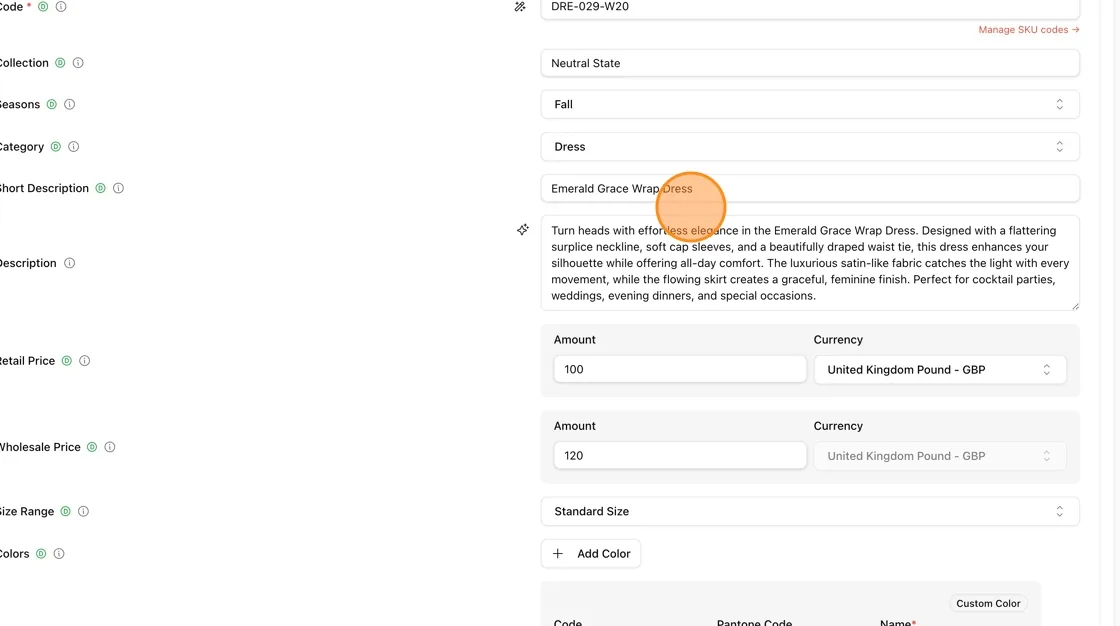
- Add a Short Description ("Emerald Grace Wrap Dress") and a full Description highlighting design features and use occasions.
Fill in pricing and colors
- Scroll down to set the Wholesale Price (e.g., £120) and Size Range.
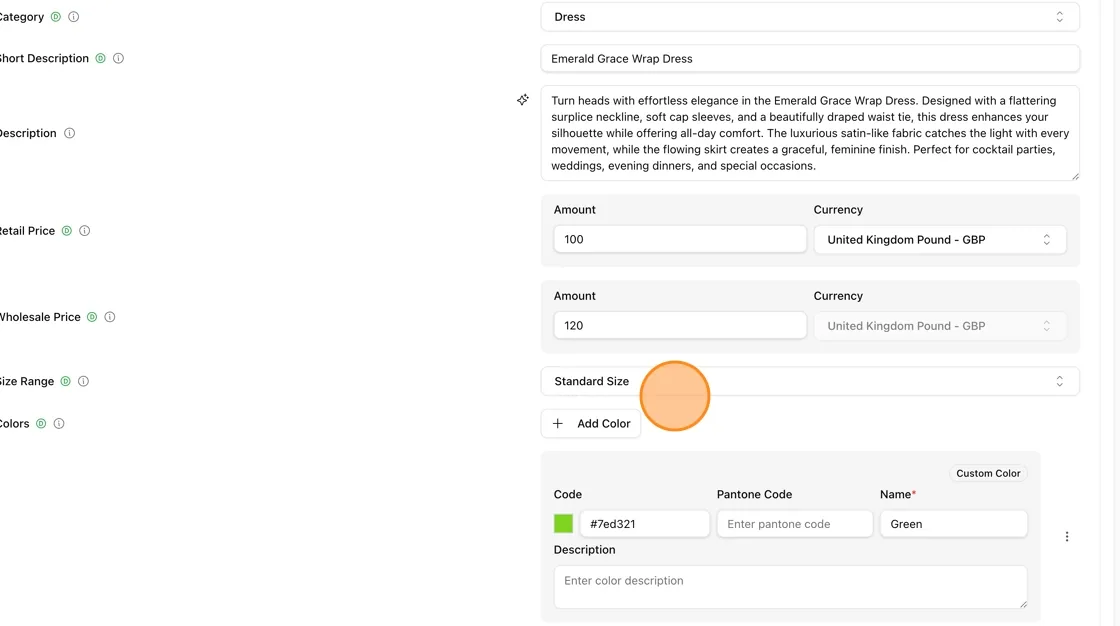
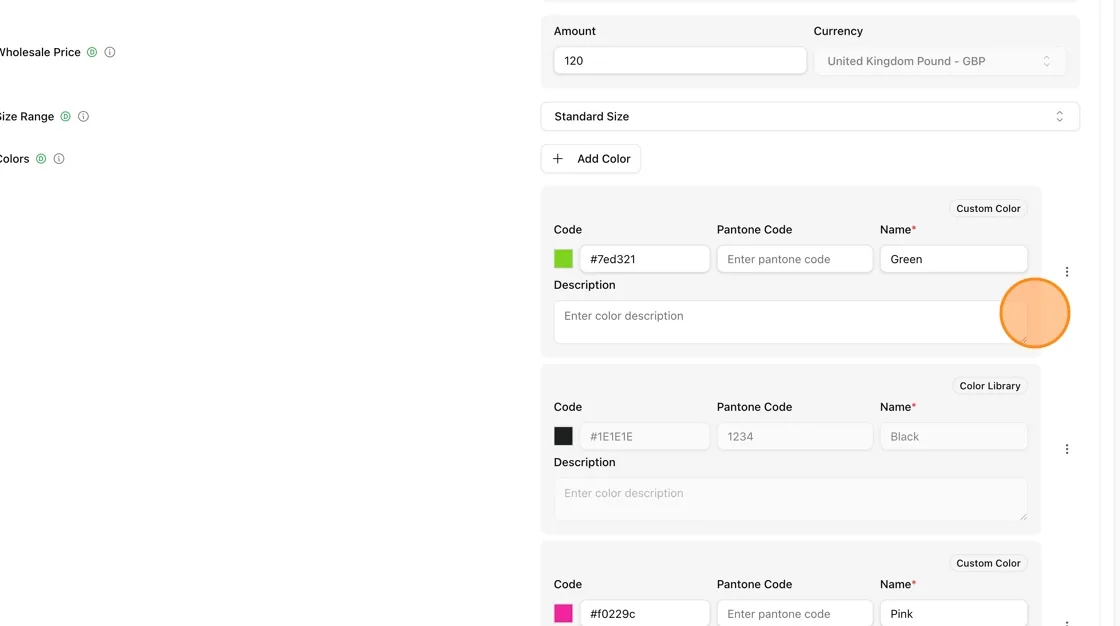
- Review the Colors section, where each color has a Code (hex), optional Pantone Code, Name, and Description.
Complete style attributes and care instructions
- Add relevant Attributes (e.g., "Dress - Mid," "Gender - Women") using + Add Attribute.
- Set the Status (e.g., "Launched").
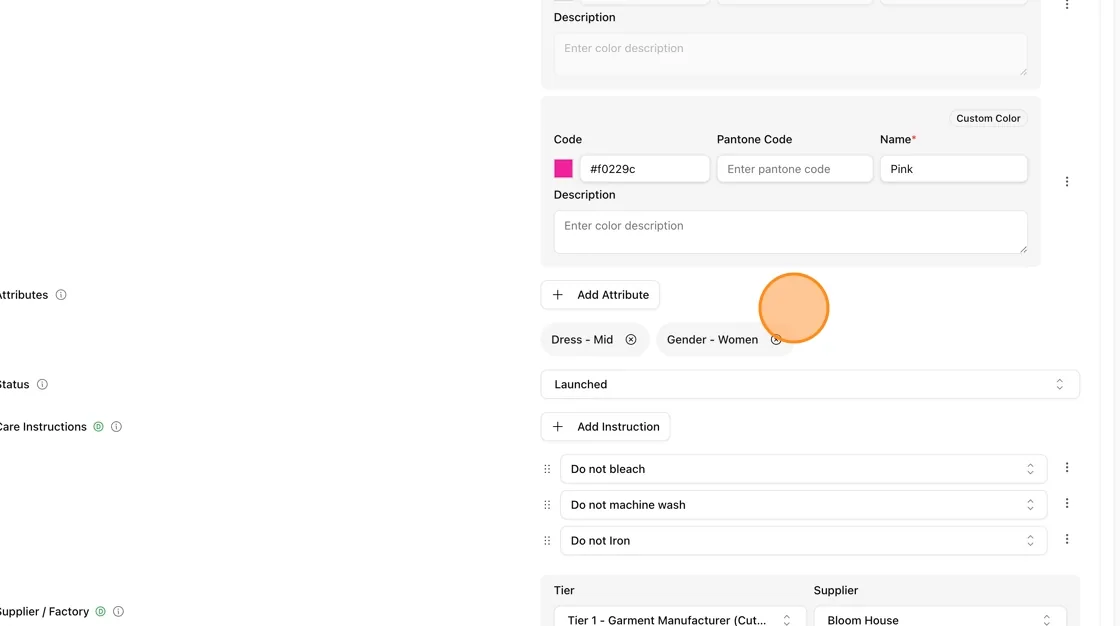
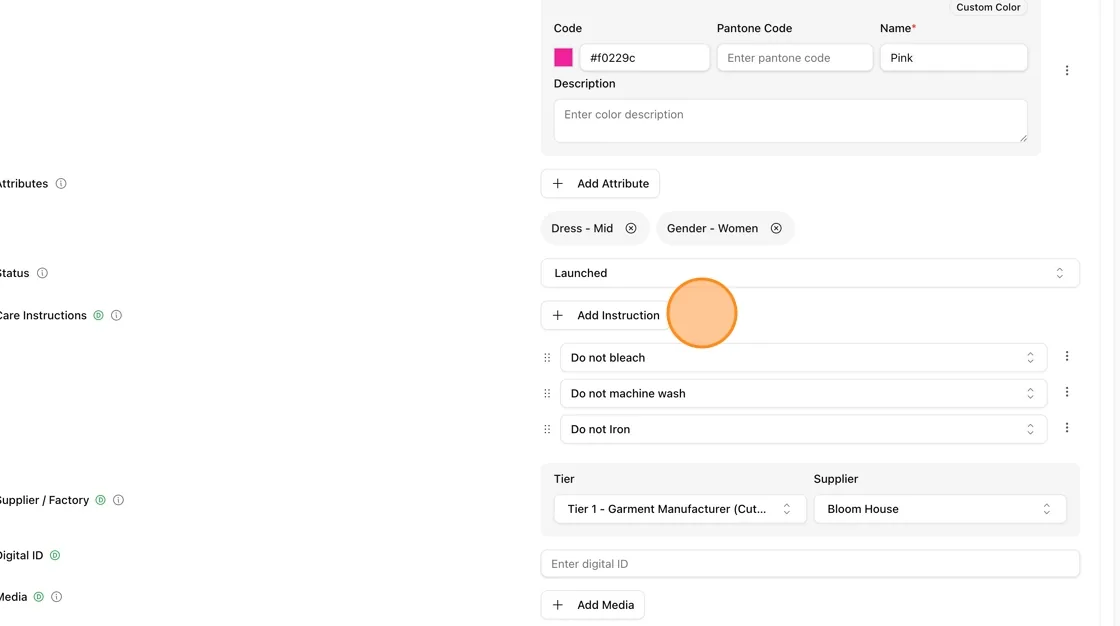
- Add Care Instructions such as "Do not bleach," "Do not machine wash," "Do not Iron" via + Add Instruction.
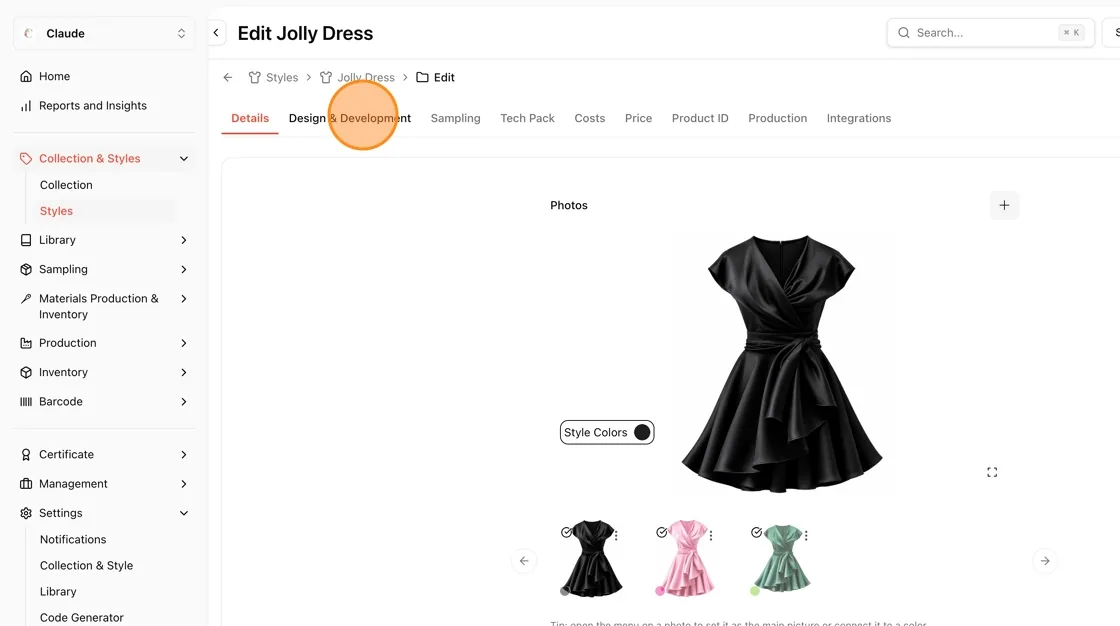
Switch to Design & Development tab
- At the top of the style page, click the Design & Development tab to move from static details into the development workflow.
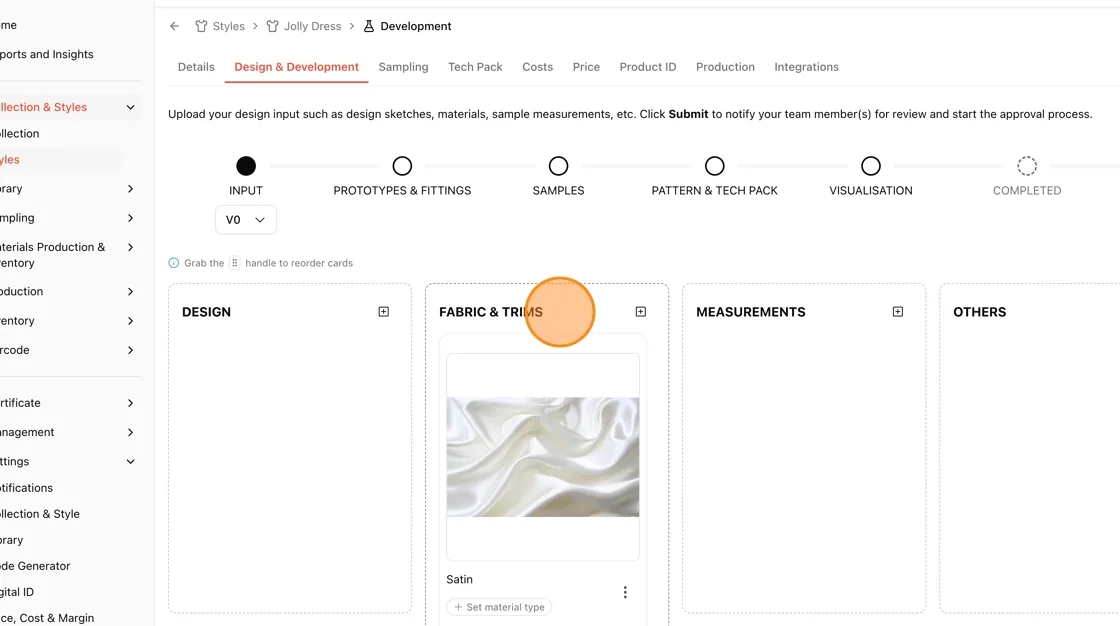
Add fabric and trims
- In the Design & Development kanban board, under the FABRIC & TRIMS column, add material swatches (e.g., "Satin") and set the material type.
Move to the Production tab
- Click the Production tab at the top of the style page to view production tracking (Total Orders, Created, In Production, Completed, Shipped, Cancelled, Delayed Production).
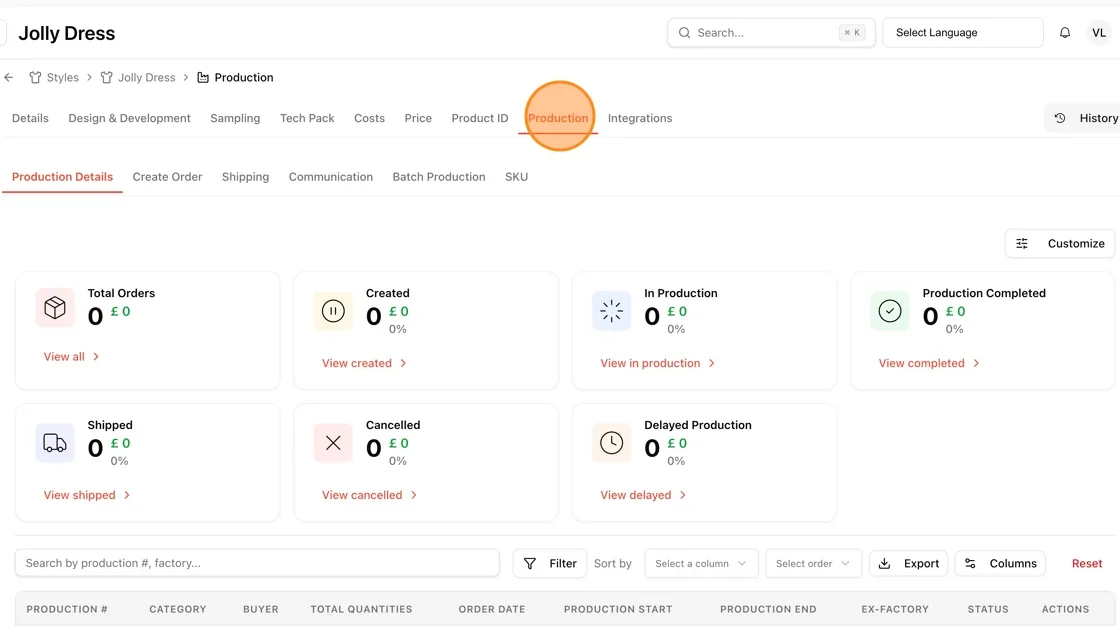
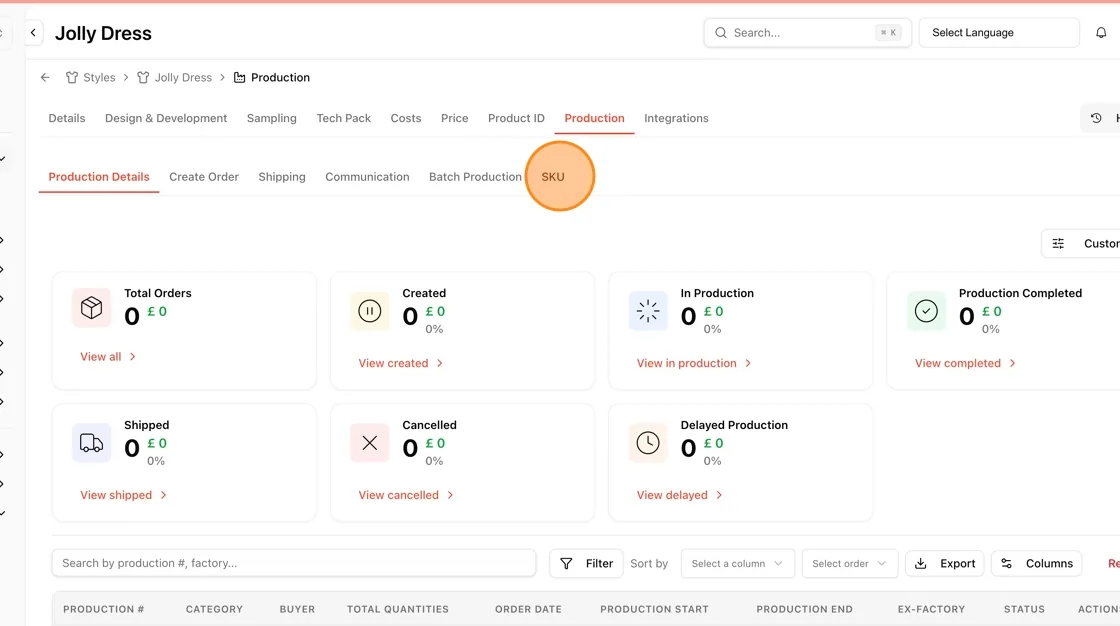
Open the SKU sub-tab
- Within Production, click the SKU sub-tab to manage SKU codes for each style-color-size combination.
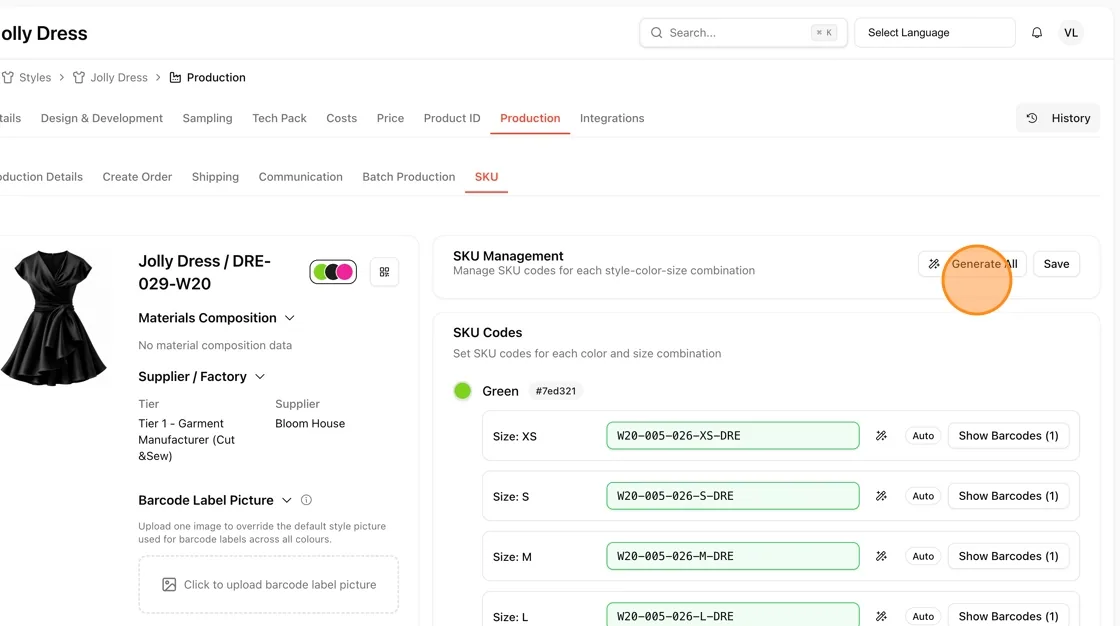
Generate SKU codes
- Click Generate All to auto-create SKU codes for every color/size combination (e.g., Green — XS: W20-005-026-XS-DRE, S: W20-005-026-S-DRE, etc.).
- Click Save once you're satisfied with the generated codes.
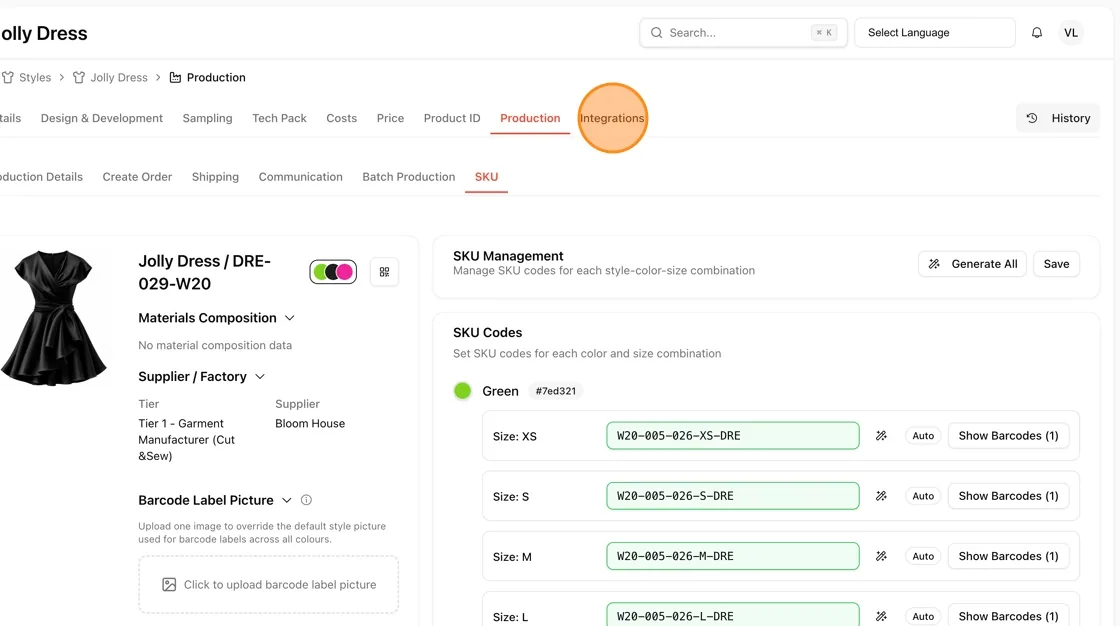
Access style-level Integrations
- Click the Integrations tab at the top of the style page — this is where you can manage the connection between this specific style and your Shopify store (e.g., pushing this product to Shopify once metadata and SKUs are finalized).
View Shopify integration status for this style
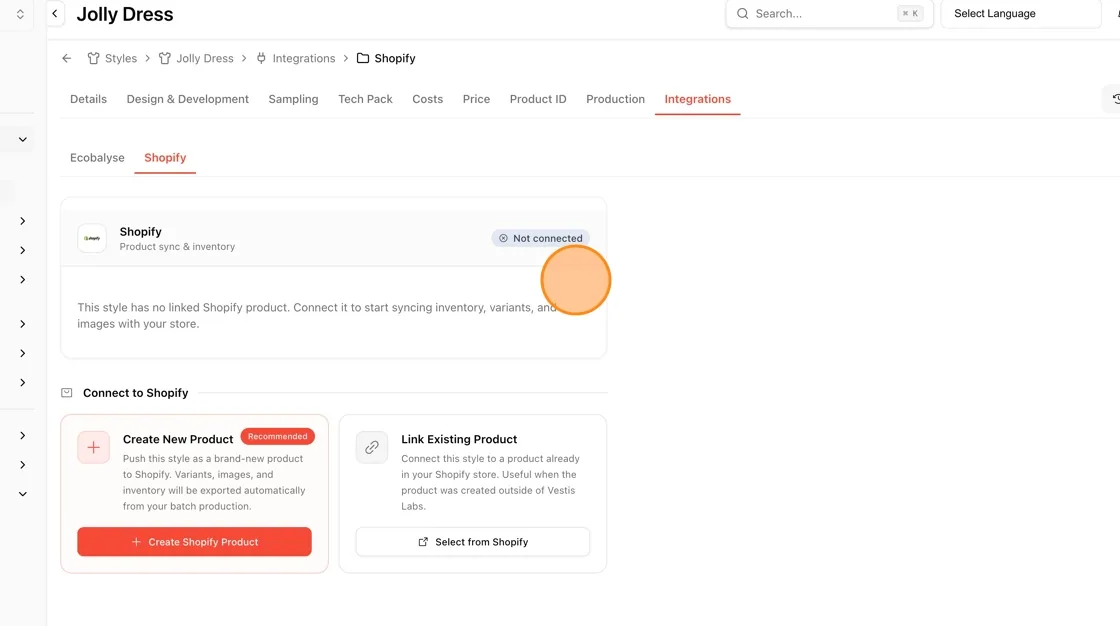
- On the Jolly Dress > Integrations > Shopify sub-tab, you'll see the status is Not connected.
- A message confirms: "This style has no linked Shopify product. Connect it to start syncing inventory, variants, and images with your store."
Choose how to connect to Shopify
- Under Connect to Shopify, you have two options:
- Link Existing Product — connects this style to a product already in your Shopify store (useful if it was created outside Vestis Labs).
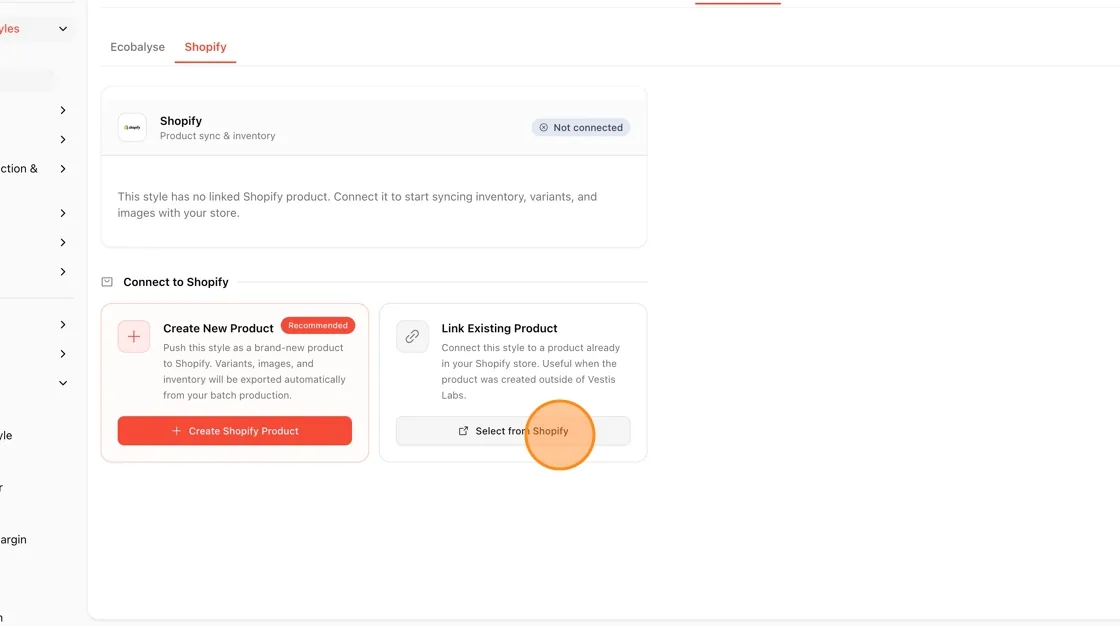
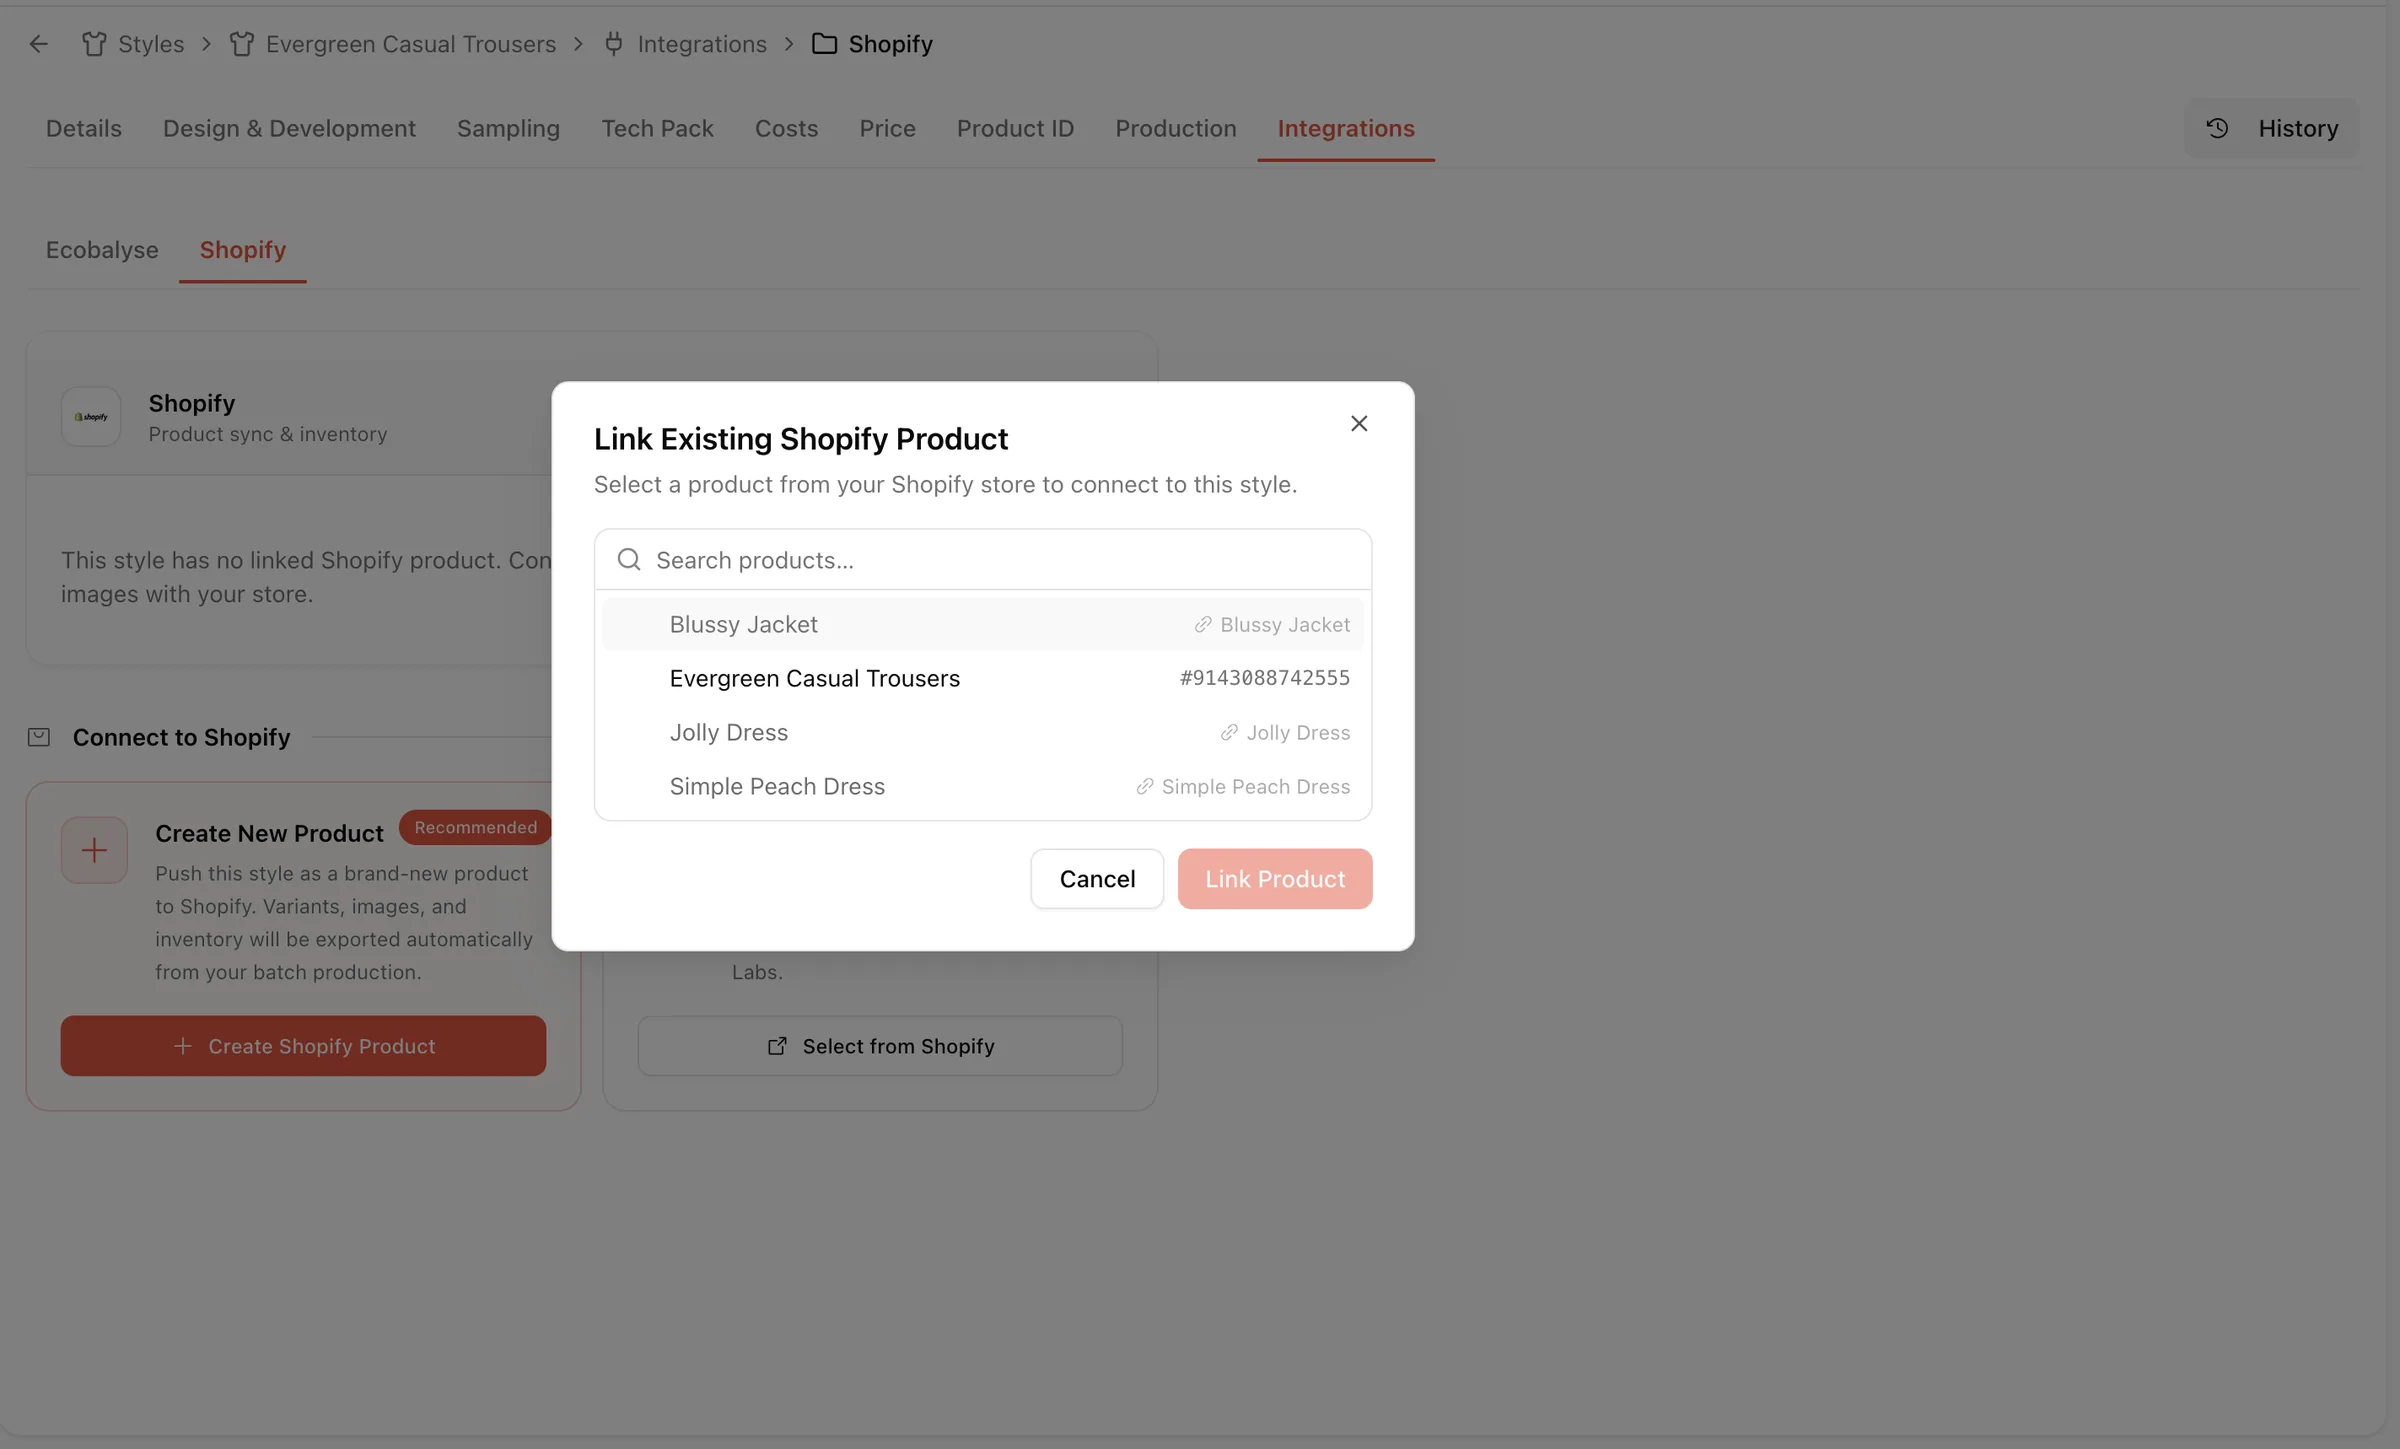
Find the Shopify product you want to link, or scroll through the list of available products. Click the product that matches your style. Click the Link Product button to connect the style to that Shopify product.
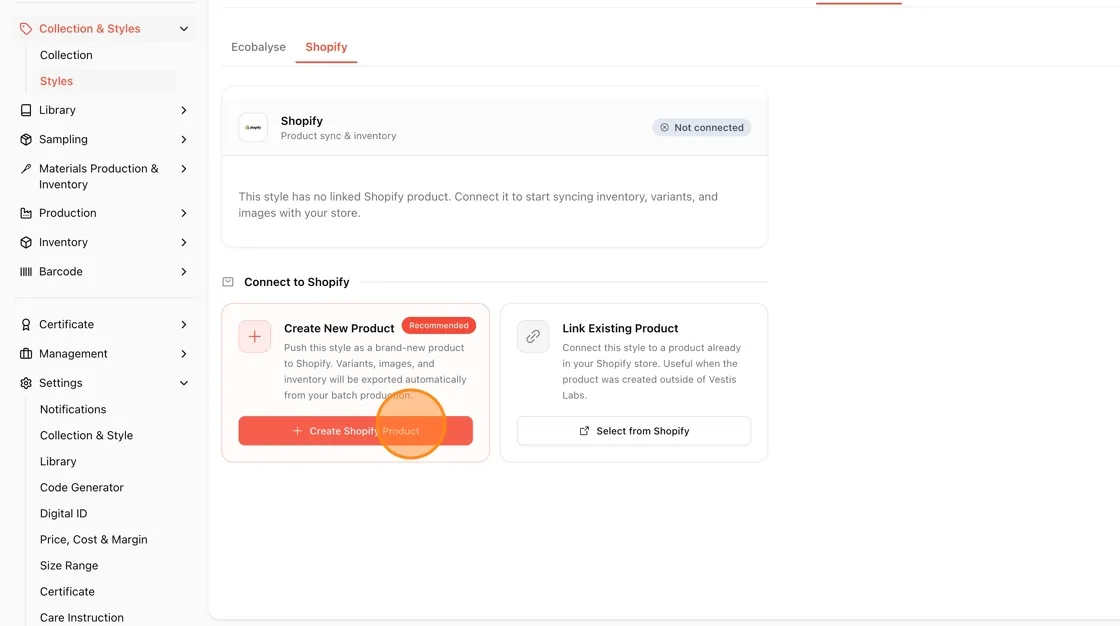
- Create New Product (Recommended) — pushes this style as a brand-new product to Shopify, exporting variants, images, and inventory automatically from your batch production.
Select a product creation method
- A Create Shopify Product modal appears with two options:
- Create with Digital ID inventory — uses batch production inventory as Shopify stock, syncing style name, description, images, color variants, inventory, and Shopify metafields.
- Style information only — creates just the product shell on Shopify (style info, metafields, color variants) without linking live inventory; stock can be connected later.
- Select the option that fits your workflow, then click Create Product.
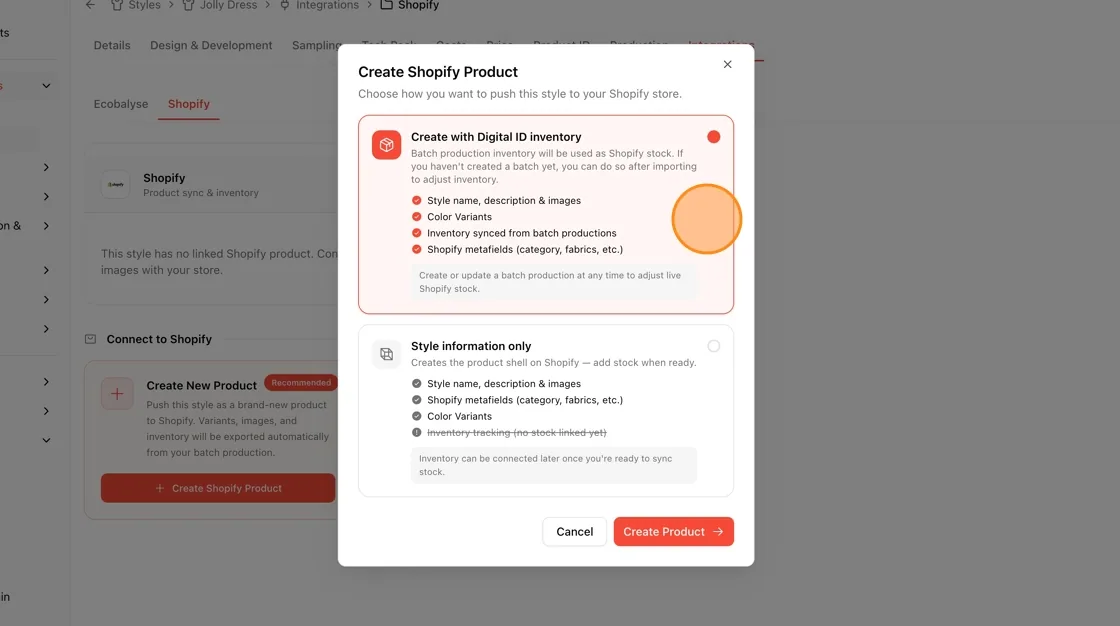
If choosing the Digital ID inventory route, review the checklist confirming what will sync (style name/description/images, color variants, inventory from batch productions, Shopify metafields).
- Select the option that fits your workflow, then click Create Product.
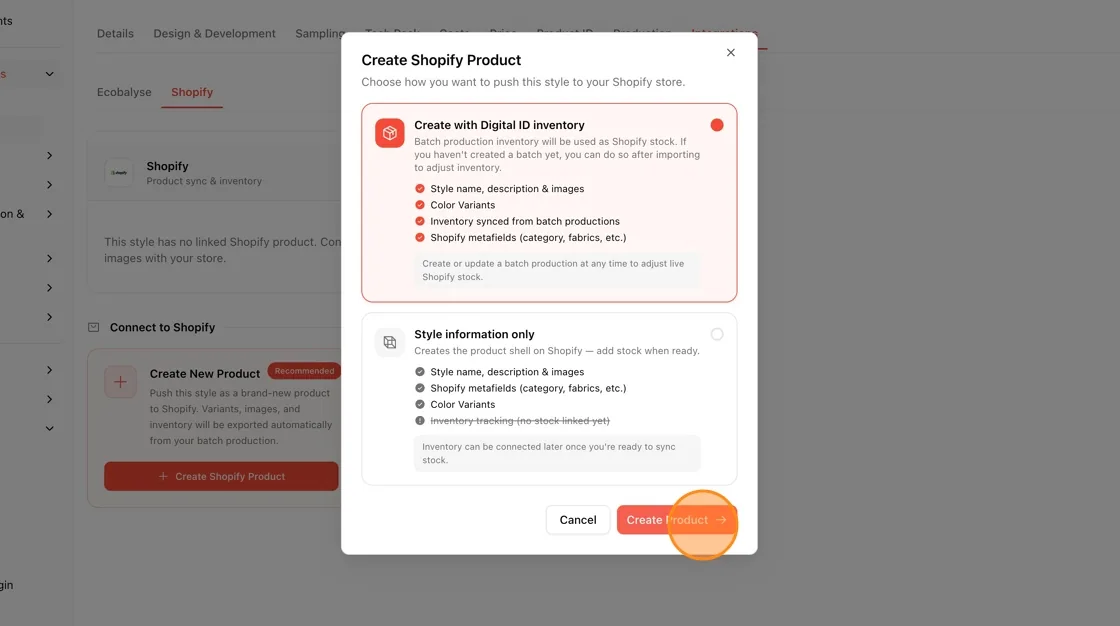
Set up inventory quantities
- A Set Up Inventory modal appears, prompting you to enter how many units to create per color (each unit becomes a Digital ID counting toward live Shopify inventory).
- Enter quantities for each color — e.g., Green: 100, Black: 100, Pink: 100 — for a total of 300 units across 3 colors.
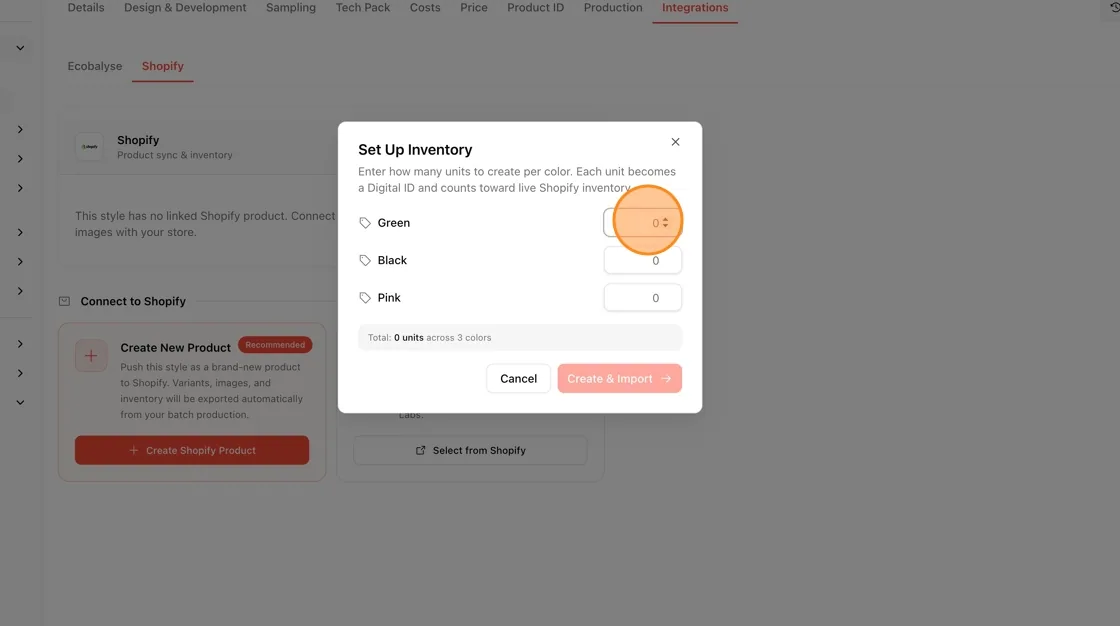
Click "Create & Import"
- Once quantities are set, click Create & Import → to push the product and inventory to Shopify.
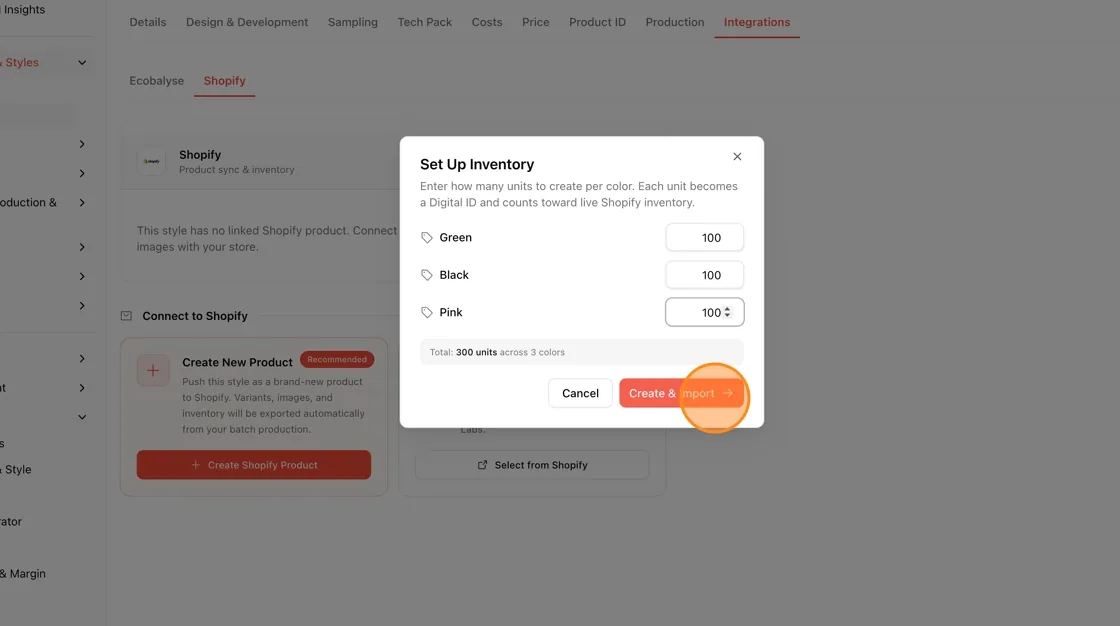
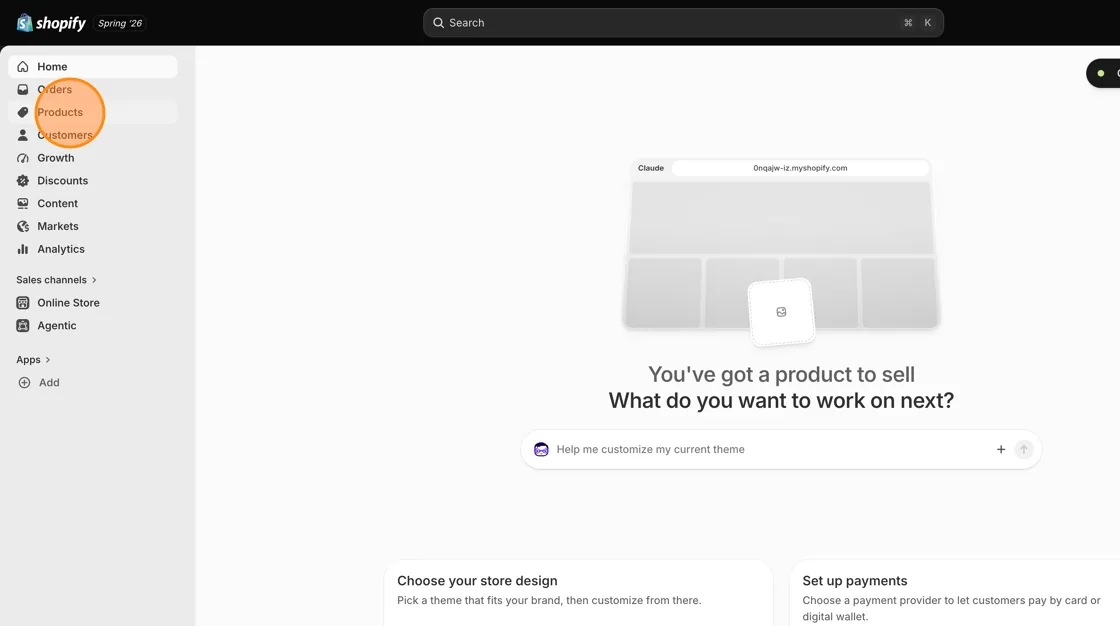
Verify in Shopify — Products
- Switch over to your Shopify admin, click Products in the left sidebar to confirm the new listing.
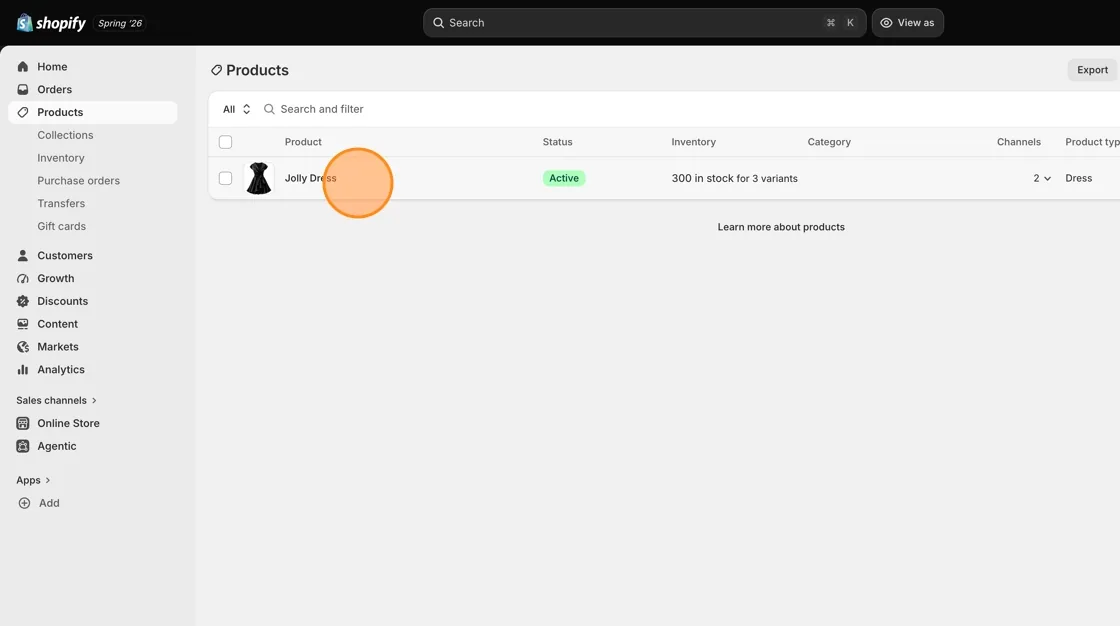
Confirm the product appears
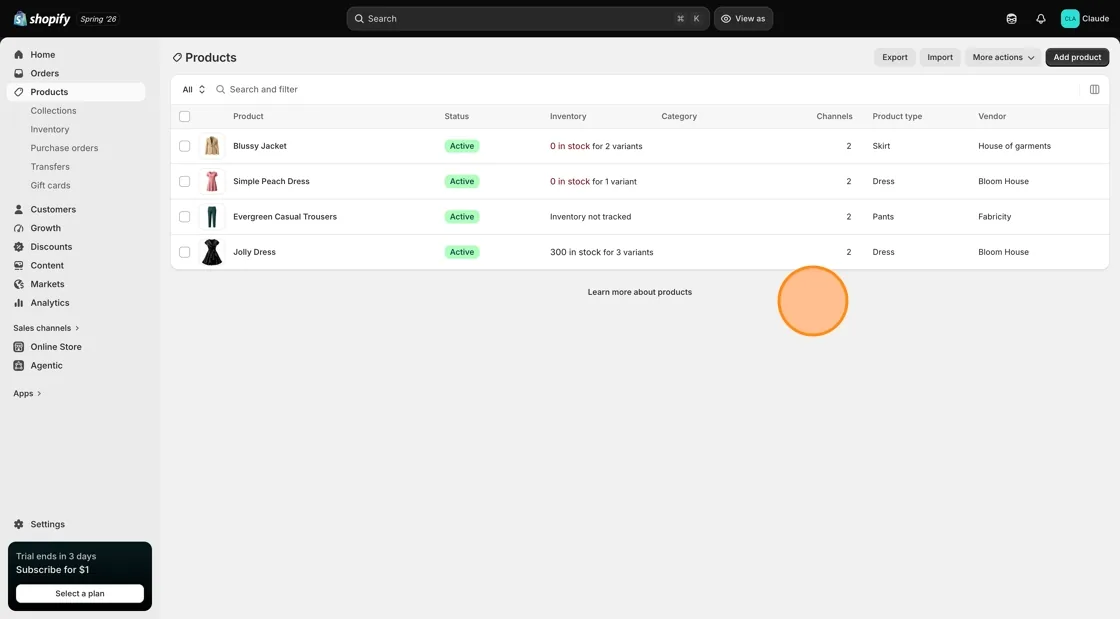
- The Jolly Dress now appears in your Shopify Products list, marked Active, with 300 in stock for 3 variants, listed under the Dress product type and synced to 2 sales channels.
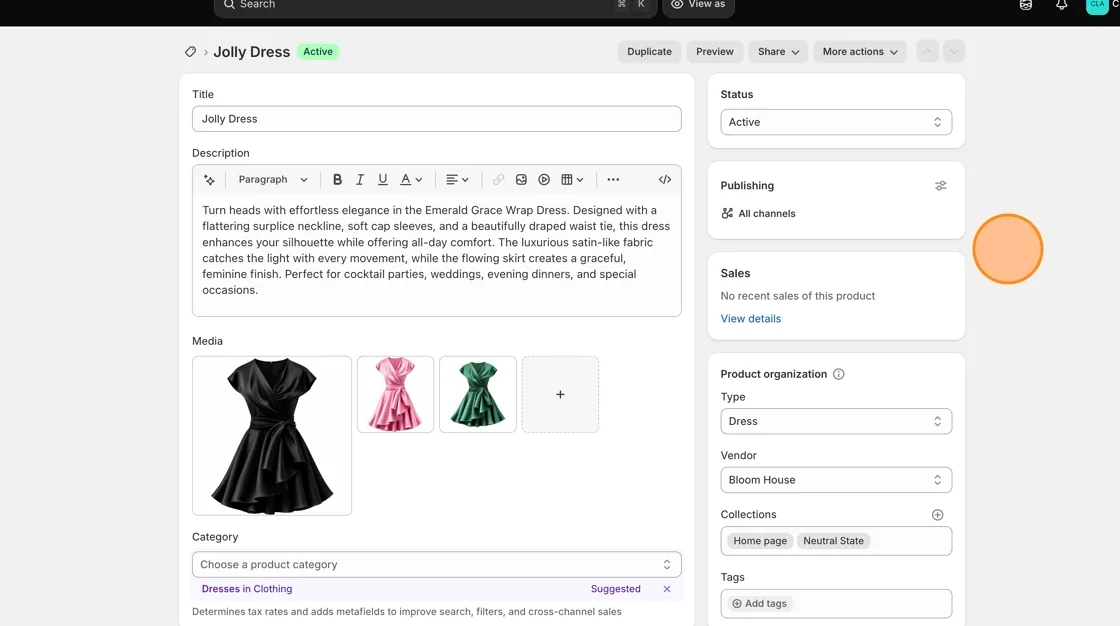
Review the synced product details
- Click into the Jolly Dress product page in Shopify to confirm all details synced correctly: Title, Description, Media (all 3 color images), Category ("Dresses in Clothing," suggested), Status (Active), Vendor (Bloom House), and Collections (Home page, Neutral State).
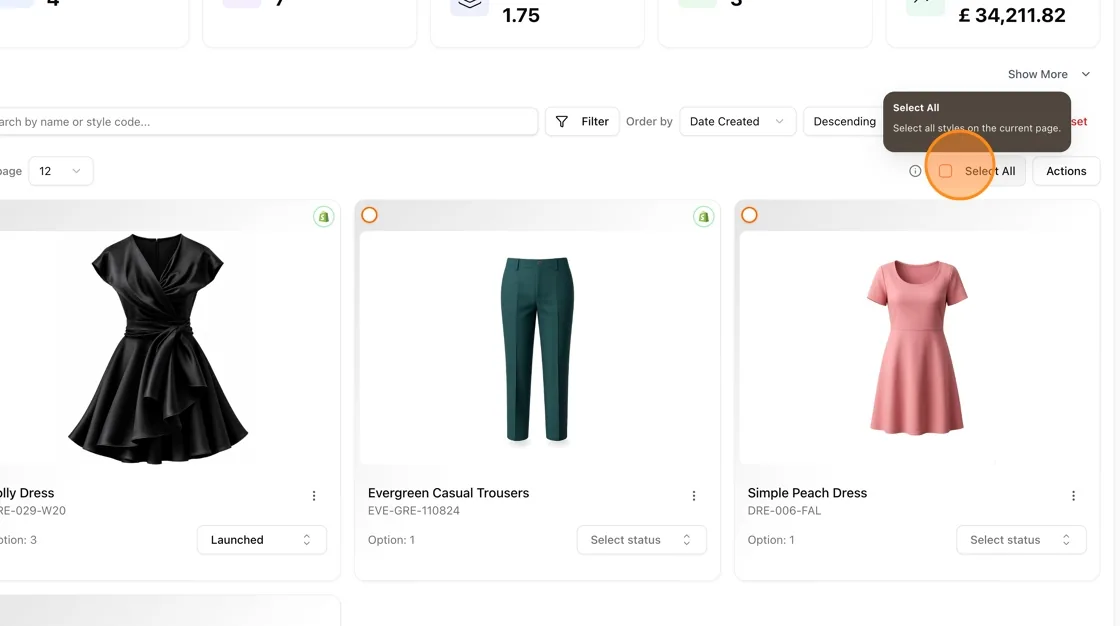
Bulk connection workflow
Select all styles
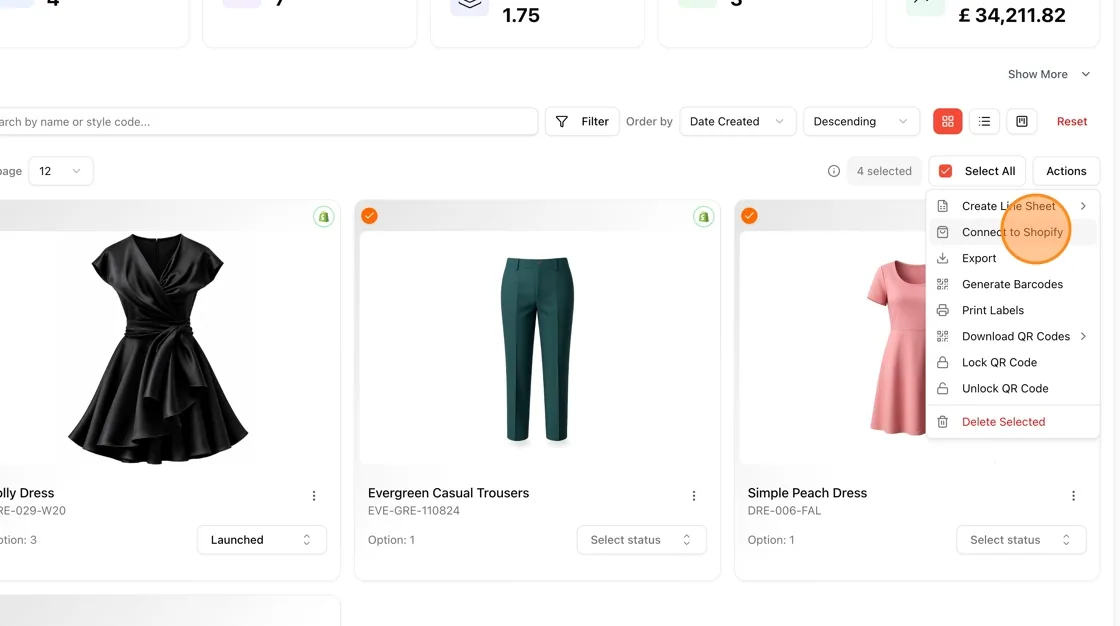
- From the Styles grid view, click Select All to select all styles on the current page (or manually check individual style cards).
Open the Actions menu
- With styles selected (shown as "4 selected"), click the Actions button.
- From the dropdown, choose Connect to Shopify (other bulk actions available include Create Line Sheet, Export, Generate Barcodes, Print Labels, Download/Lock/Unlock QR Codes, and Delete Selected).
Review which styles will sync
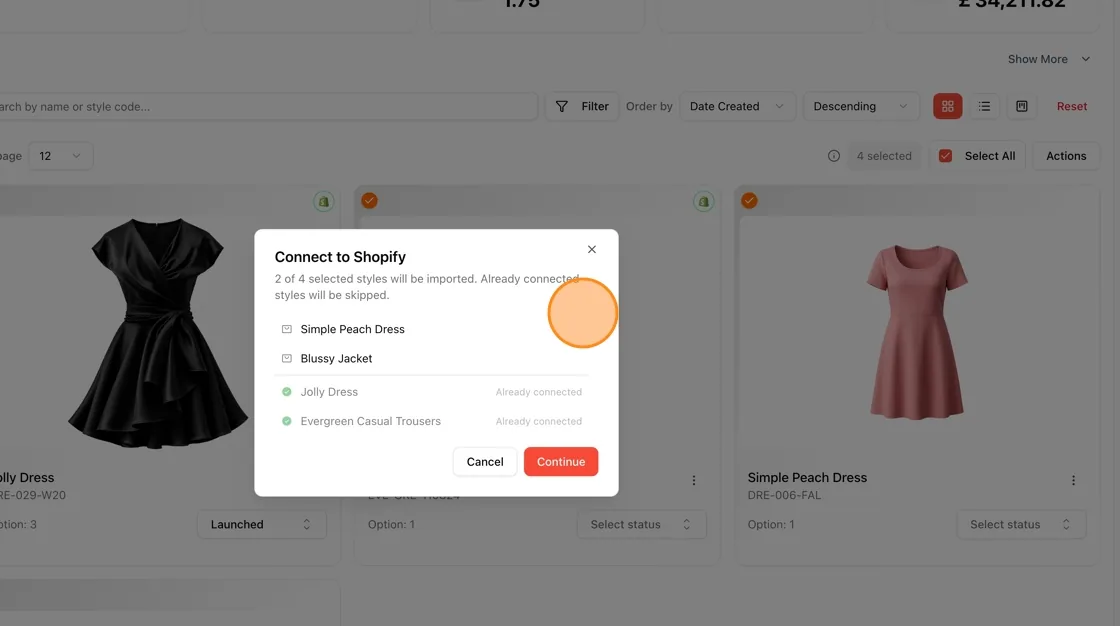
- A Connect to Shopify modal appears, showing that only new/unconnected styles will be imported — already-connected styles are automatically skipped.
- In this case: Simple Peach Dress and Blussy Jacket will be imported, while Jolly Dress and Evergreen Casual Trousers show "Already connected" and will be skipped.
- This confirms the system prevents duplicate syncing of styles already linked to Shopify.
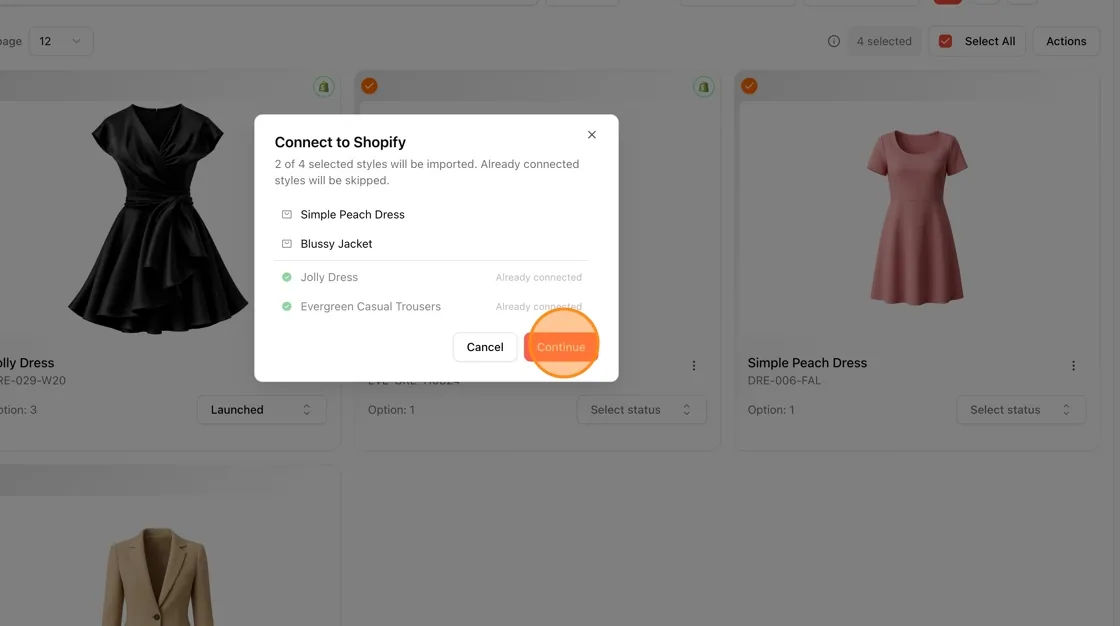
Click Continue
- Click Continue to proceed with importing the unconnected styles to Shopify.
Verify all products in Shopify
- Switch to your Shopify admin > Products page.
- Confirm all four products now appear: Blussy Jacket, Simple Peach Dress, Evergreen Casual Trousers, and Jolly Dress — all marked Active with their respective inventory, category, channels, and vendor info populated.
- Note: some products (like Blussy Jacket and Simple Peach Dress) show 0 in stock, meaning their required fields/inventory may still need to be completed on the Vestis Labs side before stock syncs properly — reinforcing the earlier point about filling out required fields before connecting.